Welcome to the ultimate guide for creating the most delightful and healthy dairy-free baked apples, a truly heartwarming treat perfect for embracing apple season! Imagine tender, juicy apples baked to perfection, generously loaded with a warm, aromatic blend of spices, wholesome oats, and naturally sweetened with pure maple syrup. This recipe offers pure comfort without any added refined sugar, making it an ideal choice for a nutritious breakfast, a satisfying snack, or a guilt-free dessert.
Forget complicated desserts; these healthy baked apples come together with just 7 simple ingredients and require mostly hands-off time in the oven. Whether you’re looking for a quick and easy weeknight indulgence or an elegant, yet simple, offering for a dinner party, this recipe is incredibly versatile and guaranteed to impress. Its inviting aroma alone will fill your kitchen with coziness, signaling that something truly special is baking.
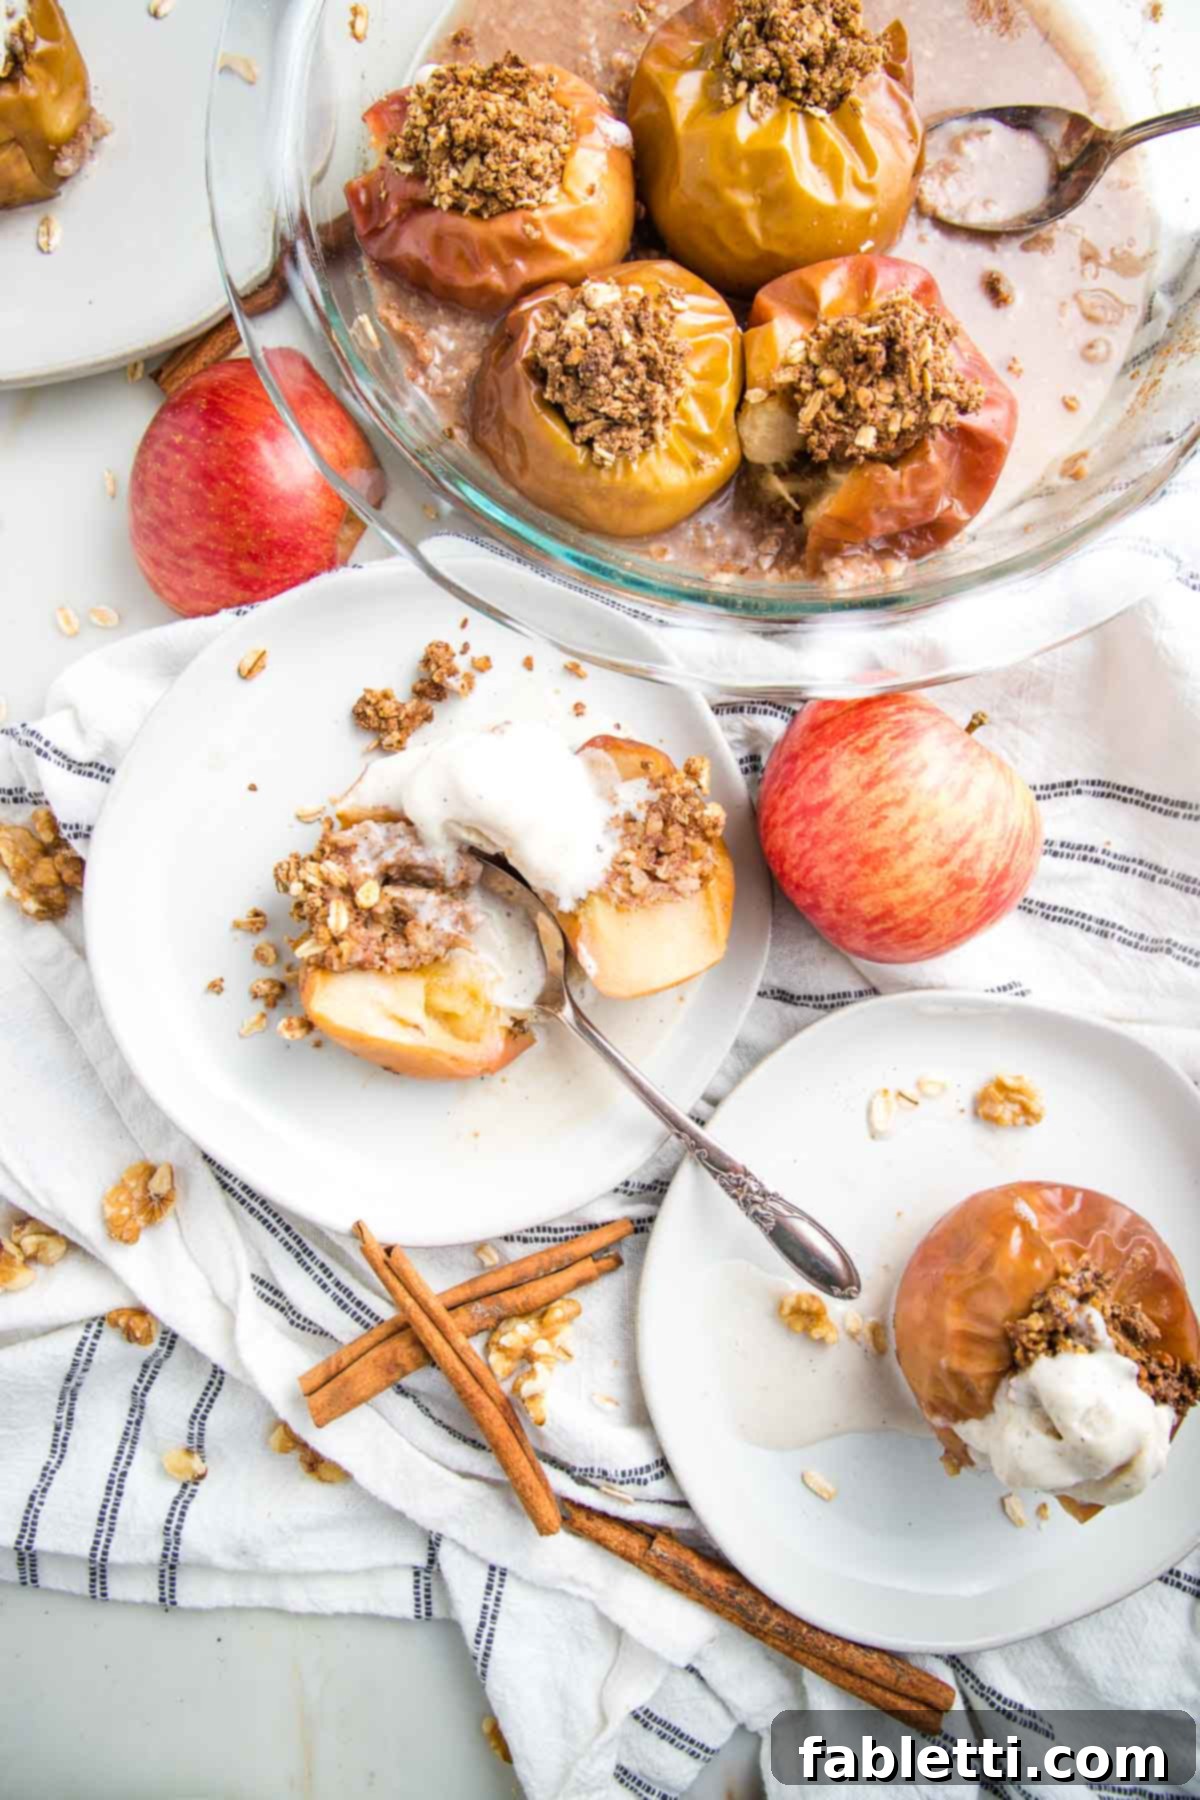
This particular baked apple recipe rises above the rest due to its effortless preparation, the wonderfully satisfying texture of its oat, flax, and cinnamon stuffing, and its consistently beautiful results. Beyond their incredible taste, these apples are packed with nutrients, making them substantial enough to enjoy as a simple vegan breakfast or an energizing, wholesome snack that fuels your day the right way. This post has been thoroughly updated from its original publication in 2016, bringing you even more tips and insights for perfect results.
Why You’ll Fall in Love with These Healthy Baked Apples
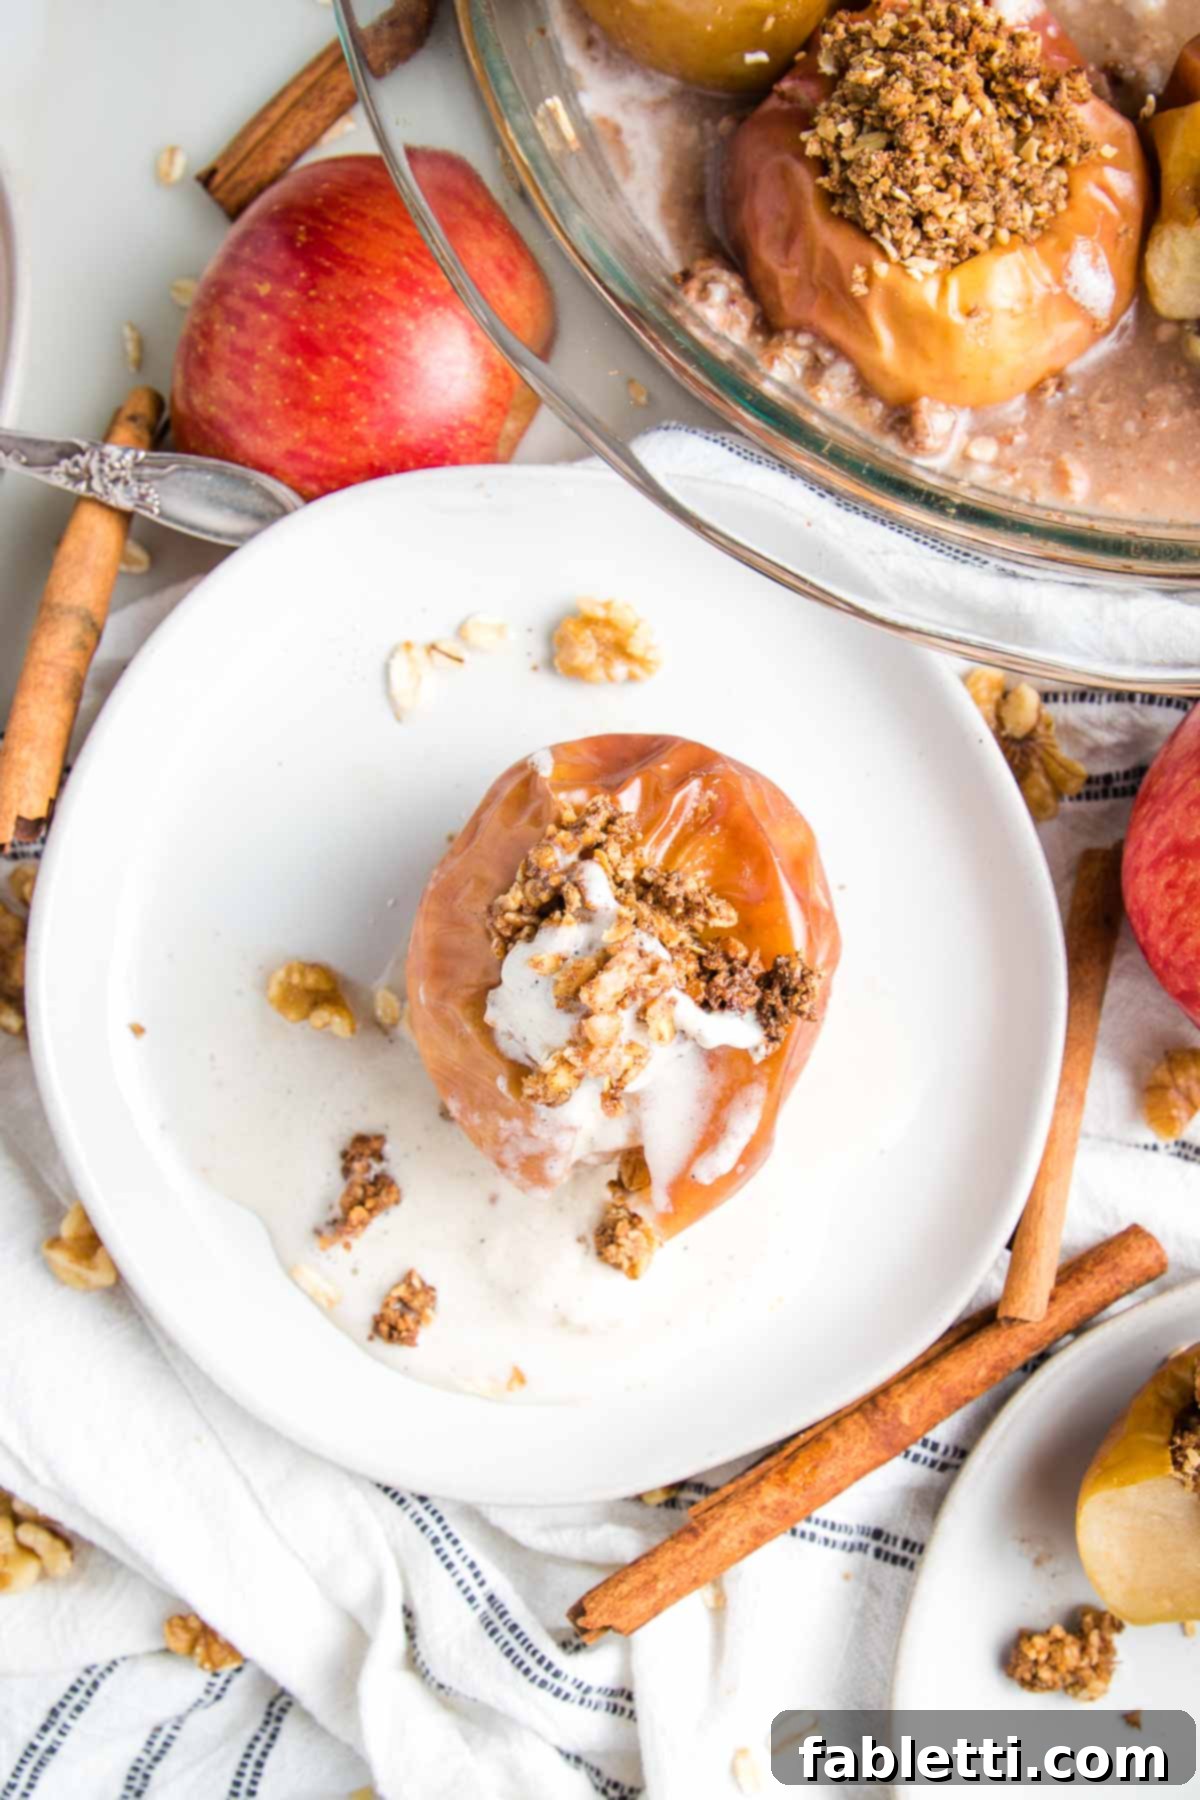
- Unforgettable Flavor & Aroma: Prepare for an explosion of comforting flavors. The combination of tender baked apples and warm cinnamon creates an irresistible aroma that will permeate your home, making every bite feel like a cozy hug and instantly elevating your mood.
- Effortlessly Simple: With just 7 core ingredients and minimal active preparation time, this recipe is designed for ease. Most of the magic happens in the oven, allowing you to focus on other tasks while your delicious healthy baked apples transform into a golden, tender delight. It’s perfect for busy weeknights!
- A Wholesome & Hearty Breakfast: Yes, a healthy baked apple is not just a dessert! Stuffed with fiber-rich oats and beneficial flax, it provides sustained energy and essential nutrients, making it a perfectly legitimate and satisfying vegan breakfast option to kickstart your day on a healthy note.
- Quicker Than Traditional Apple Desserts: If you love apple desserts but are short on time, these baked apples are a game-changer. They’re significantly quicker and easier to prepare than an apple crisp or a full apple pie, as there’s no extensive chopping, peeling, or crust-making involved. Just core, stuff, and bake for a fraction of the effort!
- Customizable & Versatile: This recipe is incredibly adaptable. Easily modify the filling to your taste preferences by adding different nuts, seeds, or spices, or simply use what you have on hand. Plus, these baked apples can be enjoyed warm with a scoop of dairy-free ice cream, or cold straight from the fridge as a grab-and-go snack or healthy breakfast.
- Naturally Sweetened: By harnessing the natural sweetness of apples and enriching it with pure maple syrup, this recipe skillfully avoids refined sugars, aligning perfectly with a healthier lifestyle without compromising on an ounce of delicious taste.
- Dietary-Friendly: Being dairy-free and vegan, this recipe is inclusive and suitable for a wide range of dietary needs. It’s also naturally gluten-free (ensure your oats are certified GF) and can be made nut-free with simple substitutions.
Choosing the Best Apples for Baking: A Detailed Guide to Perfection
When it comes to creating the perfect healthy baked apple, selecting the right apple variety is paramount to achieving your desired texture and flavor profile. With such a vast array of options available, making a choice can feel daunting. While some might seek a definitive answer, the truth is, “it depends” on your desired outcome! Apples vary widely in tartness, sweetness, firmness, size, and color, all of which significantly influence their behavior during the baking process. Here’s a detailed look at my favorite varieties and why they excel (or don’t) in baked apple recipes, empowering you to make the best decision for your palate and culinary vision.
- Honeycrisp: A true crowd-pleaser, the Honeycrisp apple consistently wins for its delightful mild honeyed flavor and exceptionally crisp texture. These qualities make it a top choice for salads, snacking, and incorporating into recipes like apple muffins where you want the apple pieces to retain their shape and distinct flavor. As my everyday “go-to” apple, I frequently bake with them simply because I always have them on hand. Honeycrisps tend to sweeten beautifully in the oven and, crucially, don’t turn into an undesirable mush, providing a pleasant, slightly firm bite.
- Fuji Apples: Known for their pronounced sweetness, Fuji apples are a superb all-rounder, equally enjoyable fresh or baked. They hold their shape remarkably well when baked whole, making them an excellent candidate for stuffed apples that maintain their structural integrity. Their year-round availability is another huge plus, ensuring you can enjoy this delicious recipe anytime you crave it!
- Pink Lady (AKA Cripps Pink): This variety offers a captivating balance of tartness with a subtle hint of sweetness, contributing a desirable depth of flavor that keeps things exciting and prevents the dish from being overly sweet. Pink Lady apples are a fantastic choice for recipes like an apple galette, where their tart profile can truly shine and provide a refreshing counterpoint to sweeter elements in the filling.
- Empire: A delicious hybrid of Red Delicious and McIntosh, the Empire apple is particularly well-suited for baking. Its creamy white flesh softens beautifully during cooking, developing a harmonious sweet and tart flavor profile that is both comforting and vibrant. It’s also a great option if you’re considering making homemade applesauce, as it breaks down nicely and offers a smooth consistency.
- Gala: These apples are crisp, incredibly juicy, and very sweet, making them an excellent snacking apple. Small Gala apples are often sold in large, economical bags, which makes them a practical choice if you’re planning to bake a large batch of individual healthy baked apples for a gathering, meal prep, or for feeding a family. They hold up fairly well during baking, offering a softer yet still discernible texture.
- Cortland: A slightly softer apple by nature, Cortland is wonderful if you prefer your baked apples to have a more tender, almost applesauce-like consistency in the center while still maintaining their general outer shape. They offer a good balance of sweet and tart, making them a solid and reliable choice for baking whole apples that yield a comforting, yielding texture.
- McIntosh: Often lauded for its amazing flavor and incredibly soft texture, the McIntosh has earned a reputation as one of the “best” baking apples. However, this is where personal preference plays a significant role. If you (or your diners) adore a very soft, almost melty baked apple that easily spoons apart, McIntosh is your perfect match. Personally, I tend to shy away from anything too mushy, so keep this textural distinction in mind when making your selection!
- Braeburn: I consider the Braeburn a five-star apple for baking due to its excellent performance. It bakes up wonderfully juicy but reliably resists becoming mushy, retaining a pleasant, slightly firm texture that I prefer. It stands its ground beautifully in recipes such as an apple honey cake with cinnamon. Visually, it’s also quite appealing with its attractive pink streaks, often interspersed with yellow and green hues, adding beauty to your dish.
- Granny Smith: Renowned for its pronounced tartness, the Granny Smith apple is excellent for balancing sweetness in recipes, preventing them from becoming cloyingly sugary. Its skin is a bit thicker compared to other varieties, which provides a satisfying crunch when eaten raw but might be less ideal for a baked apple if you plan to eat the skin. It’s worth noting that a significant amount of an apple’s nutrition and fiber resides in its skin. This tart apple is one of my top picks for my harvest salad with apple vinaigrette, where its sharp flavor truly complements the dish and brightens the overall profile.
- The Golden Rule: Ultimately, there is no “wrong” kind of apple for baking. While varieties offer different outcomes, the best apple to use for baking is often simply the one you already have on hand! Don’t let the choice overwhelm you; experiment with different varieties to discover your personal favorite texture and flavor profile.
Essential Ingredients and Thoughtful Substitutions for Your Baked Apples
Crafting the perfect healthy baked apples starts with understanding each ingredient’s role and knowing how to adapt the recipe to various dietary needs or preferences. Each component contributes to the delicious flavor, comforting texture, and impressive nutritional profile of this wholesome dish. Here’s a closer look at what goes into our delightful filling and why, along with smart substitution ideas to make this recipe truly your own.
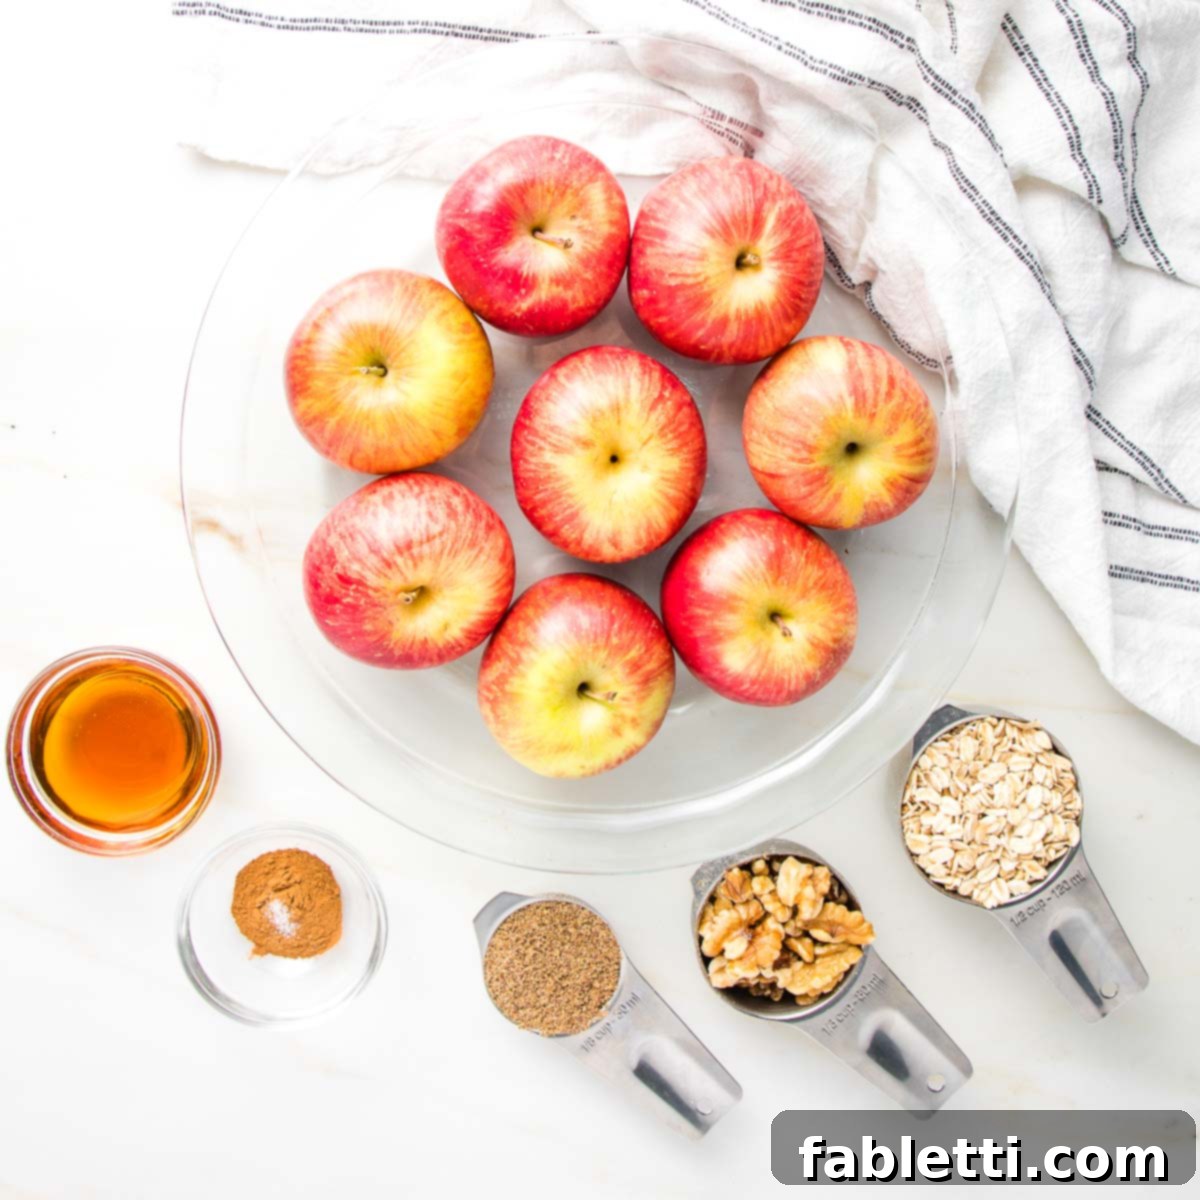
- Apples: The undeniable star of this dish, providing the juicy, tender base for our flavorful filling! As discussed in detail above, choose a variety that suits your preference for sweetness and textural integrity after baking. Apples are composed mostly of water, making them incredibly hydrating, and are an excellent source of dietary fiber, crucial for digestive health. They also provide a good amount of Vitamin C, a powerful antioxidant, along with various other beneficial antioxidants and flavonoids. These components contribute significantly to overall gut health, brain function, and cardiovascular well-being, making apples a true superfood.
- Substitution: While apples are ideal for this recipe, firm pears can work in a pinch if you’re looking for an alternative. Be sure to select very firm pear varieties (like Bosc or Anjou) and reduce the baking time to approximately 30 minutes to prevent them from becoming overly mushy or losing their shape during cooking.
- Rolled Oats: A fantastic foundation for our filling, rolled oats are a whole grain renowned for being a rich source of soluble fiber, particularly beta-glucans. This type of fiber is crucial for maintaining healthy digestion, promoting satiety, and effectively regulating blood sugar levels, contributing to sustained energy. They add a hearty, wholesome texture and a satisfying chewiness to our apple filling.
- Substitution: If you only have quick-cooking or instant oats, you can use them, but be aware that they might result in a softer, mushier filling as they break down more quickly. To ensure the recipe remains gluten-free, always use certified gluten-free rolled oats. For a completely oat-free alternative, a combination of gluten-free flour blend (such as almond or oat flour if suitable) and a small amount of arrowroot powder can be used to achieve a similar binding and thickening effect. Quinoa flakes are another excellent nutrient-dense substitute, used in the same quantity, offering a slightly different texture. Cooked grains like rice or even cooked quinoa can also be incorporated for a different textural experience, though they won’t bind as effectively.
- Walnuts: These provide a wonderful nutty flavor, a satisfying crunch, and a delightful textural contrast that elevates the apple filling. Beyond their sensory appeal, walnuts are celebrated for their exceptionally high content of Omega-3 fatty acids (specifically alpha-linolenic acid, ALA), which are beneficial for heart health, brain function, and reducing inflammation.
- Substitution: Almonds or pecans are great alternatives, offering similar flavor profiles and satisfying crunch. For those with nut allergies, hemp seeds are a fantastic, nutrient-dense substitute that provides healthy fats and protein without the allergens. If both nuts and seeds are problematic or simply not desired, feel free to omit them entirely; the apples will still be delicious and flavorful, though with a slightly softer texture.
- Ground Flax Seeds: A tiny but mighty powerhouse of nutrition, ground flax seeds contribute a significant amount of soluble and insoluble fiber, playing a vital role in aiding gut health and promoting regularity. They are also incredibly rich in Omega-3 fatty acids and provide a good dose of plant-based protein. Their slightly nutty flavor beautifully complements the other ingredients in the filling. Crucially, ground flax acts as a natural binder (due to its mucilage content), helping to hold the filling together and absorb moisture during baking.
- Substitution: Chia seeds can be used as a direct substitute for ground flax seeds, offering similar binding properties and a comparable nutritional boost. Like flax, they swell and become gelatinous, helping to create a cohesive filling.
- Cinnamon: More than just a spice for flavor, cinnamon provides an incredible warmth, a delightful, inviting aroma that fills your kitchen, and a beautiful reddish-brown color to the dish. It also subtly enhances the perceived sweetness of the apples, allowing us to reduce or even eliminate added sugars, making the recipe healthier. Beyond its culinary uses, ground cinnamon boasts impressive antiviral, antibacterial, and antifungal properties, along with significant anti-inflammatory benefits, making it a wonderful addition to any healthy diet.
- Pure Maple Syrup: My preferred natural sweetener for baked goods, pure maple syrup offers a distinct, rich, and nuanced flavor that pairs perfectly with apples and warm spices. Unlike refined sugars, maple syrup contains antioxidants and minerals. The amount you use can be adjusted based on your personal taste preferences and the natural sweetness of the specific apple variety you’ve chosen. Often, you might find you need less than you think, especially with naturally sweet apples like Fuji or Gala!
- A Pinch of Fine Grain Sea Salt: While often overlooked, a small amount of salt is essential in virtually all baking and sweet recipes. It doesn’t make the dish taste salty but rather acts as a flavor enhancer, balancing the sweetness, deepening the apple’s natural flavors, and making the cinnamon and other spices truly pop. Don’t skip this subtle but impactful ingredient, as it brings all the flavors into perfect harmony.
The Easiest Way to Core an Apple: Three Methods Explored for Seamless Stuffing
Coring an apple efficiently and effectively is a crucial preliminary step before stuffing and baking, and it’s a task many find surprisingly tricky or cumbersome. For years, I struggled with various tools, including dedicated apple corers, often ending up with an imperfectly hollowed apple or one that had broken through the bottom, which can lead to your delicious filling leaking out. Through extensive trial and error in my kitchen, I’ve discovered a few reliable methods. Below, I’ll share my honest assessment of three common approaches, highlighting their pros and cons, and ultimately revealing what I believe is the absolute easiest, safest, and most effective way to core an apple specifically for baking whole stuffed apples.
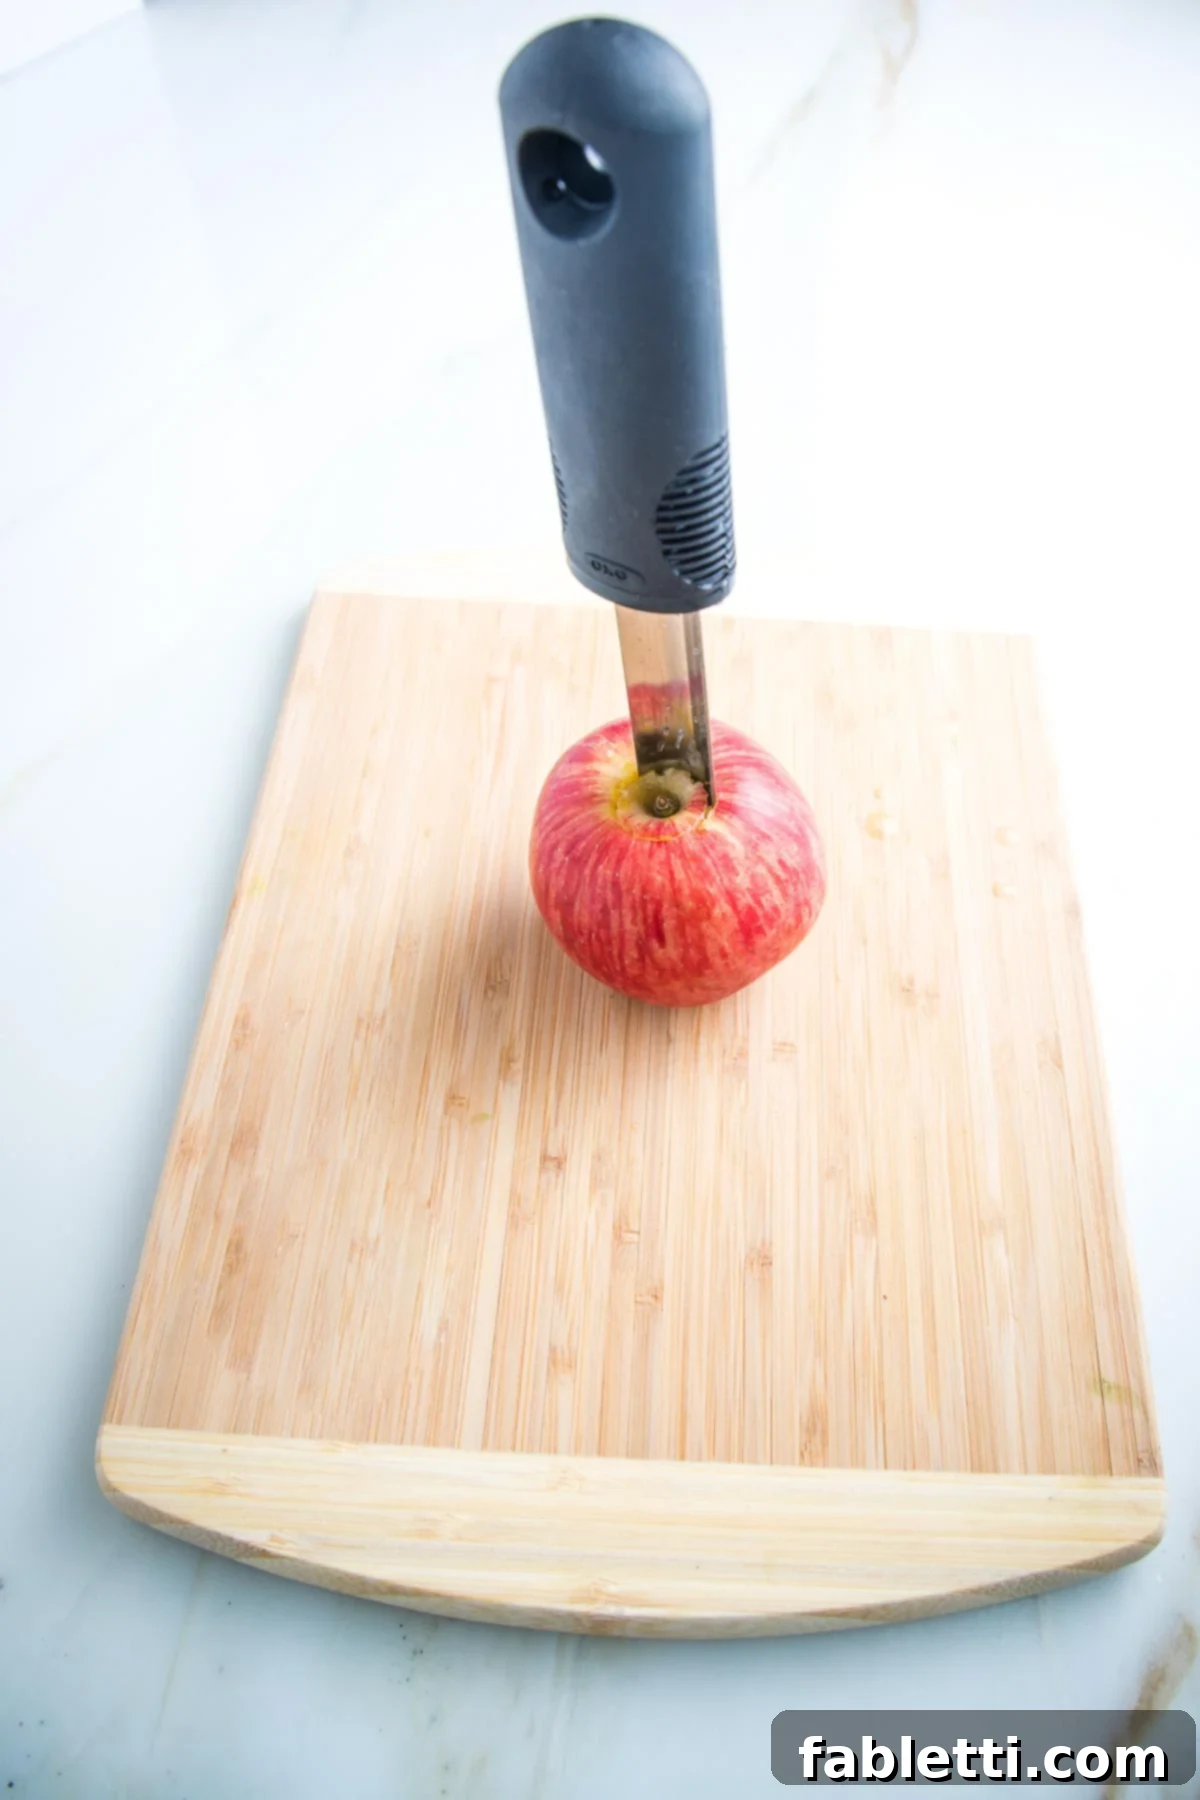
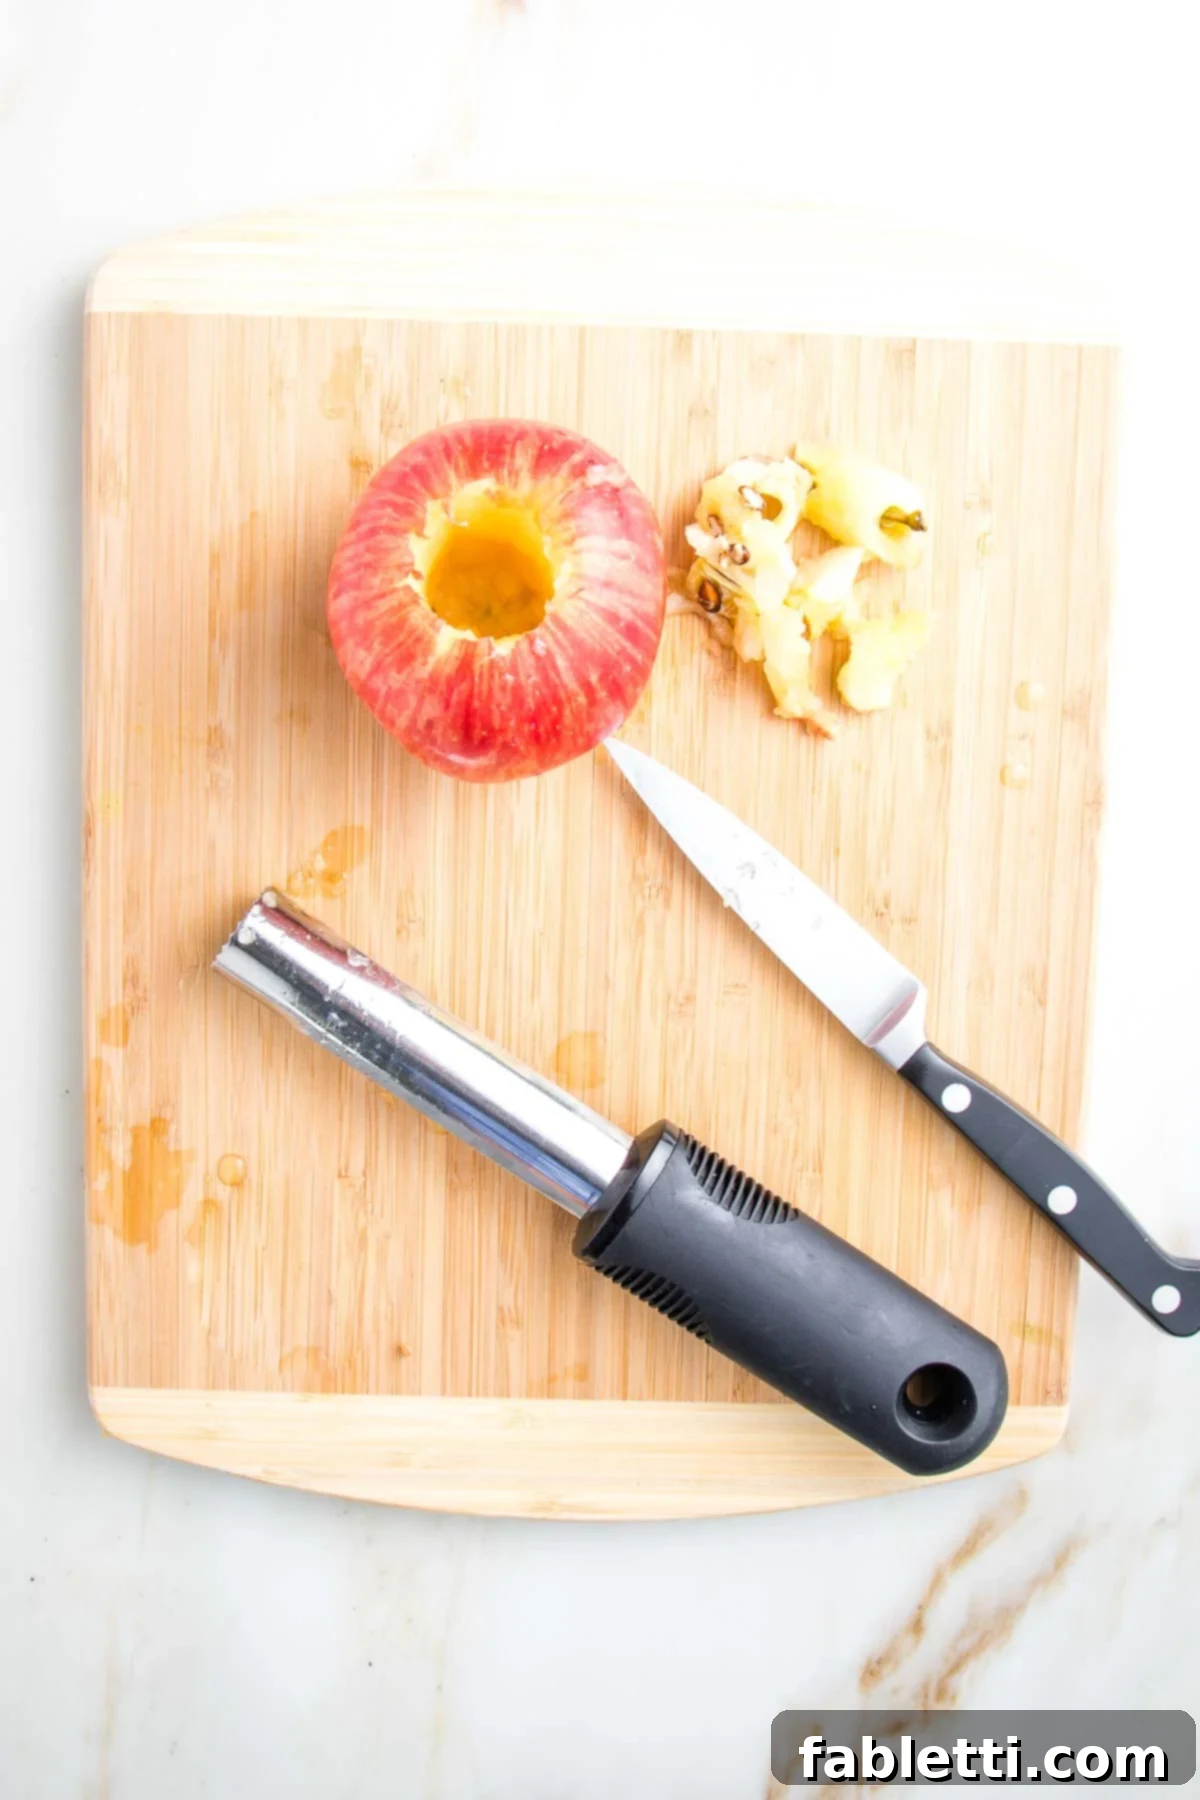
- Method 1: Using a Dedicated Apple Corer: A specific apple corer is designed precisely for this task and can certainly make the initial step of removing the core a little easier by creating a neat cylindrical hole. However, in my experience, it often doesn’t remove all the fibrous “stuff” or stray seeds cleanly in one go, especially with larger cores. You frequently need to follow up with another tool, like a small knife, to tidy up the cavity. Ultimately, considering the space it occupies in my kitchen drawer and its limited, sometimes imperfect, functionality, I’m not entirely convinced it’s an indispensable kitchen tool for everyone.
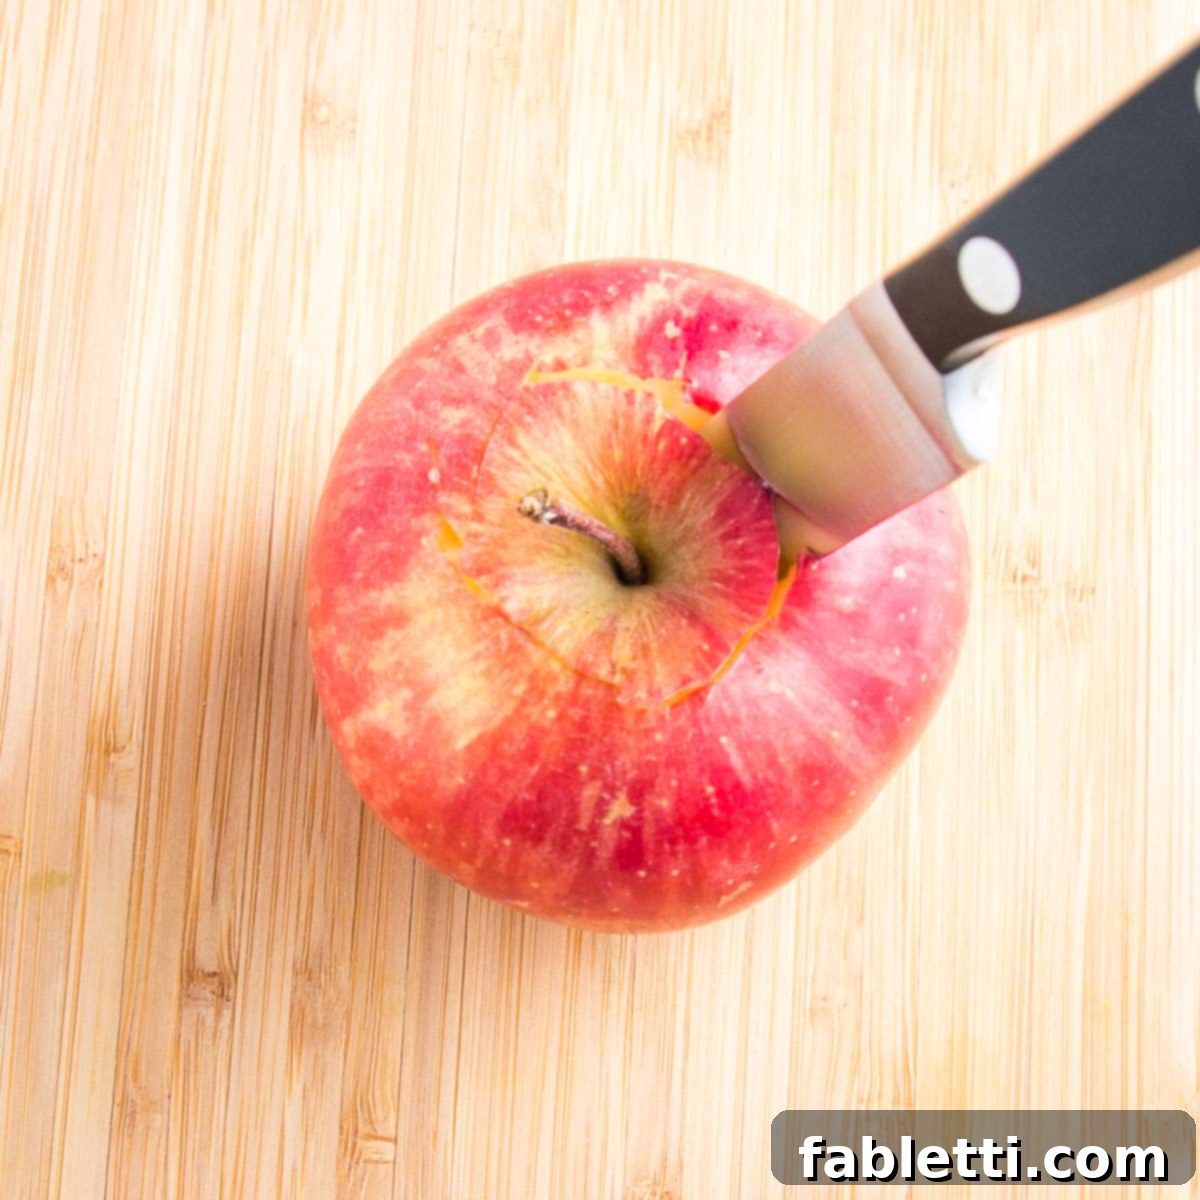
- Method 2: Using a Paring Knife: If you are comfortable and confident in your knife skills with a sharp blade, a paring knife offers excellent control and precision, allowing you to tailor the size and shape of your cavity.
- Start by inserting the knife at an angle around the stem, carefully cutting down ALMOST all the way to the bottom. To avoid cutting through the apple, which could cause filling to leak, hold the knife alongside the apple to accurately gauge the depth, then aim to stop just short of breaking through the base.
- Rotate the apple slightly (about an inch at a time) and continue making angled slices, moving around the circumference until you’ve completed a full circle, connecting your cuts.
- Gently pull out the central section you’ve just cut. If the core doesn’t detach in one clean piece, that’s perfectly okay! Simply use your knife to carefully dig out any remaining seeds or tough, fibrous bits until you have a smooth, clean cavity.
This method offers great control but requires a steady hand.
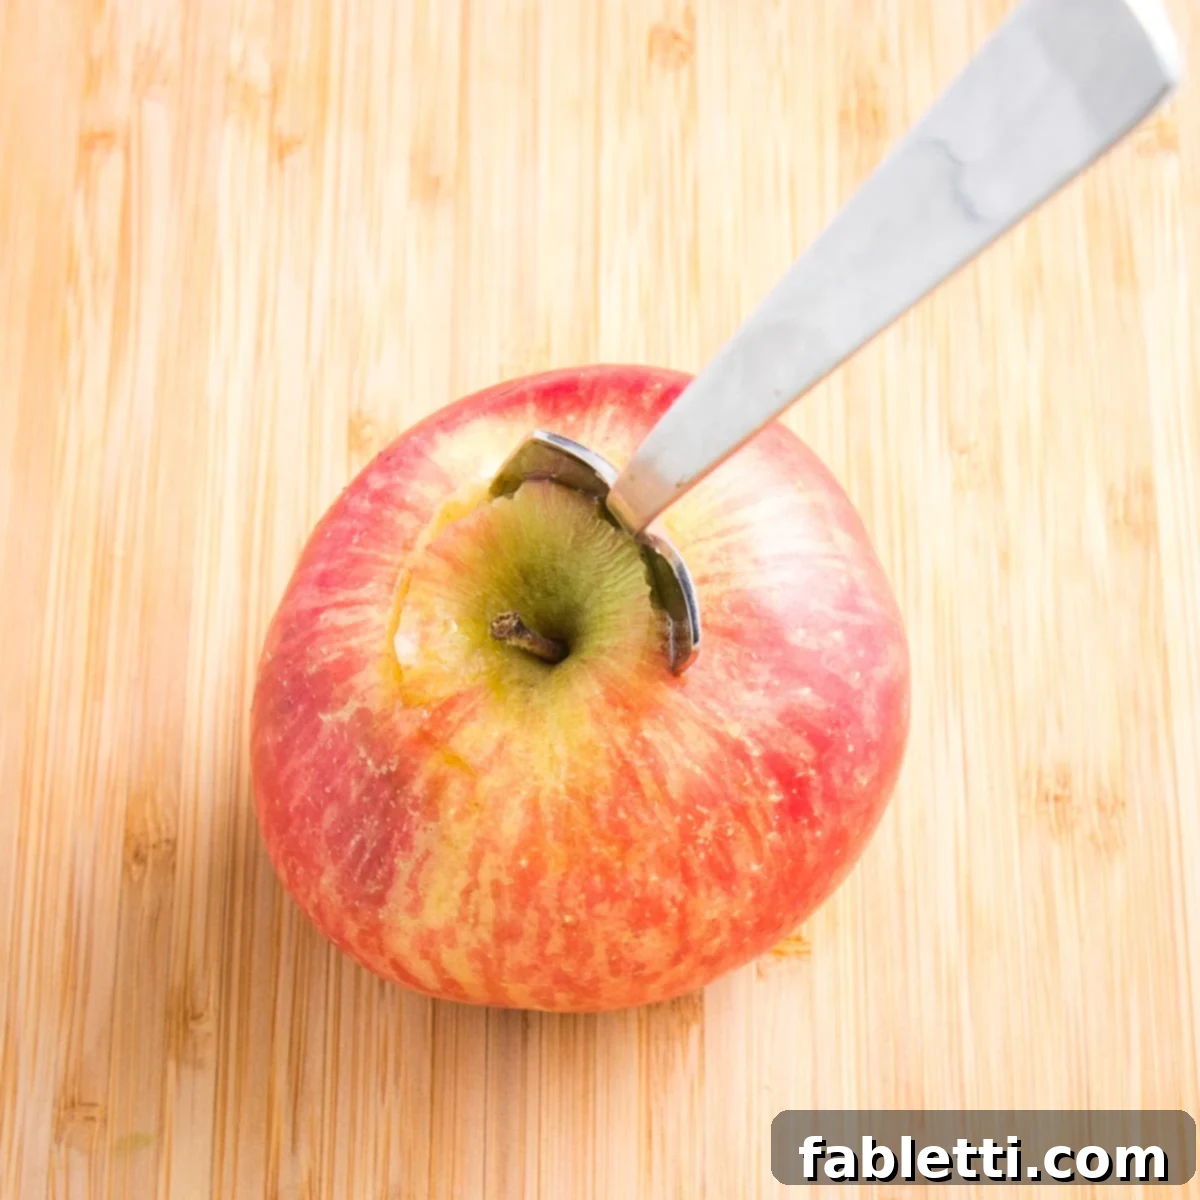
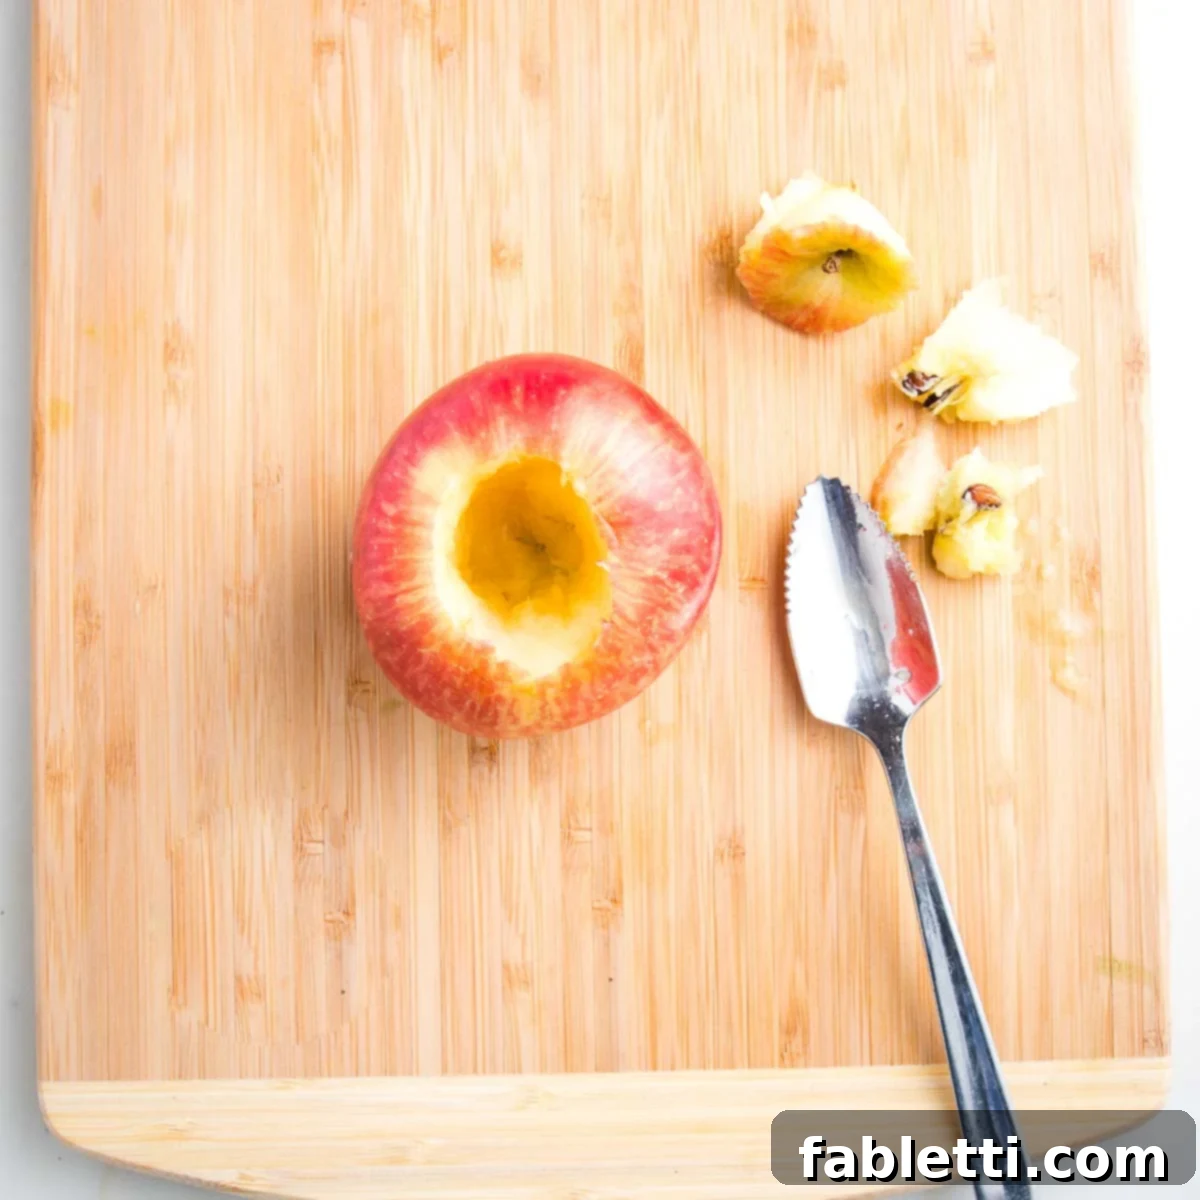
- Method 3: The Grapefruit Spoon (My Top Recommendation!): For sheer ease, safety, and remarkable effectiveness, using a grapefruit spoon is my absolute preferred method for coring apples for stuffing. The serrated edges of the spoon are incredibly efficient at scraping out the woody core and seeds cleanly without risking too much precious apple flesh or accidentally cutting through the bottom.
- Insert the spoon around the stem opening, pressing down gently but firmly. Scoop out the top layer of the core by making small, circular slits and rotating the apple or the spoon.
- Then, make a second pass, this time going a bit deeper into the apple, continuing to scoop and rotate until you’ve removed a good portion of the core.
- Finally, assess the cavity. Use the spoon’s serrated edge to efficiently scrape out any stubborn remaining seeds, fibrous parts, or inner membrane until you have a perfectly clean, hollow space ready for your delicious filling.
A grapefruit spoon is an incredibly inexpensive kitchen tool that you’ll quickly find yourself reaching for constantly, far beyond just coring apples. Its versatility and effectiveness truly make it a valuable, unsung hero in any kitchen. Use it for deseding cucumbers, zucchinis, or even hard winter squash with remarkable ease.
What if you accidentally cut through the bottom of the apple? Don’t fret! It happens to the best of us, and trust me, I’ve done it many times. The cooked apple will still taste absolutely delicious, and chances are, you won’t lose any significant amount of the filling out the bottom. The apple flesh typically softens and seals around the filling during baking. Simply move on to the next apple, and don’t let a minor slip deter you. This entire coring process becomes quicker, easier, and more intuitive with practice. With each apple you prepare, you’ll become more proficient and confident. You’ll be a pro in no time!
How to Make These Irresistible Healthy Baked Apples: Step-by-Step Instructions
Get ready to create a truly delicious, comforting, and healthy treat with surprising ease. This section guides you through each step of preparing and baking these wonderful stuffed apples, ensuring perfect, tender, and flavorful results every single time. Follow these simple directions to enjoy your homemade healthy baked apples.
Preparation is Key: Preheat Your Oven and Core Your Apples
First things first, let’s get organized. Preheat your oven to 350°F (175°C). By the time you finish prepping your apples and preparing the filling, your oven should be perfectly heated and ready for baking. The hands-on preparation process itself is quick and straightforward, allowing you to get these apples into the oven efficiently.
Thoroughly wash your chosen apples under cool running water. Using your preferred coring method (as detailed above, I highly recommend the grapefruit spoon for its ease and safety), carefully remove the woody core and any seeds from the center of each apple. The goal is to create a hollow cavity that’s large enough for your delicious filling while ensuring the bottom of the apple remains intact to hold everything in. Once cored, arrange your apples snugly in a glass or ceramic baking dish. A snug fit helps to create a steamy environment during baking.
Crafting the Aromatic and Nutritious Oat Filling
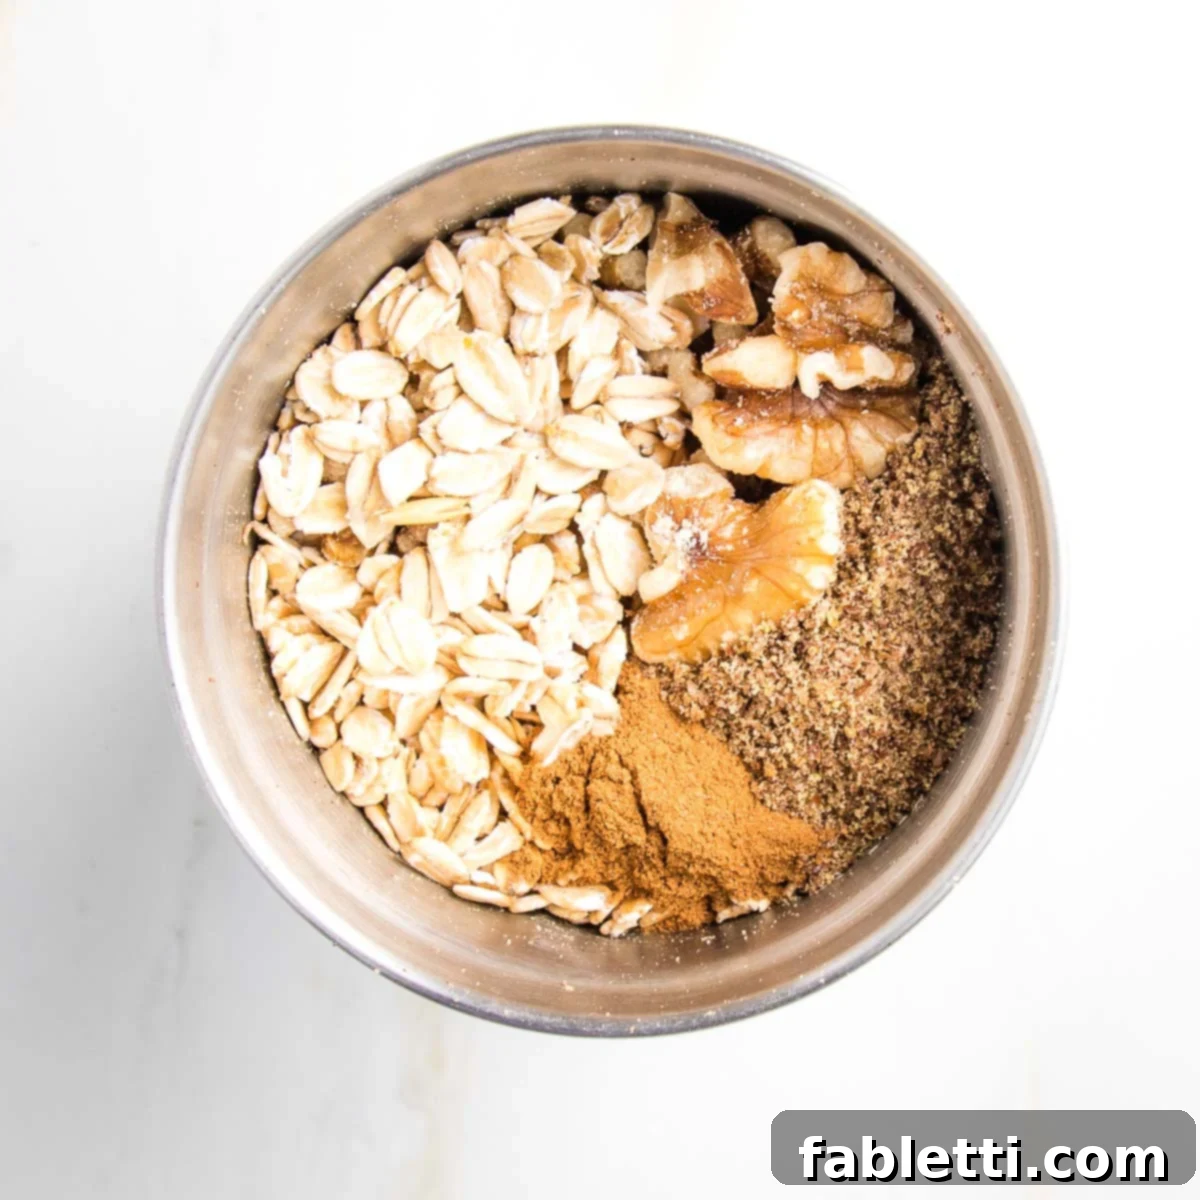
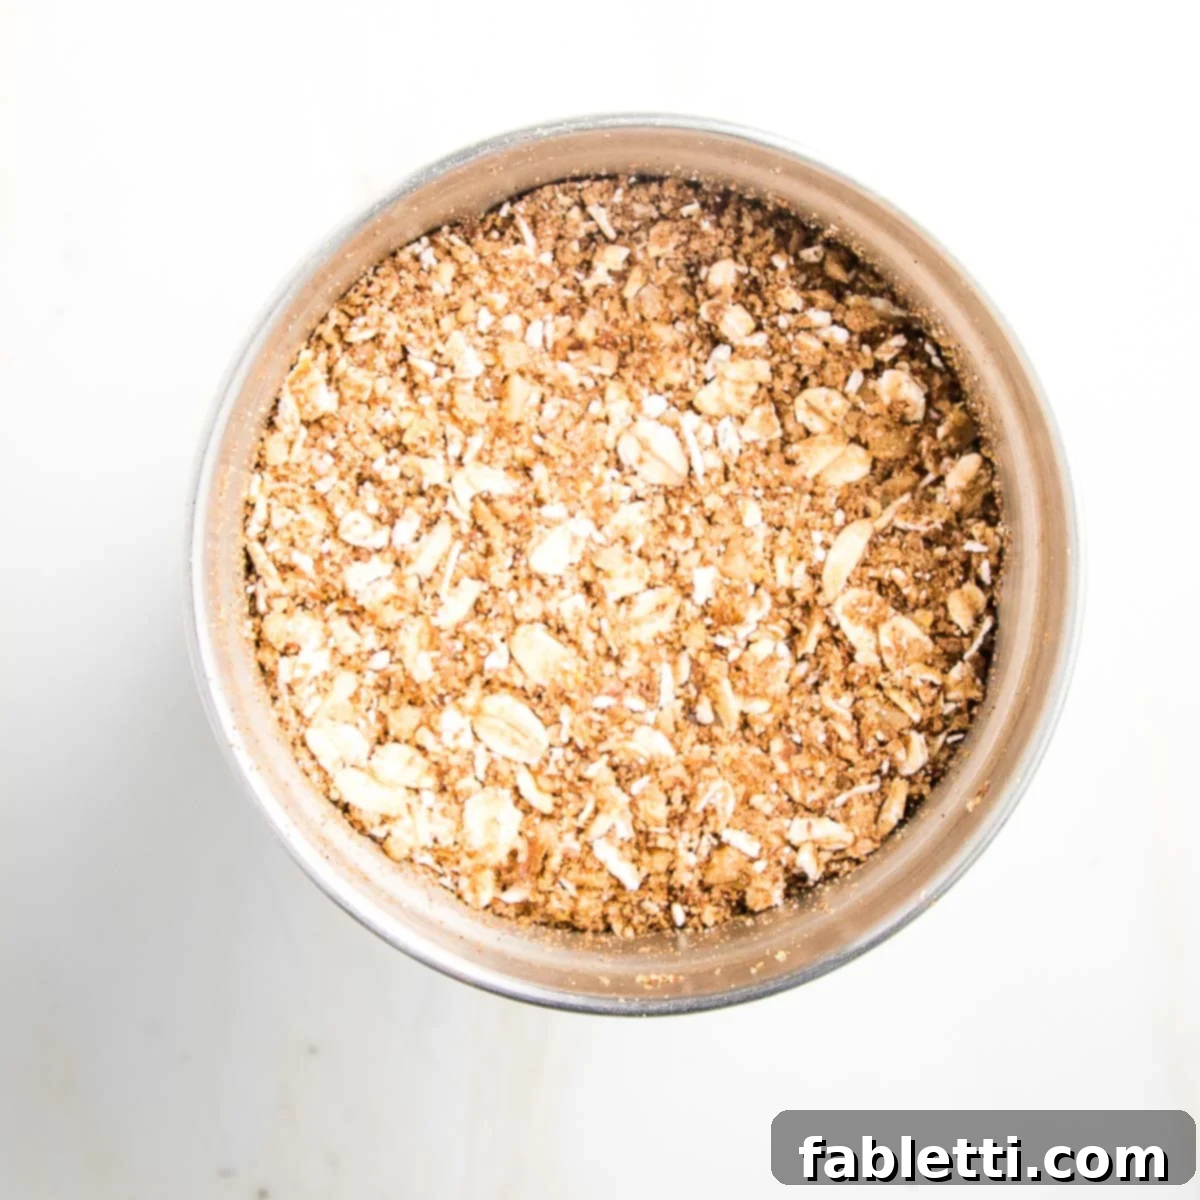
The heart of these healthy baked apples is their flavorful and nutritious filling, packed with wholesome ingredients. To prepare it, combine the rolled oats, walnuts (or your chosen nut/seed substitute), ground flax seeds, fragrant cinnamon, and a pinch of fine grain sea salt in a small spice grinder, a small food processor, or even a clean coffee grinder. Pulse the ingredients until they form a uniform, crumbly mixture. It’s perfectly fine—and even desirable for some—if some of the oats retain a bit of their whole texture; this adds a pleasant chewiness and hearty quality to the finished filling.
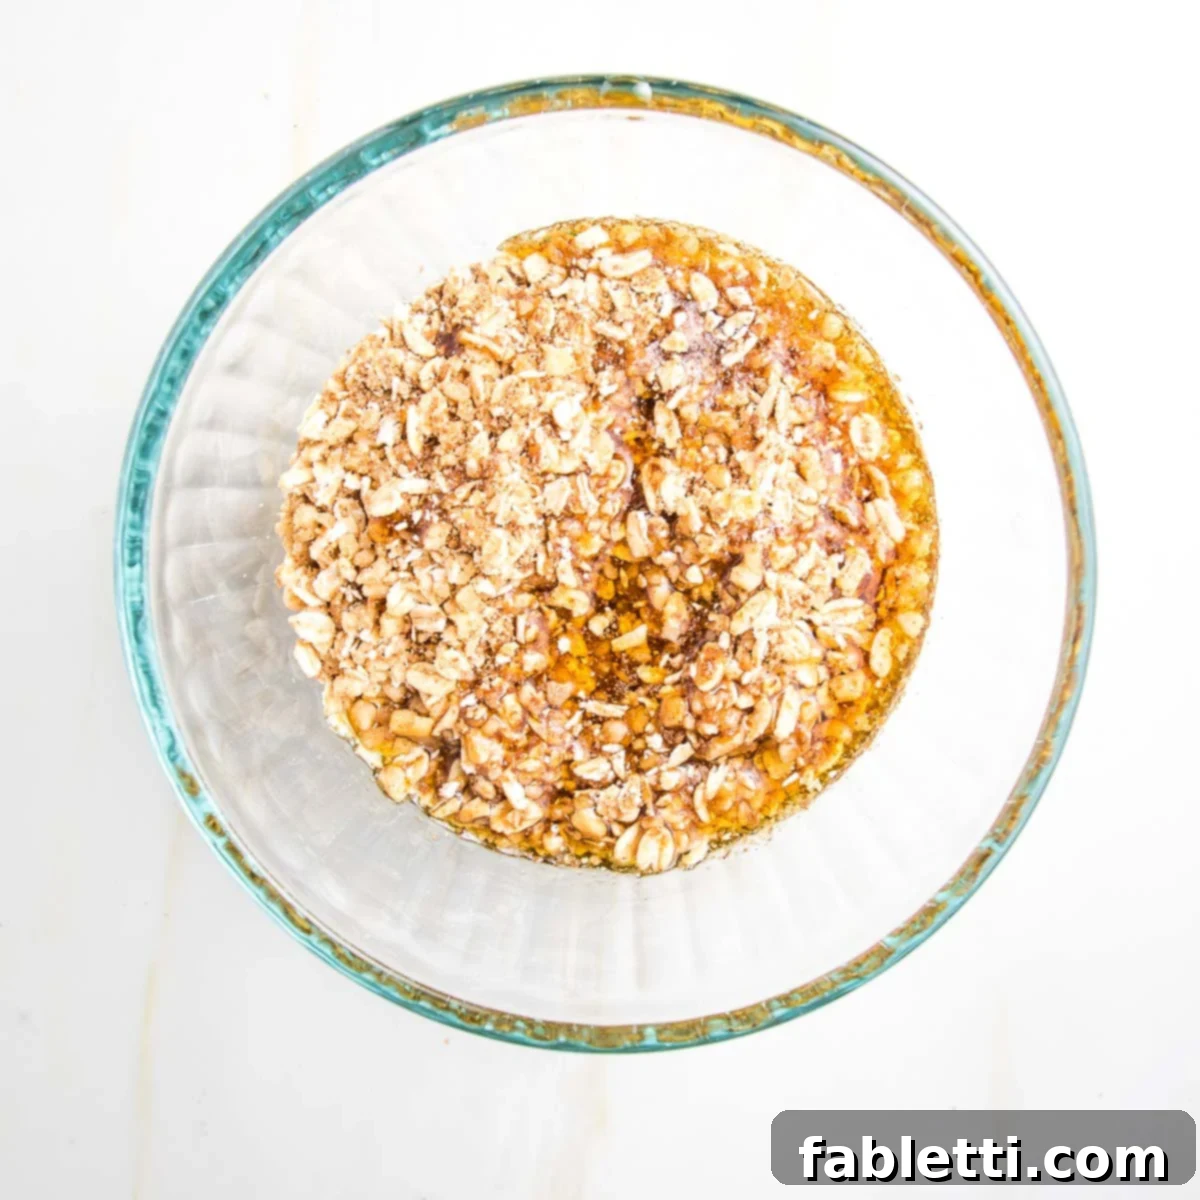
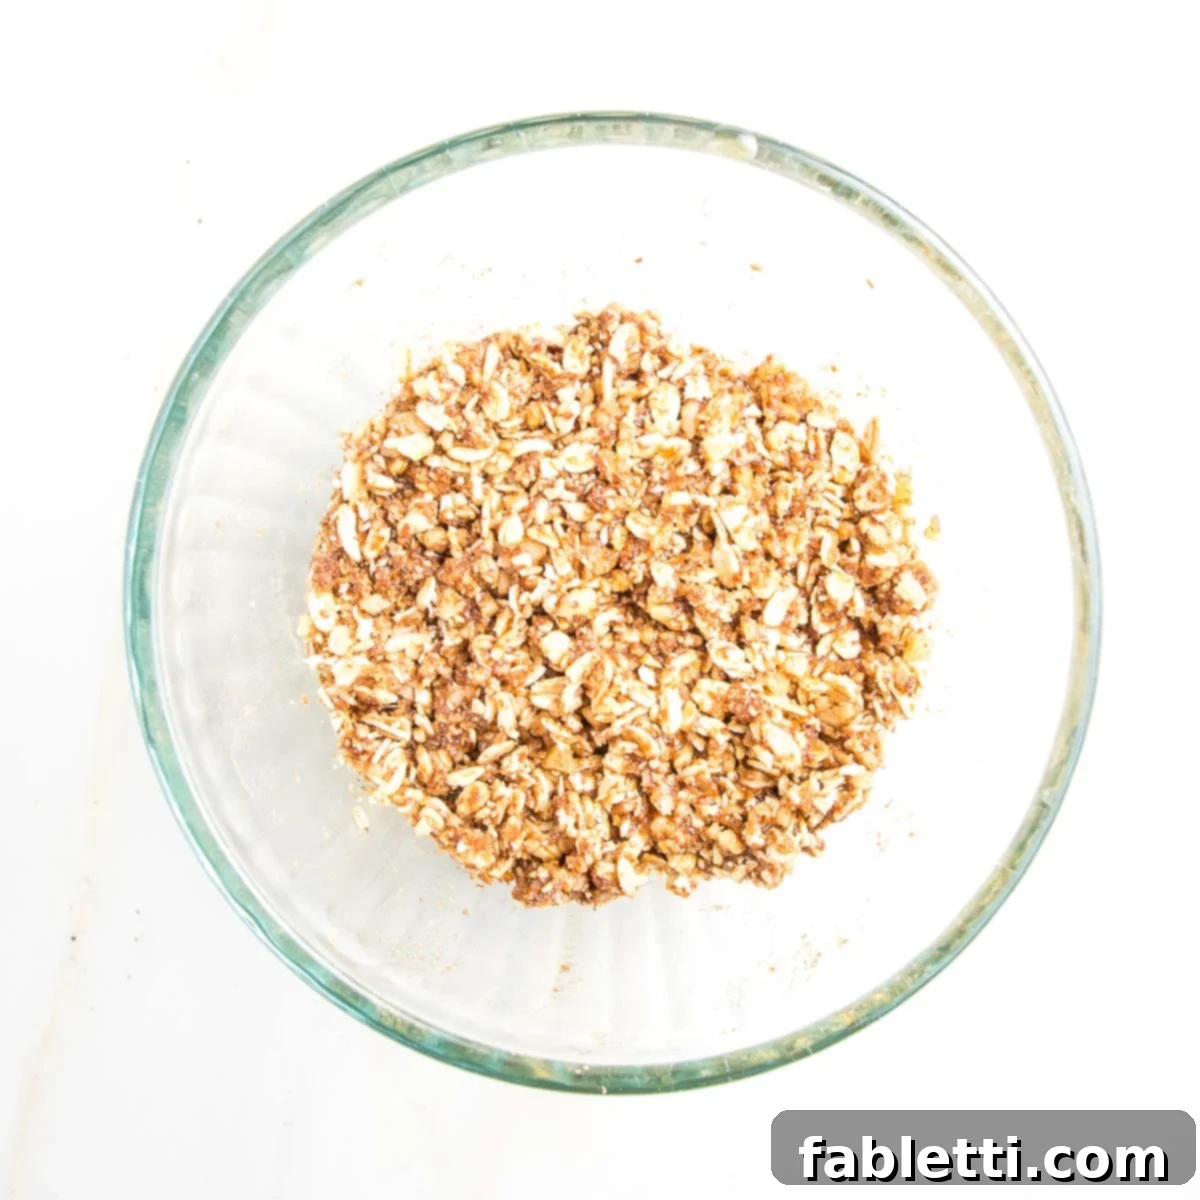
Transfer the ground oat and nut mixture into a small mixing bowl. Pour in the pure maple syrup and stir thoroughly until all ingredients are well combined, and the mixture is moist and cohesive. This forms the flavorful heart of your baked apples. Set this delicious filling aside while you finish preparing the apples for stuffing.
Stuffing and Baking to Golden Perfection
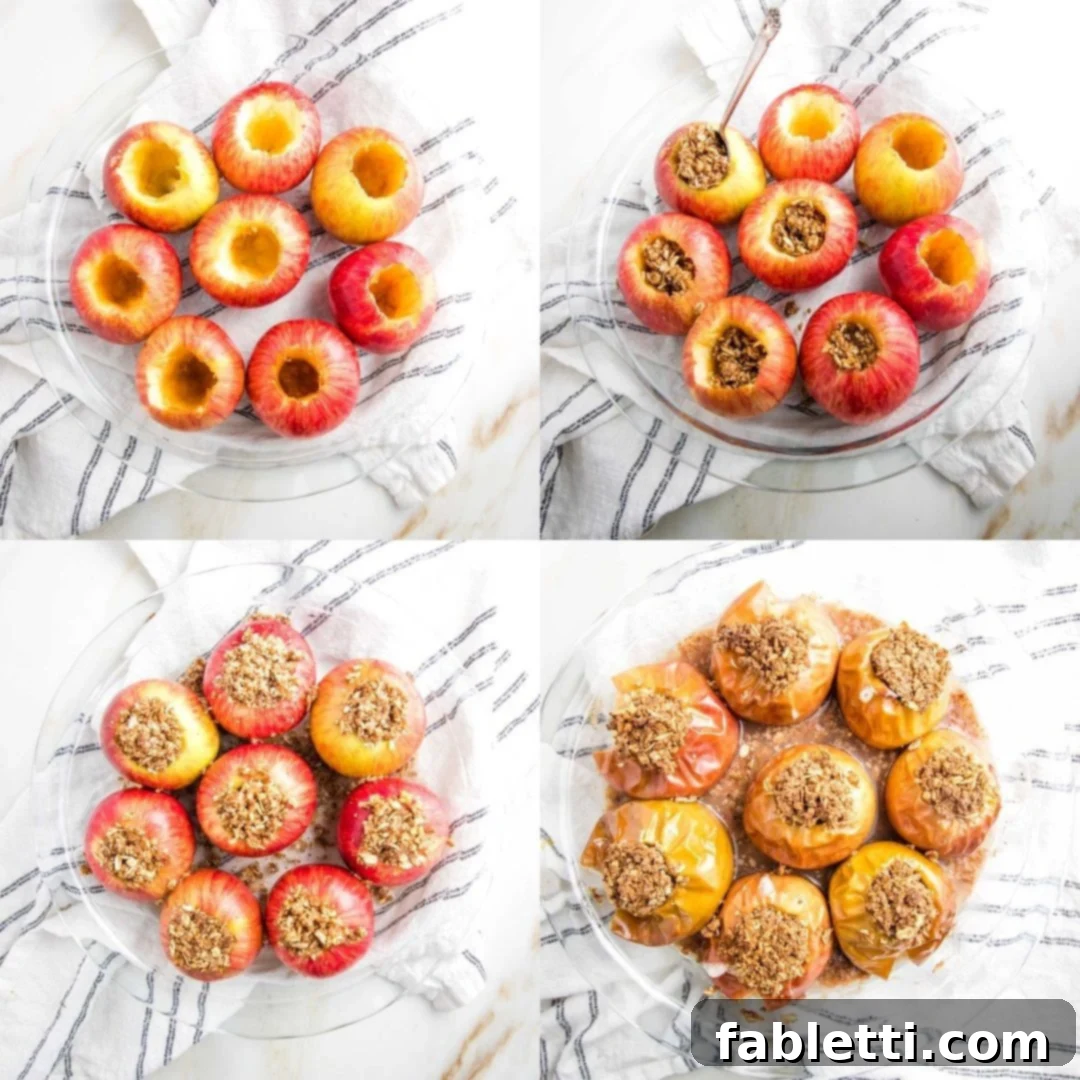
- Stuff the Apples: With your apples cored and arranged in the baking dish, it’s time for the fun part! Carefully spoon the prepared oat and spice filling into the hollowed cavities of each apple. Pack it gently but firmly, mounding it slightly at the top to create a generous and inviting crown of deliciousness.
- Hydrate the Pan: Once all your apples are beautifully stuffed and nestled in the dish, pour about ¼ inch of water into the bottom of the baking dish. For an extra boost of flavor, you can substitute the water with apple juice or apple cider. This liquid is essential as it creates a steamy environment in the oven, which is crucial for softening the apples evenly and preventing them from drying out, ensuring they come out wonderfully tender.
- Bake Until Tender: Carefully place the baking dish with your stuffed apples into the preheated oven. Bake for approximately 45 minutes to 1 hour, or until the apples are golden brown, fragrant, and wonderfully tender when easily pierced with a fork. Keep in mind that larger apples will require a slightly longer baking time to become fully soft and cooked through. Always test with a fork for your desired tenderness.
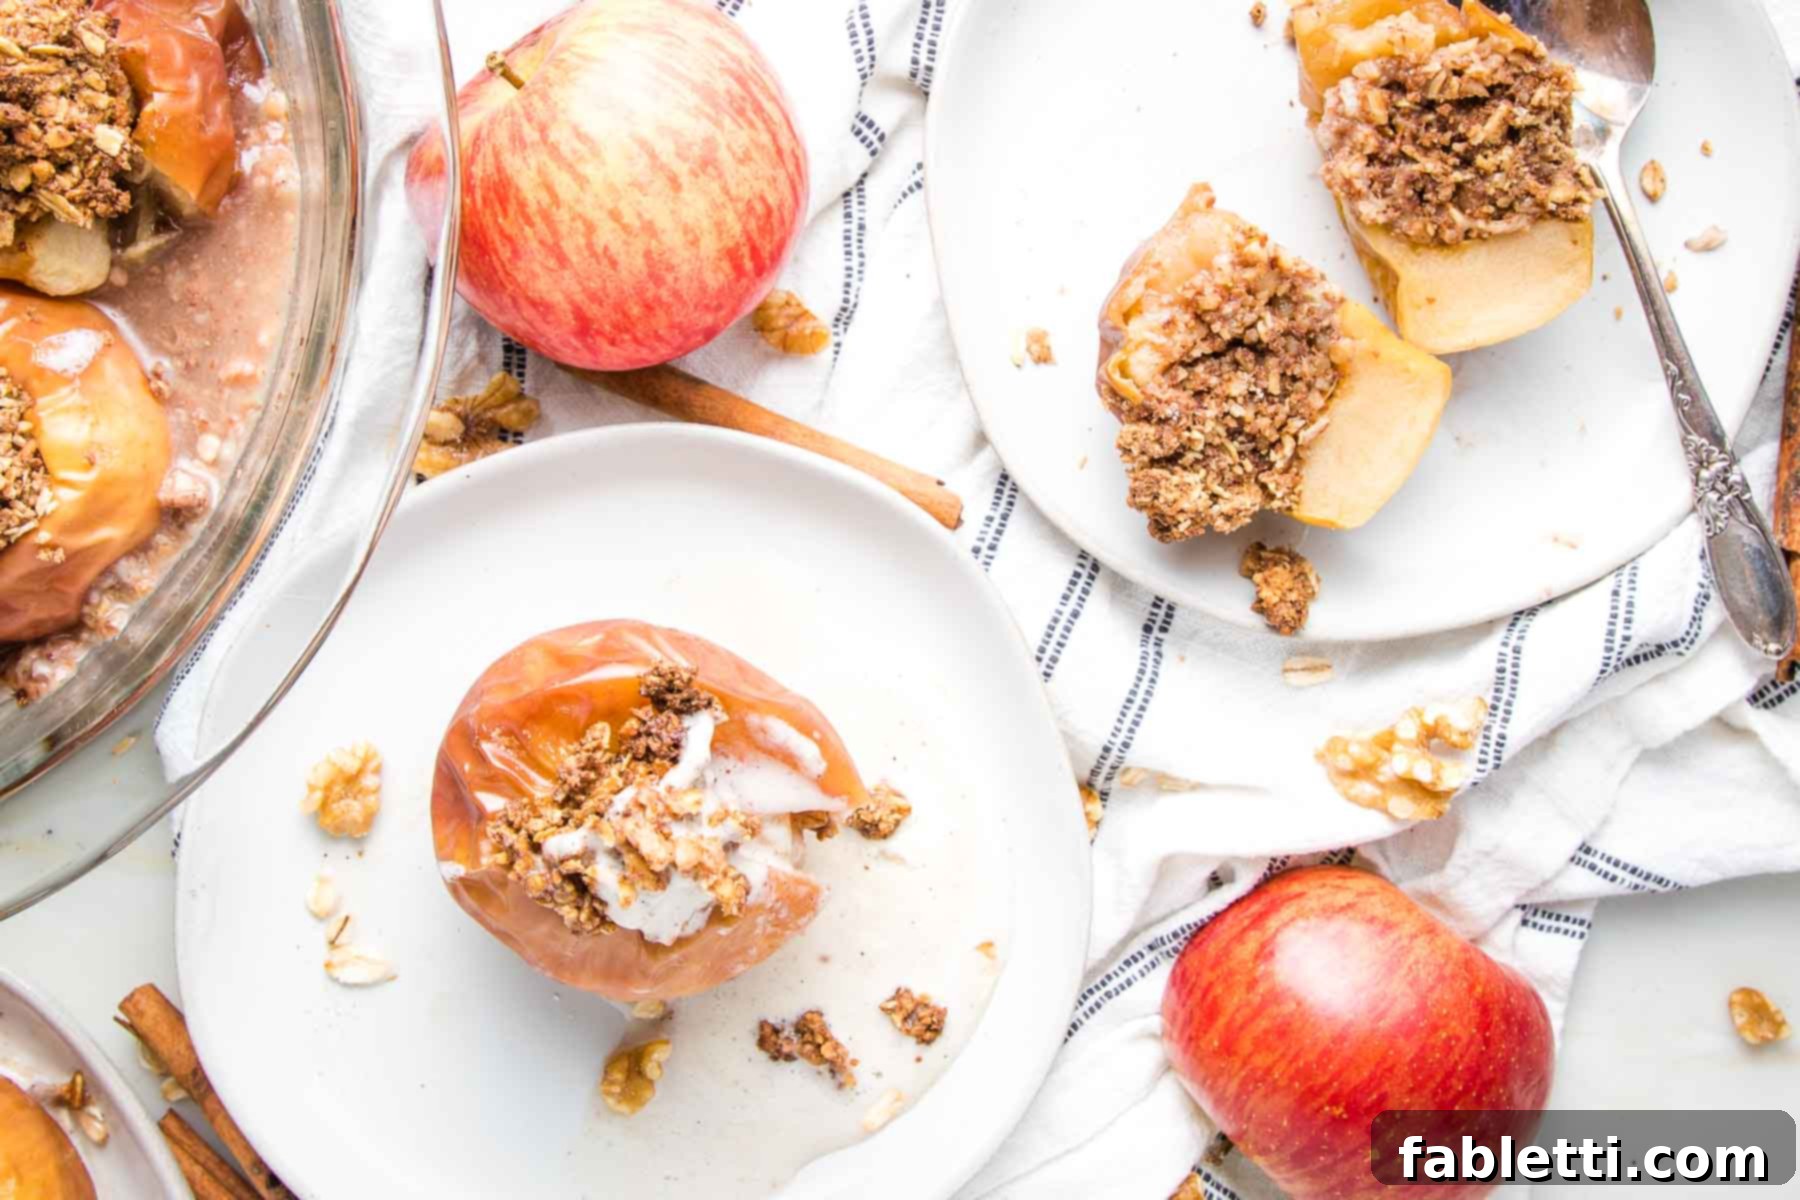
- Serve and Enjoy: Once baked to perfection, carefully remove the dish from the oven. Allow the apples to cool for a few minutes, as they will be very hot. These healthy baked apples are absolutely divine served warm, perhaps with a scoop of dairy-free vanilla ice cream, a dollop of coconut whipped cream, or a drizzle of extra maple syrup. They are equally delightful enjoyed at room temperature or even chilled as a refreshing cold breakfast or grab-and-go snack.
Expert Tips for Perfectly Healthy Baked Apples
- Bake a Few Extra: These healthy baked apples are incredibly versatile and make for wonderful leftovers. Always consider baking an extra batch or two, as they are truly fantastic to discover in the fridge for a quick cold breakfast or a satisfying, wholesome snack throughout the week. They hold up beautifully and their flavors deepen over time.
- The Power of Steam is Crucial: The secret to achieving perfectly tender, moist, and juicy apples lies in creating a steamy, humid environment in your oven. Never skip the crucial step of adding about ¼ inch of water (or for an extra boost of flavor, apple juice or apple cider) to the bottom of your baking dish before placing it in the oven. This gentle steaming ensures the apples soften beautifully without drying out.
- Snug Fit for Optimal Success: Choose a baking dish that allows your apples to fit snugly together, with minimal space between them. This arrangement helps to trap steam more effectively during baking, contributing to a consistent and even cooking process for all the apples, resulting in a more uniform tenderness.
- Apple Size Matters (for filling and baking time): As a general rule, the larger the apple, the more generous a cavity you can carve out for that delicious cinnamon oat filling. This means more tasty stuffing per apple! Just remember that larger apples will inherently require a slightly extended cooking time to ensure they become thoroughly soft and tender all the way through. Always test for doneness with a fork.
- Embrace What You Have: It’s important to reiterate that there’s no single “wrong” apple for baking. While different varieties offer distinct characteristics – some are tarter, some sweeter; some will maintain their shape, while others will become delightfully soft and almost melty – they all make delicious baked apples. The *best* apple for your baked apple recipe is always the one you already have available in your kitchen! Don’t let perfection be the enemy of good.
- Amp Up the Flavor Naturally: If you’re looking to add more depth of flavor to your filling without incorporating additional sweeteners, consider a tiny pinch of other warm spices such as nutmeg, cloves, allspice, or even a touch of cardamom. These warm spices beautifully complement cinnamon and apples, adding complex layers to your treat.
- Divine Serving Suggestions: While undeniably delicious on their own, serving these warm healthy baked apples with a generous scoop of dairy-free vanilla ice cream or a dollop of fluffy coconut whipped cream is pure perfection. Watch as the creamy topping gently melts into the warm apple, dripping down its sides, creating an irresistible treat. You could also serve them with a sprinkle of extra cinnamon, a light drizzle of more maple syrup, a spoonful of almond butter for added richness and protein, or a scattering of toasted nuts.
- Storage and Reheating Made Easy: Leftover baked apples are wonderful and keep well! Store them in an airtight container in the refrigerator for 3-5 days. To reheat, simply warm them gently in a 325°F (160°C) oven for about 15-20 minutes, or microwave for 30-60 seconds until heated through to your desired warmth. They are also surprisingly wonderful served cold, straight from the fridge!
More Healthy Apple-Inspired Recipes to Explore
If you’ve fallen in love with these healthy baked apples, you’ll be thrilled to discover even more delicious and nutritious ways to enjoy the versatility of apples throughout the year. Apples are a fantastic ingredient for both sweet and savory dishes. Here are some of my favorite apple-centric recipes that are perfect for any occasion, from comforting desserts to vibrant salads:
- Apple Cinnamon Bundt Cake
- Fall Harvest Salad with Apple Vinaigrette
- Gluten-free Apple Galette Recipe
- Dairy-free Apple Noodle Kugel Recipe
Did you enjoy crafting these wholesome, healthy baked apples? We’d absolutely love to hear from you! Please consider leaving a five-star rating and a heartfelt comment below to support your favorite food bloggers and help our recipes reach more home cooks. Your feedback is invaluable! Also, don’t forget to share your beautiful culinary creations on Instagram by tagging me @dkhealthcoach and using the hashtag #debraklein. Your shares inspire our entire community and truly make our day!
📖 Recipe: Healthy Baked Apples

Healthy Baked Apples
Author: Debra Klein
Healthy Baked Apples with Oatmeal are easy to make with this vegan recipe. They’re juicy, tart, sweet, and incredibly comforting. These baked cinnamon apples are perfect for a simple gluten-free dessert, a wholesome breakfast, or a satisfying snack that the whole family will love.
5 from 89 votes
Rate this Recipe
Pin Recipe
10 mins
50 mins
1 hr
Dessert
American
6 servings
167 kcal
Equipment
- Paring Knife
- Measuring Cups and Spoons
- Spice Grinder
- 9 Inches Pie Plate
- Grapefruit Spoons
- Apple Corer (optional, if preferred)
Ingredients
For the Stuffed Apples:
- 6 medium-large apples* (see notes for suitable varieties)
- ½ cup old fashioned rolled oats (use certified gluten-free for GF version)
- ⅓ cup walnuts (or substitute with pecans, almonds, or hemp seeds for a nut-free option)
- 2 Tablespoons ground flax seeds (or substitute with chia seeds for similar binding properties)
- 1 teaspoon ground cinnamon (for warmth and aroma)
- Pinch fine grain sea salt (to enhance and balance flavors)
- 2 Tablespoons pure maple syrup (adjust to your sweetness preference and apple type)
- ¼ cup water or apple cider/juice (for the baking dish to create steam)
Instructions
- Preheat your oven to 350°F (175°C).
- Prepare apples: Wash the apples thoroughly. Using a grapefruit spoon (my recommended method) or a sharp paring knife, carefully core each apple, removing the seeds and woody center while leaving the bottom intact. Place the cored apples snugly in a glass or ceramic baking dish.
- Prepare the filling: In a coffee grinder, small blender, or food processor, combine the rolled oats, walnuts, ground flax seeds, cinnamon, and sea salt. Pulse until the mixture is well mixed and crumbly. It’s okay if some of the oats remain slightly whole; this adds desirable texture.
- Combine filling ingredients: Transfer the oat and nut mixture to a small bowl. Pour in the pure maple syrup and stir thoroughly until all ingredients are well combined and the mixture is moist and cohesive.
- Stuff and hydrate: Evenly distribute the prepared oat mixture into the hollow cavities of the cored apples, mounding the filling slightly at the top. Then, pour approximately ¼ inch of water (or apple cider/juice) into the bottom of the baking dish around the apples.
- Bake: Place the baking dish into the preheated oven. Bake for 45 minutes to 1 hour, or until the apples are golden brown, fragrant, and wonderfully tender when easily pierced with a fork. Keep in mind that larger apples will require a longer baking time.
- Serve: Remove from oven and let cool slightly. Serve warm for the best experience, or enjoy at room temperature.
Video: How to Make Healthy Baked Apples
Notes
- Apple Varieties & Filling: The size of your chosen apple will affect how much filling you can add. This recipe provides enough filling for 6 medium-large apples. If your apples are smaller, you might have some filling left over. Recommended apple varieties that work beautifully in this recipe include Fuji, Honeycrisp, Pink Lady, Braeburn, Granny Smith, or Gala.
- Make Ahead & Storage: These healthy baked apples are excellent for meal prep! They can be prepared in advance and stored in an airtight container in the refrigerator for 3-5 days.
- Serving Options & Reheating: Enjoy them cold straight from the fridge for a refreshing treat, allow them to come to room temperature, or gently reheat in a 325°F (160°C) oven for about 15 minutes for a warm, comforting experience. They can also be briefly warmed in the microwave.
Nutrition Facts (Estimated per serving)
The nutrition calculations provided below are estimates, done using online tools and average ingredient values. To obtain the most accurate representation of the nutritional information for any given recipe, it is always recommended that you calculate the nutritional information with the actual ingredients and brands you used. You are ultimately responsible for ensuring that any nutritional information you rely upon is accurate, complete, and useful for your dietary needs.
- Serving Size: 1 apple
- Calories: 167 kcal
- Carbohydrates: 34 g
- Protein: 2 g
- Fat: 4 g
- Polyunsaturated Fat: 3 g
- Sodium: 26 mg
- Fiber: 6 g
- Sugar: 23 g
Did you make this delicious recipe?
Please leave a review below and consider giving it a star rating! Then, we’d absolutely love for you to snap a picture of your beautiful creation and share it on Instagram. Tag me @dkhealthcoach or use the hashtag #dkhealtcoach (or #debraklein) so I can see it and celebrate your culinary success!
