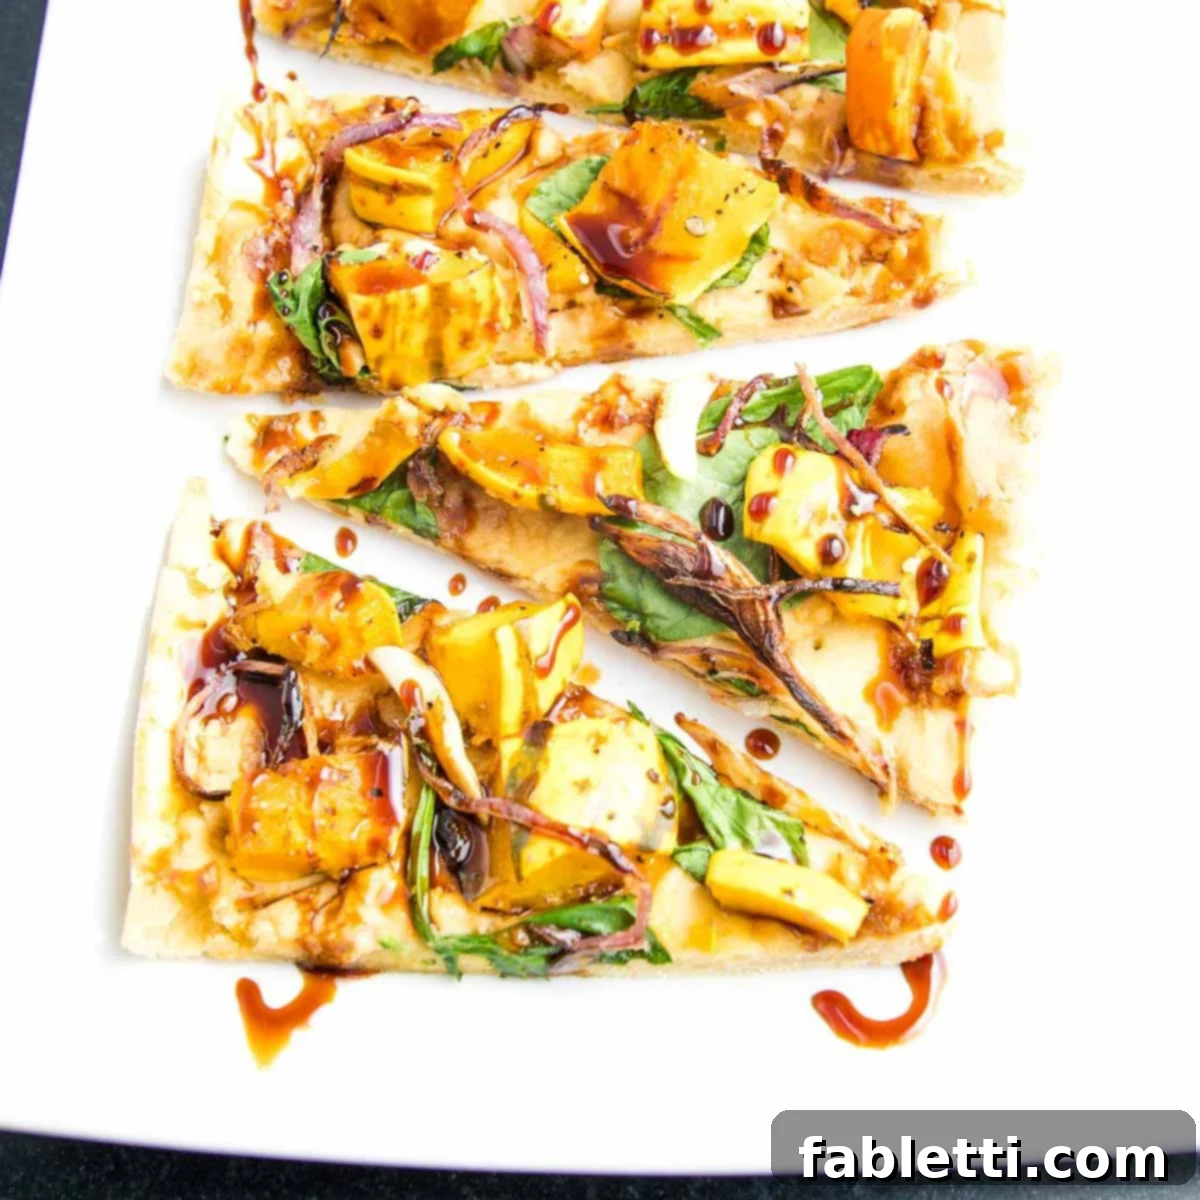
Craving a crispy, delicious, and healthy meal that’s ready in a flash? Look no further than this incredibly easy Vegan Flatbread Recipe. Perfect as a light appetizer, a satisfying dinner, or a versatile base for all your favorite toppings, this recipe delivers a restaurant-quality experience without the fuss. Using just a few simple ingredients and requiring absolutely no yeast, you can whip up a perfectly crispy flatbread crust in minutes, making homemade pizza night more exciting and accessible than ever before. Whether you’re a seasoned chef or a kitchen novice, you’ll be amazed at how effortlessly this plant-based delight comes together.

This recipe transforms ordinary family pizza night into a gourmet experience. Imagine a flatbread that’s beautifully crispy, incredibly flavorful, and immensely fun to customize. The best part? It’s remarkably simple to prepare, giving you more time to savor the moments with loved ones. Our secret lies in the crust: it uses just four core ingredients and can be mixed in as little as five minutes. This versatile dough works wonderfully with any all-purpose flour, including gluten-free varieties, ensuring everyone can enjoy a slice of this wholesome goodness. Say goodbye to lengthy rising times and hello to instant gratification with this speedy, no-yeast flatbread.
The beauty of homemade flatbread lies in its boundless customization options. These flatbreads are not only perfect for a casual dinner but also make an impressive and healthy appetizer for any gathering. Imagine spreading a creamy layer of hummus, scattering vibrant fresh greens, and piling on an array of delicious, healthy toppings. With minimal effort, you can create a culinary masterpiece tailored to specific dietary needs or personal preferences. From savory roasted vegetables to tangy sauces, the possibilities are endless. For more inspiring ideas, don’t forget to check out our summer no-yeast flatbread recipe, which offers even more creative topping combinations to explore.
Crafting the Perfect Vegan Flatbread Dough
One of the many advantages of this recipe is its efficiency. You can easily prepare your chosen toppings and get them roasting in the oven while you quickly whip up the incredibly simple flatbread dough. This synchronized approach ensures that everything is ready around the same time, minimizing wait times and maximizing flavor. Our no-yeast dough is not only quick but also remarkably forgiving, making it ideal for both beginners and experienced bakers.

COMBINE DRY INGREDIENTS: Begin by combining your chosen flour with a touch of salt. A food processor makes this step incredibly quick, but a large bowl and a whisk will work just as well. For this recipe, I’ve successfully tested various all-purpose flours, including Bob’s Red Mill 1-to-1 gluten-free flour, Cup4Cup GF, Jovial Einkorn Flour, and Mighty Mill whole wheat flour. Each yielded a wonderfully light and crispy crust, so feel free to use your preferred variety or what you have on hand. The key is to ensure the flour and salt are thoroughly integrated before moving to the next step, setting the foundation for a consistent dough texture.
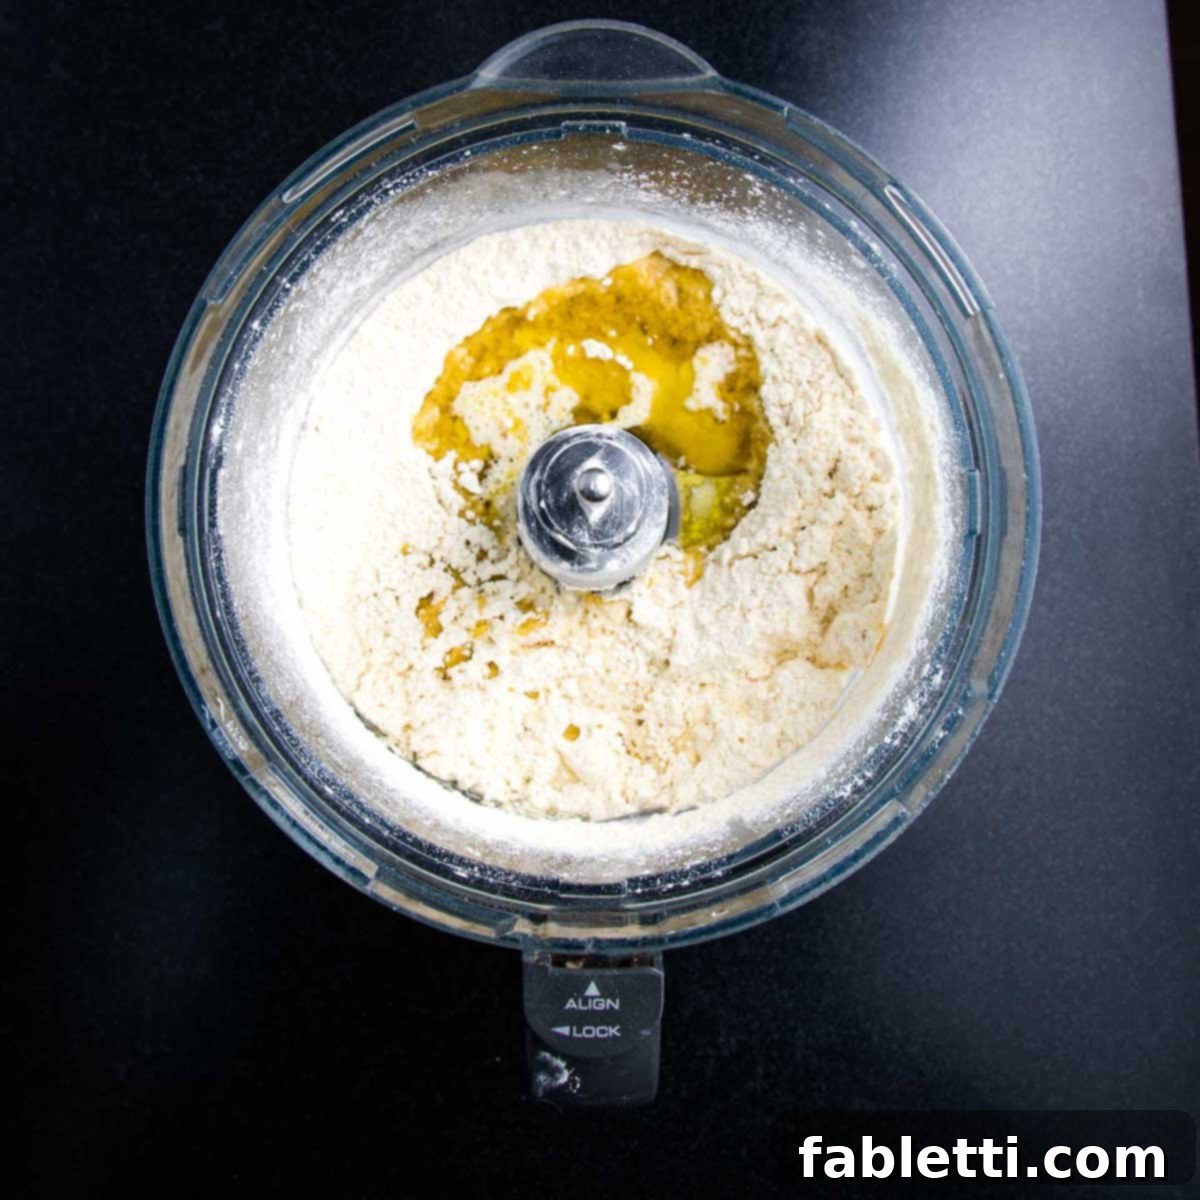
ADD WATER AND OIL: Once your dry ingredients are combined, gradually add warm water and a good quality olive oil to the flour mixture. If using a food processor, simply pour them in while pulsing. For hand mixing, create a well in the center of the flour and slowly incorporate the liquids with a fork or spatula. Periodically scrape down the sides of the bowl to ensure all ingredients are evenly mixed. While a food processor streamlines the process, don’t hesitate to mix this dough by hand – it’s quite therapeutic and yields the same fantastic results.
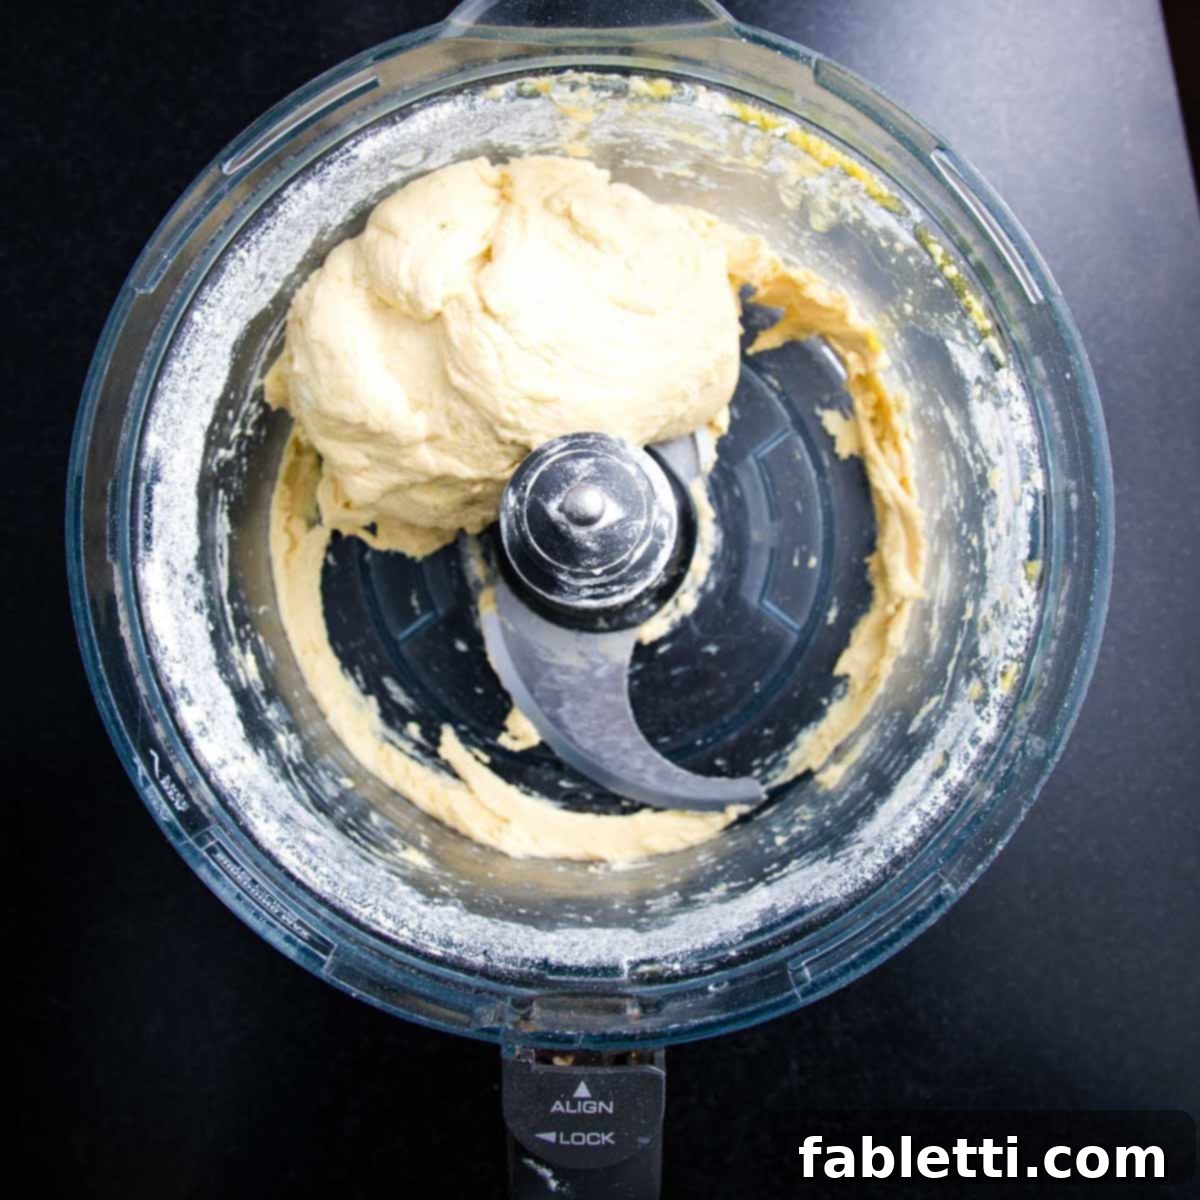
PROCESS: Continue to process or mix the dough until it forms a cohesive ball and effortlessly pulls away from the sides of the bowl. This usually takes about 1-2 minutes in a food processor. If mixing by hand, you’ll notice the dough coming together, becoming less sticky and more manageable. The exact time may vary slightly depending on your flour type and humidity, but the visual cue of the dough separating from the bowl is your clear indicator that it’s ready for the next step.

Once the dough has formed, transfer it to a lightly floured surface. A brief, gentle kneading by hand is all that’s needed to bring the dough into a perfectly smooth, uniform ball. This typically takes around one minute, just enough to ensure the ingredients are fully integrated and the dough has a supple texture. This short kneading process is essential for achieving a pliable dough that will roll out beautifully and bake into a wonderfully crispy flatbread.
Rolling, Baking, and Topping Your Flatbread Masterpiece
With your dough ready, the exciting part begins: transforming it into a thin, crispy canvas for your chosen toppings. The simplicity of this process makes it a joy, and the quick baking time means you’re just minutes away from a delicious meal or appetizer. Follow these steps for perfect results every time.
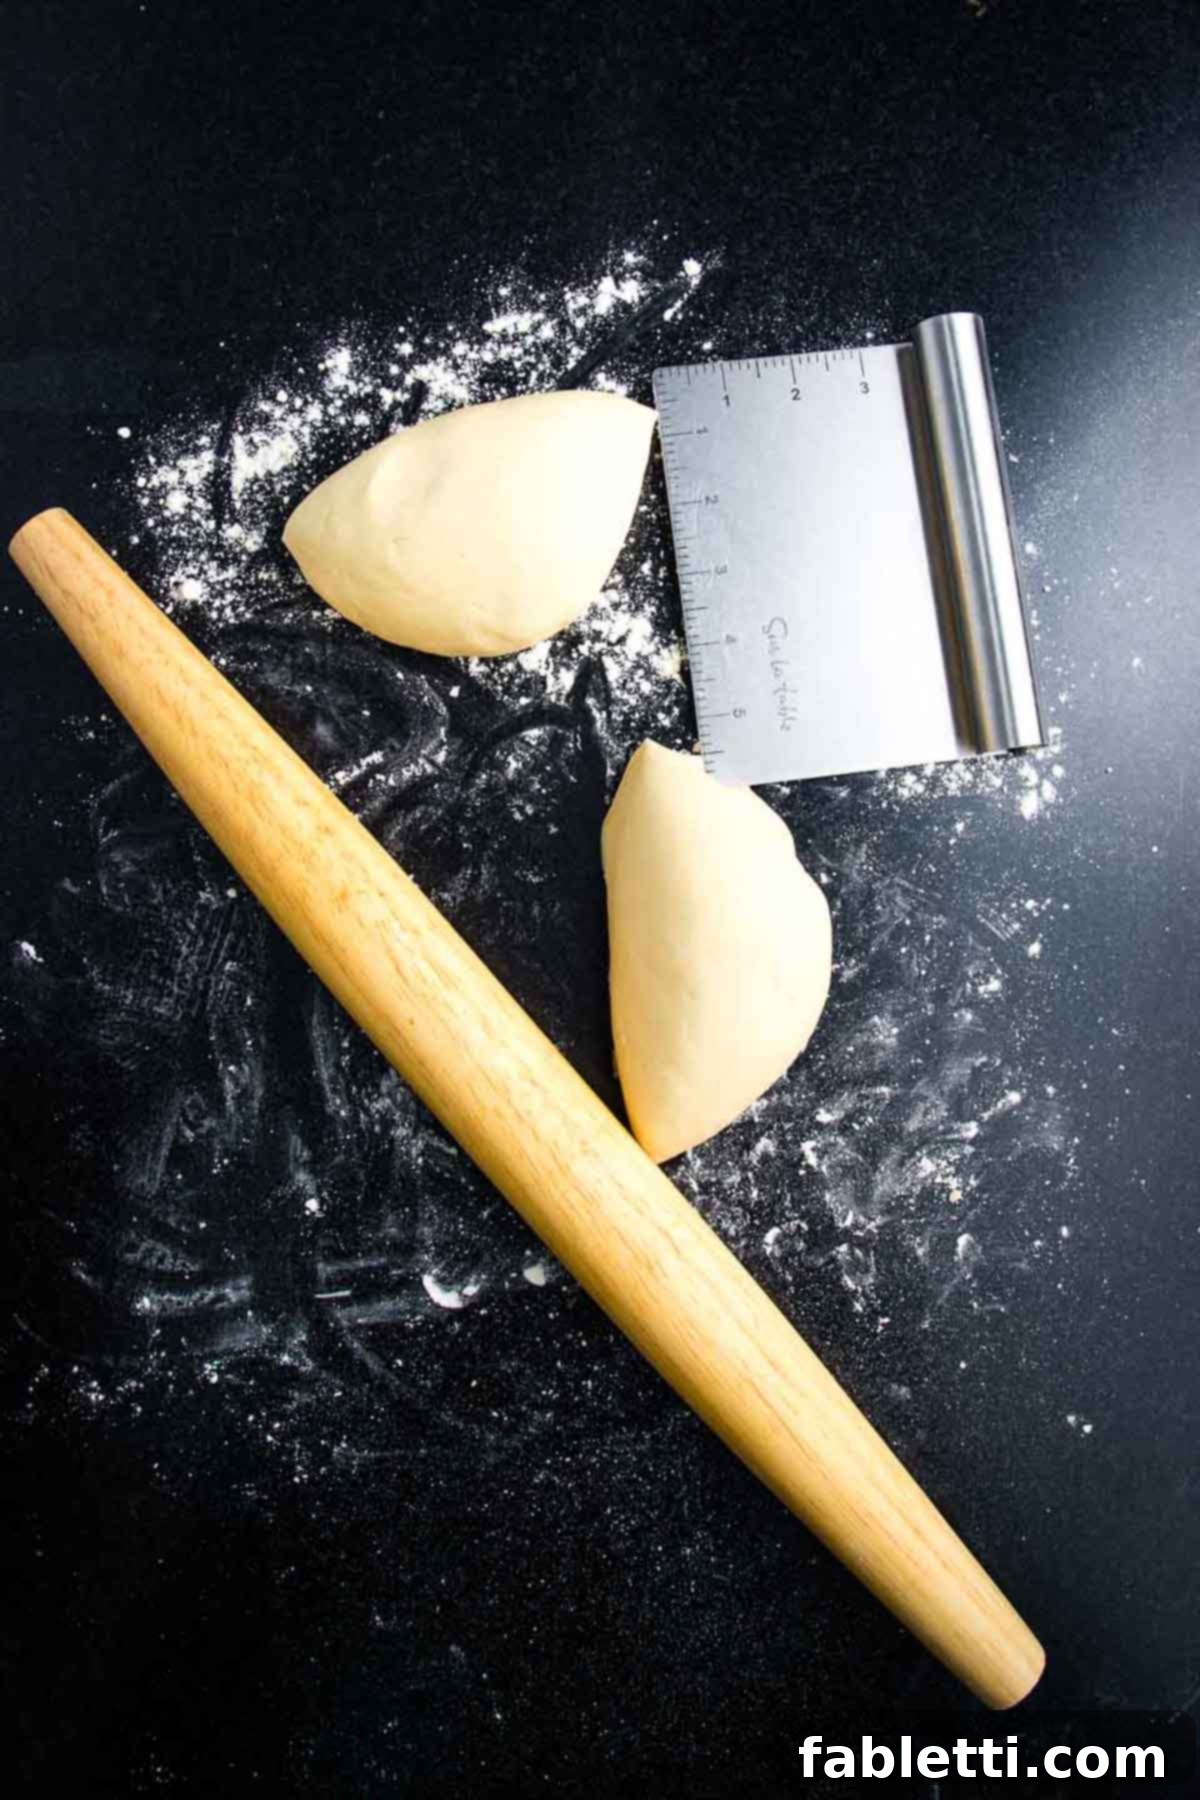
Divide the freshly kneaded dough ball into two equal portions. This recipe is designed to yield two perfect flatbreads, offering flexibility for your meal planning. You have several options here: use one portion immediately for a fresh flatbread and freeze the other for later, or freeze both to enjoy at a future date. See our dedicated tips for freezing dough further down in this article, ensuring you can enjoy homemade flatbread whenever the craving strikes.
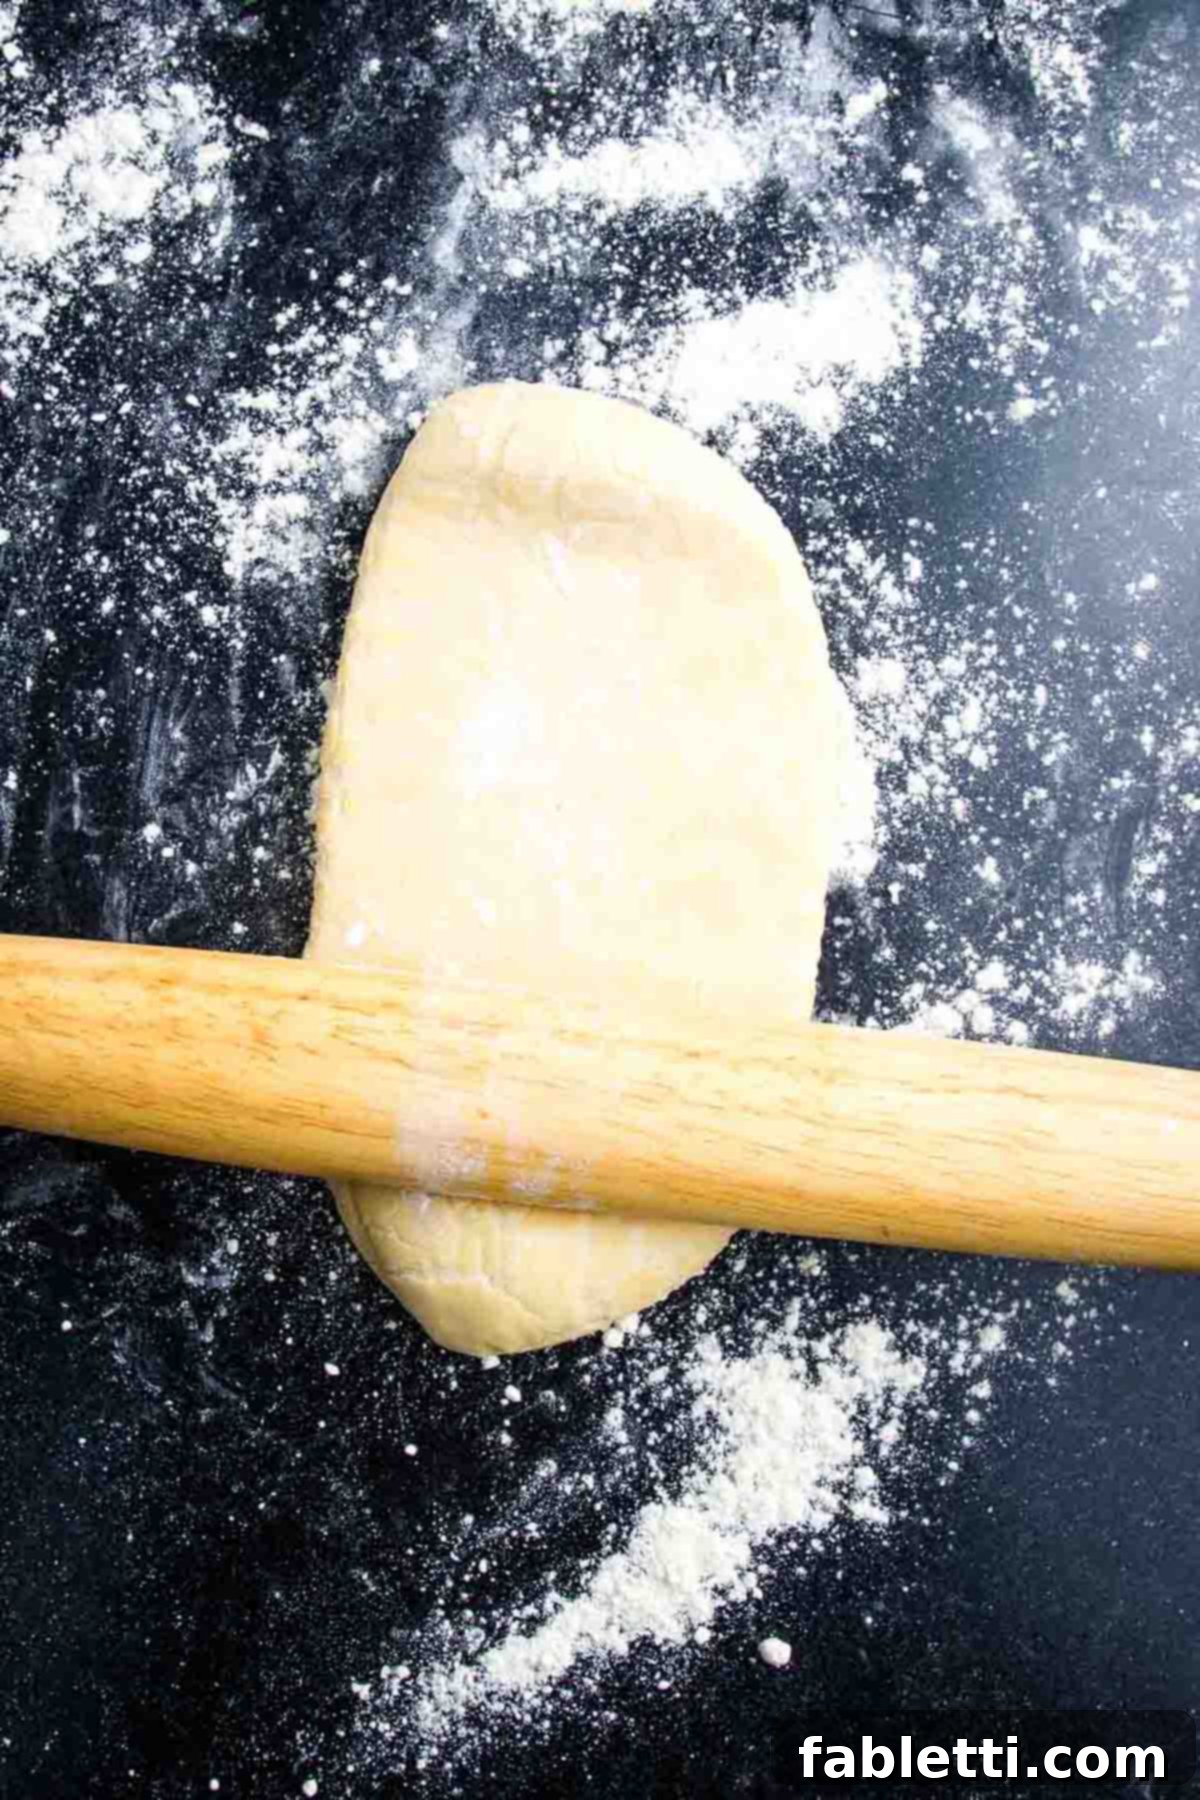
To prevent any sticking, lightly sprinkle your work surface with a dusting of flour. Then, using a rolling pin, roll out one portion of the dough until it achieves a uniform thickness of approximately ¼ inch. You can choose to shape your flatbread into a long oval, a traditional circle, or any whimsical shape that inspires you. The key is to aim for an even, thin crust, which is essential for that signature crispy texture that makes this no-yeast flatbread so irresistible.
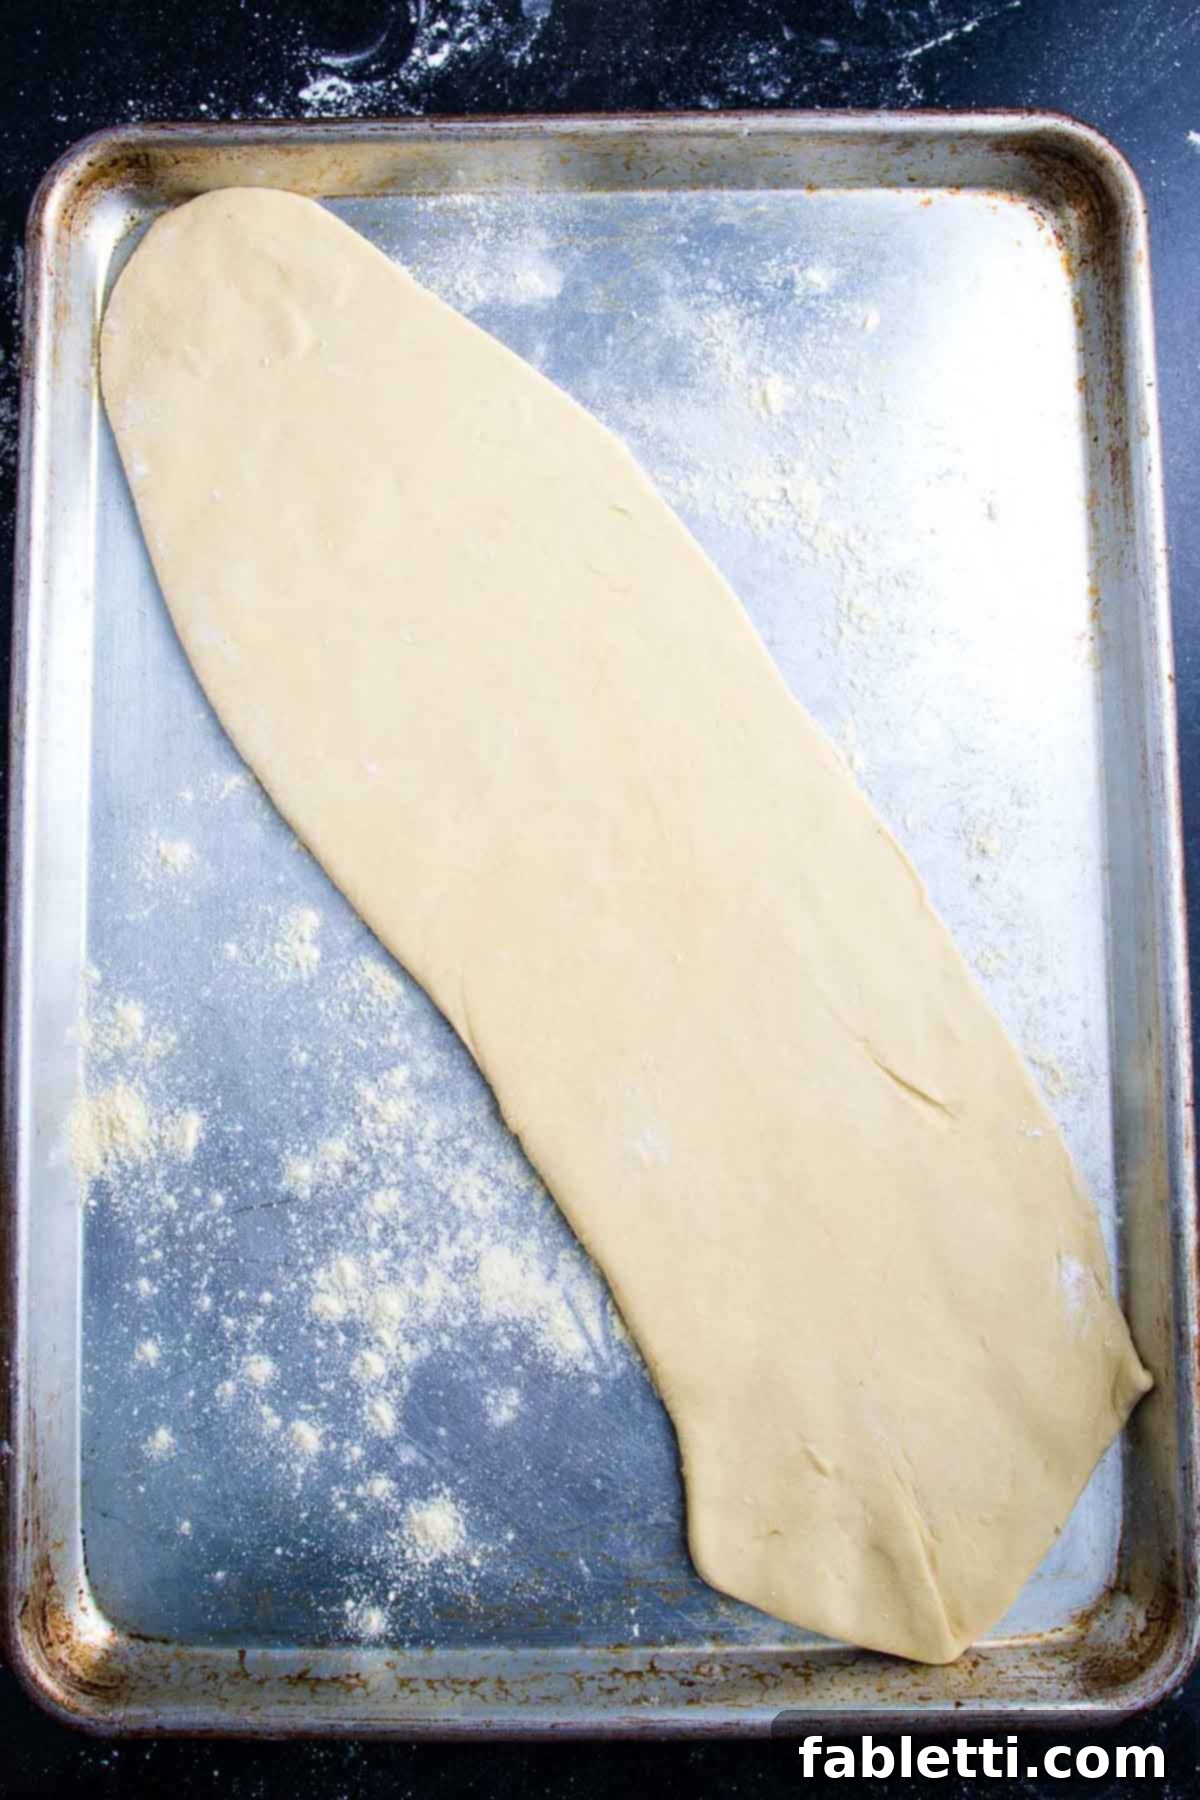
Before placing your rolled-out dough, prepare a heavy rimmed baking sheet by dusting it evenly with cornmeal or a light coating of flour. This helps prevent sticking and contributes to an even crispier bottom crust. Carefully transfer the thinly rolled dough onto the prepared baking sheet. Ensure it lays flat without any major creases or folds, as this will affect the final texture and appearance of your vegan flatbread.
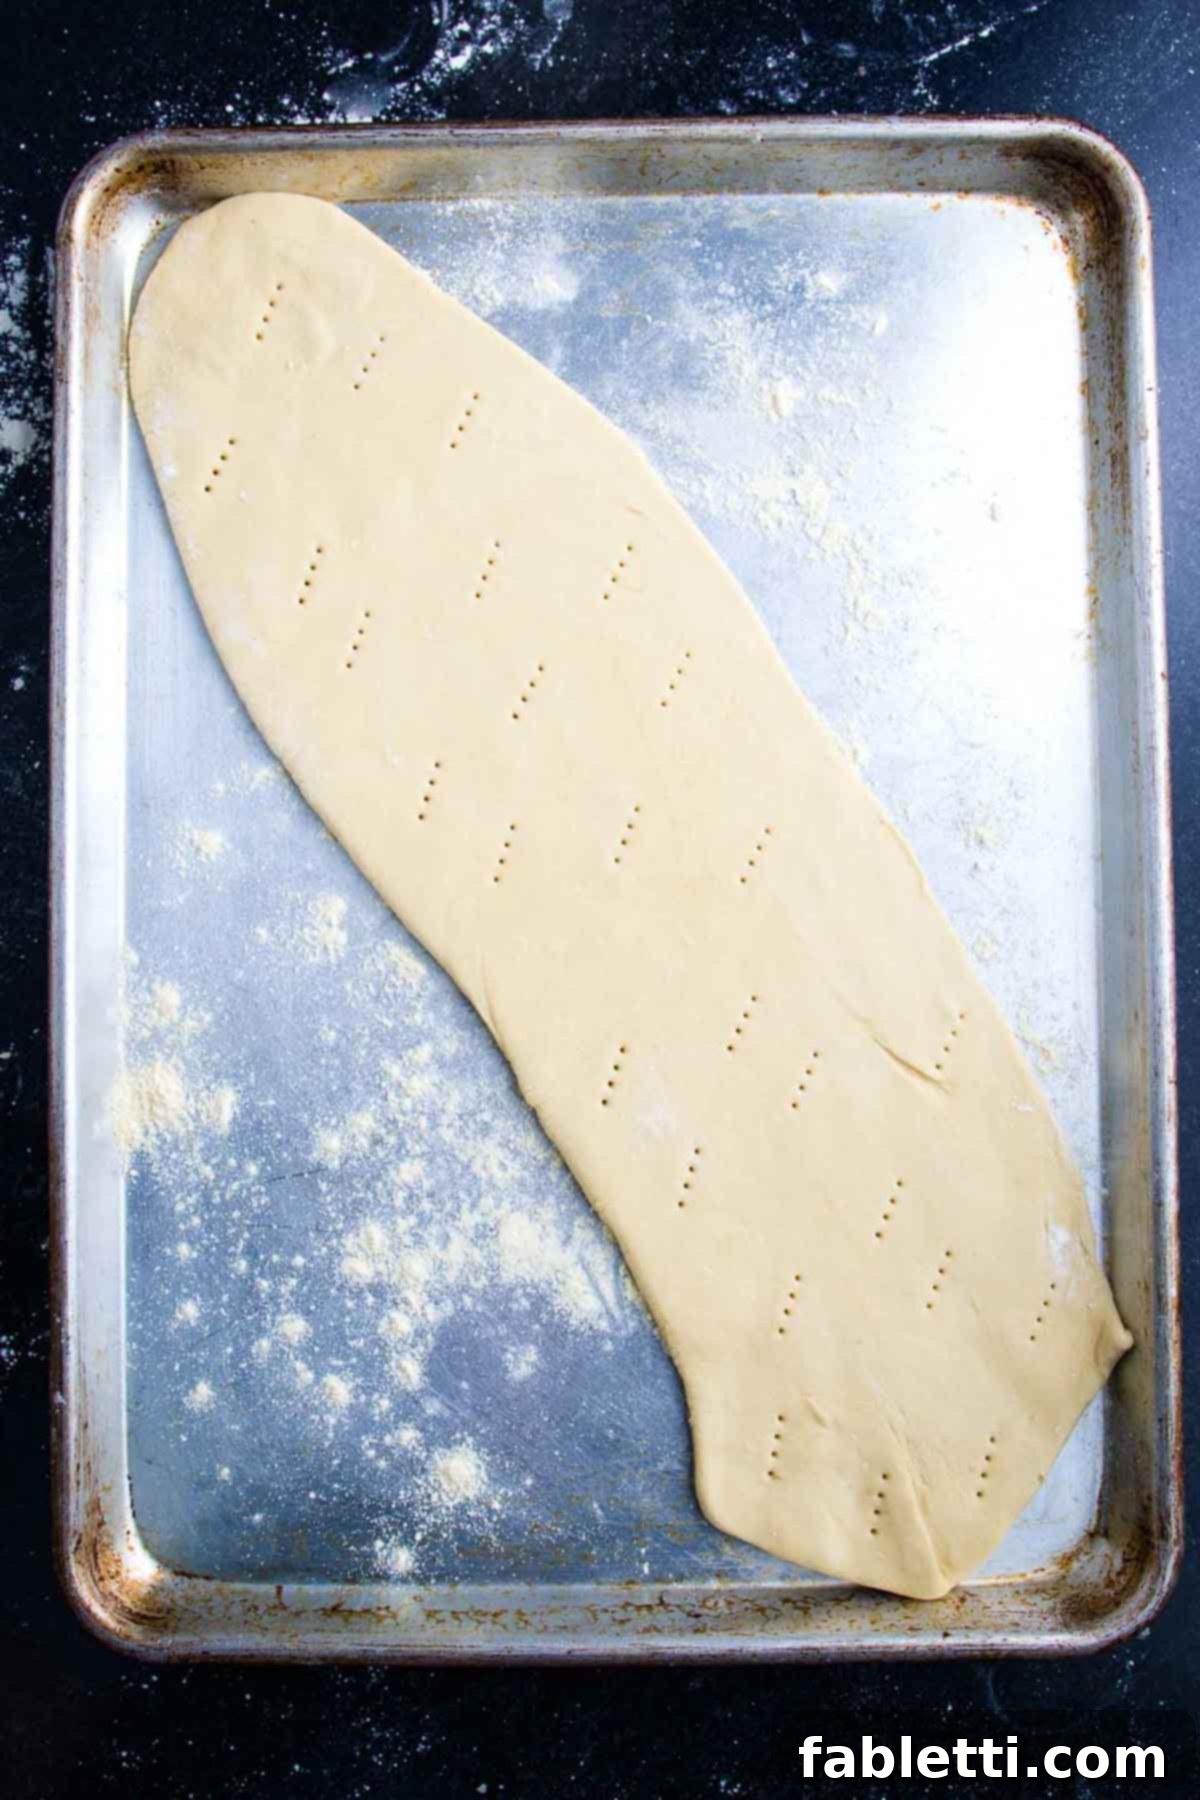
Once the dough is on the baking sheet, take a fork and gently prick the entire surface of the flatbread. These small air holes are crucial: they prevent the crust from puffing up excessively and forming large bubbles as it bakes, ensuring it remains wonderfully flat and evenly crispy. This simple step is vital for achieving the ideal texture of your homemade flatbread, creating a stable base for your delicious toppings.
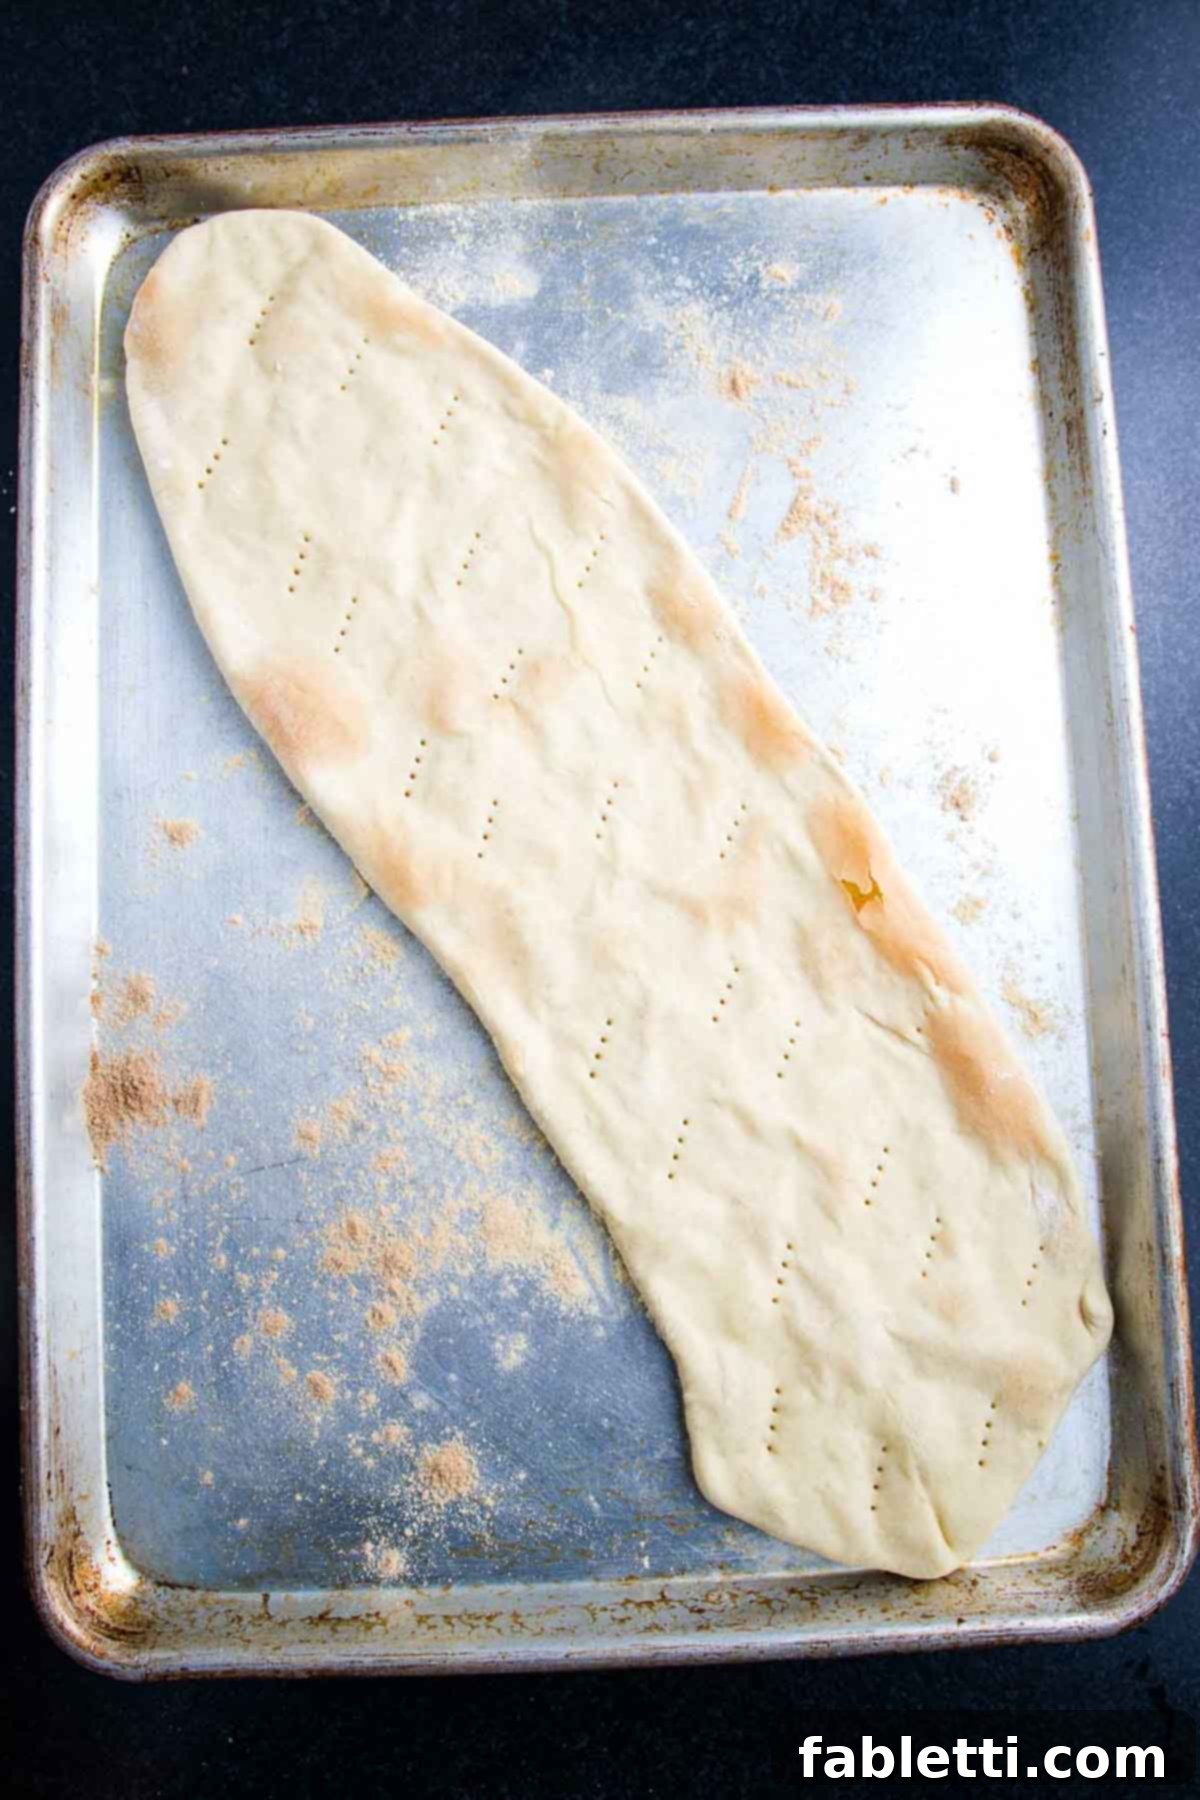
Now, it’s time for the initial bake. Par-bake the crust in your preheated oven for approximately 5 minutes. This crucial step begins the crisping process and sets the dough, preventing it from becoming soggy once the toppings are added. Even in just a few minutes, you’ll notice the crust starting to firm up and develop a light golden hue, laying the groundwork for that irresistible crispy texture that defines a perfect flatbread.
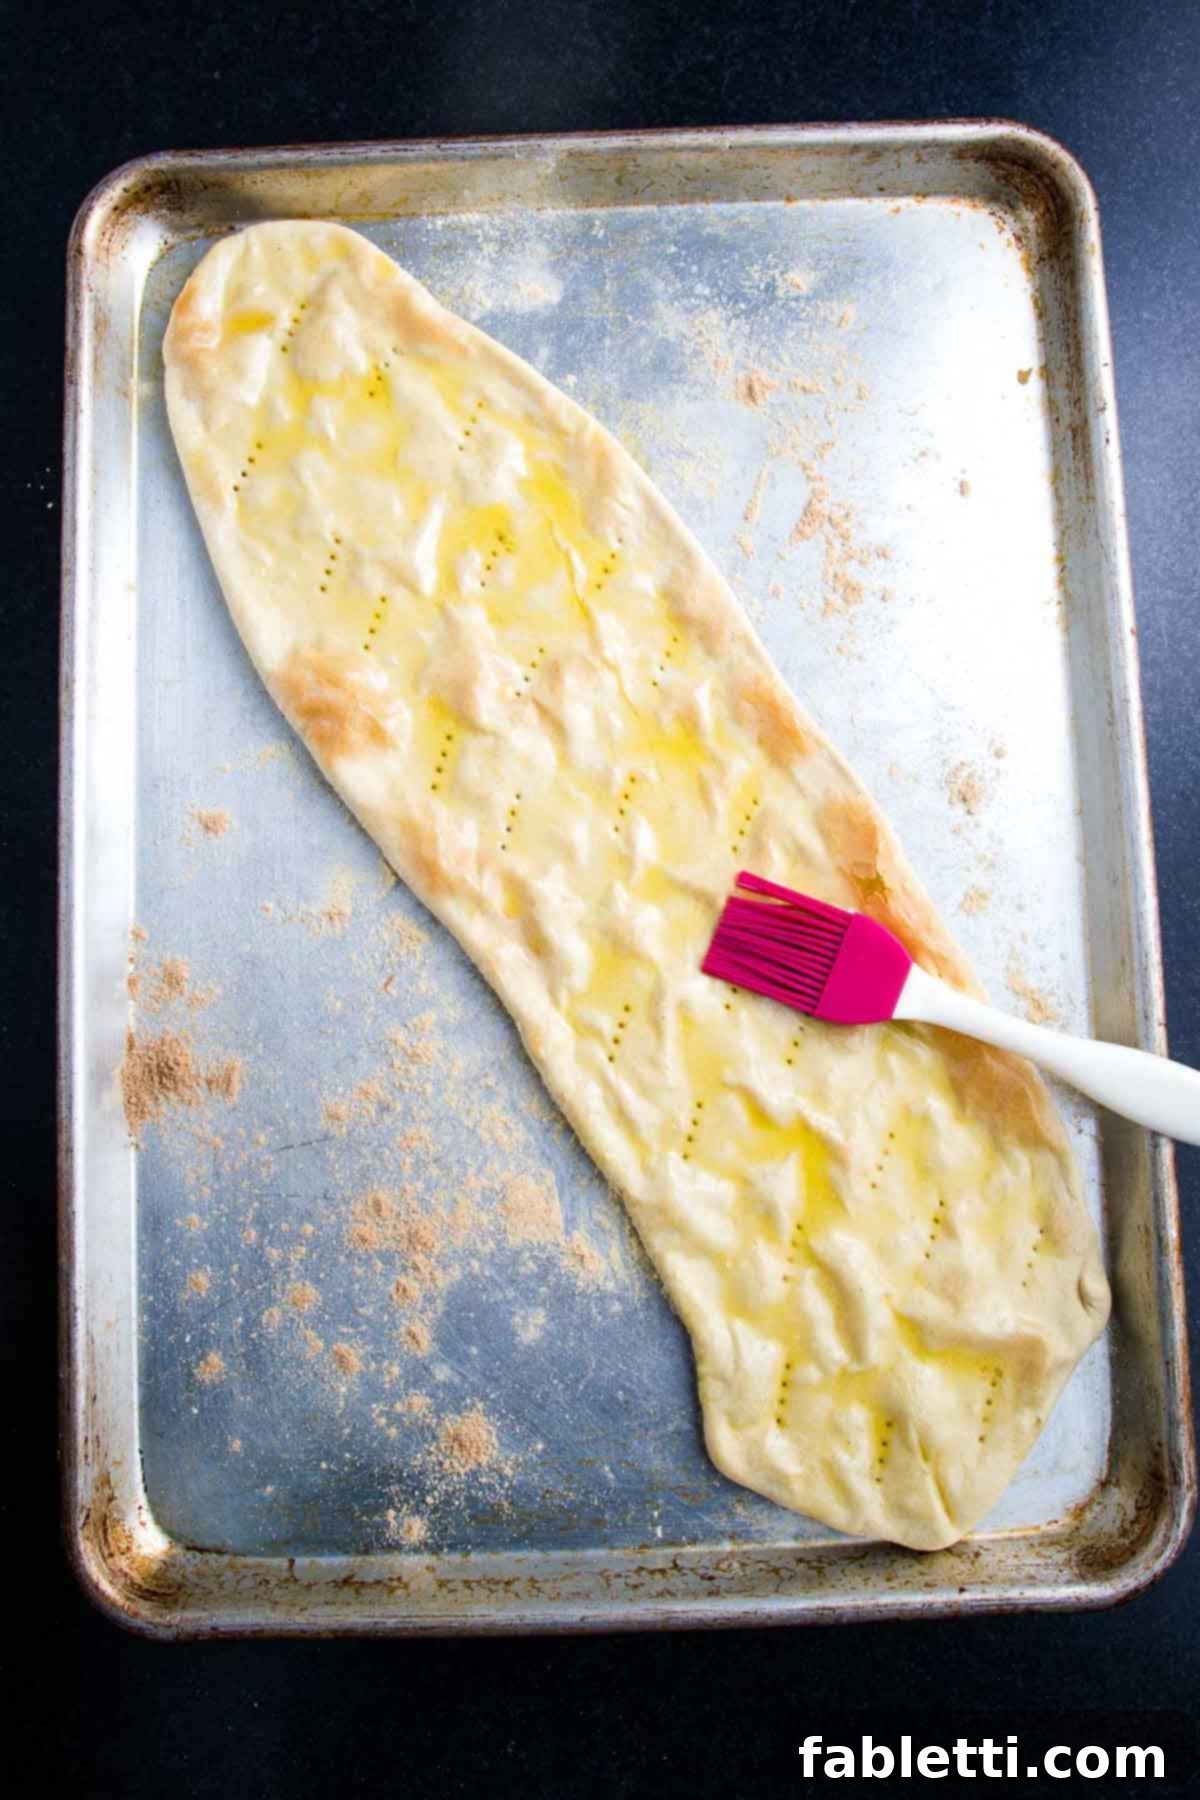
After the initial par-bake, gently brush the entire surface of the crust with a little extra olive oil. This simple yet effective step is key to preventing the flatbread from becoming soggy once you add your delicious toppings. The oil creates a protective barrier, ensuring the crust remains crisp and delightful through the final bake. A silicone pastry brush makes this task effortless, ensuring even coverage.
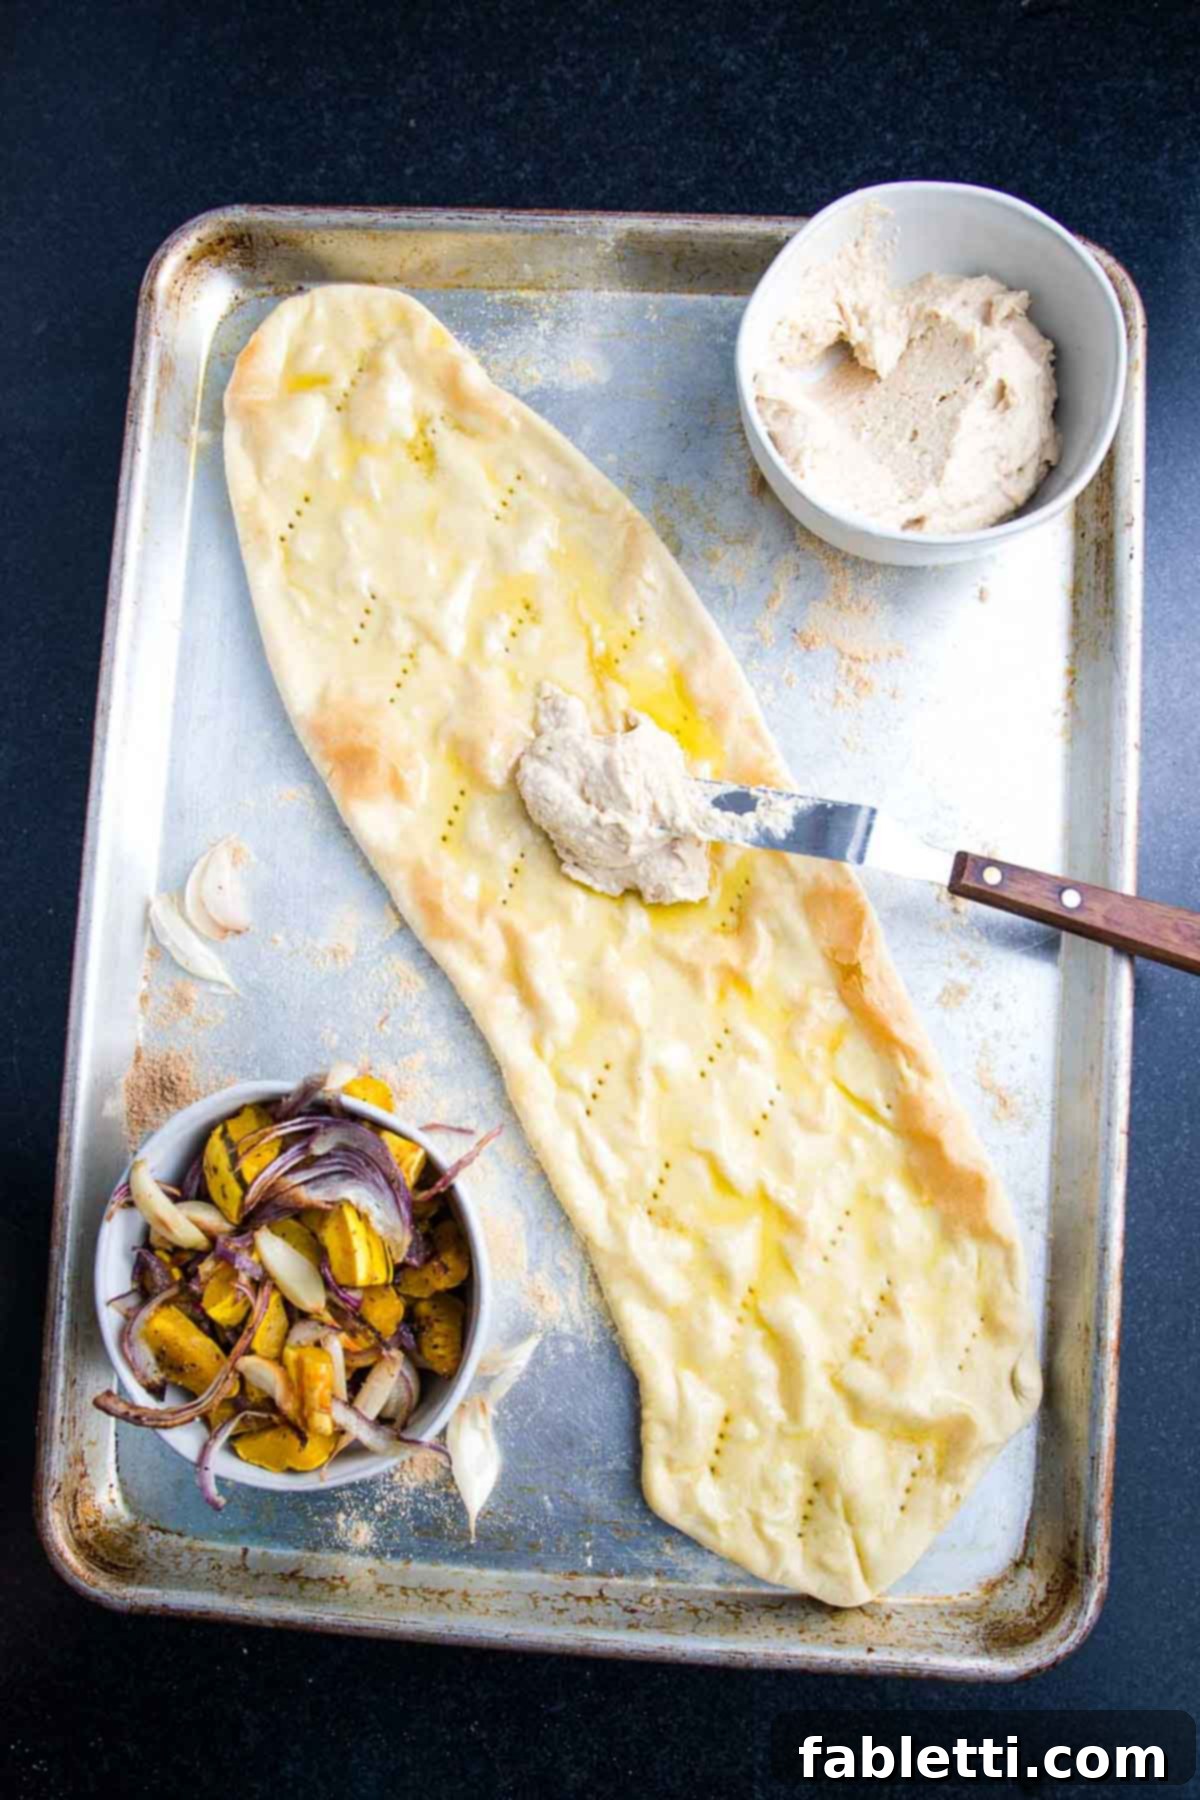
Now for the base layer of flavor! Spread a generous, even layer of hummus over the olive-oiled flatbread crust. Hummus not only adds a wonderful creamy texture and savory depth but also serves as a fantastic plant-based ‘sauce’ for your flatbread. The amount can be adjusted to your preference, but a thin, even layer works best to ensure the crust remains crispy and the flavors are balanced.
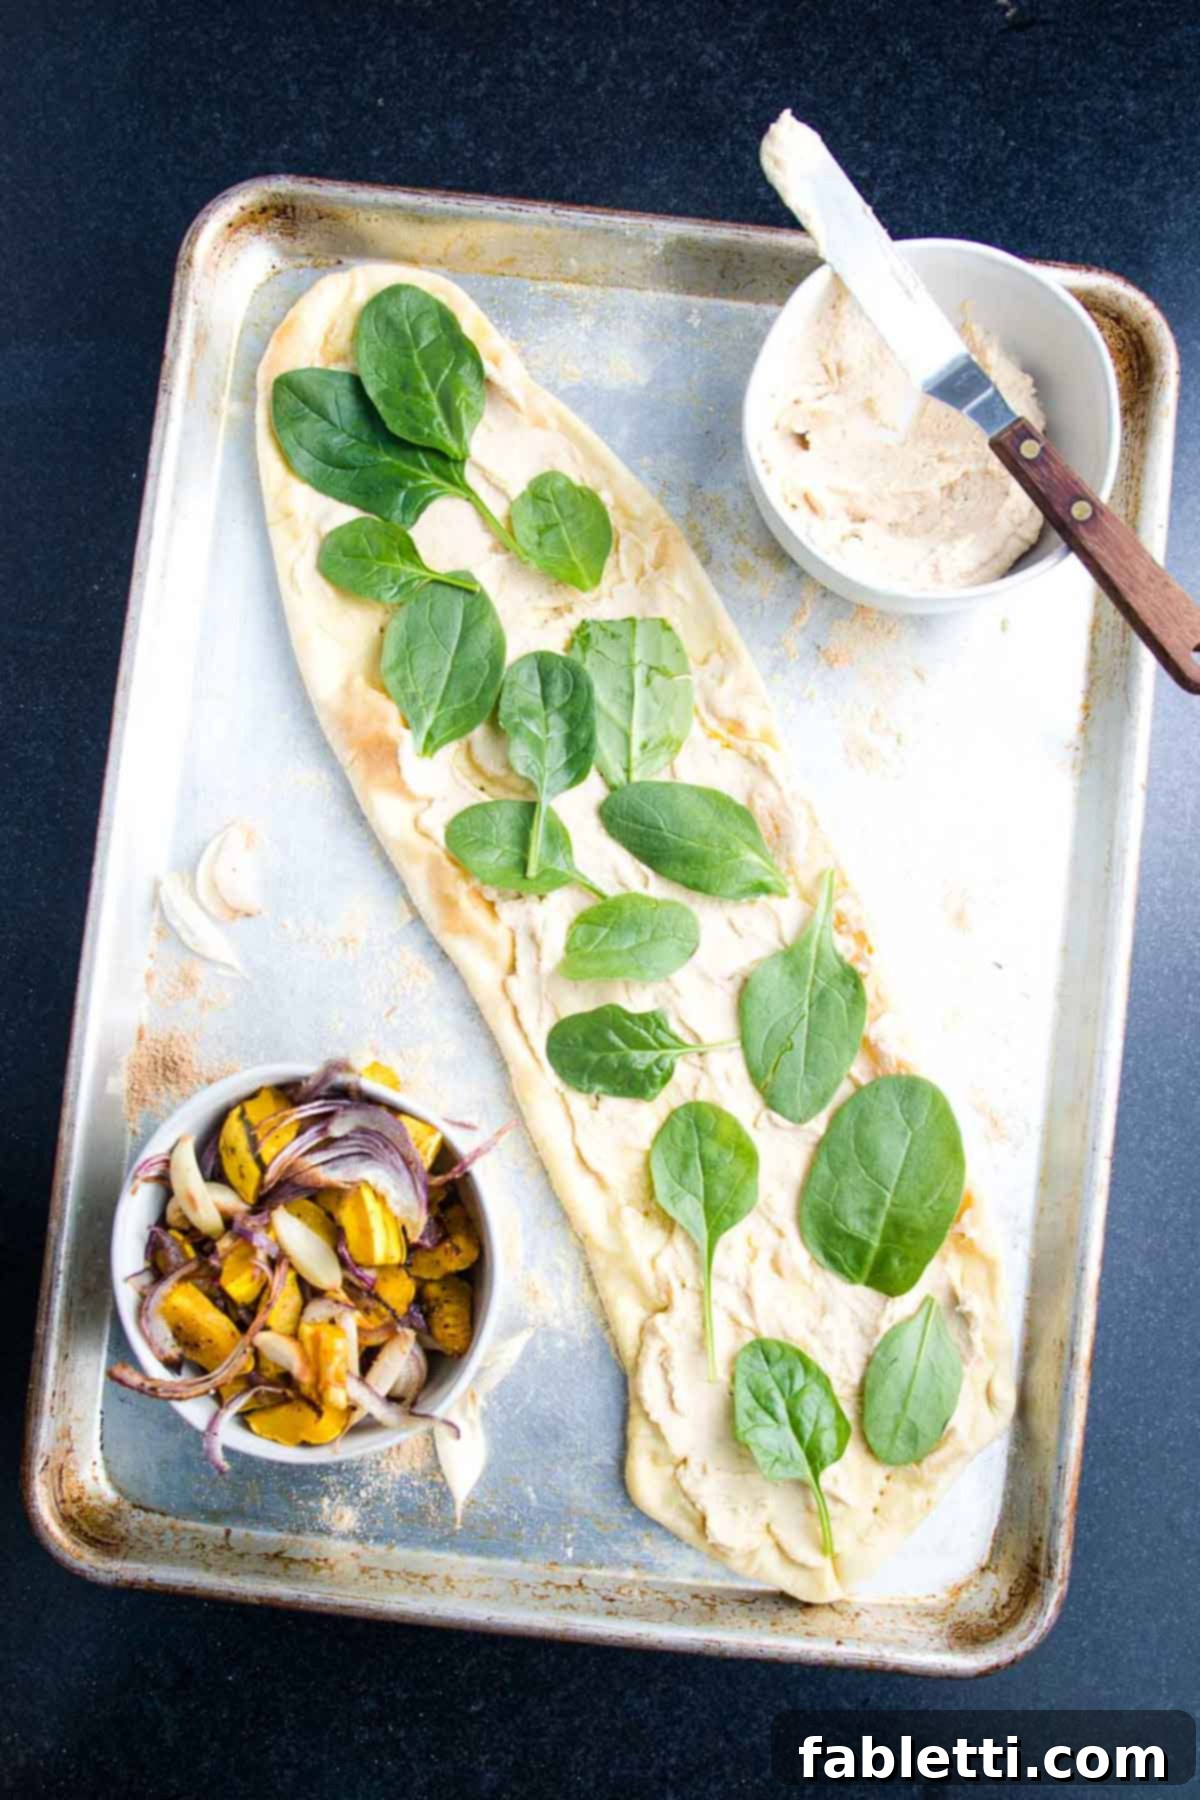
Next, sprinkle a hearty handful of fresh greens over the hummus layer. Baby spinach is a classic choice, offering a mild flavor and delicate texture that wilts beautifully in the oven. Arugula can add a peppery kick, while massaged kale provides a more robust, earthy taste. Choose your favorite, or mix a combination, for an added layer of freshness and essential nutrients. This vibrant green layer not only enhances the flavor profile but also boosts the nutritional value of your flatbread.
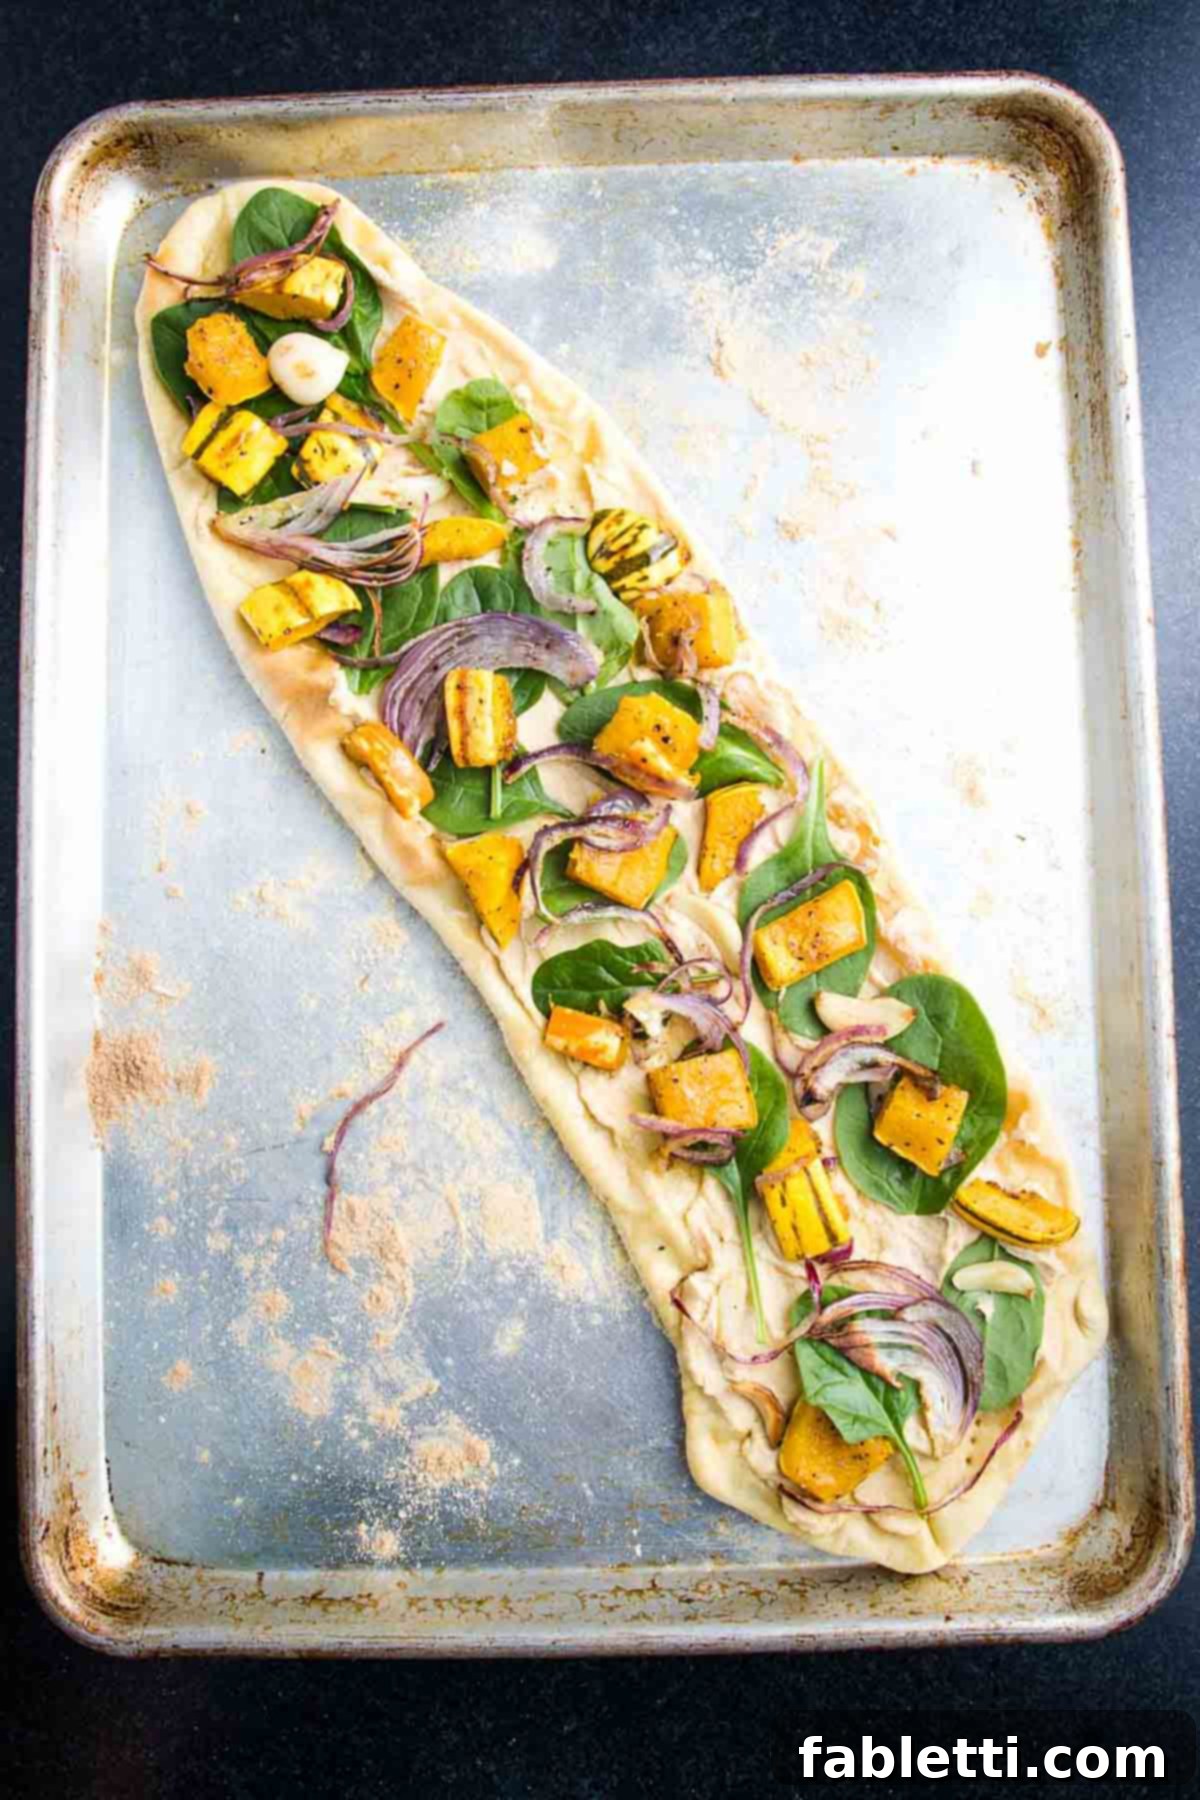
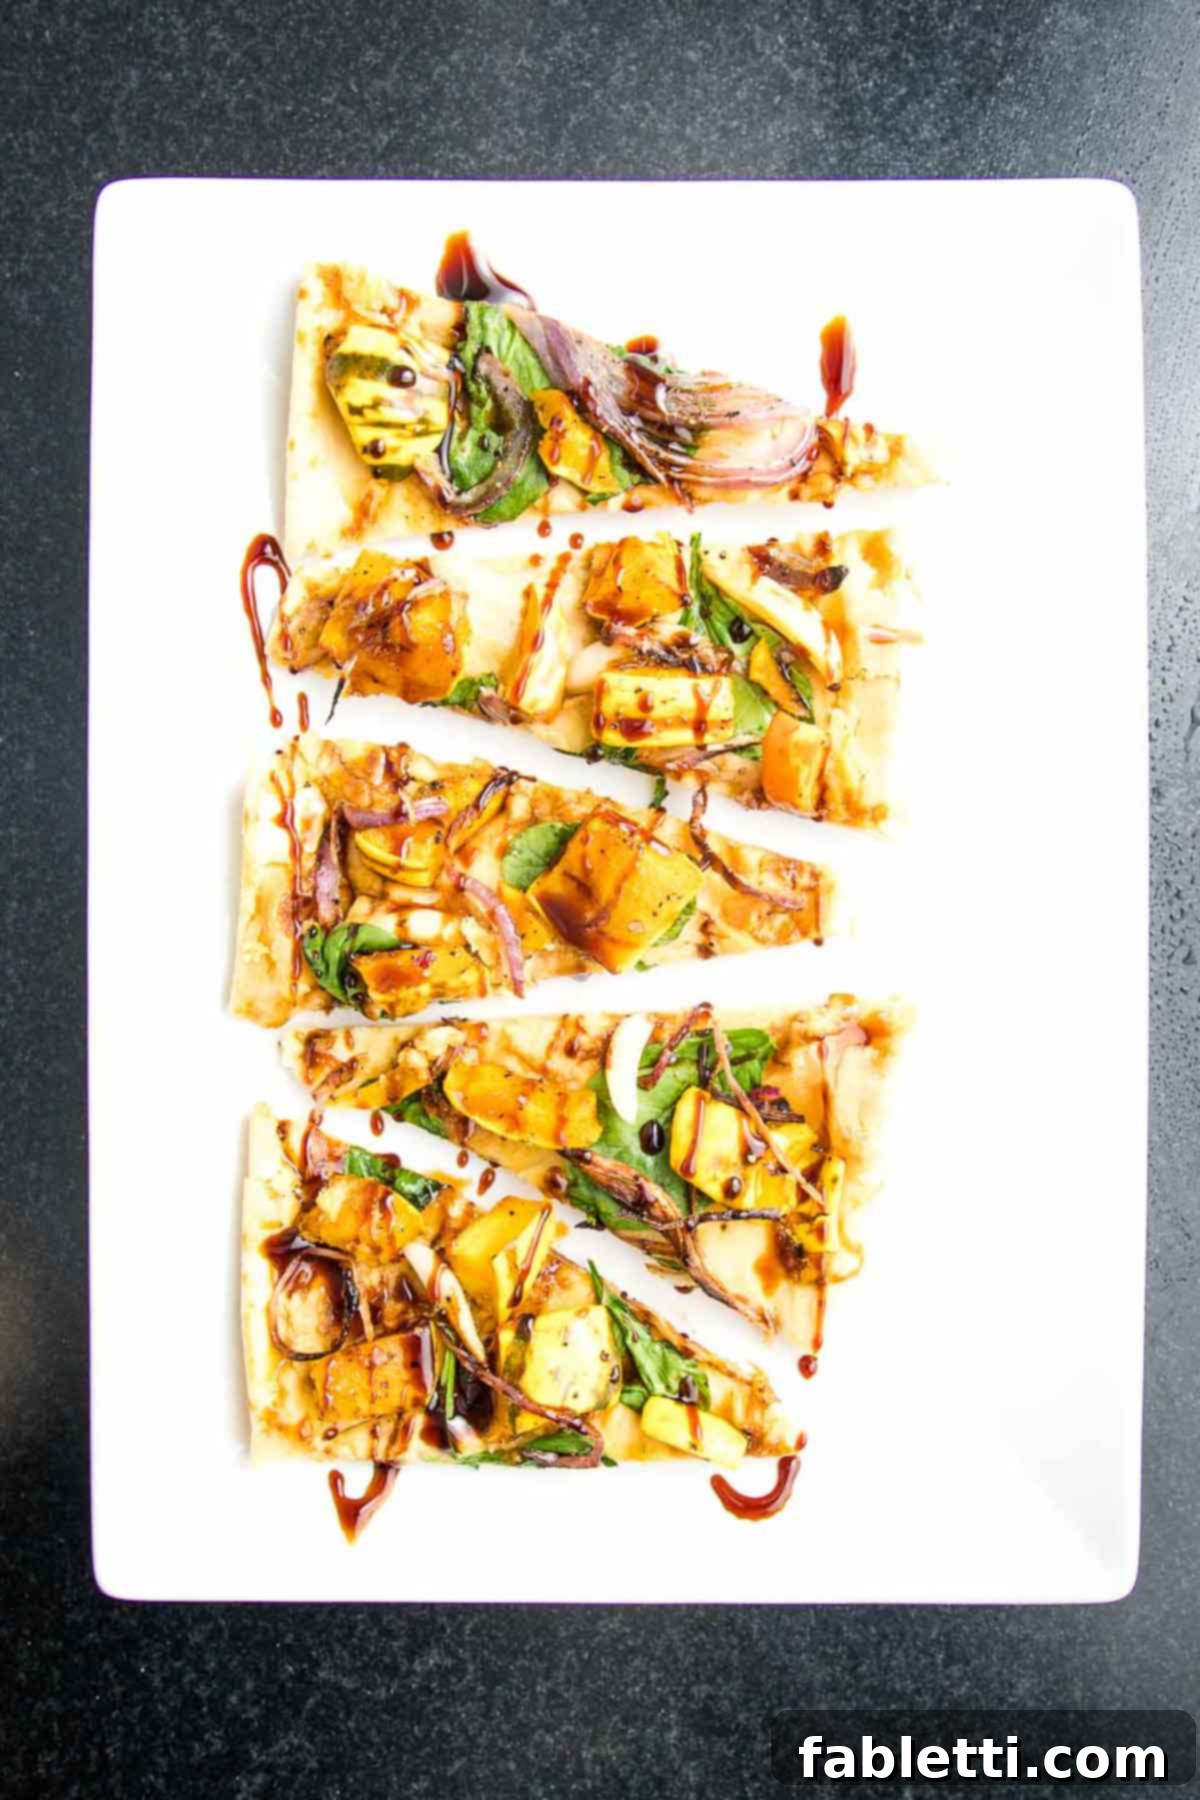
Now, generously scatter the pre-roasted delicata squash cubes, thinly sliced onions, and tender garlic cloves over the fresh greens. These roasted vegetables are the star of this particular flatbread, bringing sweet, savory, and aromatic notes that perfectly complement the creamy hummus and crispy crust. Return the flatbread to the oven for an additional 5-8 minutes. During this final bake, the crust will finish cooking to a golden crisp, and the toppings will warm through beautifully, melding all the delicious flavors together.
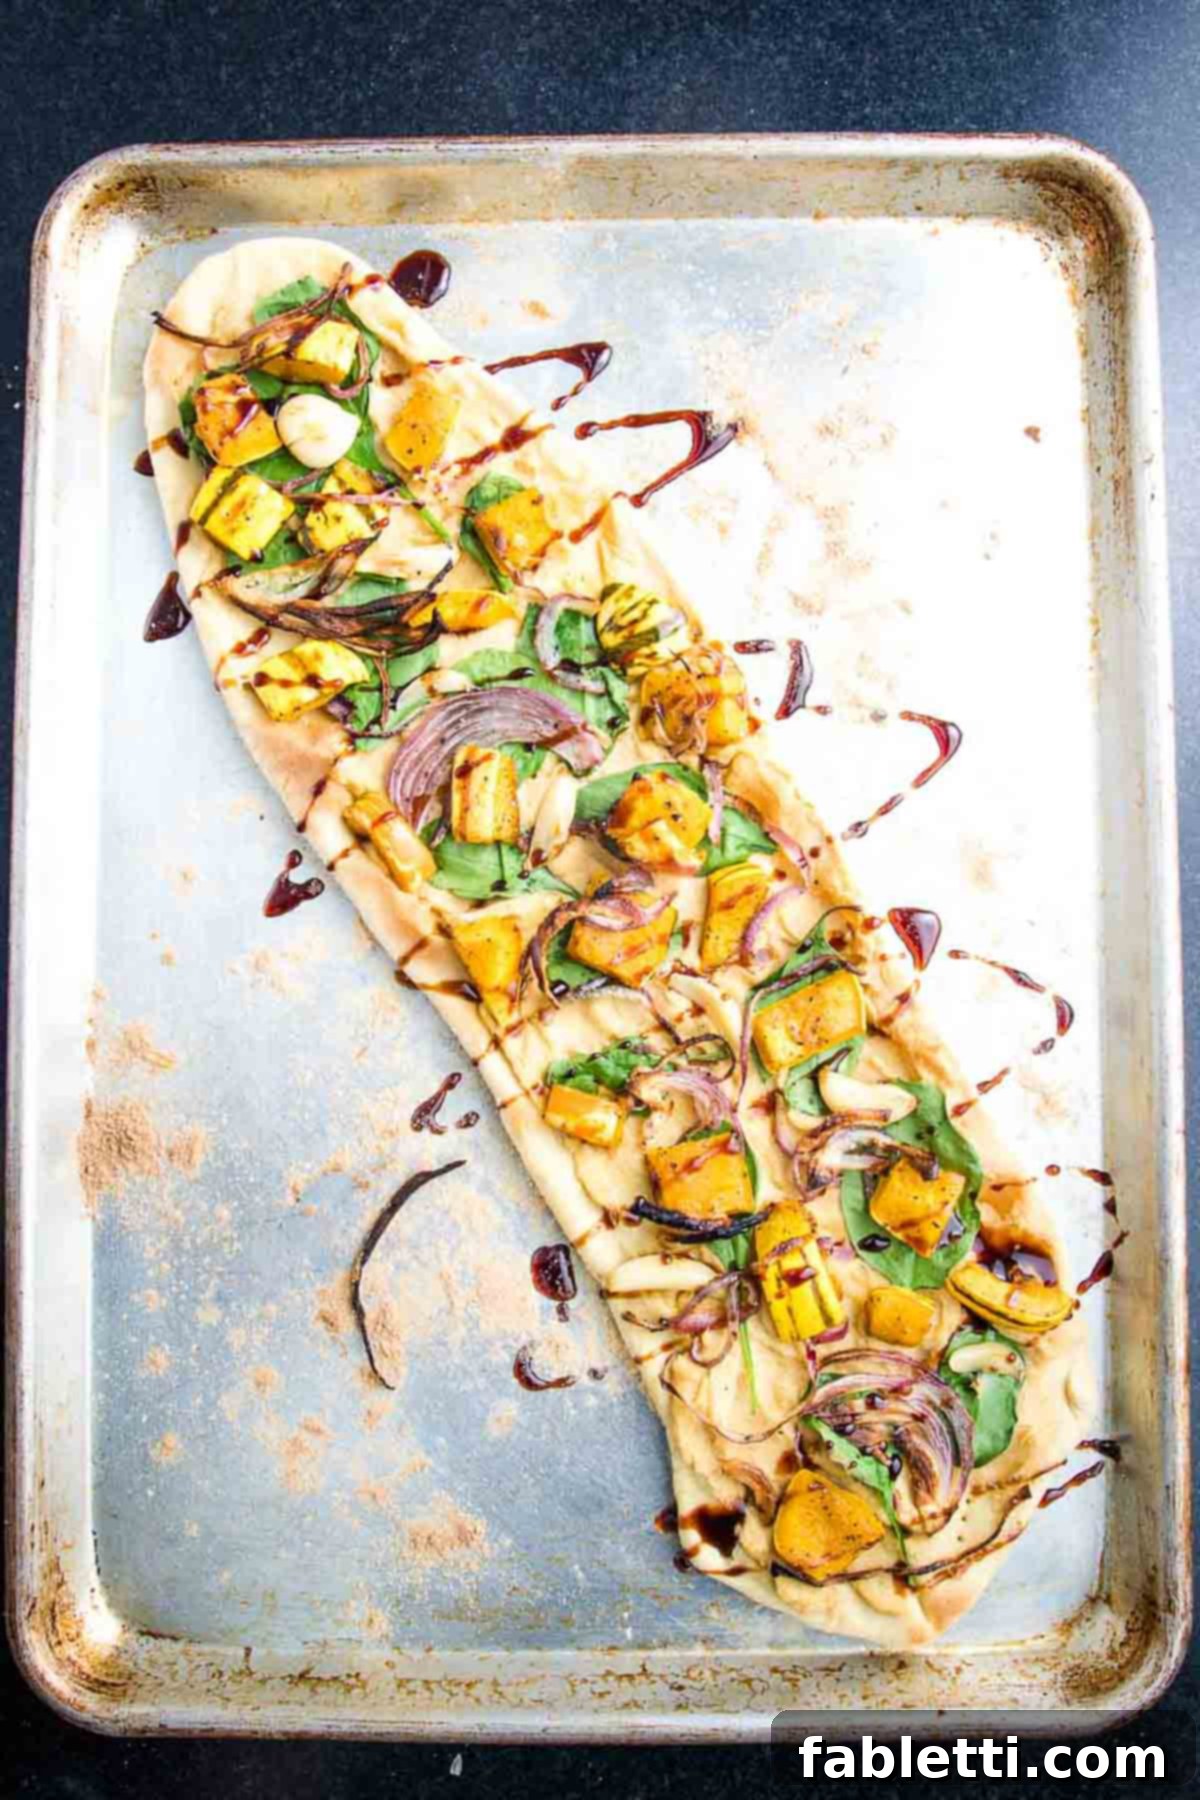
For an optional, delightful touch of sweetness and depth, consider drizzling your freshly baked flatbread with a bit of date syrup just before serving. This complements the savory roasted vegetables beautifully, creating a harmonious balance of flavors. The subtle, natural sweetness of date syrup elevates the entire dish, adding an unexpected layer of complexity that will impress your taste buds. It’s a small addition that makes a big difference!
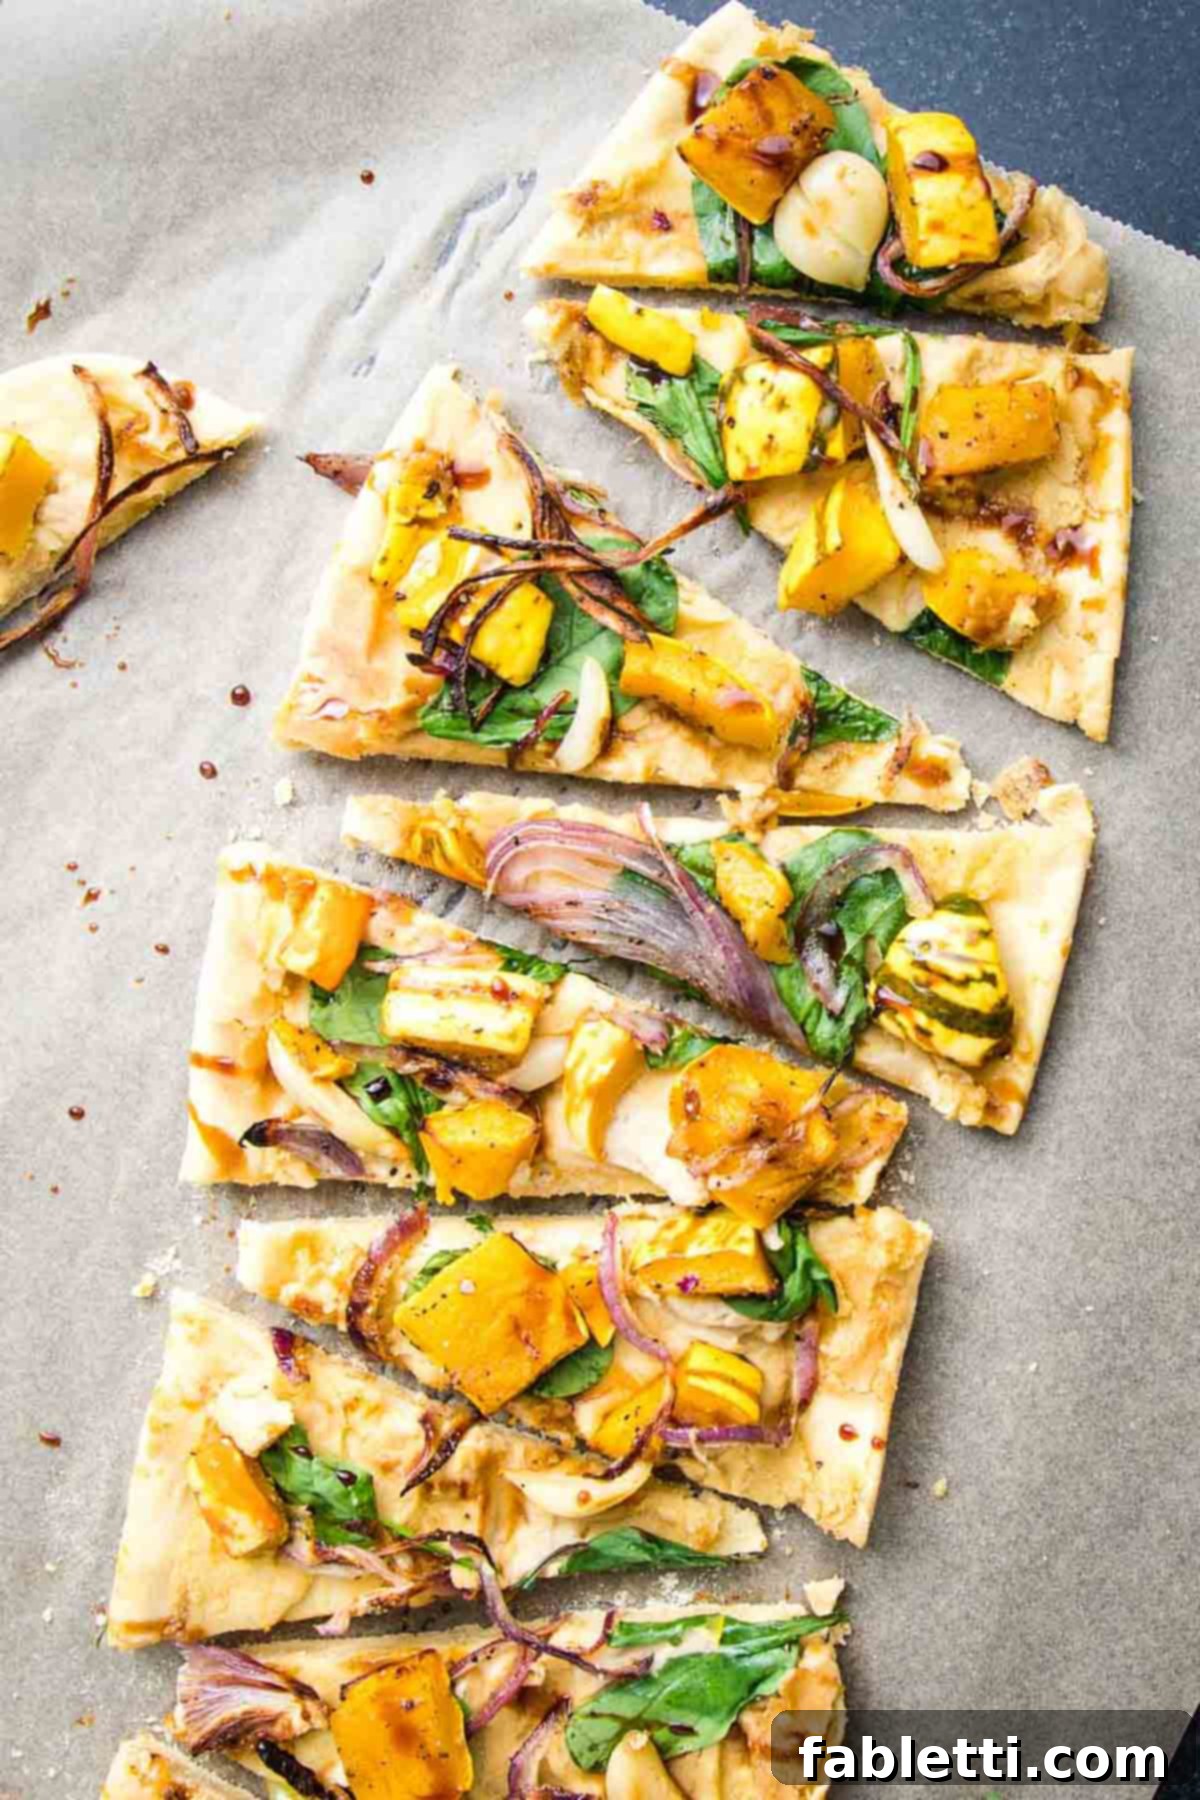
Once baked to golden perfection, transfer your flatbread to a cutting board. Using a sharp knife or a pizza cutter (which makes this step particularly easy), slice the flatbread into desired portions. Whether you prefer large rectangular pieces for a main course or smaller triangles for appetizers, this crispy delight is ready to be enjoyed. Serve immediately and relish the harmonious blend of flavors and textures in every bite.
Mastering the Art of Roasting Delicata Squash, Onions, and Garlic
The star toppings of this vegan flatbread are the beautifully roasted delicata squash, caramelized onions, and tender garlic. This combination creates a rich, sweet, and savory profile that perfectly complements the crispy crust and creamy hummus. Roasting brings out the natural sugars and deepens the flavors, making these vegetables irresistible. You’ll find yourself wanting to make extra just to snack on straight from the pan!
Delicata Squash: The Easy, No-Peel Wonder!
Roasted squash is an absolute game-changer for vegan flatbread toppings. When paired with sweet onions and aromatic garlic, it achieves a level of deliciousness that you might just find yourself eating directly off the baking sheet. Trust me on this – you’ll want to double the squash portion of this recipe, just to ensure you have plenty to top your thin-crust pizzas and maybe a little extra for a healthy snack!
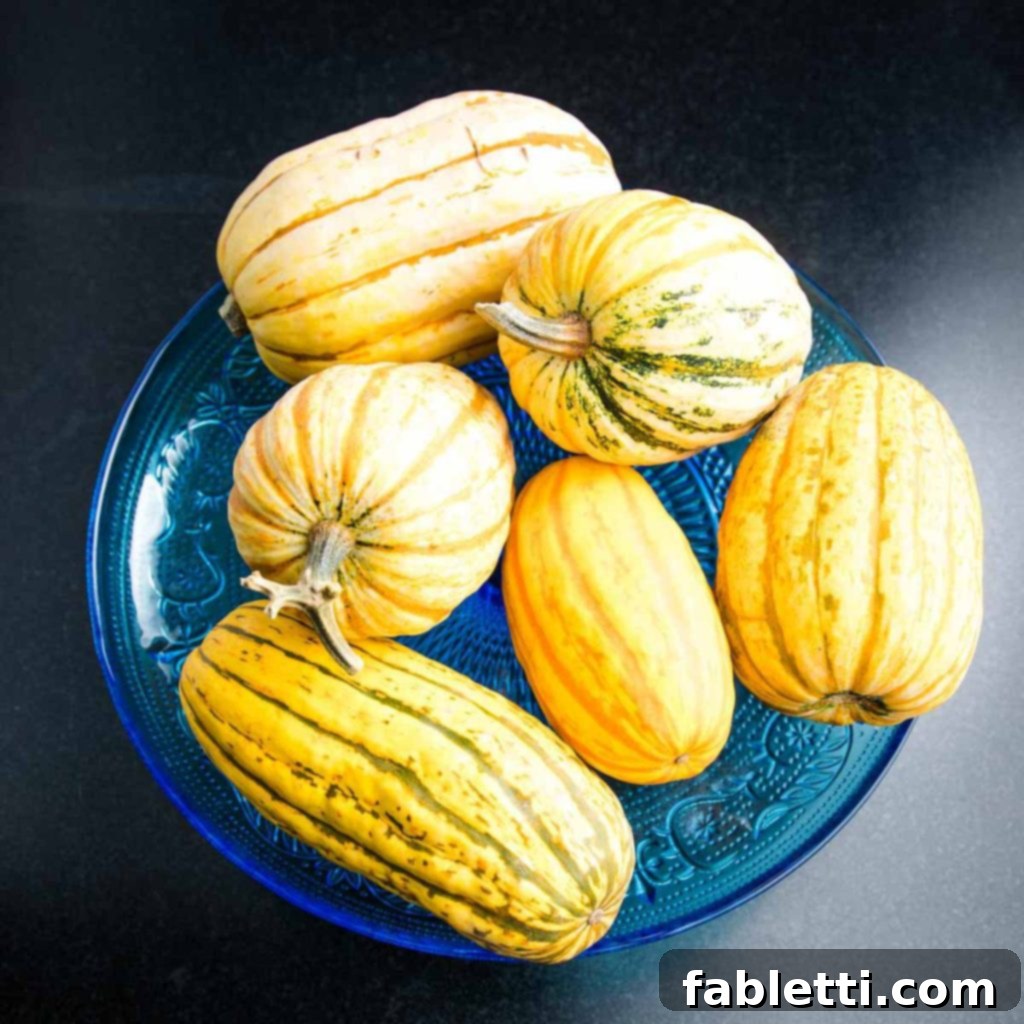
Delicata squash is truly a culinary gem. Its elegant appearance and delightful flavor make it a joy to work with. Unlike many other winter squash varieties, delicata boasts a thinner, tender skin, which means no laborious peeling is required! This feature alone makes it an incredibly convenient and easy choice for this flatbread recipe, significantly cutting down on prep time. Its mild, sweet, and nutty flavor profile, especially when roasted, adds a rich depth that elevates any dish.
Simple Steps to Cube Delicata Squash
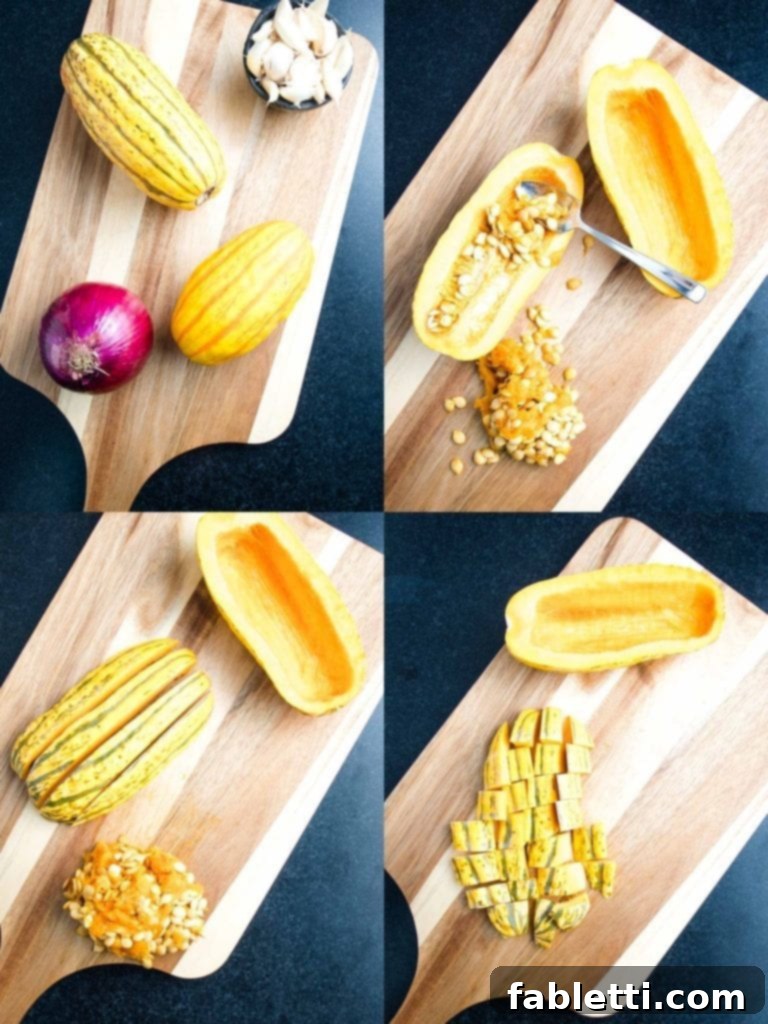
One of the greatest advantages of delicata squash is that peeling is completely unnecessary. However, it is paramount to wash the squash thoroughly before cutting. If you notice any stubborn caked-on dirt, a brief soak followed by a good scrubbing should do the trick, ensuring your squash is perfectly clean and ready for preparation.
Start by carefully cutting the squash lengthwise to create two halves. Then, using a spoon, scoop out all the seeds and any stringy bits from the hollow center. Once cleaned, proceed to cut the squash halves into 1-inch lengthwise strips. Finally, cut across these strips to form uniform 1-inch cubes. These bite-sized pieces are perfect for roasting, ensuring they cook evenly and become delightfully tender with crispy edges.
Roasting the Trio: Squash, Onions, and Garlic
The combination of roasted delicata squash, sweet onions, and aromatic garlic creates a flatbread topping that is both simple to prepare and incredibly rich in flavor. This versatile mix can be prepared while you’re making the flatbread dough, streamlining your cooking process and ensuring maximum freshness. The roasting process caramelizes the onions, tenderizes the squash, and mellows the garlic, resulting in a symphony of tastes and textures that will elevate your flatbread to new heights.
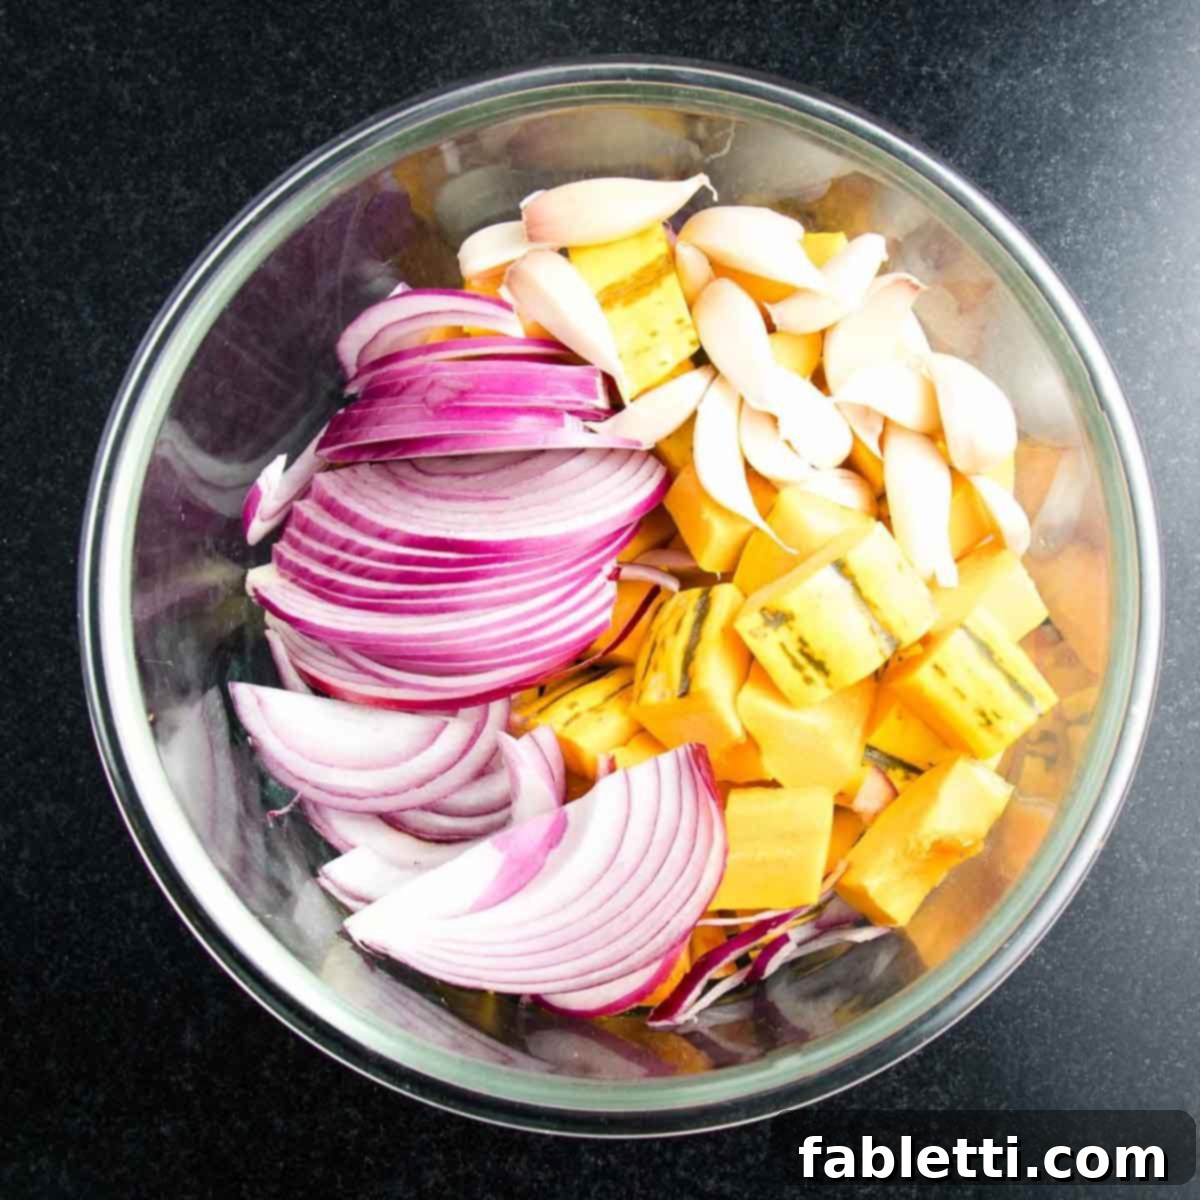
In a medium mixing bowl, combine the freshly cubed delicata squash, thinly sliced onions, and whole garlic cloves. For the garlic, remember to leave their papery skins intact; this protective layer will prevent them from burning during roasting and help them steam to a wonderfully tender consistency inside. This simple preparation step is crucial for achieving perfectly cooked, flavorful garlic that can be easily squeezed from its skin after roasting.
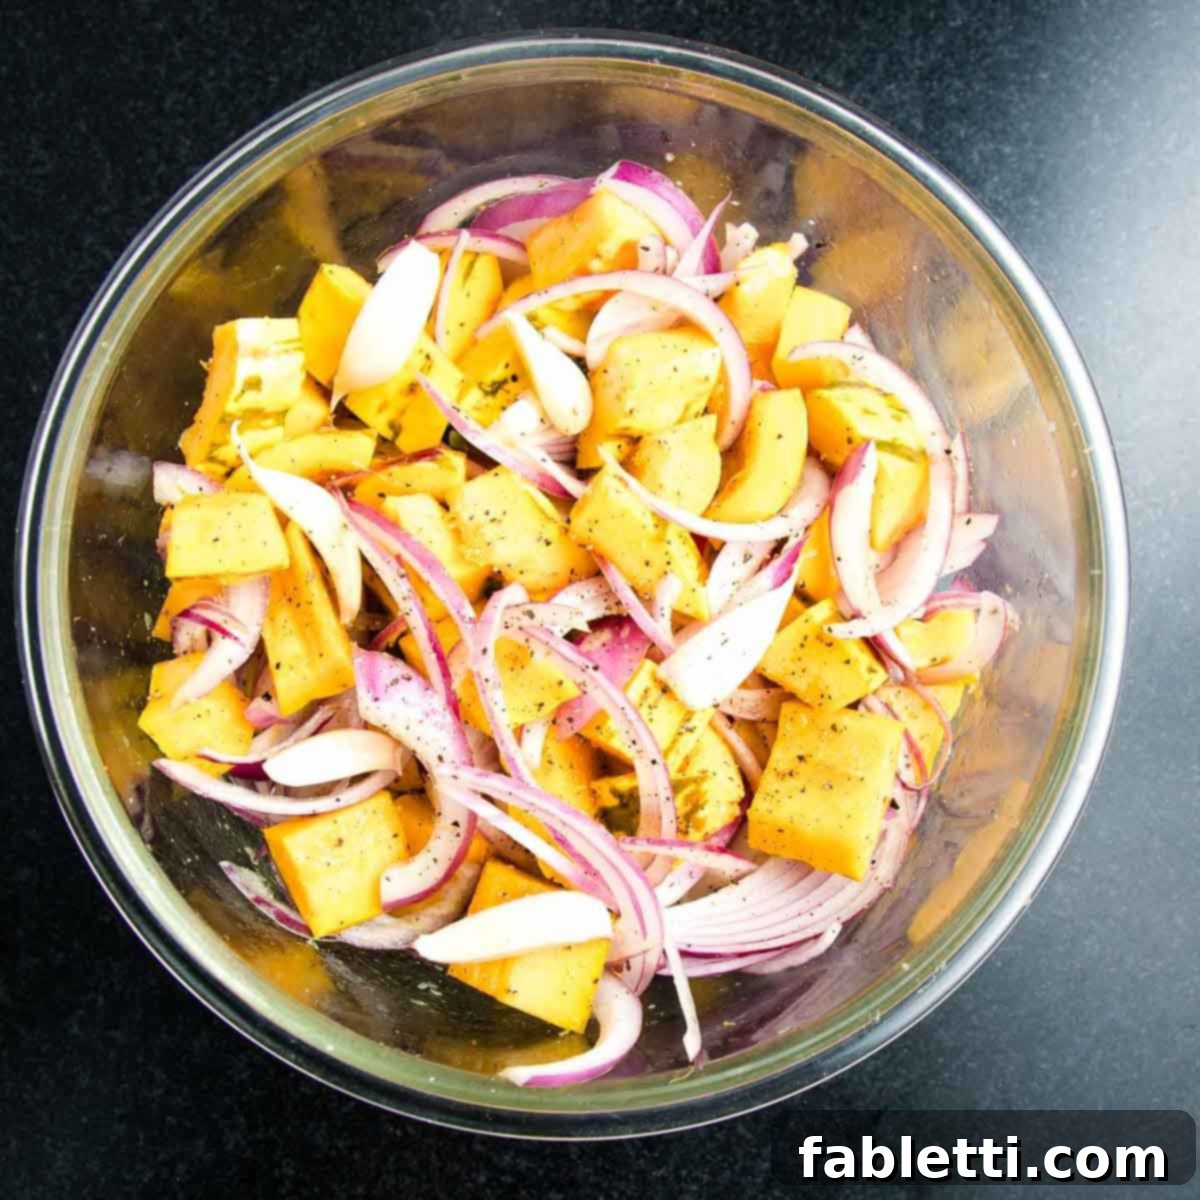
Once your vegetables are in the bowl, generously drizzle them with olive oil. The oil helps them caramelize and prevents sticking while roasting. Follow with a liberal sprinkle of sea salt and freshly ground black pepper. Then, toss everything together thoroughly, ensuring each piece of squash, onion, and garlic is evenly coated with the oil and seasonings. This foundational seasoning is key to developing a rich flavor in your roasted topping.
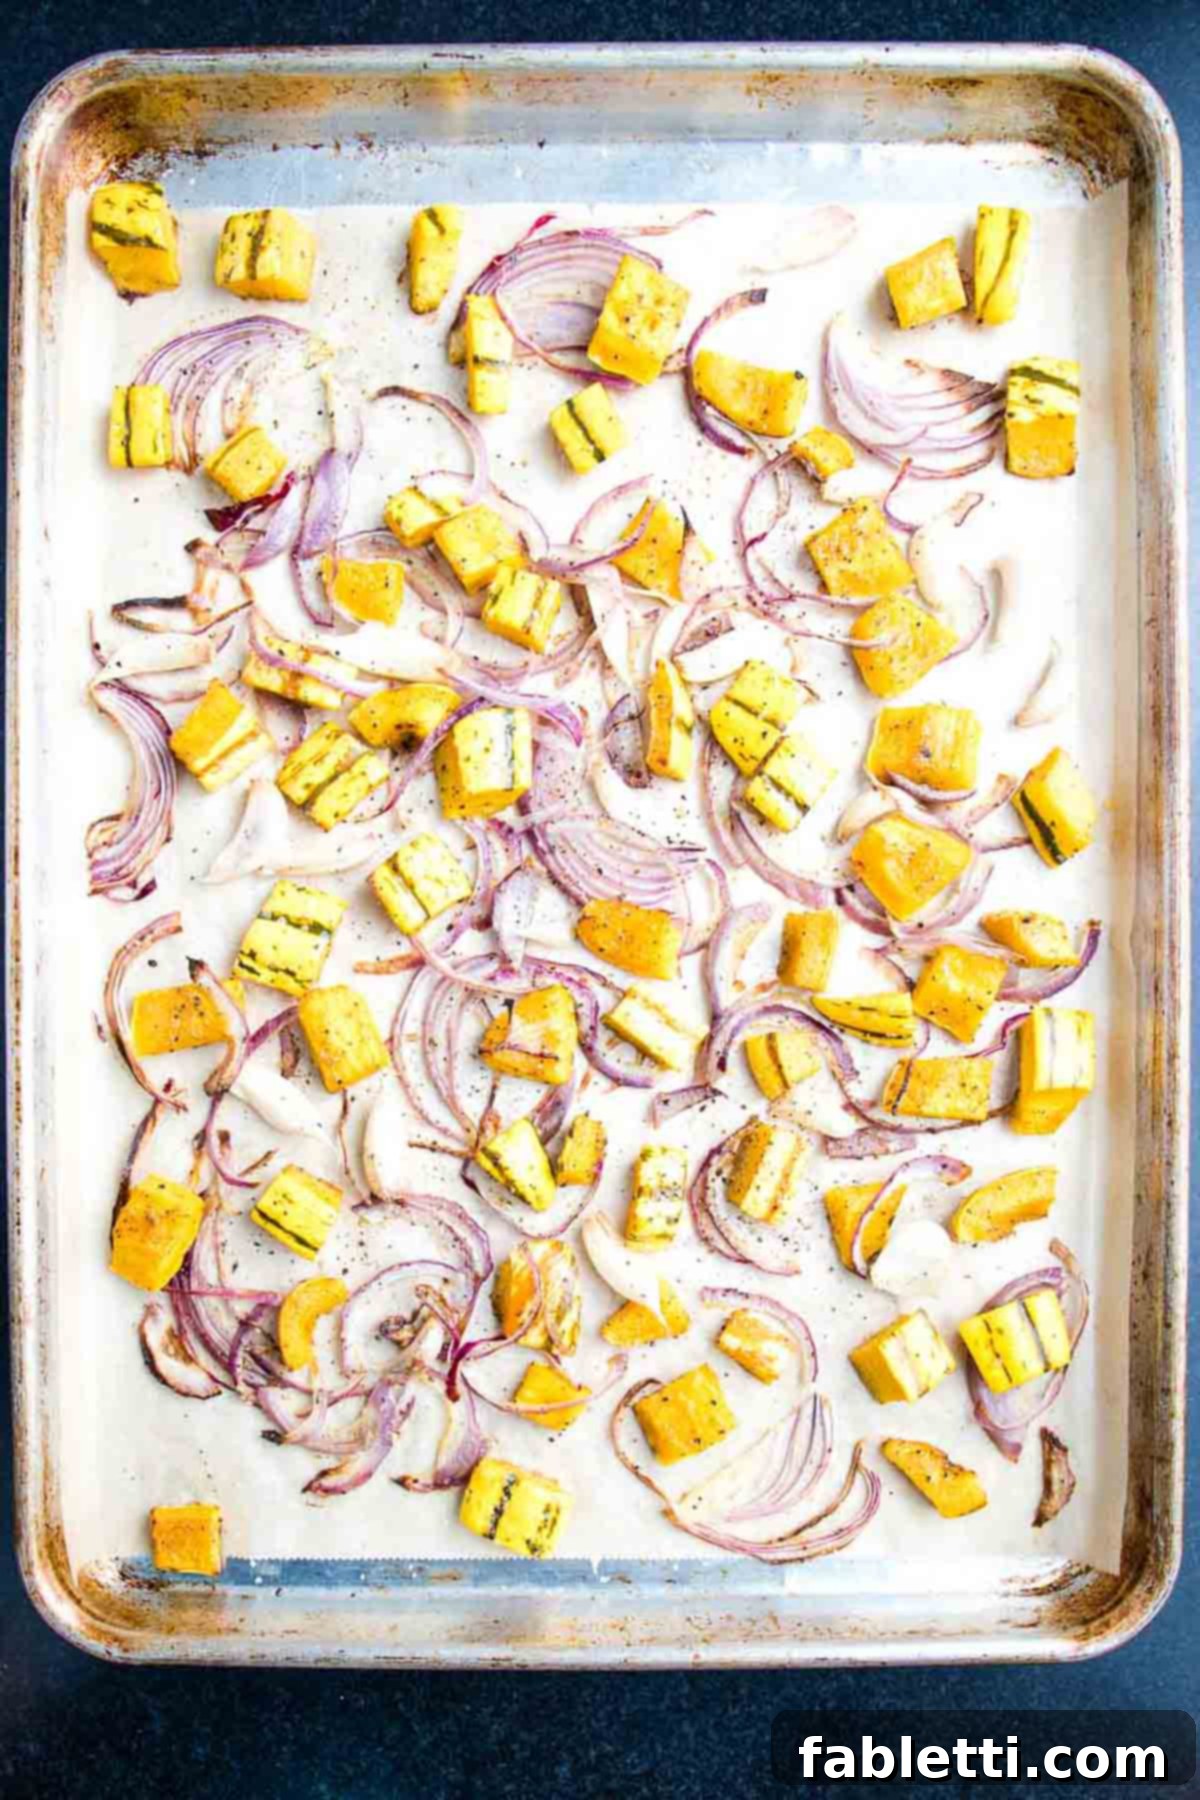
Spread the seasoned vegetables evenly in a single layer onto a rimmed baking sheet lined with parchment paper. Roast them in a preheated oven at 400°F (200°C) for about 15-20 minutes, or until the squash is tender and slightly caramelized, and the onions are soft. While your vegetables are roasting, take advantage of the time to prepare your flatbread dough. Once the vegetables are done, remove them from the oven, and increase the oven temperature to 500°F (260°C) for baking the flatbread crust. This high heat is essential for achieving that desirable crispy texture.
Debra’s Pro Tips for Flatbread Success
- Efficient Prep: Always start by prepping your toppings and getting them into the oven to roast first. This allows you to multitask, preparing the flatbread dough while the vegetables cook, ensuring everything is ready around the same time for a seamless cooking experience.
- Topping Versatility: While our recipe features roasted delicata squash, onions, and garlic, don’t limit yourself! This flatbread is a blank canvas. Feel free to use any roasted vegetables you love, leftover potatoes, or other types of squash. Using leftovers makes this recipe even quicker and reduces food waste. Think roasted bell peppers, zucchini, mushrooms, or even sweet potatoes.
- Perfectly Roasted Garlic: Roasting whole garlic cloves with their papery skins on is a brilliant trick. The skins protect the delicate garlic pulp from burning, allowing it to soften and sweeten beautifully. Once the garlic is cool enough to handle after roasting, simply squeeze the tender, caramelized pulp directly from the skins to add a burst of mild, sweet garlic flavor to your flatbread before its final bake.
- Make-Ahead Toppings: To save even more time on busy days, you can roast the squash, onions, and garlic up to 3 days in advance. Store them in an airtight container in the refrigerator. When you’re ready to assemble your flatbread, simply add the pre-roasted vegetables to your par-baked crust and pop it into the oven for the final 5-8 minutes until everything is heated through and the crust is perfectly crisp.
Vegan Flatbread Pizza: Perfect for Any Meal
While this recipe excels as an effortlessly elegant vegan appetizer, its versatility truly shines when adapted as a main course. The ease of preparation and the depth of flavor make it a fantastic option for a weeknight dinner that feels special without requiring extensive time or effort.
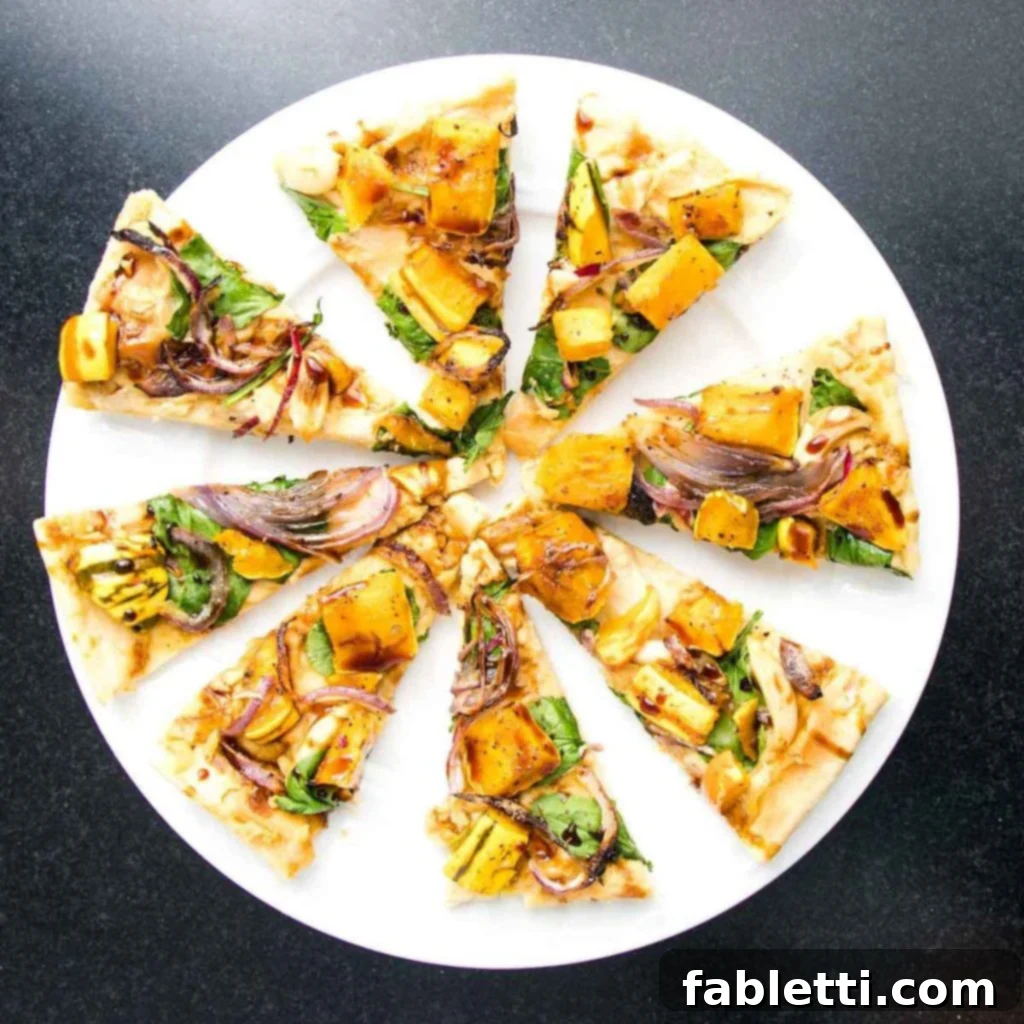
To transform this delightful recipe into a full-fledged dinner, simply roll out your flatbread dough into a larger, more traditional pizza-sized circle. Load it up with your favorite toppings – perhaps some extra roasted veggies, vegan cheese, or a protein of choice – and bake as directed. In no time at all, you’ll have a wholesome, delicious, and easy gluten-free pizza that’s perfect for feeding the whole family. It’s a convenient and healthy way to enjoy classic pizza flavors with a plant-based twist.
Simplify Your Life: Make-Ahead Flatbread Crust
- This incredible flatbread crust comes together in less than 5 minutes, making it ideal for meal prepping. You have the flexibility to make the dough ahead of time and store it in the refrigerator or freezer until you’re ready to bake. This convenience means fresh, homemade flatbread is always within reach, even on the busiest days.
- To freeze raw dough: After kneading, divide the dough ball in half. Roll each half into a tight ball and place them on a piece of parchment paper on a baking sheet. Flash freeze for about an hour until solid. Once frozen, transfer the dough balls to a freezer-safe zip-top bag, ensuring all air is removed, and freeze for up to 3 months. When ready to use, simply defrost the dough at room temperature for about 2 hours, then proceed with rolling and baking from step 9 of the instructions.
- To par-bake and freeze crusts: Another excellent make-ahead option is to par-bake the crusts through step 11 of the recipe. Allow the par-baked crusts to cool completely. For easy storage, place them directly on the baking pan, covered tightly with plastic wrap or aluminum foil, in the fridge for 4-5 days. For longer storage, wrap each cooled, par-baked crust tightly in plastic wrap and then aluminum foil, and freeze for up to 3 months. When you’re ready to serve, simply pull a frozen crust from the freezer, add your desired toppings, and bake directly from frozen, adding an extra 2-3 minutes to the baking time depending on the crust’s thickness. This method saves significant time when you’re craving a quick, homemade meal.
Perfect Pairings: What to Serve with Vegan Flatbread
This versatile vegan flatbread is a meal in itself, but it also pairs wonderfully with a variety of side dishes to create a more complete and satisfying dining experience. Here are some fantastic suggestions to complement your delicious flatbread:
- Vegan Caesar Salad: A crisp, refreshing salad with a creamy, tangy dressing offers a delightful contrast to the warm, savory flatbread.
- Cole Slaw: A vibrant and crunchy coleslaw, especially one with a zesty or miso dressing, adds a burst of freshness and texture.
- Minestrone Soup: For a heartier meal, a comforting bowl of minestrone soup provides warmth and a medley of vegetables that perfectly complements the flatbread.
- Tahini Brownies: Indulge your sweet tooth with rich, fudgy tahini brownies for a decadent dessert that’s still plant-based.
- Chocolate Chunk Skillet Cookie: A warm, gooey chocolate chunk skillet cookie is the ultimate comforting treat to finish off your meal.
📖 Recipe: Easy Vegan Roasted Delicata Squash Flatbread

Vegan Flatbread Recipe
Author: Debra Klein
This Gluten-free Vegan Flatbread Recipe is super easy to make, uses just a few simple ingredients and makes the perfect healthy appetizer or dinner. Crispy pizza crust that uses no yeast so it’s ready in minutes.
Prep Time: 10 minutes
Cook Time: 30 minutes
Total Time: 40 minutes
Course: Appetizer
Cuisine: American
Servings: 4 serving each, makes 2 flatbreads
Calories: 358 kcal per serving
Equipment
- French Rolling Pin
- Parchment Baking Paper
- Baking Sheet with Silicone Mat
- Food Processor (optional, for dough)
Ingredients
Roasted Vegetable Toppings
- 2-3 delicata squash* (total 3 lbs.)
- 1 small red onion, halved and thinly sliced
- 1 head garlic, separated into cloves (with paper skin still on)
- 2 Tablespoons olive oil
- ½ teaspoon sea salt
- ¼ teaspoon freshly ground black pepper
- ½ cup hummus*
- 1 cup baby spinach*
- OPTIONAL: 2 Tablespoons date syrup
Flatbread Pizza Dough
- 3 ¼ cups flour* (all-purpose, whole wheat, or gluten-free blend)
- 1 teaspoon sea salt (fine grain)
- 1 cup warm water
- 3 Tablespoons olive oil
- 1 Tablespoon cornmeal (for dusting baking sheet)
Instructions
- Preheat your oven to 400°F (200°C). Line a large rimmed baking sheet with unbleached parchment paper.
- Thoroughly wash the outside of the delicata squash. Since the skin is edible, ensure all dirt and debris are removed. Cut each squash in half lengthwise and use a spoon to scoop out the seeds and stringy bits. Cut the squash halves into 1-inch thick strips lengthwise, then cut crosswise to form 1-inch cubes.
- Peel the papery outer layer from the red onion. Cut the onion in half through the root end. Place one half flat side down and slice thinly. Repeat with the other half.
- Separate the head of garlic into individual cloves, leaving the papery skins intact to protect them during roasting.
- In a large bowl, combine the squash cubes, sliced onion, and garlic cloves. Drizzle with 2 tablespoons of olive oil and sprinkle with ½ teaspoon sea salt and ¼ teaspoon black pepper. Toss well to ensure all vegetables are evenly coated.
- Spread the seasoned vegetables in a single layer on the prepared baking sheet. Roast for 20 minutes, or until the squash and garlic are tender and lightly caramelized. Remove from the oven. Increase the oven temperature to 500°F (260°C). Once the garlic is cool enough to handle, carefully remove the paper skins.
- MAKE FLATBREAD DOUGH: In a food processor (or large bowl), pulse the flour and 1 teaspoon salt until combined. Add the warm water and 3 tablespoons olive oil. Process until the dough forms a ball and easily pulls away from the sides of the bowl (this usually takes 1-2 minutes). If mixing by hand, stir until a shaggy dough forms, then turn it out onto a lightly floured surface. Knead by hand for about 1 minute until a smooth ball has formed.
- Divide the dough into two equal sections.
- On a lightly floured surface, use a rolling pin to roll out one piece of dough into a long, THIN oval (or circle). It’s crucial for the flatbread to be thin; if it’s too thick, the top may burn before the center cooks through. Aim for approximately ¼ inch thickness.
- Lightly dust a clean rimmed baking sheet or pizza stone with cornmeal to prevent sticking and add extra crispiness.
- Carefully transfer the rolled-out flatbread oval onto the prepared baking sheet. Bake for 7 minutes in the 500°F (260°C) oven, until it starts to turn golden and is cooked through.
- Remove the par-baked crust from the oven. Lightly brush the surface with a little olive oil. Spread a few tablespoons of hummus evenly over the crust. Scatter a handful of baby spinach over the hummus, then evenly distribute half of the roasted squash, onion, and garlic mixture on top of the spinach.
- Return the flatbread to the oven and bake for another 5-8 minutes, or until the veggies are warm, and the crust is wonderfully crisp. Keep a close eye on it after 5 minutes to prevent the garlic from burning.
- Repeat steps 9-12 with the remaining dough and toppings to create the second flatbread.
- Once baked, allow the flatbread to cool slightly before slicing and serving.
Video
Notes
FLOUR: This recipe is incredibly versatile when it comes to flour. I’ve personally tested it with GF Cup4cup, Bob’s Red Mill GF 1-to-1 baking flour, Jovial Einkorn flour, and Mighty Mills Whole Wheat All Purpose Flour. All varieties produced excellent results. Any standard all-purpose flour will work beautifully. For the Einkorn flour, I found it needed an additional 2 tablespoons of water to achieve the perfect consistency. Both gluten-free options yielded a light and crispy crust, while the whole wheat flour resulted in a slightly denser, but equally delicious, flatbread with a satisfying texture.
SQUASH: Delicata squash is my top recommendation for this recipe because its thin skin means no peeling is required, it’s easy to cut, and it cooks relatively quickly. However, you can certainly substitute acorn squash or butternut squash. If using these, remember they will need to be peeled before cutting into cubes. Many grocery stores now offer pre-peeled and cubed butternut squash, which is a fantastic time-saver, though you might need to cut the cubes slightly smaller to ensure they are bite-sized on your flatbread.
GARLIC: When preparing the garlic, separate the cloves but leave the papery skins intact. This clever trick ensures that the inner flesh cooks to a tender, mellow perfection without burning. The skins act as a natural protective layer. Once the roasted vegetables are cool enough to handle, the skins will be easy to remove, allowing you to enjoy the soft, sweet roasted garlic pulp.
HUMMUS: To streamline your preparation, feel free to use your favorite store-bought hummus. If you prefer a homemade touch, you can easily prepare traditional homemade hummus or opt for a lighter, low-carb alternative like this cauliflower hummus.
DATE SYRUP: While listed as optional, the addition of date syrup is highly recommended for its unique and delicious sweetness that beautifully complements the savory toppings. If you’re new to date syrup and wondering if it’s worth buying, the answer is a resounding YES. It’s a natural sweetener with a low glycemic index, making it a fantastic addition to any clean eating pantry. I use it frequently in baking, drizzled over oatmeal or pancakes, as a topping for “nice cream” (made from frozen bananas), and even in my matcha lattes, to name just a few applications. When purchasing, always look for brands made solely from dates, with no added ingredients. Two reputable brands to consider are The Date Lady or Just Date Syrup.
MAKE AHEAD: To simplify meal preparation, the roasted vegetables can be made up to 3 days in advance and stored in the refrigerator. For the dough, you have a couple of options: you can make the dough, wrap it well, and freeze it for up to 3 months. To use, simply defrost it at room temperature for about 2 hours, then roll it out and continue from step 9 of the instructions. Alternatively, you can par-bake the crusts (through step 11), let them cool completely, then wrap them tightly and freeze for up to 3 months. When you’re ready to enjoy, simply add your toppings to the frozen crust and bake, adding an extra 2-3 minutes to the cooking time, depending on the crust’s thickness.
Nutrition
Serving: 1g
Calories: 358kcal
Carbohydrates: 48g
Protein: 8g
Fat: 11g
Saturated Fat: 2g
Polyunsaturated Fat: 9g
Sodium: 426mg
Fiber: 6g
Sugar: 7g
The nutrition calculations were done using online tools. To obtain the most accurate representation of the nutritional information in any given recipe, you should calculate the nutritional information with the actual ingredients you used. You are ultimately responsible for ensuring that any nutritional information is accurate, complete and useful.
Did you make this recipe?
Please leave a review below, then snap a picture and tag me @dkhealthcoach or use hashtag #dkhealtcoach on Instagram so I can see it!!
Flatbread is essentially an unleavened bread, meaning it does not contain yeast. This characteristic makes it quicker to prepare than traditional pizza dough.
Absolutely, yes! This specific recipe has been successfully tested with two different types of gluten-free flours, yielding a crispy and flavorful crust. Many gluten-free all-purpose flour blends work wonderfully for this recipe.
The primary difference lies in the dough. Flatbread dough typically contains no yeast, resulting in a thin, crispy crust that bakes quickly. Pizza dough, on the other hand, traditionally uses yeast, leading to a thicker, chewier, and more doughy crust that requires more time to rise and bake.
Yes, this particular flatbread recipe is entirely vegan. Its simple four-ingredient crust is made from all-purpose flour (which can be white, whole wheat, or gluten-free), salt, warm water, and olive oil, with no animal products whatsoever.
The topping possibilities for flatbread are endless! Start with a spread like hummus (as in this recipe), marinara sauce, or pesto. Remember that flatbread is thin, so it can’t handle as many heavy toppings as a traditional pizza. Then, add your favorite combination of vegetables or plant-based proteins. Think roasted bell peppers, olives, sun-dried tomatoes, artichoke hearts, or even vegan sausage crumbles.
