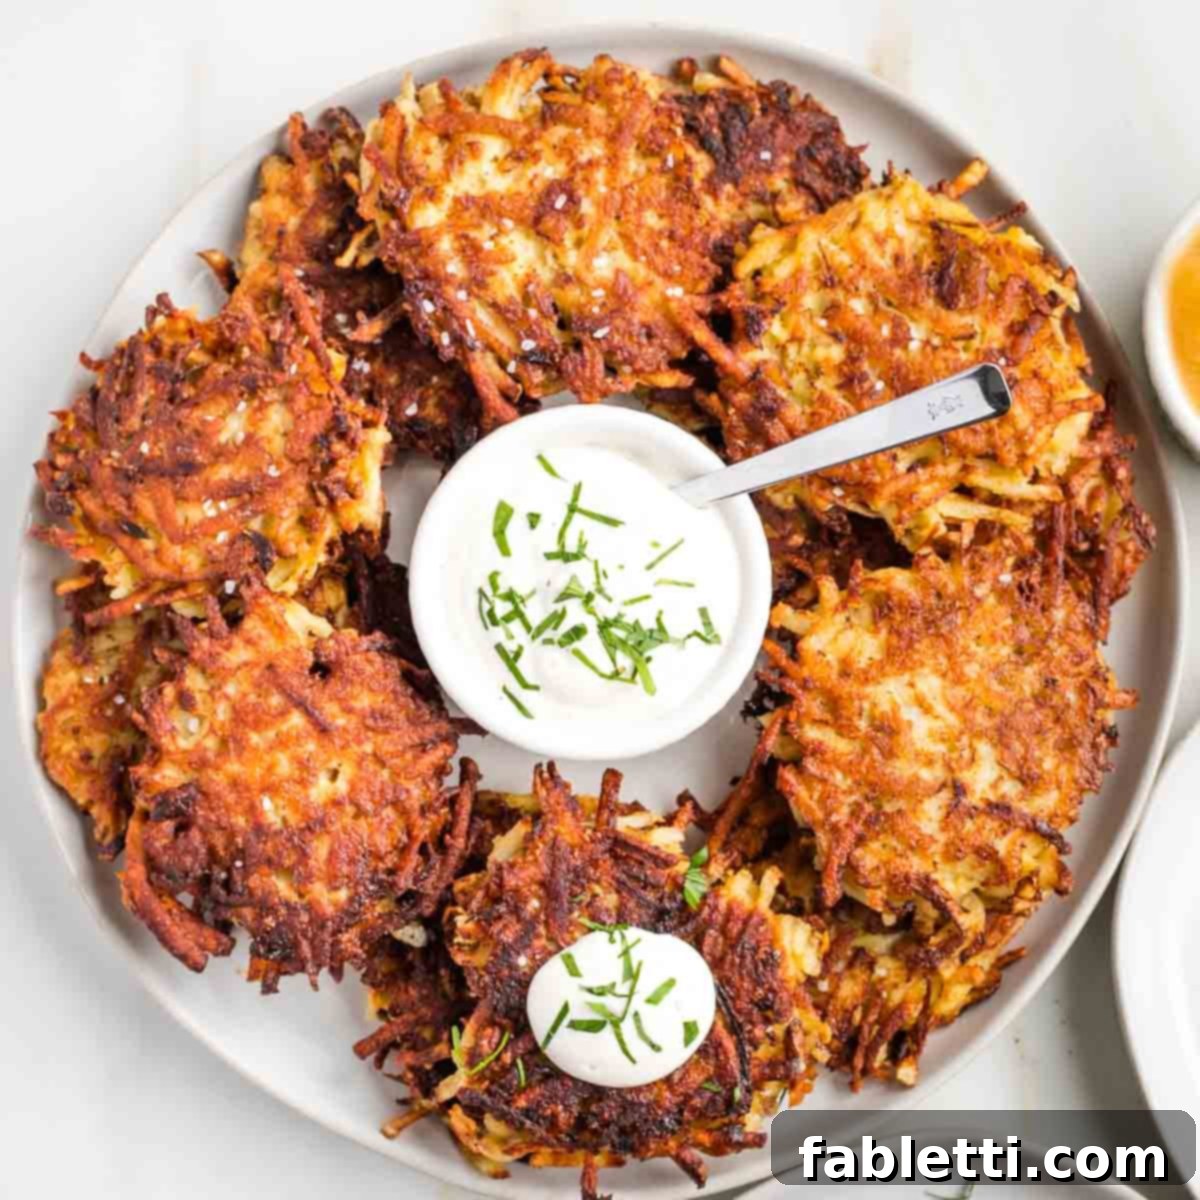
Welcome to the ultimate guide to crafting the most exquisite potato latkes you’ll ever taste! This isn’t just any recipe; it’s a treasured family legacy, refined over generations, promising latkes that are truly the BEST. Prepare for an unforgettable culinary experience with potato pancakes boasting an irresistible crisp exterior and a tender, flavorful interior. Whether you’re celebrating Hanukkah or simply craving a taste of tradition, this recipe is incredibly adaptable, even for those needing Gluten-free Latkes. Consider this Traditional Potato Latkes Recipe my heartfelt gift to you, designed to bring joy and deliciousness to your table for many years to come.
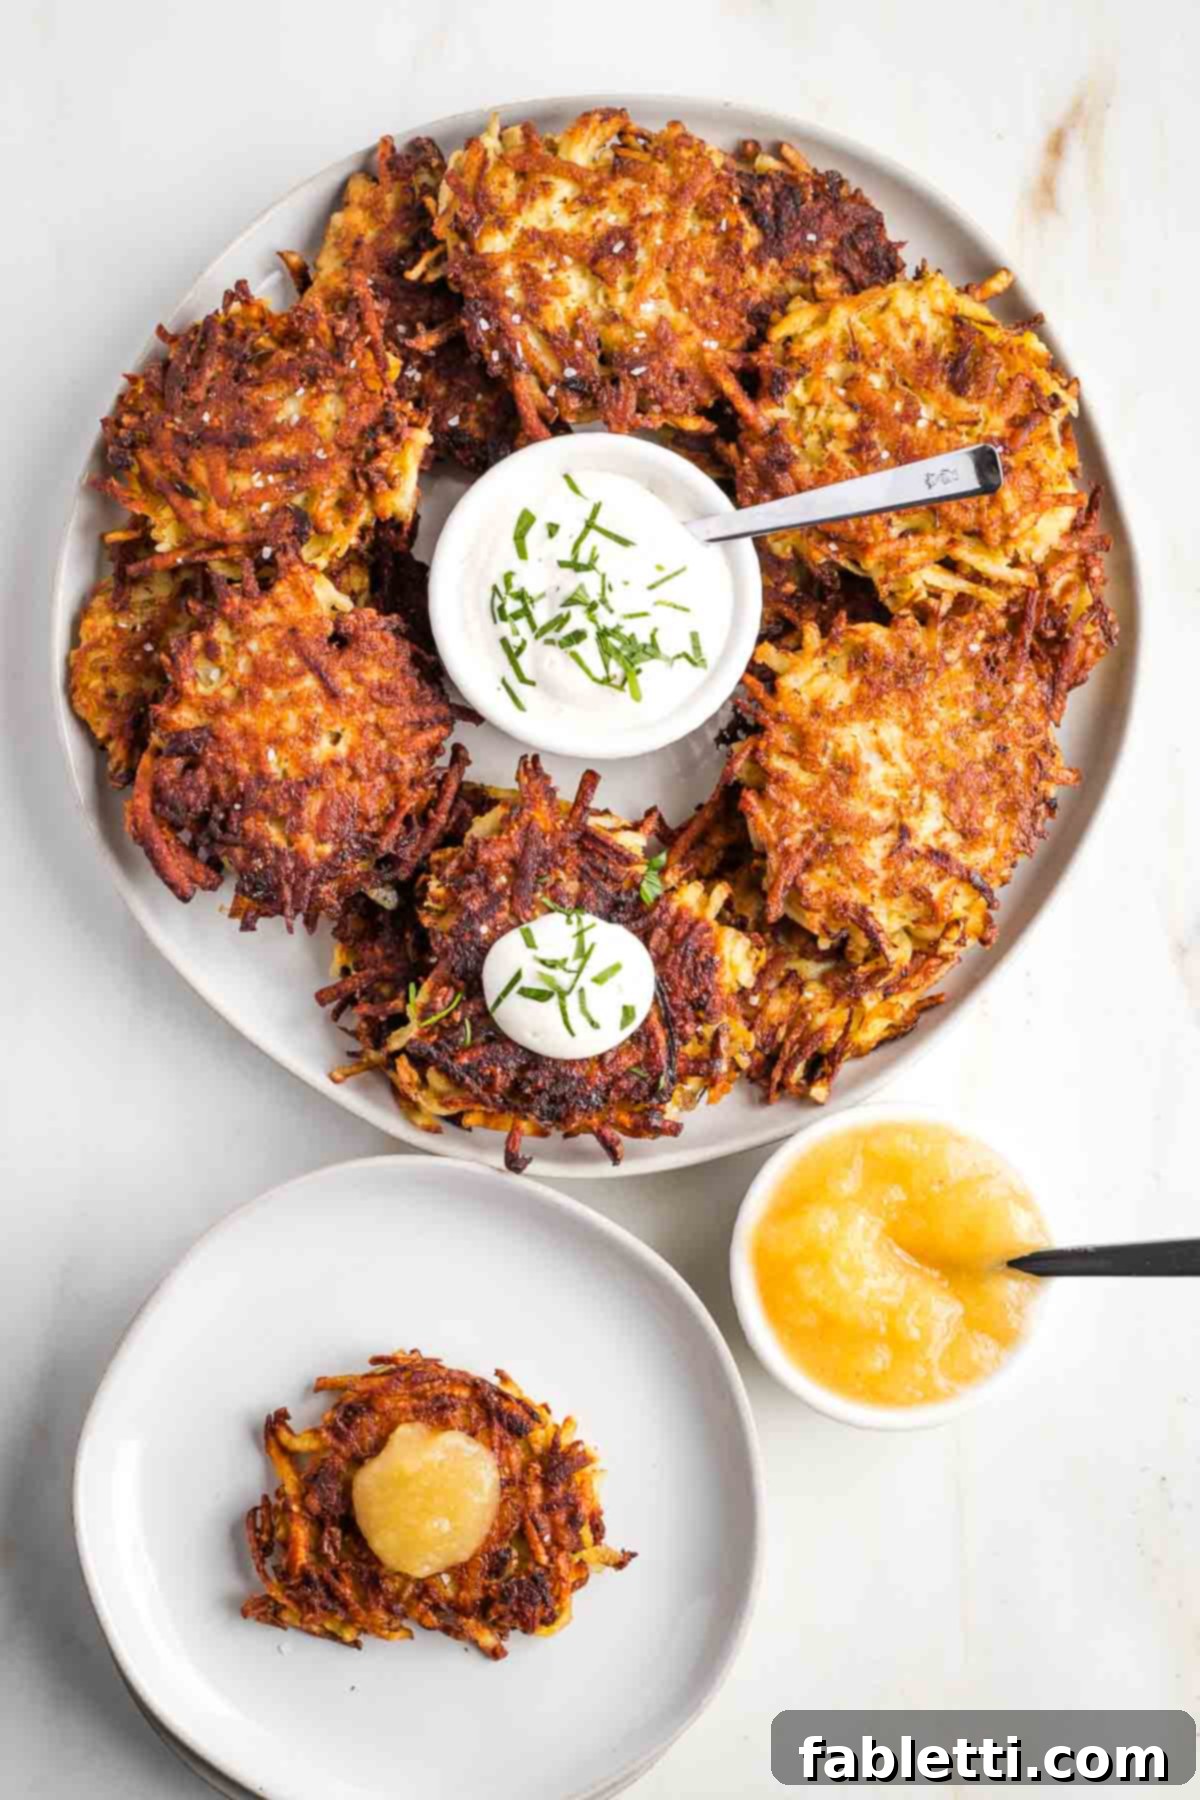
For me, latkes transcend mere food; they are a love language, nourishing both body and soul. My beloved grandmother, Blanche, was a culinary genius who incorporated some form of potato into almost every dinner. Her latkes, however, were truly unparalleled. These crispy, golden potato pancakes weren’t just a Hanukkah staple; Grandma Blanche made them year-round, much to my delight. Each batch I prepare today evokes a powerful sense of nostalgia, a comforting reminder of her warmth and love that continues to inspire my cooking.
While I generally avoid heavily fried foods, the distinctive aroma of latkes signals the start of the holiday season and the joyous celebration of Hanukkah in my home. If you’re seeking a lighter approach to this classic dish, I encourage you to explore my Baked Brussels Sprouts Latke Recipe. They may not be Grandma Blanche’s traditional version, but they are undeniably delicious and Debra-approved for a healthier, equally delightful latke option.
The Enduring Tradition: Why Latkes are a Hanukkah Staple
The consumption of oily foods during Hanukkah is a deeply rooted Jewish tradition, commemorating a profound miracle. The story goes that during the rededication of the Second Temple in Jerusalem, there was only enough consecrated oil to light the Menorah for a single day. Miraculously, this small quantity of oil sustained the flames for eight days and nights, allowing enough time for new pure oil to be prepared. This “Miracle of the Oil” is celebrated by eating foods cooked in oil, symbolizing divine providence and enduring faith.
Consequently, traditional Hanukkah menus prominently feature fried delicacies. Latkes (livivotin Hebrew), savory potato pancakes fried in oil, are perhaps the most iconic. Alongside them are sufganiyot (jelly-filled donuts, also fried in oil), and chocolate gelt (foil-wrapped chocolate coins). While these remain central, individual families often enrich their Hanukkah feasts with other cherished dishes, creating unique culinary traditions that reflect their heritage and preferences.
Grandma Blanche’s Latke Recipe, though seemingly simple, held a secret to perfection. It called for just four core ingredients: potatoes, onions, eggs, and matzo meal. The potatoes and onions were always freshly shredded, and the eggs whisked until wonderfully fluffy. What truly set her method apart was her intuitive approach to quantities. She never relied on precise measurements, understanding that the moisture content of potatoes and onions can vary, as can the size of eggs. Instead, she’d adjust the matzo meal by feel, achieving the ideal consistency every time.
Crucially, I never once witnessed her wringing liquid from the shredded potatoes using a cheesecloth or kitchen towel. Her movements were swift and purposeful; the potato mixture quickly transitioned from bowl to hot frying pan, long before excessive liquid could accumulate. This speed, combined with her masterful technique, resulted in latkes that were consistently crisp and incredibly flavorful. I place immense trust in Grandma’s Potato Latkes Recipe, precisely because it bypasses the “extra work” of squeezing out liquid – a step I’ve always found cumbersome and, frankly, unnecessary for achieving the perfect latke.
Choosing the Perfect Potato for Crispy Latkes
The foundation of an exceptional latke lies in selecting the right potato. For that coveted crispy exterior and tender interior, a potato with a higher starch content is essential. The starch released during shredding acts as a natural binder, contributing significantly to the latke’s structural integrity and its ability to achieve golden crispiness.
- Russet Potatoes: These were my grandmother’s go-to choice, and for good reason. Russets are characterized by their large size, earthy dark brown skins, few eyes, and fluffy white flesh. Their high starch content makes them ideal for frying, creating the light, airy texture within and the signature crunch without. They are the same variety often preferred for making perfect french fries.
- Idaho Potatoes: Often a variety of Russet, Idaho potatoes are cultivated in the unique growing conditions of Idaho, known for its rich volcanic soil and ideal climate. These conditions yield potatoes that are naturally low in moisture and exceptionally high in starch, making them a superb choice for latkes. Their inherent dryness helps prevent soggy results.
- Yukon Gold Potatoes: These versatile, medium-starch potatoes offer a rich, buttery flavor profile. While not as starchy as Russets, they produce hash brown-like latkes with a delightful, slightly nutty taste. If you enjoy a richer potato flavor, Yukon Golds are an excellent alternative, offering a slightly different but equally delicious character.
- Sweet Potatoes: For a vibrant and naturally sweeter latke, sweet potatoes can be a wonderful addition. However, they typically release less water and are less starchy than white potatoes. To ensure your sweet potato latkes hold together and crisp up beautifully, it’s advisable to mix them with an equal portion of high-starch white potatoes like Russets. The white potatoes will provide the necessary moisture and starch to bind the mixture effectively.
Grandma Blanche’s Essential Latke Ingredients
The true artistry of Grandma Blanche’s recipe wasn’t in strict measurements, but in understanding the nature of the ingredients and adapting. She’d teach by demonstrating, emphasizing that potatoes and onions vary in moisture, and eggs aren’t uniform in size. The goal was to achieve an ideal batter consistency, intuitively knowing when a touch more matzo meal might be needed. While similar to many other potato latke recipes, the genuine difference lies in the execution and the quality of the core components. For authentic, true-to-Grandma latkes, minimize substitutions where possible.
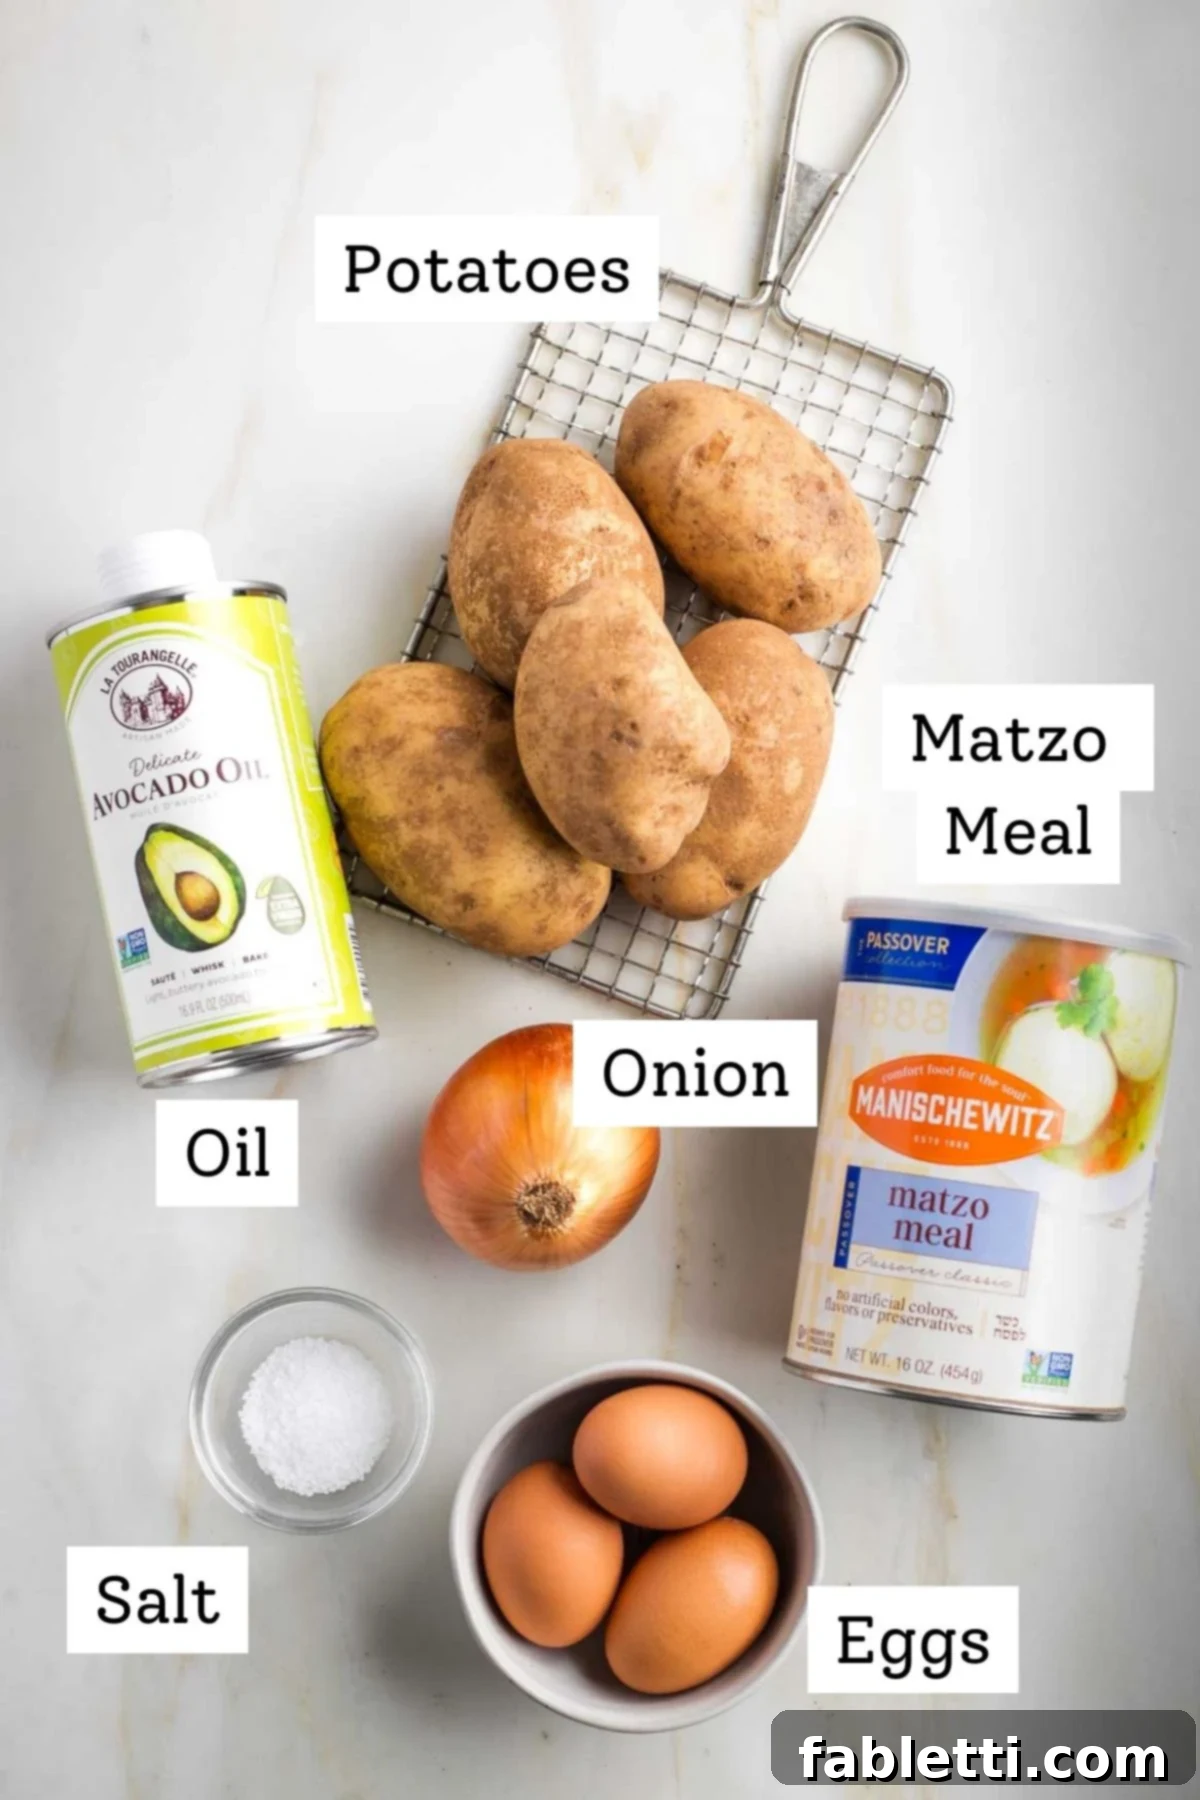
- Potatoes: Grandma strictly used russet or Idaho potatoes due to their high starch content, which is crucial for the crispiest latkes. While I sometimes use Yukon Gold for a slightly richer, buttery flavor, they are noticeably starchier and require careful handling.
- Onions: Opt for white or yellow onions. The distinct flavor profile of shredded onions, including their juices, is a game-changer, elevating these latkes above others. Especially if you’re not using chicken schmaltz for frying, the onion’s natural liquids and pungent flavor become even more vital for a truly savory taste.
- Eggs: Eggs are integral to the classic latke texture and flavor that reminds me of my grandmother’s. They act as a binder, helping the latkes hold their shape while frying. For those seeking vegan potato latkes, a fantastic workaround involves replacing eggs with a mixture of arrowroot, ground flaxseed, and a splash of almond milk. (Refer to the recipe card for specific ratios).
- Matzo Meal: This traditional Passover ingredient is key to achieving that signature lacy, crispy texture. It absorbs excess moisture and provides the necessary binding. Many of us have a half-full container lingering in the pantry from Passover – this is its moment to shine!
- Fat: For frying, my preference is avocado oil, a healthier alternative to highly processed vegetable oils like canola. A blend of olive oil and avocado oil is also an excellent option, lending a subtle depth of flavor. The choice of oil significantly impacts the overall taste and health profile of your latkes.
- Potato Shredder: While not an edible ingredient, a proper shredder is absolutely essential for achieving the ideal texture for the best latkes. While a food processor can be a convenient time-saver for large batches, there’s an undeniable magic to the old-fashioned, hand-held shredder that Grandma used. It produces longer, more rustic shreds than a typical grater, which is vital for that delicate, lacy crispness.
Step-by-Step Guide to Making Grandma’s Perfect Latkes
Before you begin shredding, ensure your workspace is fully prepped for efficiency. Line one baking sheet with several layers of paper towels or a clean brown paper bag, which will absorb excess oil from the freshly fried latkes. On a second baking tray, place a wire rack – this is where the latkes will cool slightly and maintain their crispness. Set both aside, ready for use. You’ll need either a food processor equipped with a shredding disc or a traditional box grater to prepare your onions and potatoes. For smaller batches, I highly recommend using a hand shredder, similar to my grandmother’s; it yields superior texture. You can find a similar shredder on Amazon. Finally, heat a large, heavy-bottomed skillet over medium-high heat. Pour in about ¼ inch of oil; we’re aiming for a shallow fry, not a deep fry, adding more oil as needed throughout the cooking process.
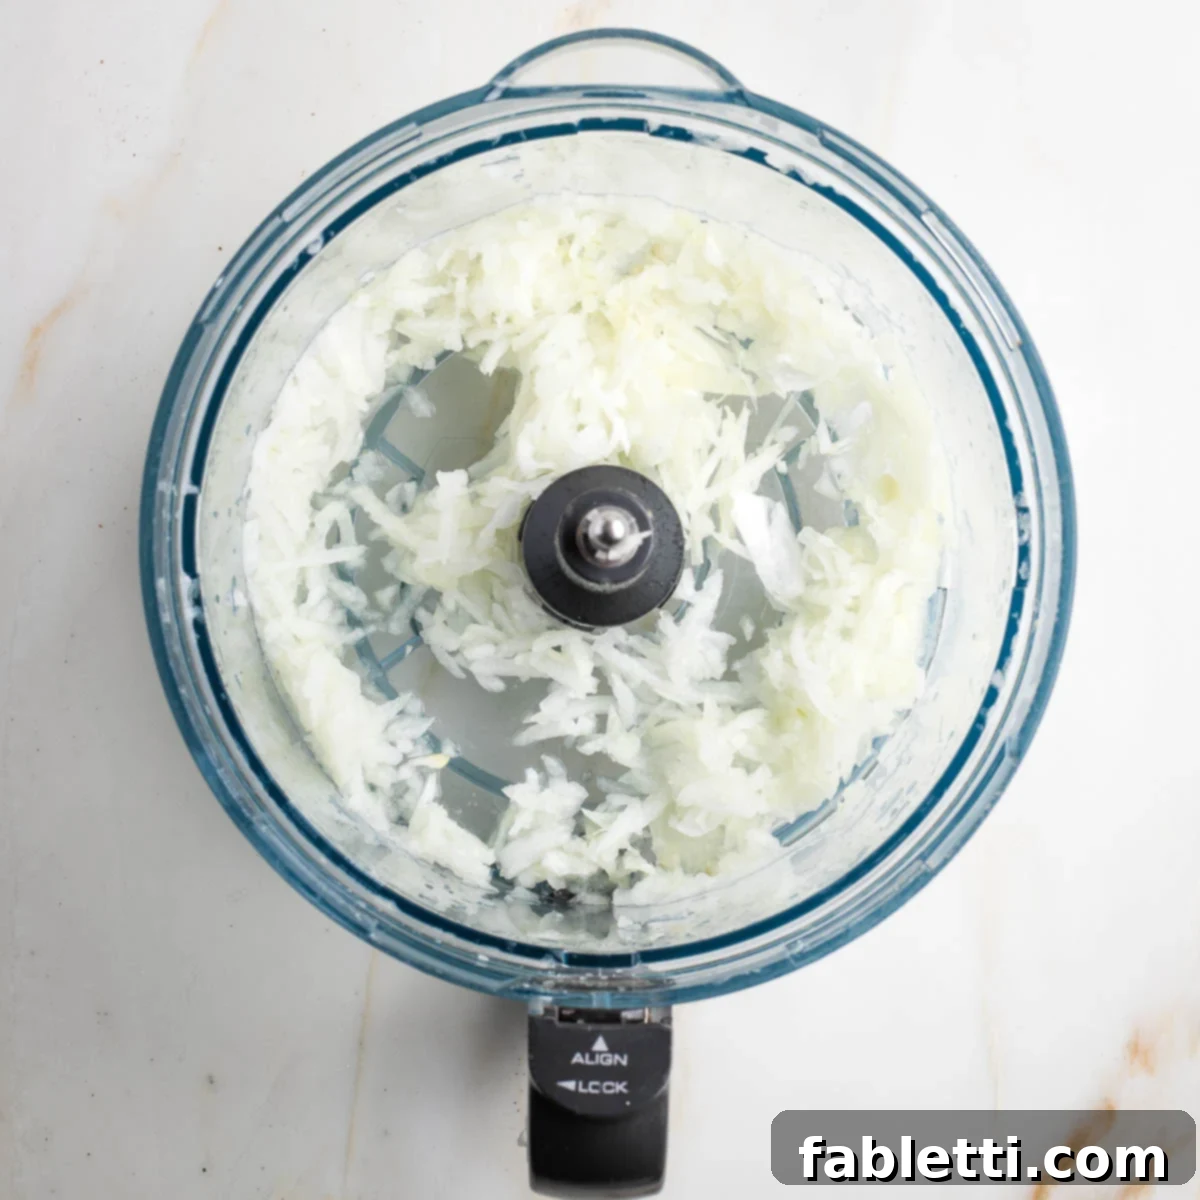
Step 1: Shred the Onion. Begin by shredding your onion. For larger quantities, the shredding disc of a food processor is incredibly efficient. However, for smaller batches, I find that hand-shredding yields a superior texture. Do not wash the food processor bowl (if used) as you will use it again for the potatoes, allowing any residual onion flavor to blend.
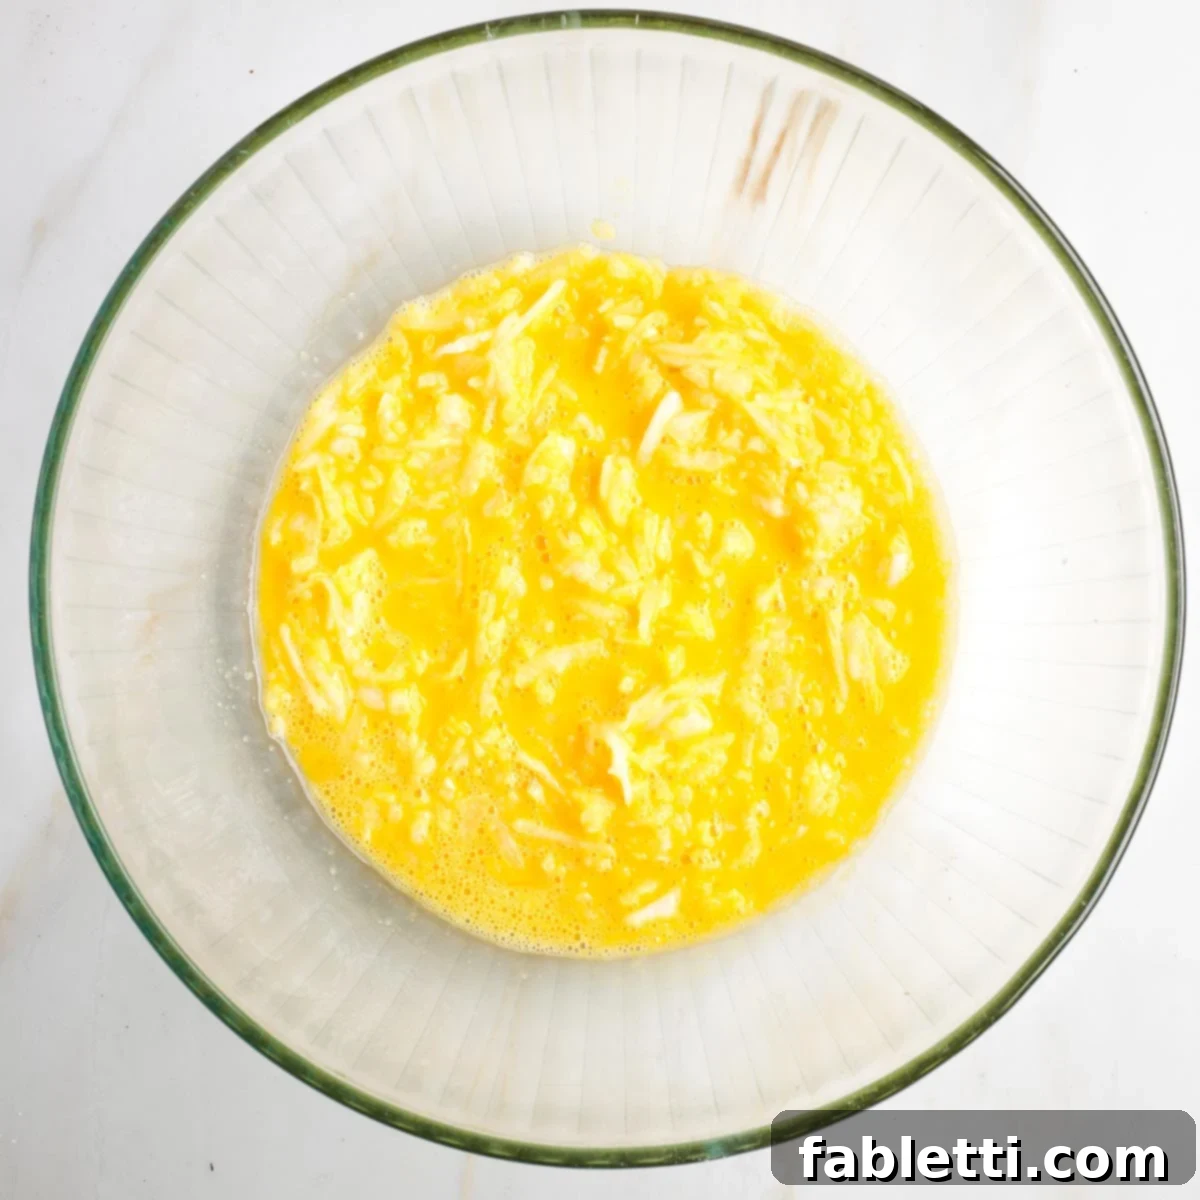
Step 2: Combine Eggs and Onion. In a spacious mixing bowl, vigorously whisk the eggs until they become light and frothy. This aeration is important for the latke’s texture. Then, incorporate the shredded onion, including any accumulated juices, mixing thoroughly to combine.
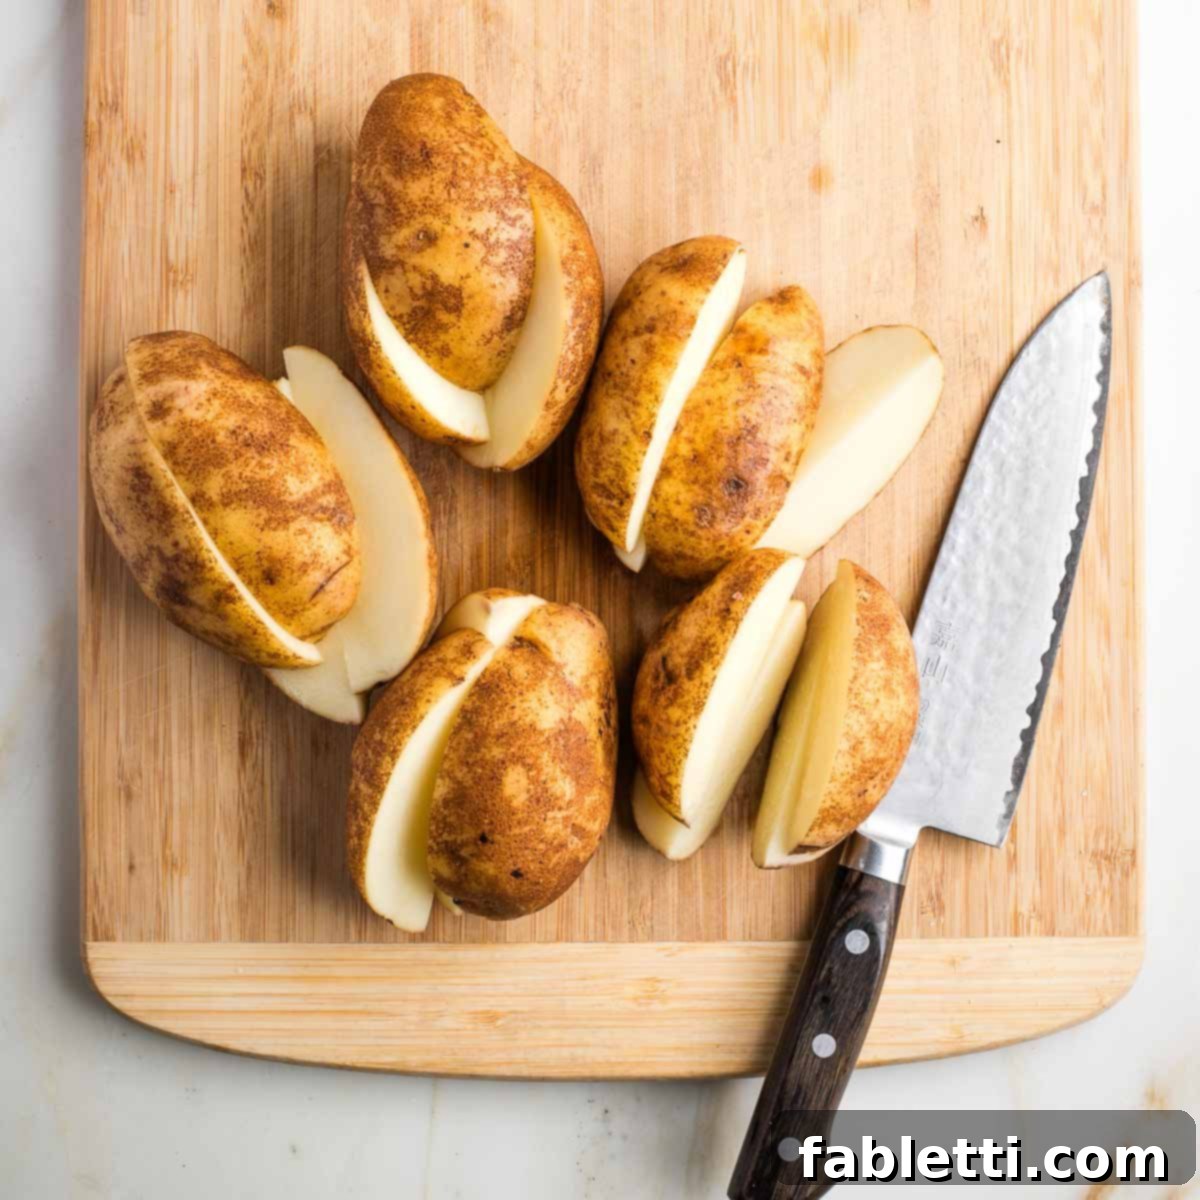
Step 3: Prepare the Potatoes. Scrub the potatoes thoroughly under running water; peeling is not necessary for this recipe, as the skin adds rustic charm and nutrients. Carefully cut out any bruised sections or eyes. Then, slice each potato lengthwise into quarters, preparing them for shredding.
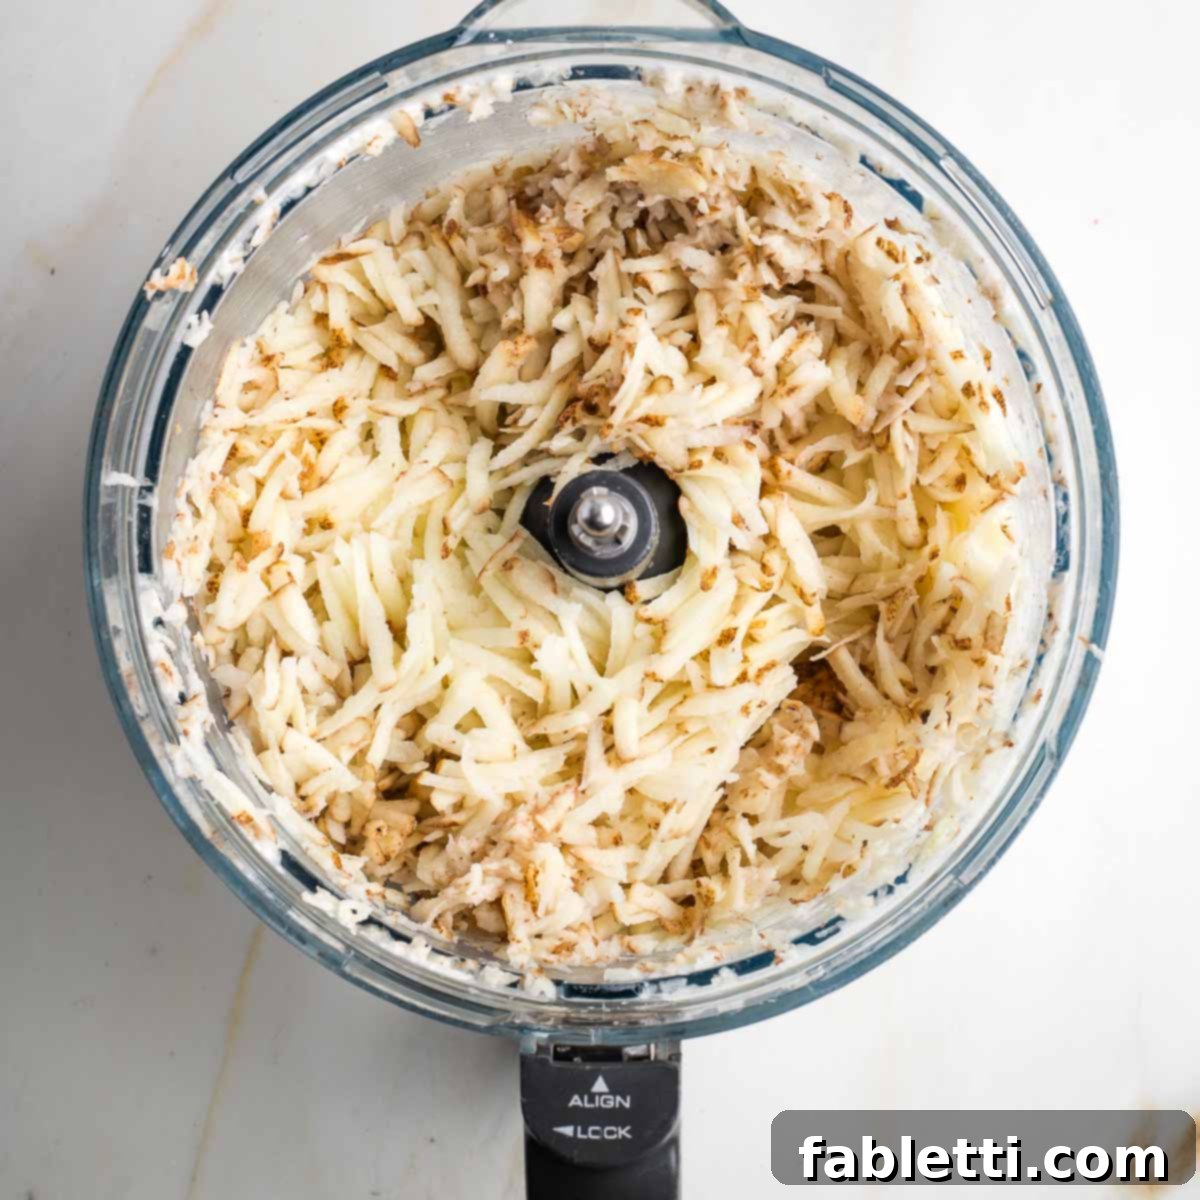
Step 4: Shred the Potatoes. Proceed to shred the potatoes. A food processor makes this step incredibly quick and effortless, particularly for larger batches. However, if you don’t have one, don’t worry – I’ve made countless batches by hand, and you can too! Utilize the equipment you have available to achieve uniform shreds.
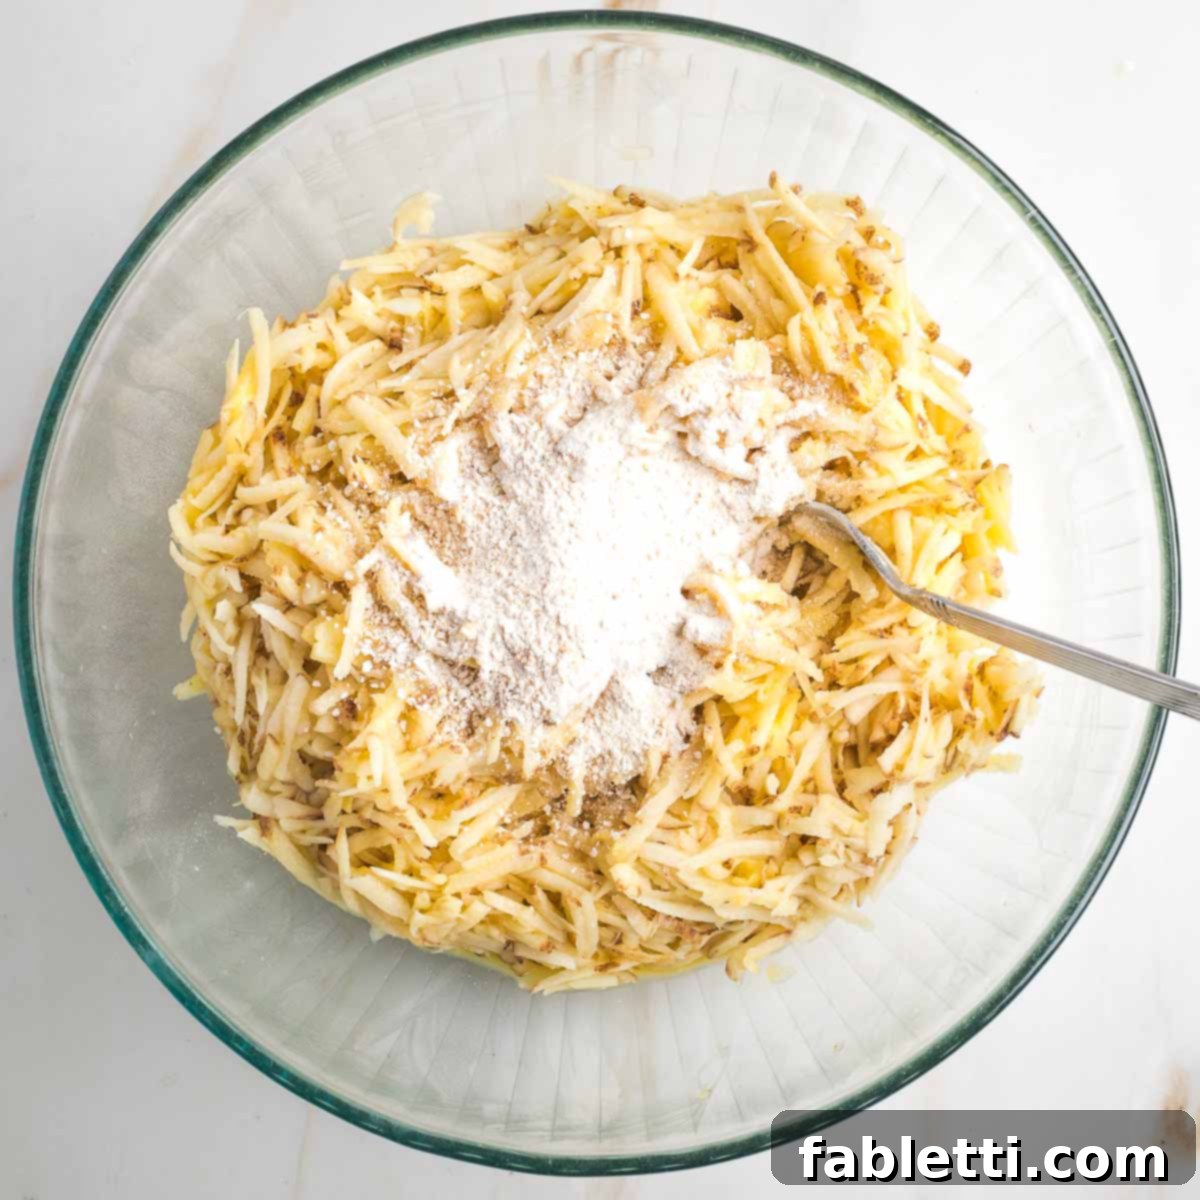
Step 5: Mix the Batter. Add the freshly shredded potatoes to the large bowl containing the egg and onion mixture. Mix everything together thoroughly until well combined. Next, sprinkle the matzo meal evenly over the potato mixture and mix again, ensuring it’s fully incorporated. The matzo meal will absorb excess moisture and act as a binder.
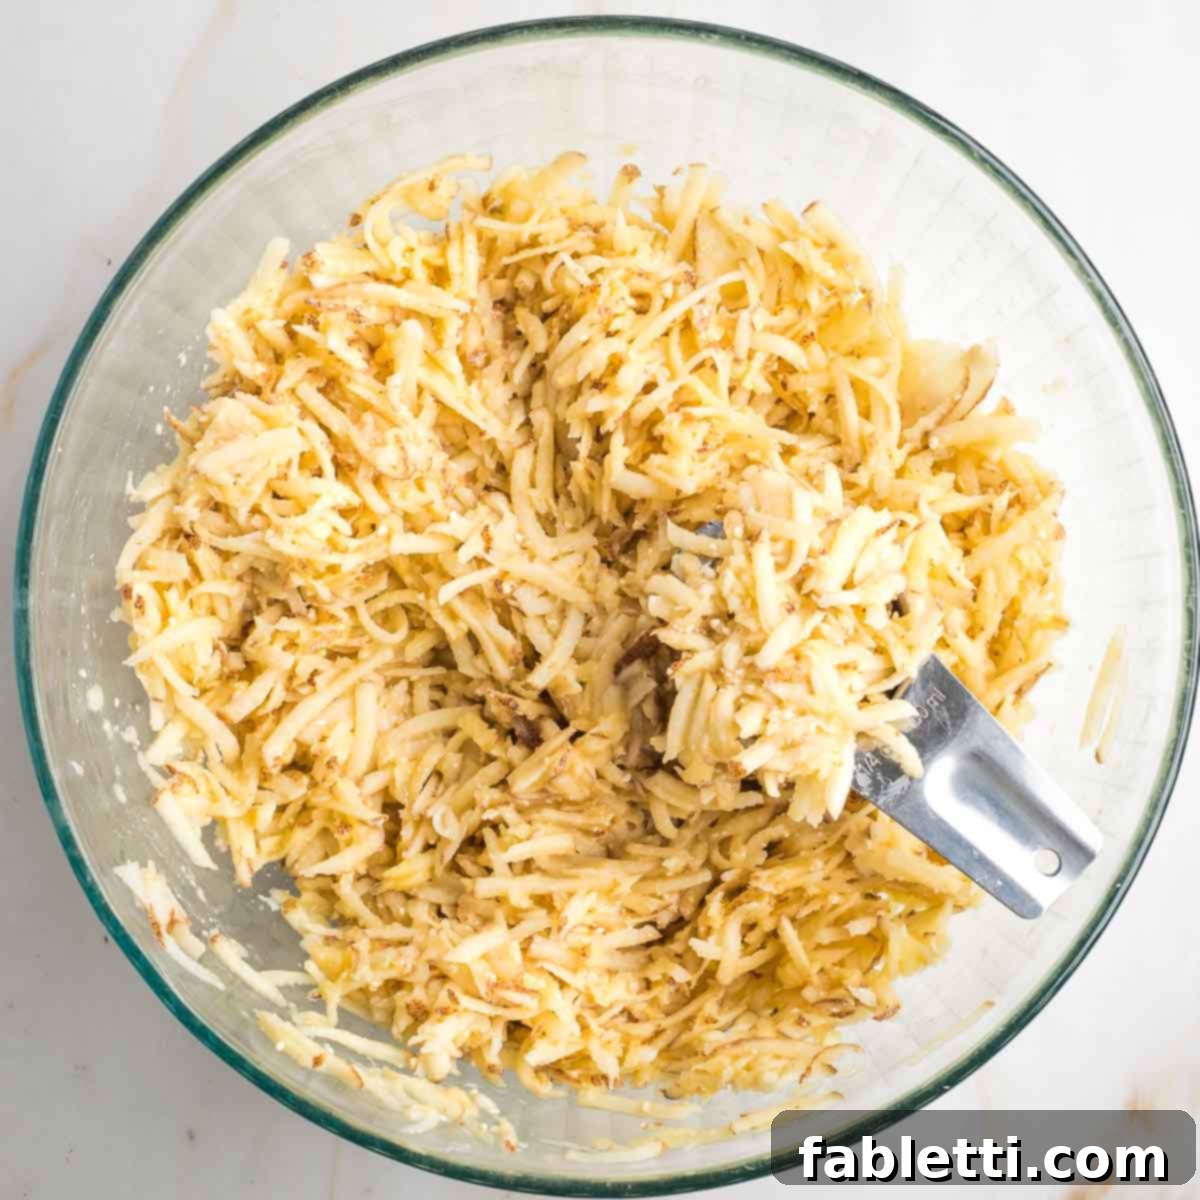
Step 6: Portion and Fry. Using a ¼ cup measuring cup, scoop out portions of the latke mixture and carefully place them into the hot pan with the heated oil. It’s crucial to work quickly at this stage to prevent the potato mixture from releasing too much liquid. If you notice excess moisture developing in the bowl over time, mix in an additional tablespoon of matzo meal as needed to maintain consistency.
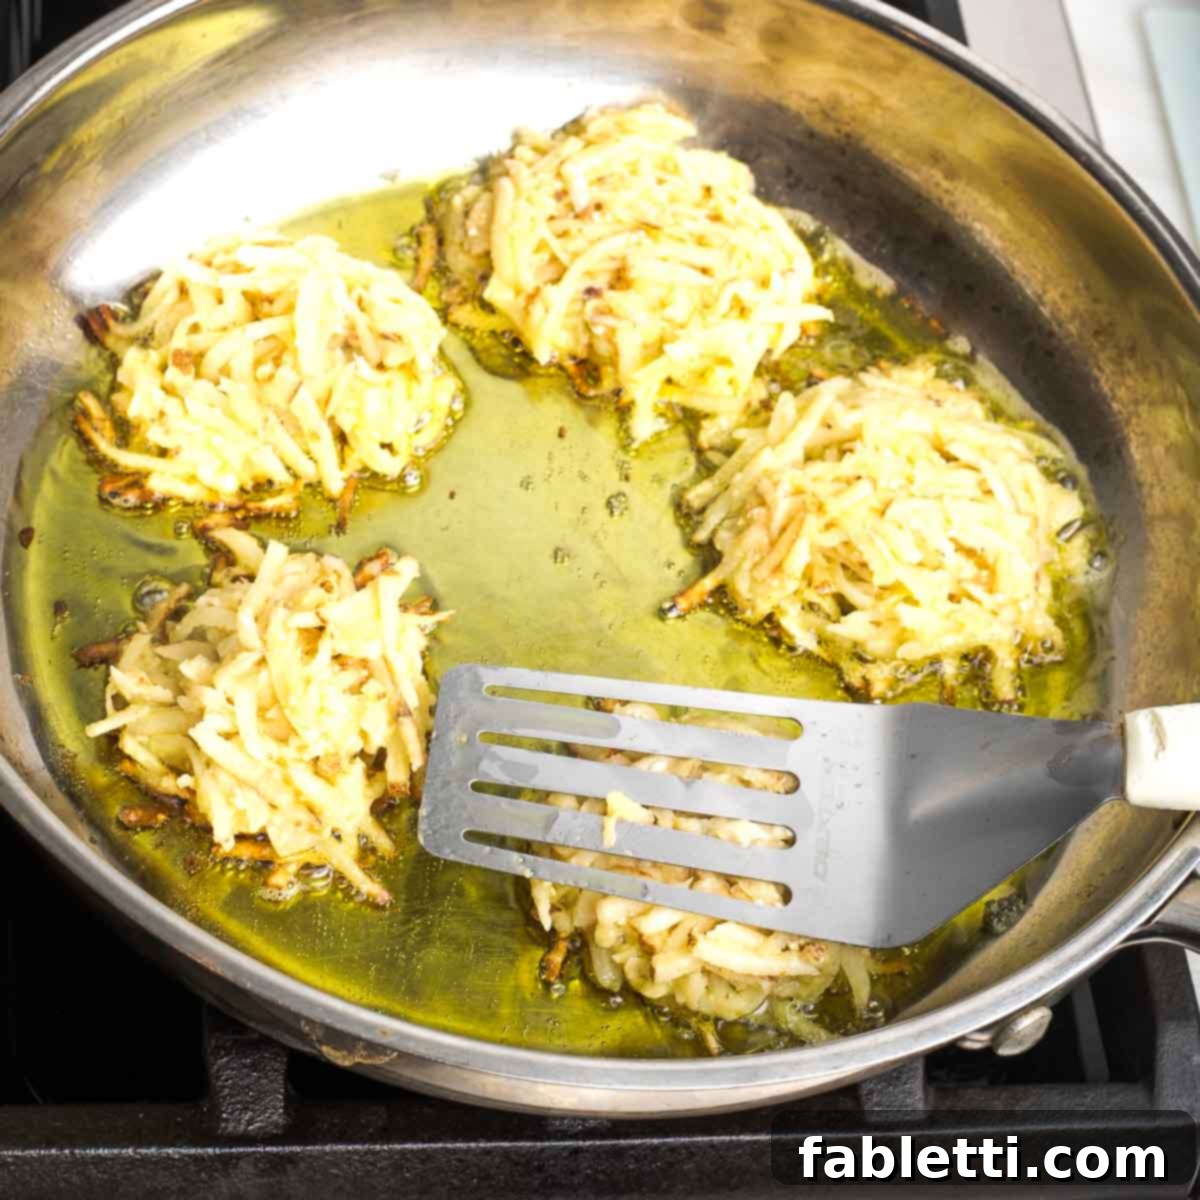
Step 7: Flatten and Flip. Immediately after placing each scoop of latke mixture into the hot oil, use the back of a spatula to gently flatten it into a uniform, round shape. This ensures even cooking and crispness. Allow the latke to fry undisturbed until the bottom turns a rich golden brown and the edges appear crispy. Then, carefully flip it to the other side to cook evenly.
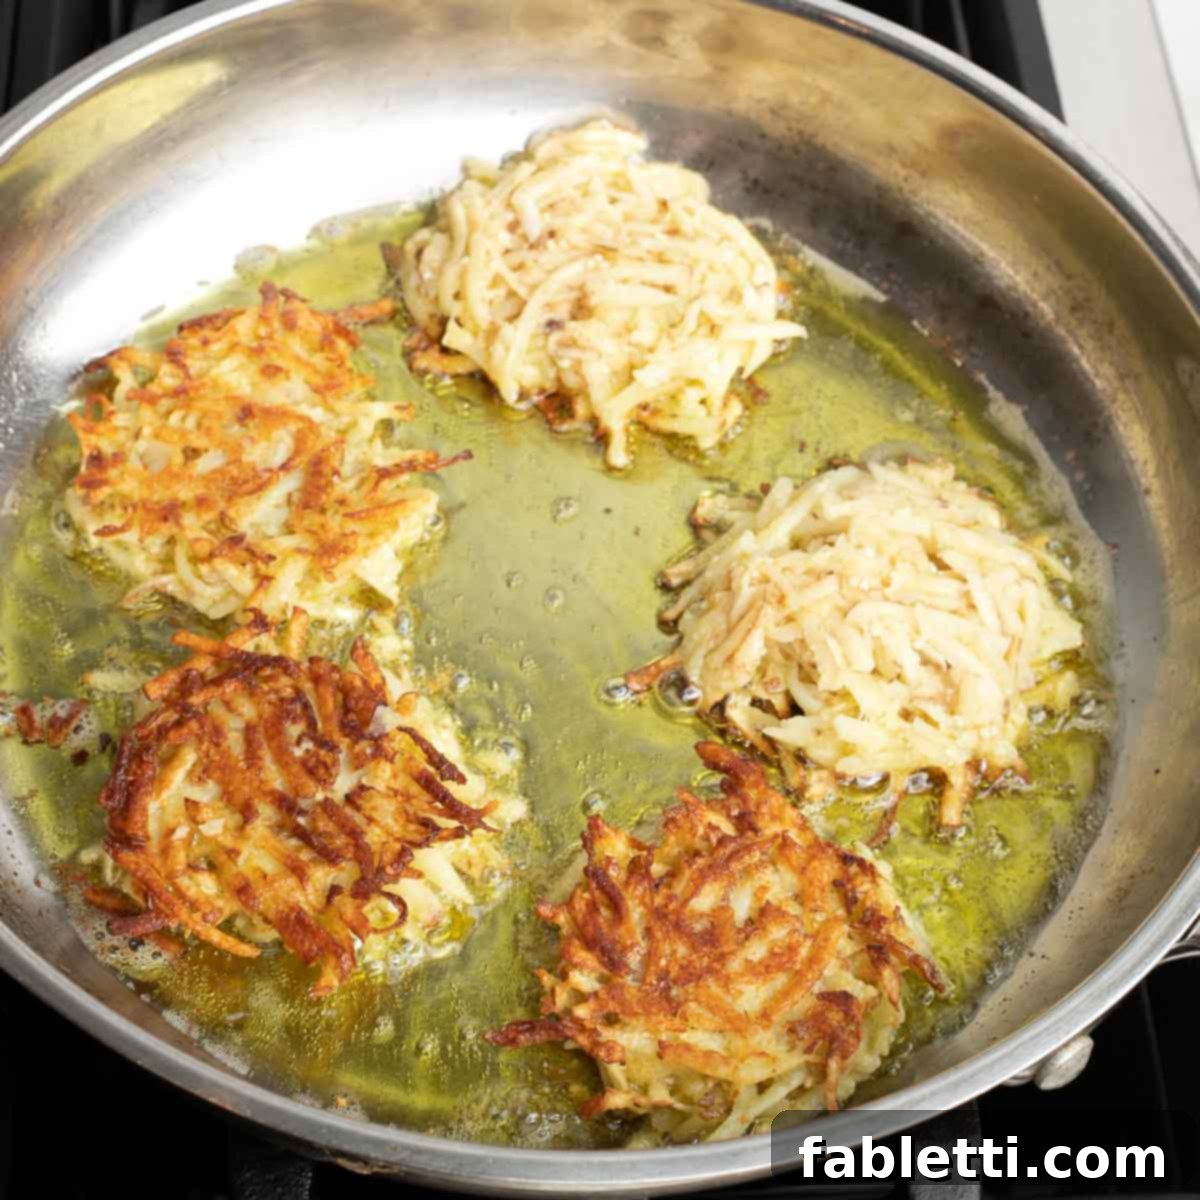
Step 8: Continue Frying. Once the second side of the latke is golden brown and cooked through, transfer it to the prepared baking tray lined with paper towels to drain excess oil. Replenish the pan with additional oil as needed to maintain the ¼ inch depth, ensuring consistent frying. Continue scooping and frying the remaining latke batter until all of it is used, adding fresh oil as required for each batch.
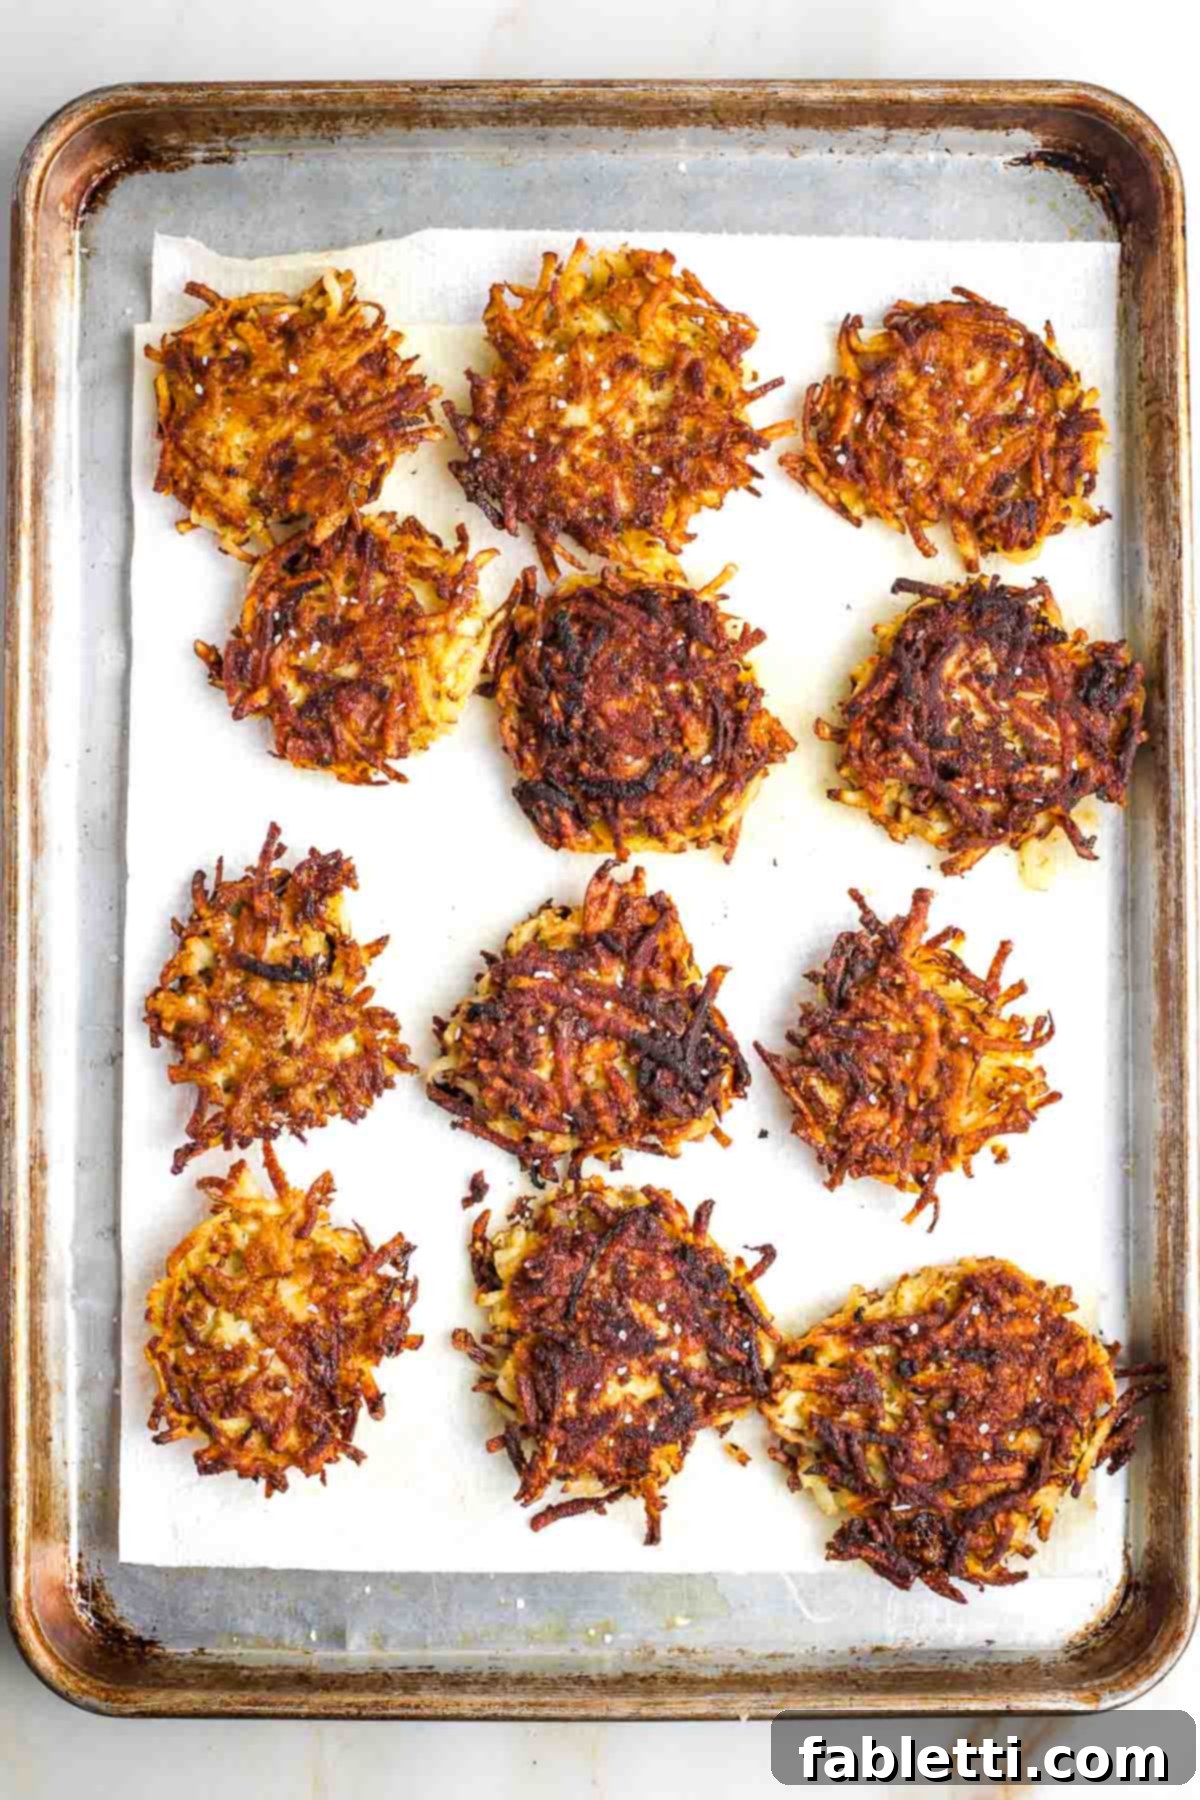
Step 9: Season and Rack. As soon as the latkes are transferred to the paper towel-lined tray, sprinkle them lightly with salt. The salt will adhere beautifully to the warm, slightly oily surface, enhancing their flavor. Allow them to sit for a couple of minutes to drain off any significant excess oil. Then, transfer the drained latkes to the baking pan fitted with a wire rack. This critical step ensures air circulation, preventing them from becoming soggy.
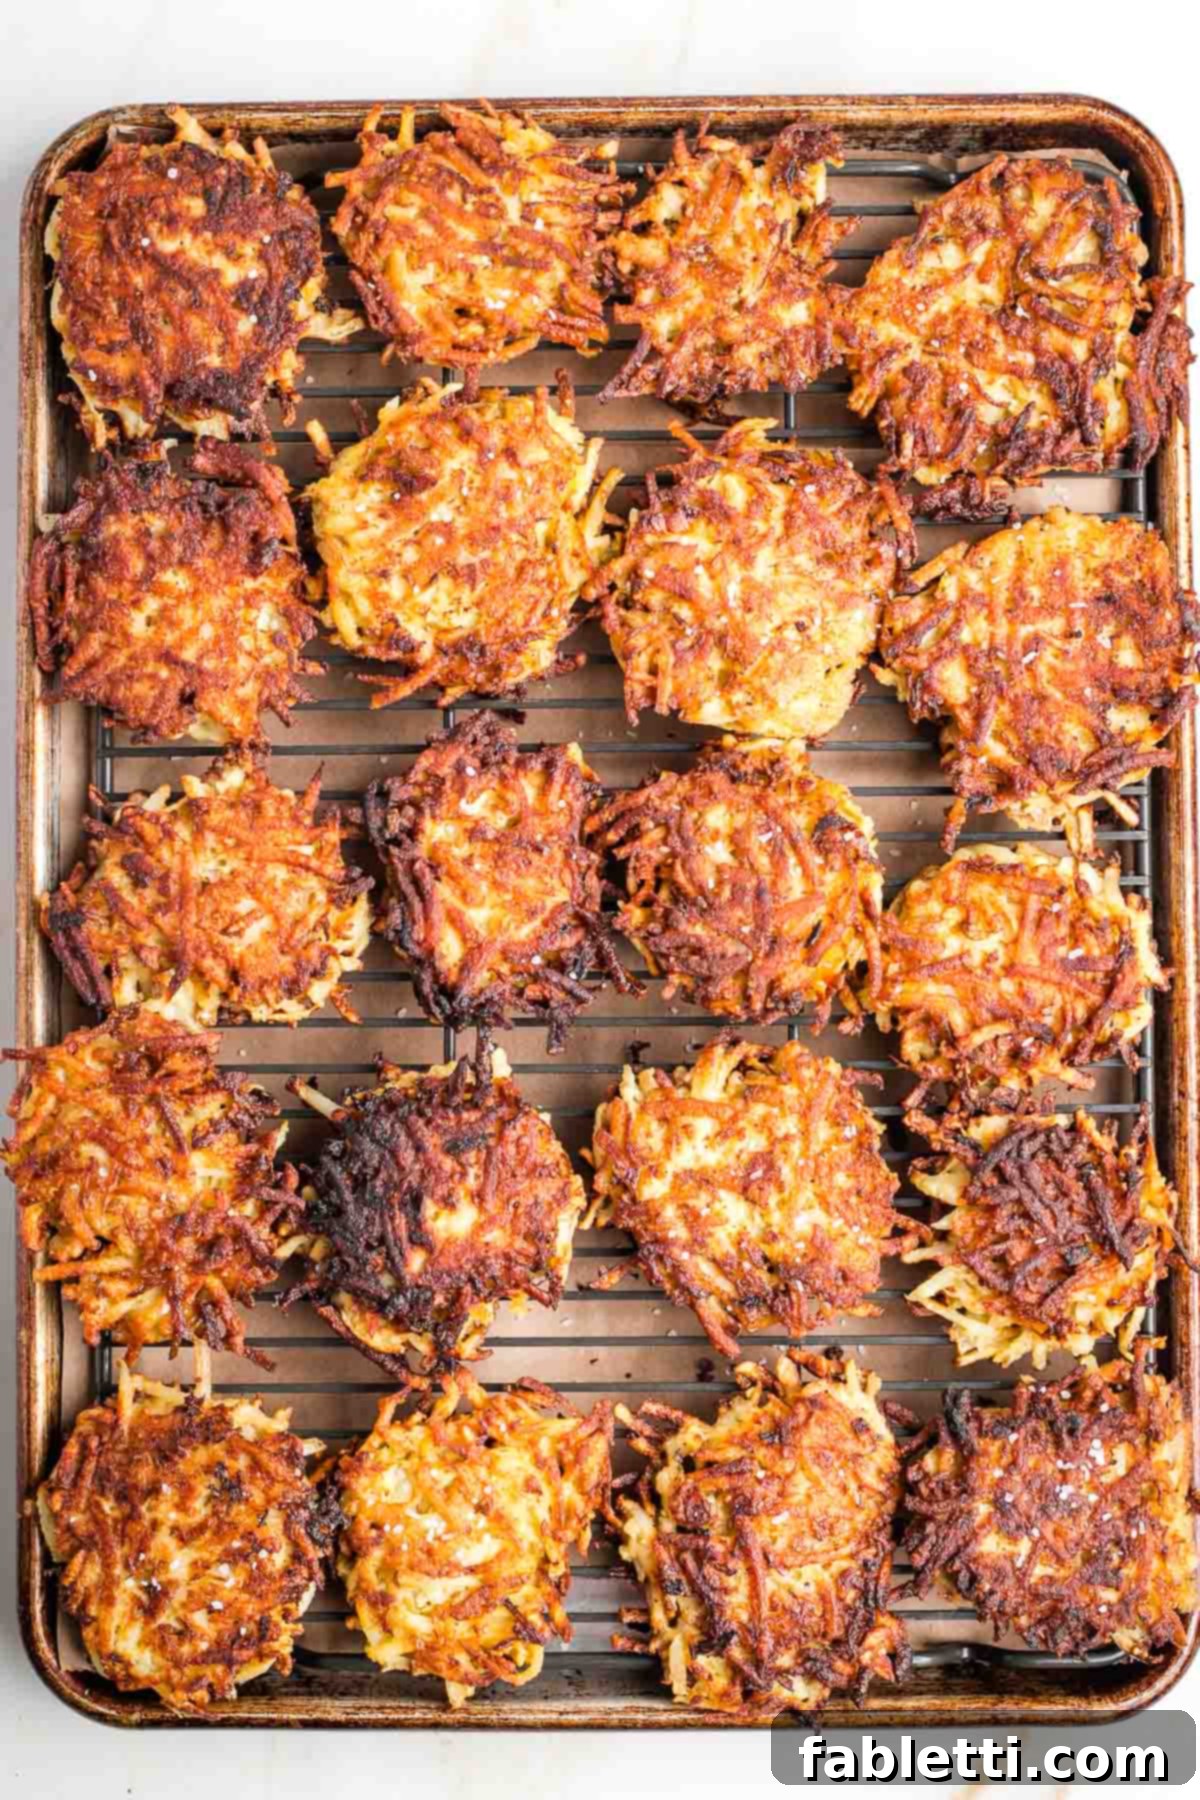
Step 10: Keep Warm. If you’re not serving the latkes immediately, transfer the baking sheet with the wire rack into a preheated 200°F (95°C) oven. This low temperature will keep them wonderfully warm and crisp without further cooking, ensuring they’re perfect for serving when your guests are ready.
Mastering the Crisp: Expert Tips for Perfect Latkes
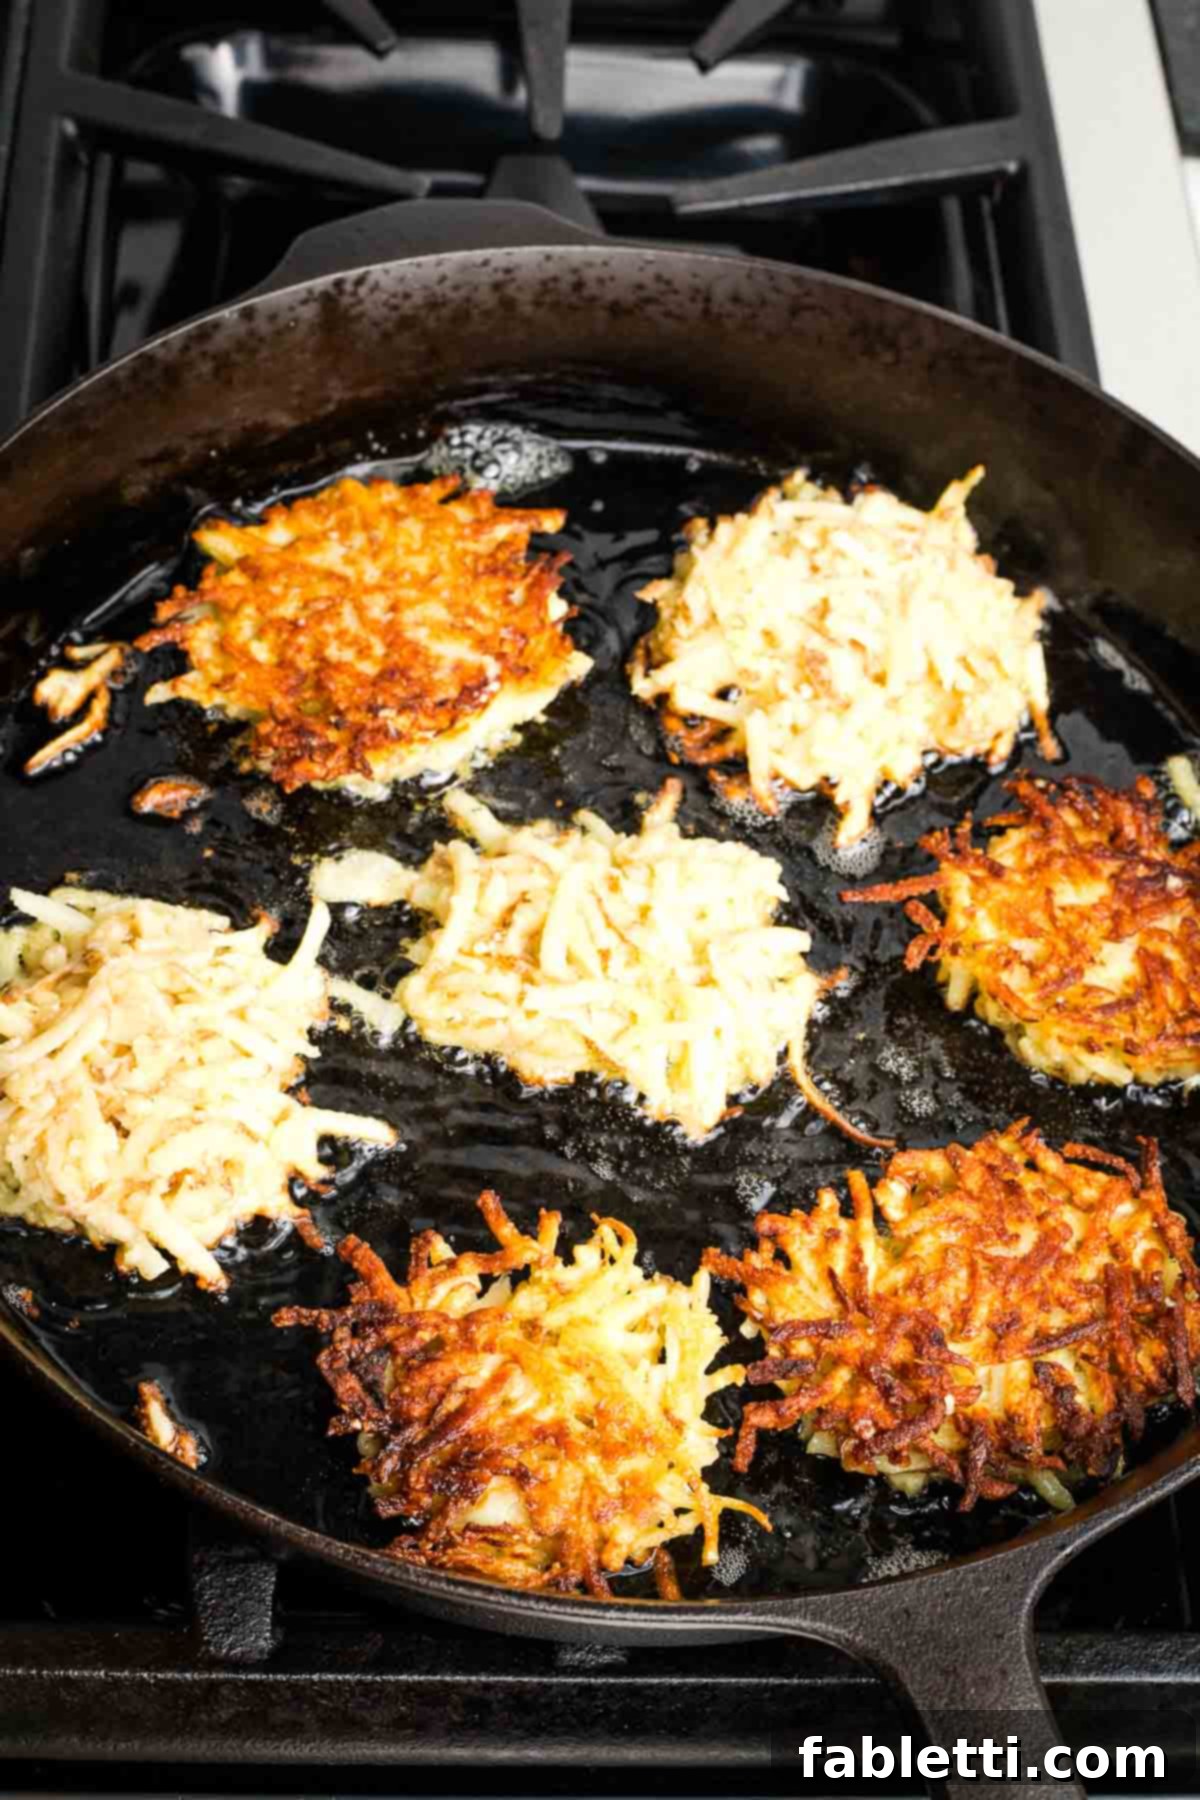
- Choose the Right Skillet: Invest in a heavy-bottomed skillet with high edges. A cast iron skillet is ideal due to its superior heat retention and even cooking. The higher edges will also help contain most of the oil splatter, making cleanup easier. Avoid nonstick pans, as they often don’t achieve the necessary crispness. A large electric skillet can also be a game-changer for batch cooking.
- Heat is Key: Always ensure your skillet and the oil are thoroughly hot before you add the latke batter. Placing batter into insufficiently hot oil will result in greasy, soggy latkes rather than crispy ones. The oil should shimmer but not smoke.
- Multi-Task for Speed: If you have the space and confidence, using two skillets simultaneously can significantly expedite the frying process. This is especially helpful for large gatherings, allowing you to get through the batter more quickly before potatoes begin to oxidize and excess liquid accumulates.
- Flatten for Evenness: After scooping the latke mixture into the pan, use the back of your spatula to gently flatten each one into a thin, uniform patty. Thick latkes tend to burn on the outside before the inside cooks through, leading to an undesirable texture. A thin latke ensures maximum crispness.
- Prompt Draining: Do not let your freshly fried latkes sit on oily paper towels or brown bags for too long. While these absorb initial oil, prolonged contact will inevitably lead to sogginess. After a couple of minutes of draining, transfer the latkes to a wire rack. The air circulation beneath the rack is vital for maintaining their crispness.
Classic and Creative Latke Toppings
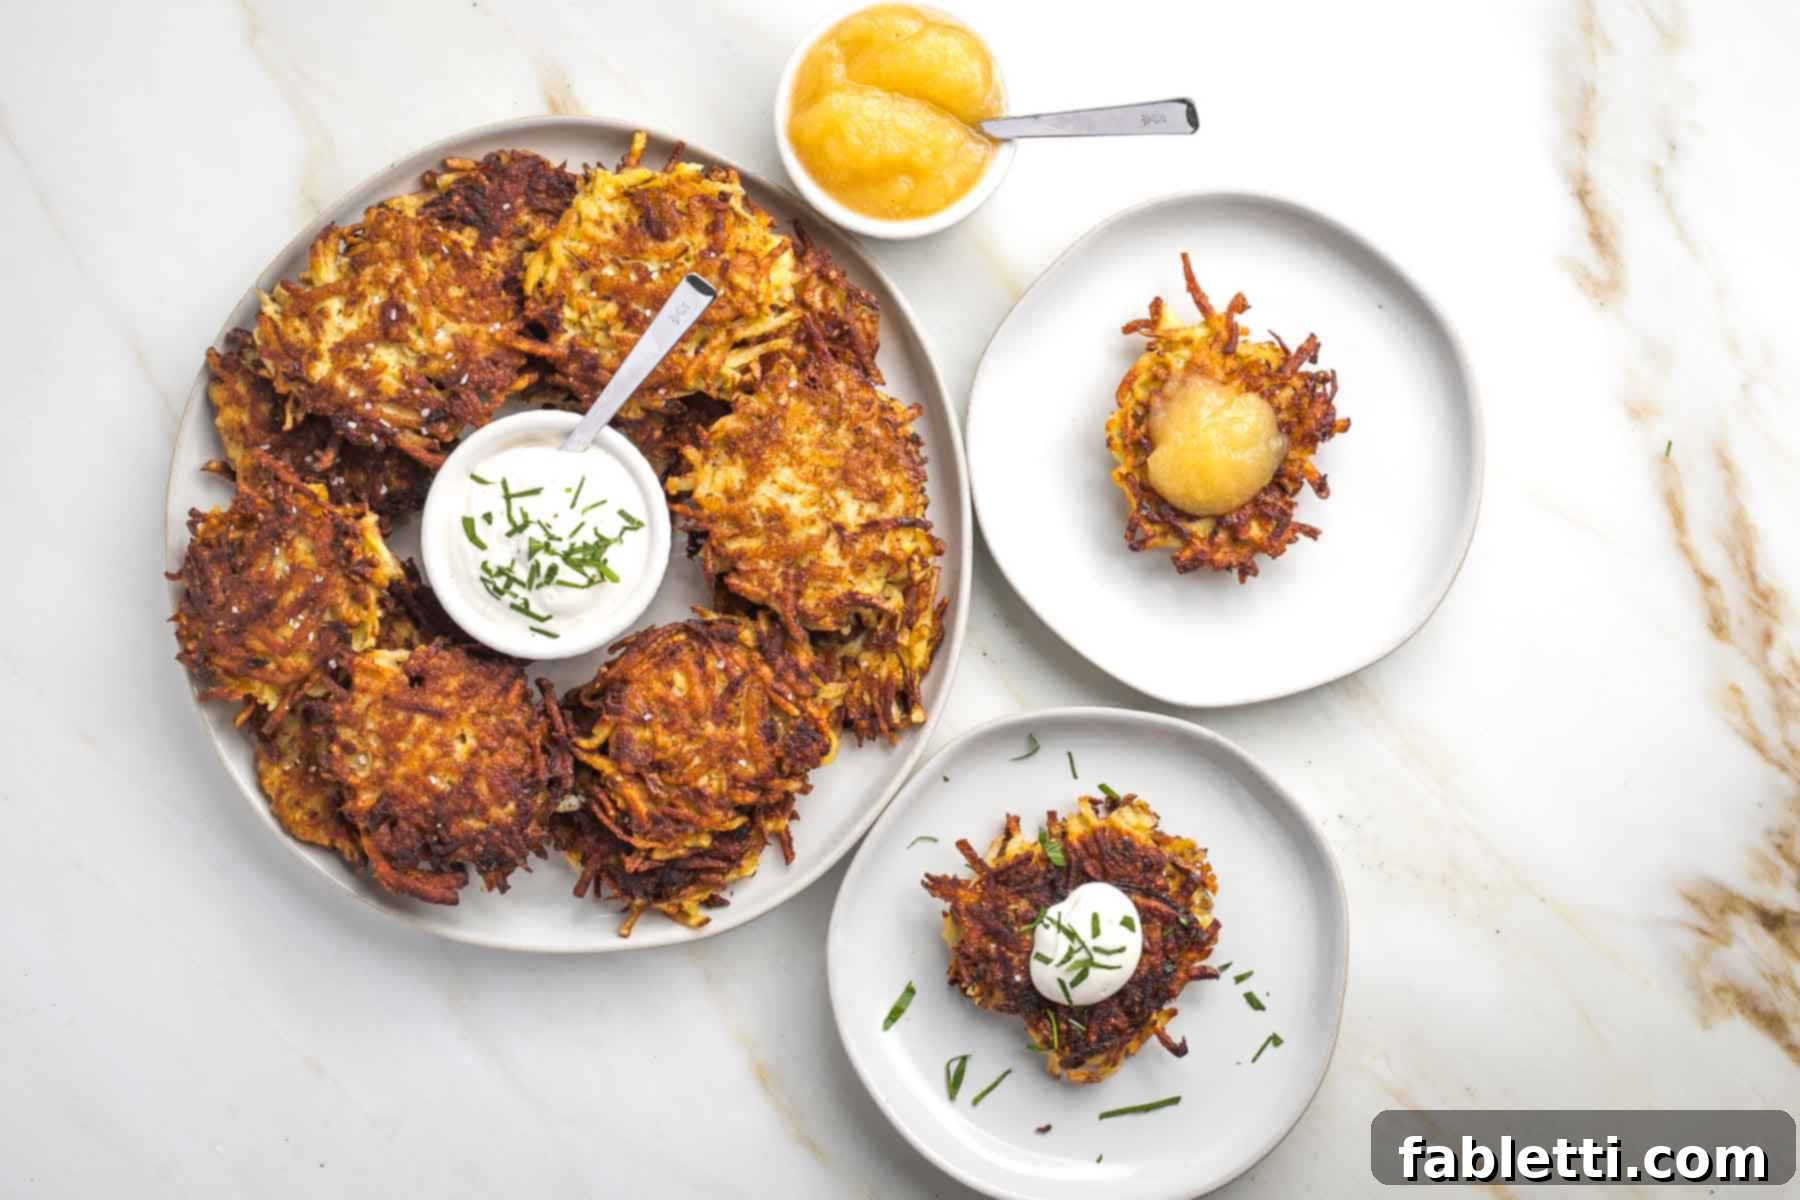
Latkes are fantastic on their own, but a delicious topping can elevate the experience. Here are some favorites:
- Sour Cream: The classic choice! Its cool, tangy creaminess perfectly complements the savory, crisp latke. For those with dietary restrictions or seeking a pareve option, it’s surprisingly easy to whip up homemade dairy-free sour cream.
- Applesauce: Another beloved traditional accompaniment. The sweet and tart notes of cold applesauce provide a refreshing contrast to the rich fried potato. For the freshest taste and to control sugar content, try my no-sugar-added applesauce recipe.
- Ketchup: While perhaps not my first personal preference, ketchup is undeniably a super popular topping, especially among younger eaters. Don’t knock it till you try it!
- Guacamole: For a fresh, creamy, and flavorful twist, I can absolutely get behind guacamole. The rich avocado, tangy lime, and hint of spice offer a delightful modern pairing that works every single time.
- Smoked Salmon or Lox: For an elevated, brunch-worthy latke, top with a dollop of sour cream (or dairy-free alternative) and a slice of smoked salmon or lox. A sprinkle of fresh dill or chives completes this elegant option.
- Chives or Scallions: Simple, yet effective. A scattering of fresh, finely chopped chives or scallions adds a mild oniony bite and a pop of color, enhancing the latke’s inherent flavors.
Debra’s Pro Tips for Latke Success
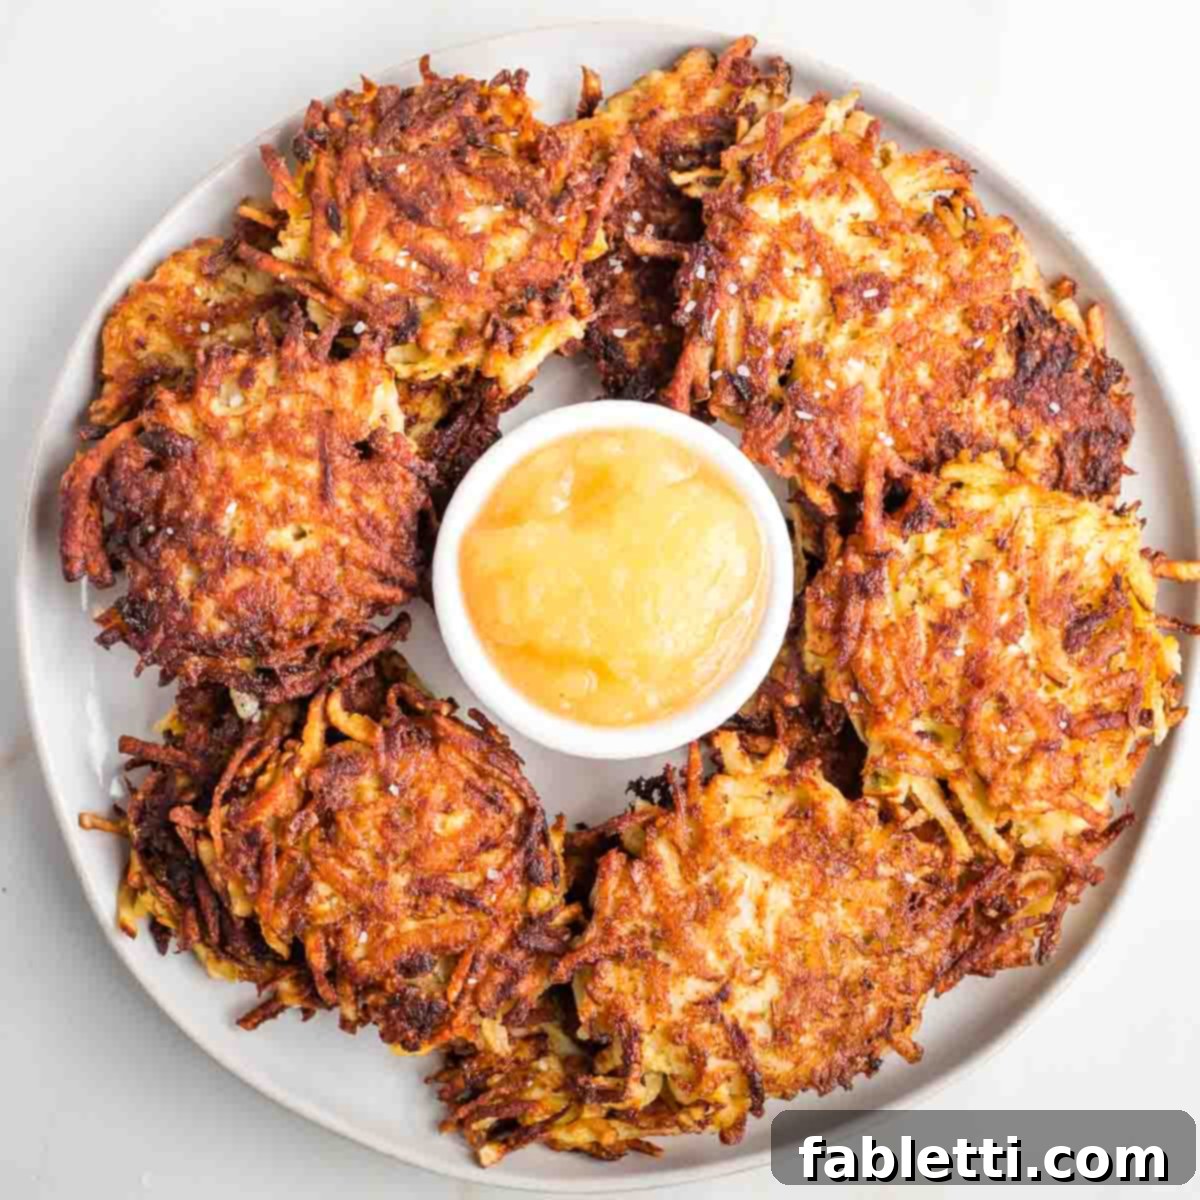
- Work with Urgency: The key to non-soggy, perfectly crisp latkes is speed. Once the potatoes are shredded, they begin to oxidize and release moisture rapidly. Ensure all your other components are ready – eggs whisked, onion added, matzo meal measured, paper-towel-lined draining tray and wire rack prepared, oil heated, and salt handy – *before* you even start shredding the potatoes. This minimizes the time the mixture sits.
- Maximize Frying Efficiency: Utilize your heaviest, largest skillet to accommodate as many latkes as possible per batch. Even better, if you have two large skillets, get them both going simultaneously. This strategy allows you to cook the latke batter much more quickly, significantly reducing the chance of the potato mixture becoming watery and oxidizing (turning brown) before it hits the pan.
- Season Post-Fry: Resist the urge to add salt directly to the latke batter. Instead, wait until the latkes are freshly fried and still warm before sprinkling them with salt. This ensures the salt adheres beautifully to the crispy surface, delivering a more pronounced salty flavor with less sodium overall, compared to mixing it into the wet batter where it can dissolve and lose its impact.
Storing, Freezing, and Reheating Latkes for Anytime Enjoyment
Latkes are often made in large batches, especially during holidays. Knowing how to properly store, freeze, and reheat them ensures you can enjoy their deliciousness long after they’re initially made, maintaining their crisp texture as much as possible.
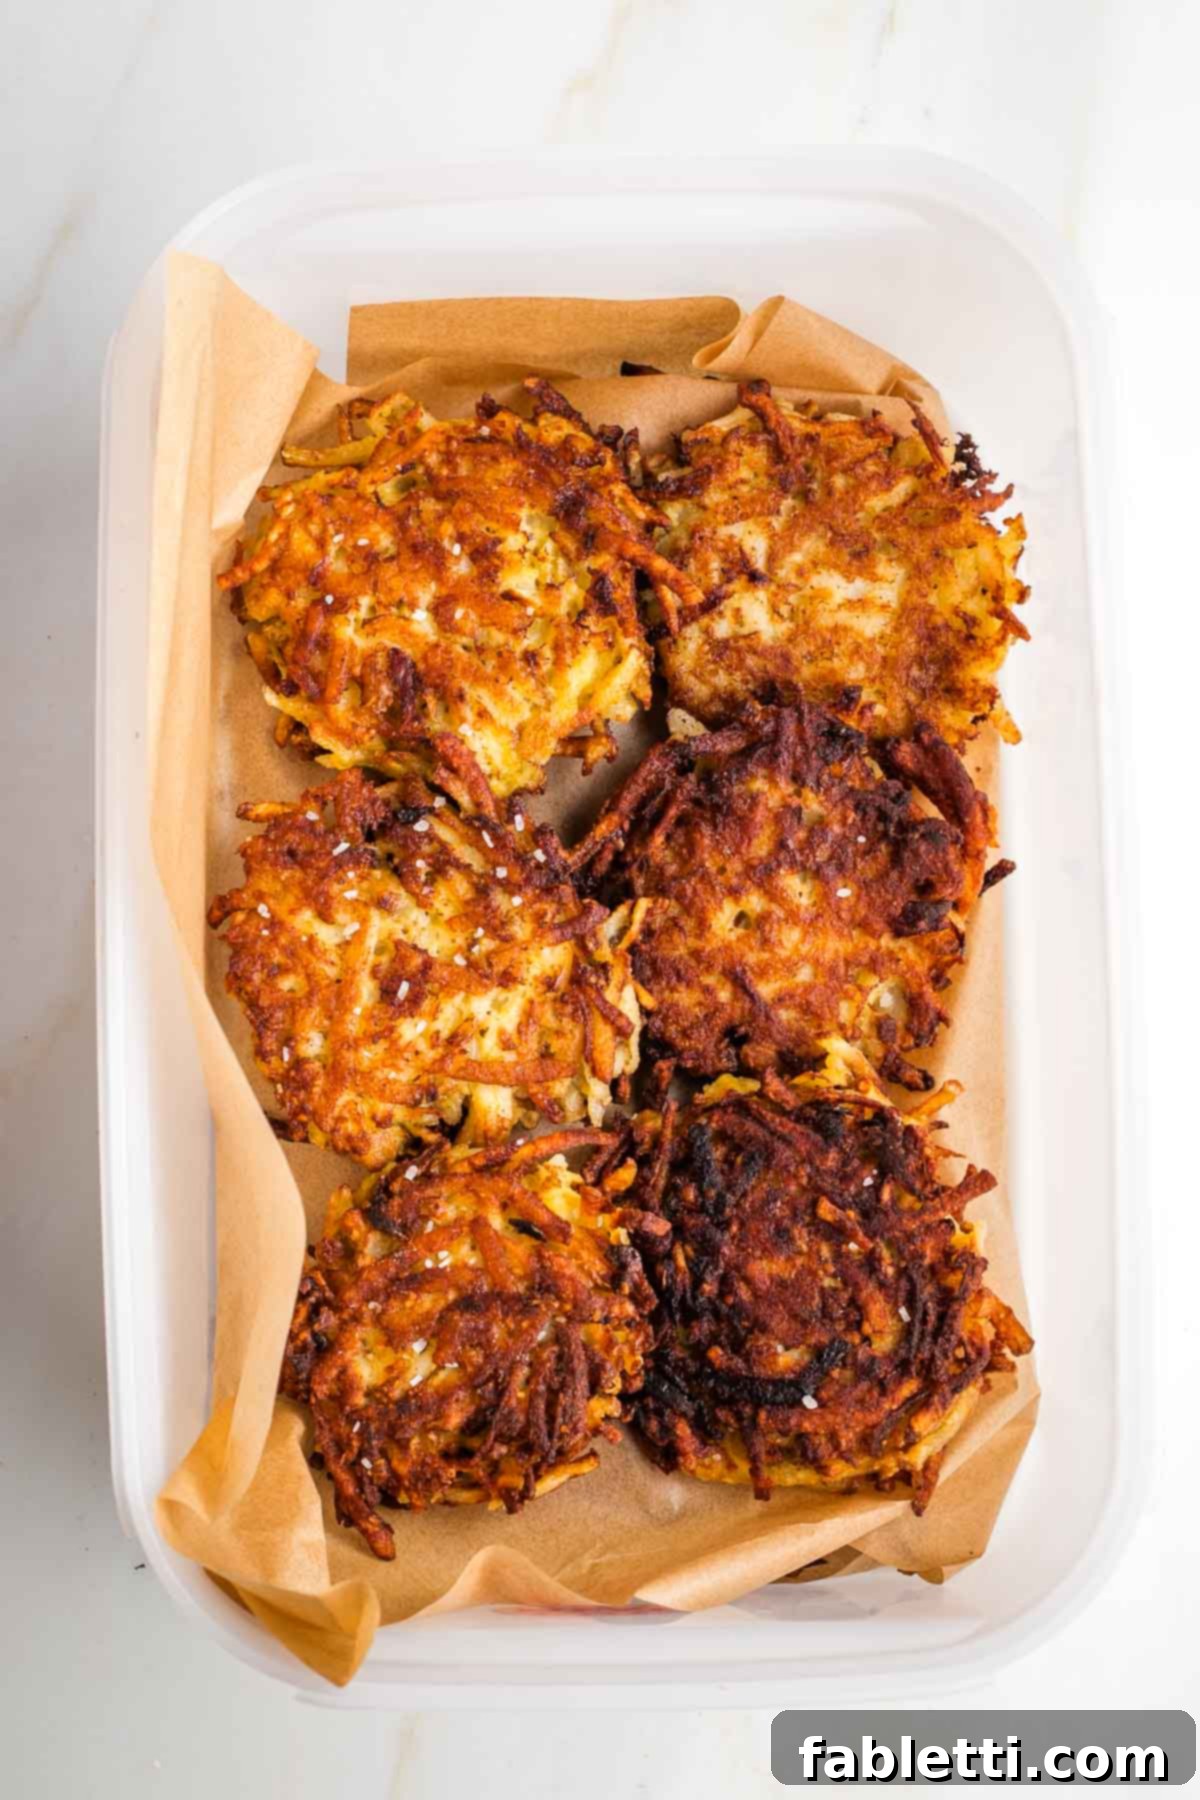
- Storing in the Refrigerator: To store cooked latkes, first allow them to cool completely on a wire rack. This is crucial to prevent condensation and sogginess. Once fully cooled, transfer the latkes into an airtight container. Arrange them in a single layer, and if stacking, use unbleached parchment paper to separate each layer. This prevents them from sticking together and helps preserve their texture. Properly stored, latkes will remain fresh and delicious in the fridge for up to a week.
- Freezing for Longer Storage: Latkes freeze beautifully, allowing you to enjoy them months later. Follow the same cooling procedure on a wire rack. For best results, arrange cooled latkes in a single layer on a baking sheet and flash freeze them for about 1-2 hours until solid. This prevents them from clumping together. Once solid, transfer them to freezer-safe containers or heavy-duty freezer bags, again separating layers with parchment paper. Latkes can be stored in the freezer for up to 6 months.
- Reheating for Optimal Crispness: The goal when reheating latkes is to restore their crispiness.
- Oven Method: For the best results, lay frozen or refrigerated latkes in a single layer on a sheet pan fitted with a wire rack. Preheat your oven to 350°F (175°C) and bake for approximately 15 minutes, or until heated through and crispy.
- Stovetop Method: Alternatively, you can reheat latkes in a heavy-bottomed skillet with a lid over medium-low heat. Add a tiny amount of oil (about a teaspoon) and heat for 2-3 minutes per side, until they are hot and crisp again. This method is excellent for a smaller batch.
- Air Fryer Method: For ultimate convenience and crispness, an air fryer works wonders. Place latkes in a single layer in the air fryer basket (do not overcrowd) and air fry at 375°F (190°C) for 5-7 minutes, flipping halfway through, until hot and crunchy.
If you made this recipe, please share your photos on Instagram by tagging me @dkhealthcoach and using the hashtag #debraklein!
📖 Recipe

Grandma’s Classic Crispy Potato Latkes
My Grandma’s Potato Latke Recipe is simply the best – hands down. These latkes are perfectly crispy, incredibly flavorful, and can easily be adapted for a gluten-free version by using alternative flours like cornmeal, oat flour, or chickpea flour.
Equipment
- Potato Grater
- 12″ Cast Iron Skillet
Ingredients
- 2 ½ lbs. russet potatoes shredded (about 5 large potatoes)
- 1 large yellow onion shredded
- 3 large eggs whisked
- ¼ cup matzo meal plus as much as ¼ cup more, as needed to soak up moisture
- ¾ cup avocado oil
- 1 teaspoon kosher salt
Instructions
- Prepare two large baking sheets: one with a couple layers of paper towels or a brown bag, and the other with a wire rack. Set aside.
- Heat a large, heavy skillet over medium-high heat with ¼ inch of avocado oil.
- Whisk the eggs until frothy in a large mixing bowl.
- Peel the yellow onion and cut it into quarters. Using a food processor fitted with a shredding disc (or a hand shredder), grate the onion. Transfer the shredded onion and any juices to the bowl with the whisked eggs and mix well.
- Wash the russet potatoes thoroughly; peeling is not necessary, but cut out any bruises or eyes. Cut the potatoes lengthwise into quarters and shred them using the food processor (or hand shredder). Immediately add the shredded potatoes to the egg and onion mixture. Mix everything thoroughly, then sprinkle in the matzo meal and mix again until well combined.
- Using a ¼ cup measuring cup, scoop out portions of the latke mixture and carefully drop them into the hot oil in the skillet. Use the back of a spatula to gently flatten each latke into a round, thin patty. Fill the pan without overcrowding. Allow the latkes to cook until the bottom turns golden brown and crispy, then carefully flip them to the other side.
- Once the second side is golden brown and cooked through, transfer the latkes to the baking tray lined with paper towels to drain excess oil. As space becomes available, replenish the pan with oil if needed, and continue scooping and frying the remaining potato mixture until all the latkes are cooked.
- After the excess oil has been soaked up by the paper towels (a couple of minutes), transfer the warm latkes to the prepared baking tray fitted with a wire rack. Immediately sprinkle them with kosher salt.
- Serve the latkes warm with your favorite toppings. To keep batches warm while you finish cooking, place the baking tray with the wire rack in a 200°F (95°C) oven.
- To store, allow latkes to cool completely on the wire rack. Place cooled latkes in an airtight container, separating layers with parchment paper. They will keep in the fridge for up to a week. For longer storage, freeze them in freezer-safe containers for up to 6 months, ensuring layers are separated by parchment. Reheat in a 350°F (175°C) oven for 15 minutes or in a skillet over medium-low heat.
Notes
Squeezing out the liquid: My grandmother never squeezed out the liquid from the potatoes, and neither do I. Instead, I rely on matzo meal (or all-purpose flour) to absorb it. The liquid will accumulate over time, so working quickly is key. If you find too much liquid building up in your bowl, feel free to pour it off, or mix in an additional tablespoon of matzo meal or flour at a time until the desired consistency is achieved. Using two frying pans simultaneously can also help you work faster.
Flour alternatives: To suit various dietary needs, you can easily substitute matzo meal with gluten-free all-purpose flour, cornmeal, oat flour, or chickpea flour. Each will offer a slightly different texture, but all will work as effective binders.
Egg substitutes for vegan latkes: For delicious vegan latkes, replace the three large eggs with a mixture of 1 tablespoon arrowroot powder and 1.5 tablespoons ground flaxseed, whisked thoroughly with ½ cup of water. Let this mixture sit for 5 minutes to thicken before incorporating it into the potato batter.
Flavor variations: Feel free to get creative with your latkes! Replace half of the russet potatoes with sweet potatoes, parsnips, or shredded zucchini for unique flavor profiles and added nutrients. Or, if you’re seeking an even healthier baked option, try my baked brussels sprouts latkes – they’re absolutely delicious!
Nutritional information: The nutritional information provided below is an estimate, based on one serving consisting of 2 latkes, with the entire recipe yielding approximately 20 latkes.
Nutrition
Carbohydrates: 25g
Protein: 5g
Fat: 18g
Saturated Fat: 2g
Polyunsaturated Fat: 3g
Monounsaturated Fat: 12g
Trans Fat: 0.01g
Cholesterol: 56mg
Sodium: 260mg
Potassium: 519mg
Fiber: 2g
Sugar: 1g
Vitamin A: 82IU
Vitamin C: 8mg
Calcium: 27mg
Iron: 1mg
Note
The nutrition calculations were done using online tools. To obtain the most accurate representation of the nutritional information in any given recipe, you should calculate the nutritional information with the actual ingredients you used. You are ultimately responsible for ensuring that any nutritional information is accurate, complete and useful.
