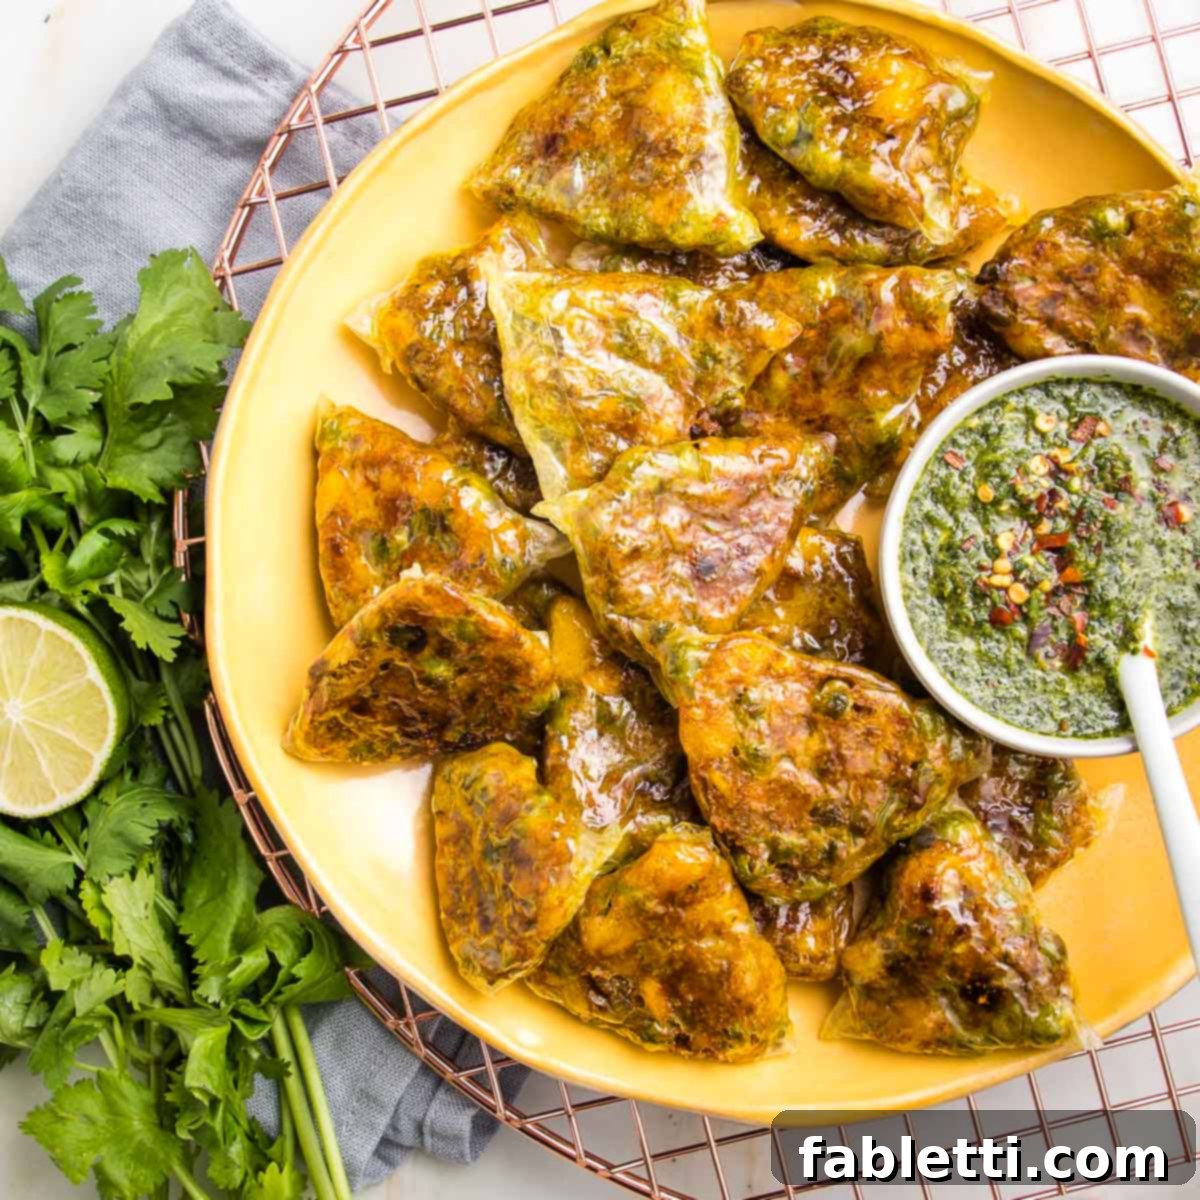
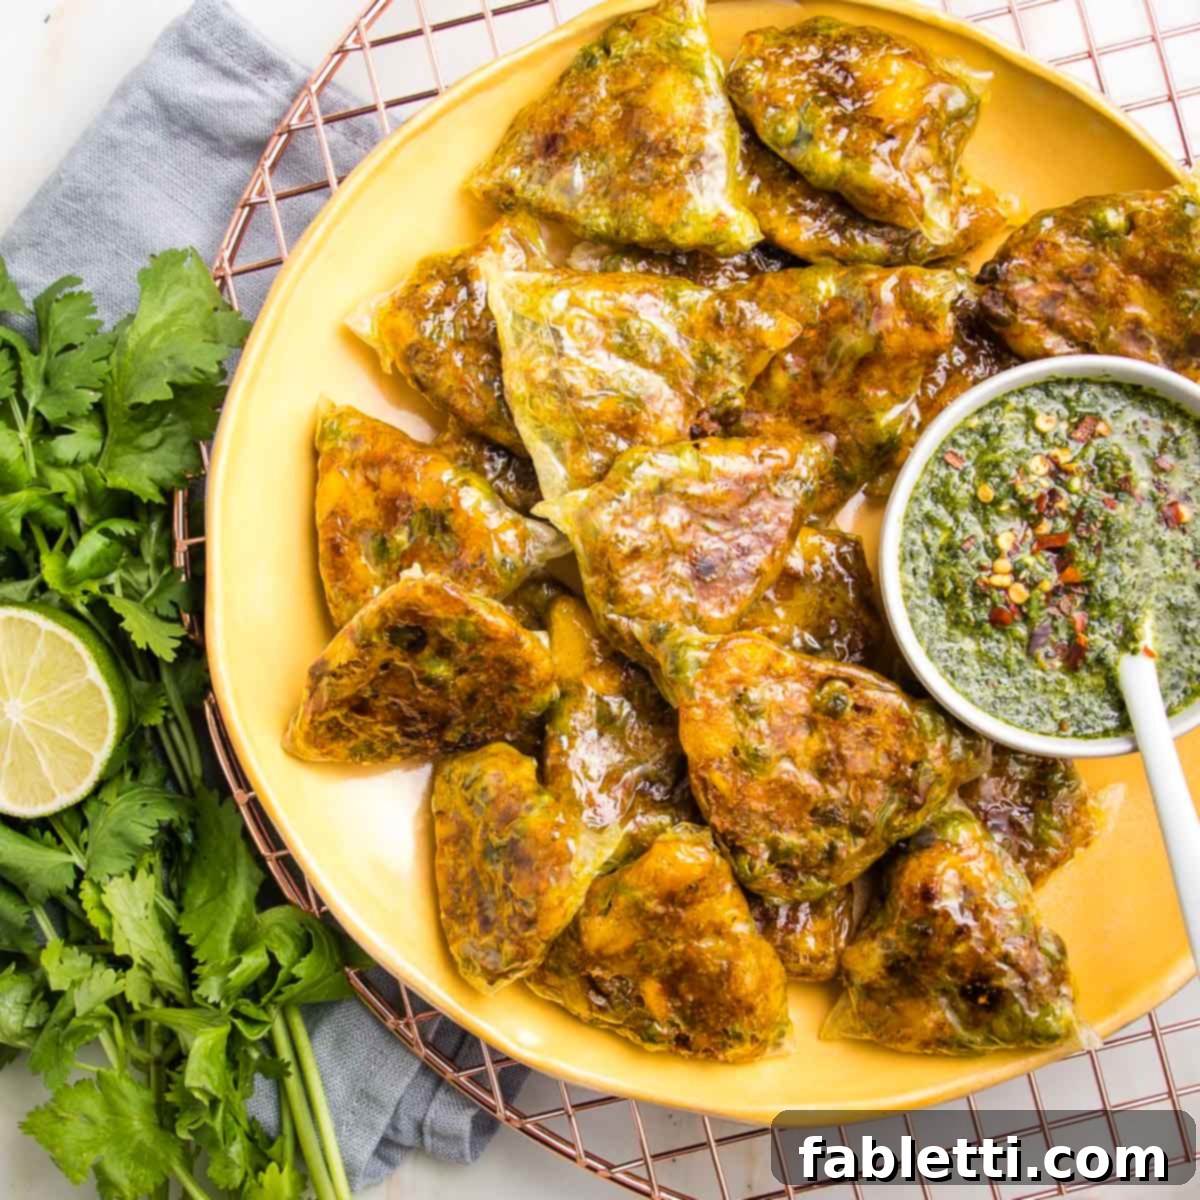
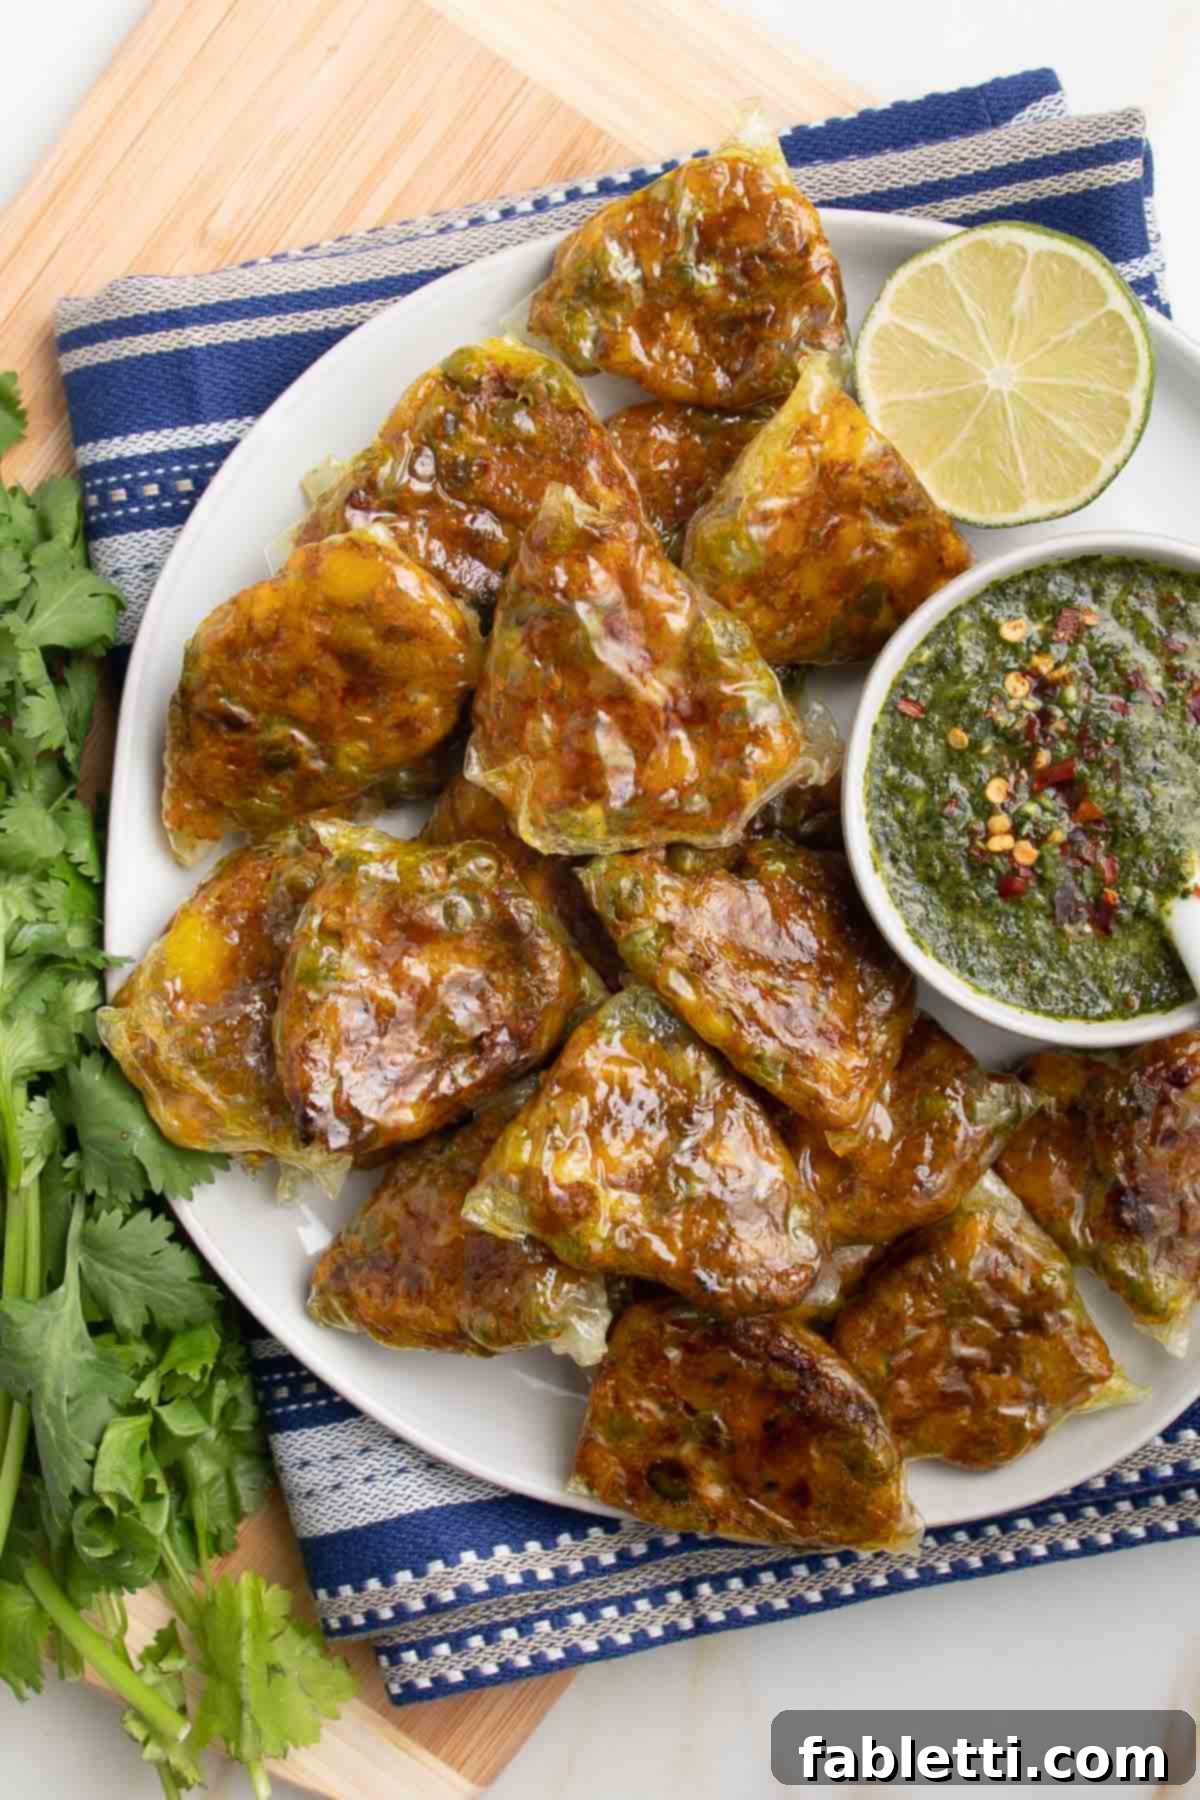
Unlock the secret to an effortless and incredibly delicious appetizer with these **Baked Vegan Samosas**, ingeniously crafted using delicate rice paper wrappers. This recipe transforms the traditional Indian favorite into a gluten-free and health-conscious delight, brimming with a fragrant filling of perfectly spiced potatoes and peas. Served alongside a vibrant, homemade green chutney, these samosas promise an explosion of authentic flavors and a wonderfully crisp texture, all without the need for deep-frying or intricate dough preparation. Prepare to impress your guests and satisfy your cravings with this guilt-free, irresistible snack that’s a guaranteed crowd-pleaser for any occasion.
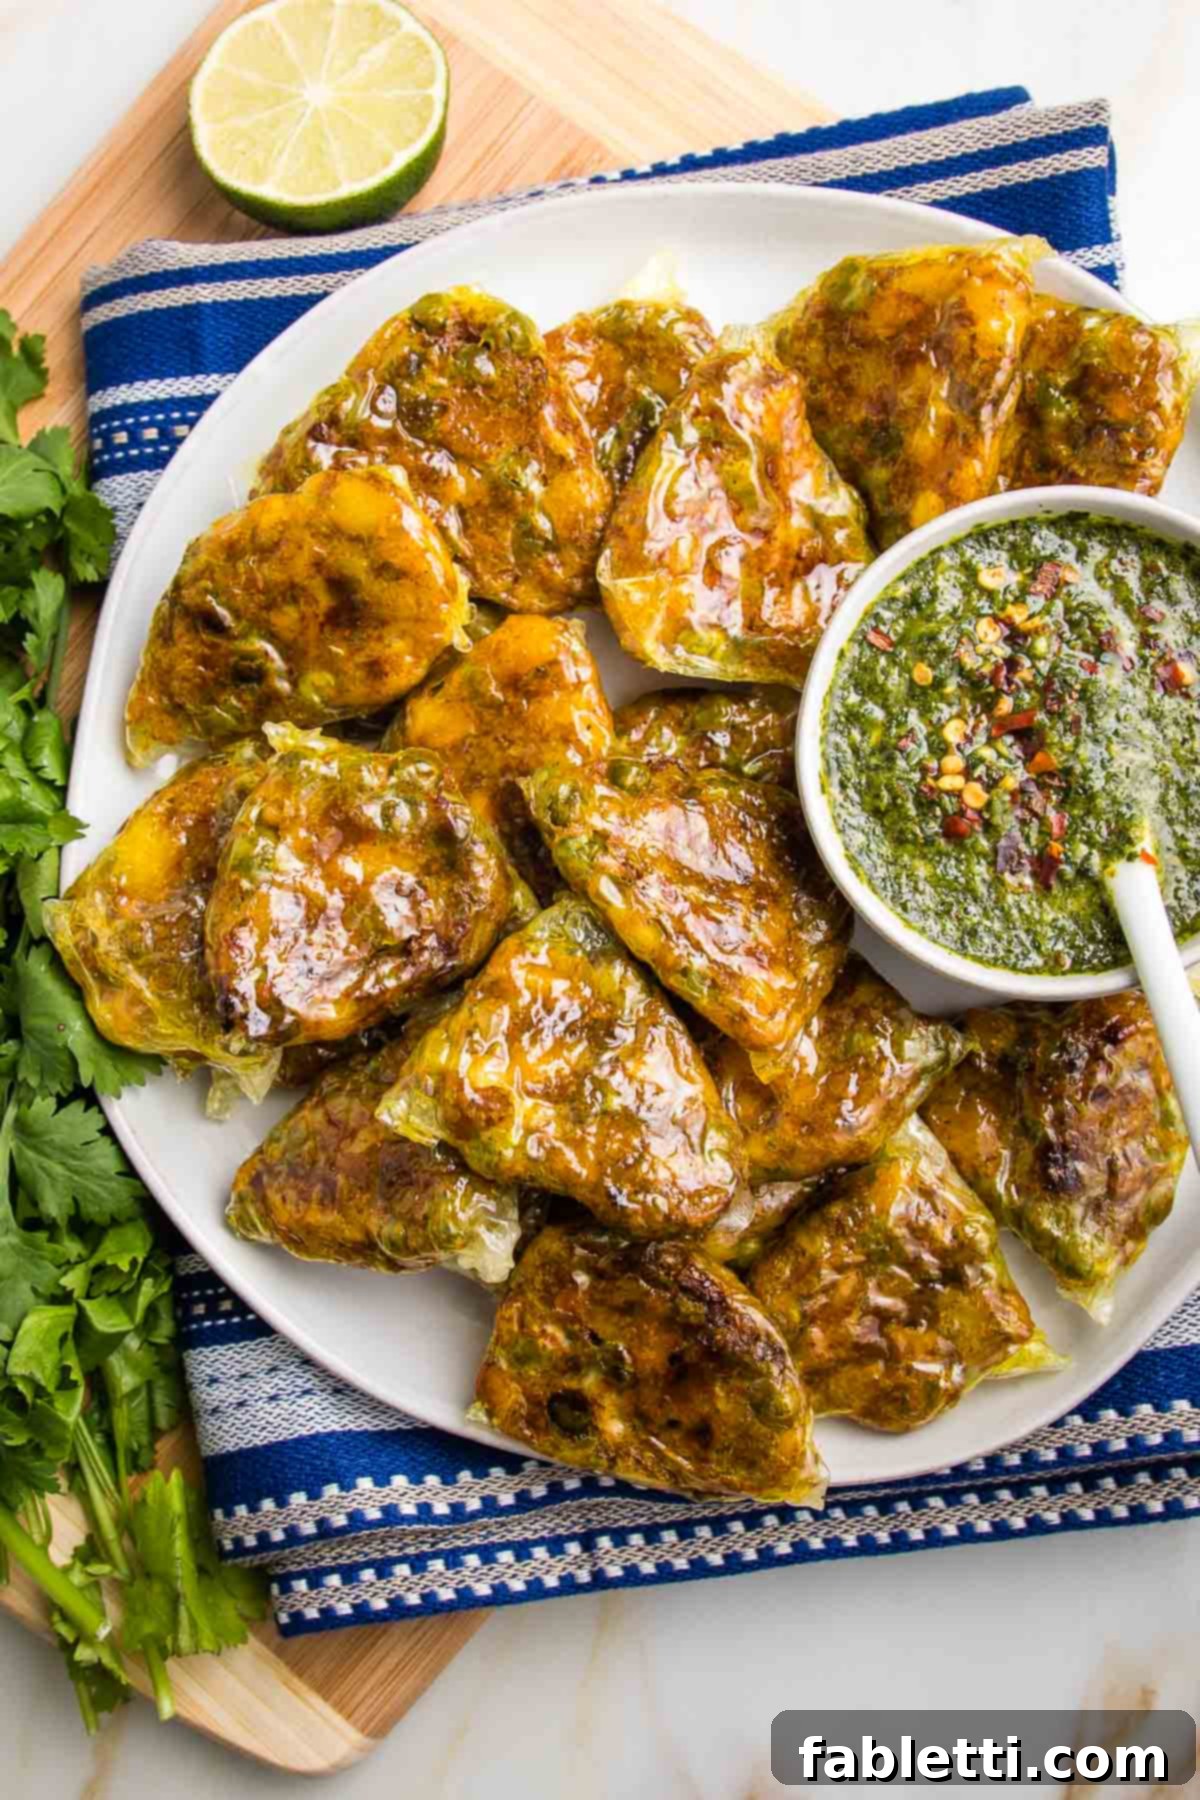
Why Baked Rice Paper Samosas Are a Game-Changer
Imagine enjoying the rich, aromatic flavors of traditional Indian samosas without the heavy oils or the time-consuming process of making dough from scratch. This baked samosa recipe does exactly that! By utilizing thin rice paper wrappers, we eliminate the need for any flour-based dough, making these samosas not only vegan but also naturally gluten-free. This innovative approach significantly reduces preparation time and mess, allowing you to whip up a batch of these savory treats much faster than traditional methods. The result? A perfectly crisp, light, and incredibly satisfying snack that’s healthier, easier to make, and just as flavorful as its deep-fried counterpart. Say goodbye to greasy fingers and hello to a smart, wholesome take on a beloved classic.
The Heart of the Matter: Ingredients for Irresistible Filling
Creating truly delicious samosas starts with selecting the right ingredients that not only contribute to their authentic flavor profile but also offer nutritional benefits. Here’s a detailed look at what makes our vegan samosa filling so special:
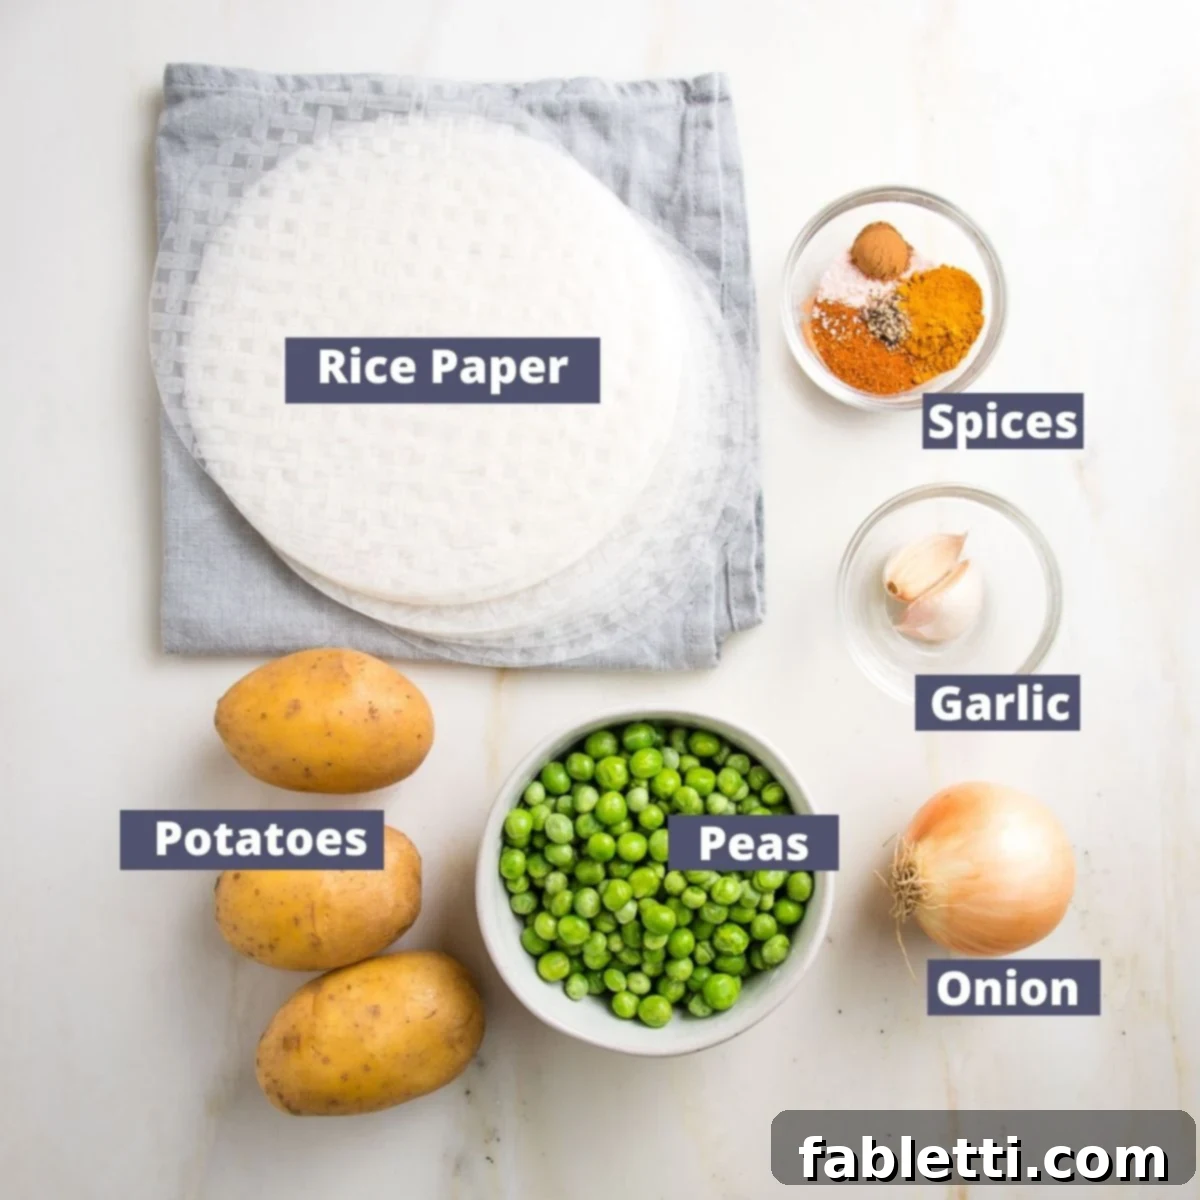
- Rice Paper Wrappers: The star of this recipe! Opt for brands made primarily from rice flour and cassava root flour (or tapioca starch) and water. These thin, translucent sheets become wonderfully pliable when moistened and bake up to a delicate, crisp texture. You can usually find them in the international aisle of most large grocery stores or conveniently order rice paper wrappers online. They are the key to keeping this recipe both gluten-free and incredibly simple.
- Potatoes: Yukon Gold potatoes are my top recommendation for their creamy texture and ability to mash beautifully, providing a smooth yet hearty base for the filling. However, feel free to use any potato variety you have on hand, including red potatoes, russets, or even sweet potatoes if you’re looking for a slight twist in flavor and a boost of beta-carotene. The goal is a tender, easily mashable potato that absorbs the spices well.
- Green Peas: Adding a pop of vibrant color and a burst of natural sweetness, frozen green peas are a convenient and essential component. Peas are not only low in sugar and high in fiber but also packed with essential vitamins and antioxidants, making them a fantastic addition to this healthy appetizer. Simply add them frozen, and they’ll thaw and cook perfectly within the warm potato mixture.
- Onion: A fundamental aromatic, onions (white, yellow, or even red) provide a savory depth that forms the backbone of the samosa filling. Finely diced and sautéed, they release their sweet and pungent notes, complementing the spices beautifully.
- Garlic: No Indian-inspired dish is complete without the robust flavor of fresh garlic. Beyond its unmistakable taste, garlic is revered for its immune-boosting properties and potent antioxidants, contributing to the overall healthfulness of the samosas.
- Indian Spices: This blend is where the magic happens, infusing the filling with authentic warmth and complexity:
- Turmeric: Known for its brilliant golden hue and powerful anti-inflammatory properties.
- Chili Powder: Adds a gentle warmth and a subtle kick, adjustable to your preference for spice.
- Cinnamon: A touch of cinnamon lends a delicate sweetness and a wonderfully aromatic depth, creating a nuanced flavor profile.
- Sea Salt: Essential for enhancing and balancing all the flavors, bringing everything into harmony.
- Black Pepper: Crucial for unlocking the full bioavailability of curcumin in turmeric, making this spice blend not just delicious but also incredibly beneficial.
- Fresh Cilantro (Optional): For an extra layer of freshness, finely chopped fresh cilantro can be stirred into the filling. Its bright, herbaceous notes provide a perfect counterpoint to the warm spices.
Crafting Your Flavorful Samosa Filling: Step-by-Step
The heart of a great samosa lies in its filling. Follow these simple steps to create a perfectly seasoned potato and pea mixture that will make your baked samosas truly unforgettable.
Begin by thoroughly scrubbing your potatoes. There’s no need to peel them if you prefer to retain their nutritional value and rustic texture. Cut the potatoes into large, uniform dice and place them in a small saucepan. Cover them with water and bring to a rolling boil. Once boiling, reduce the heat to a gentle simmer and cook, uncovered, for approximately 20 minutes, or until the potatoes are tender enough to be easily pierced with a fork. Ensure they are cooked through but not overly mushy.
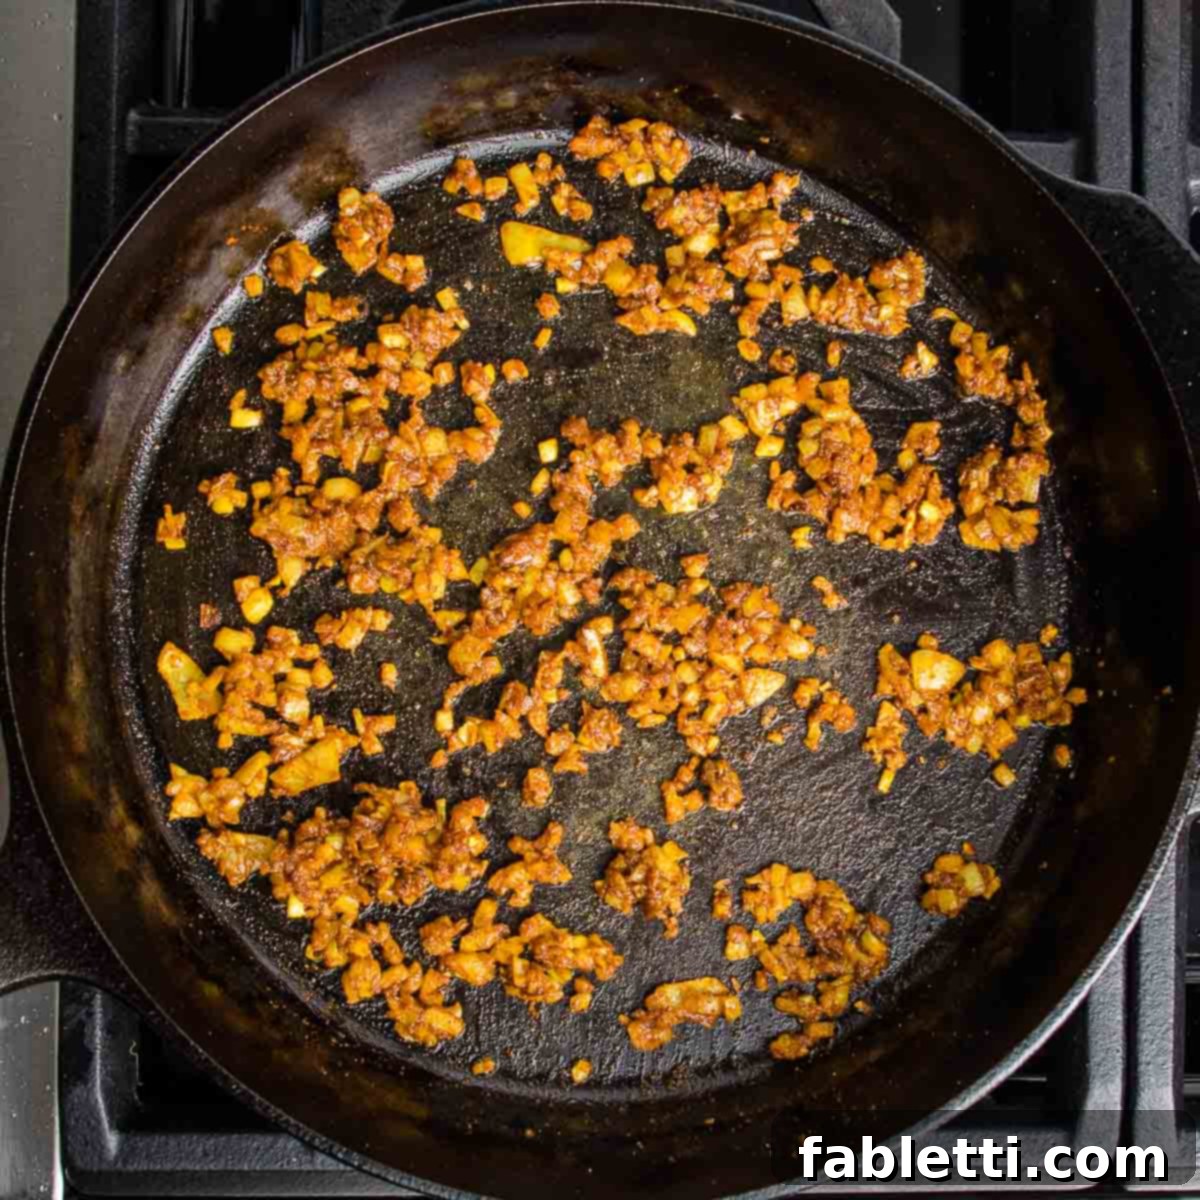
While the potatoes are cooking, heat a heavy skillet, preferably cast iron, over medium heat. Add 1-2 tablespoons of water or olive oil to the pan. If using water, this allows for a lighter sauté, keeping the recipe oil-free while still achieving tender, flavorful onions. Sauté the diced onions until they begin to soften and become translucent, usually taking 3-5 minutes. Next, sprinkle in the minced garlic, ground turmeric, chili powder, cinnamon, sea salt, and a few grinds of black pepper. Stir continuously for about 1 minute, allowing the garlic to cook and the spices to become wonderfully fragrant. Be mindful not to burn the garlic or spices; add another tablespoon of water if the pan appears too dry. Once fragrant, turn off the heat and set the skillet aside.
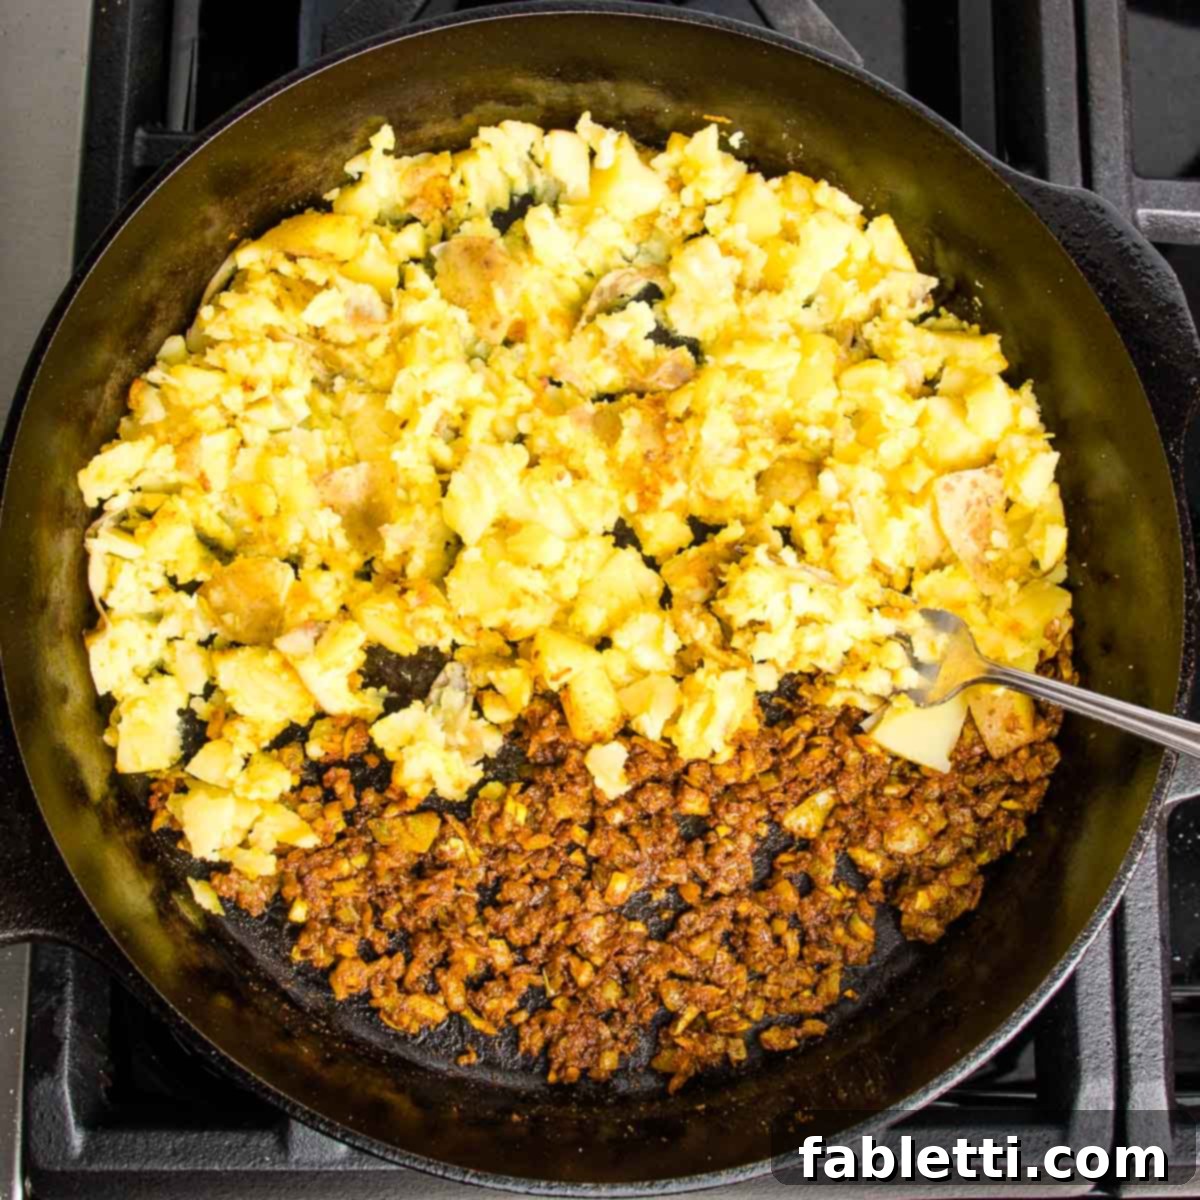
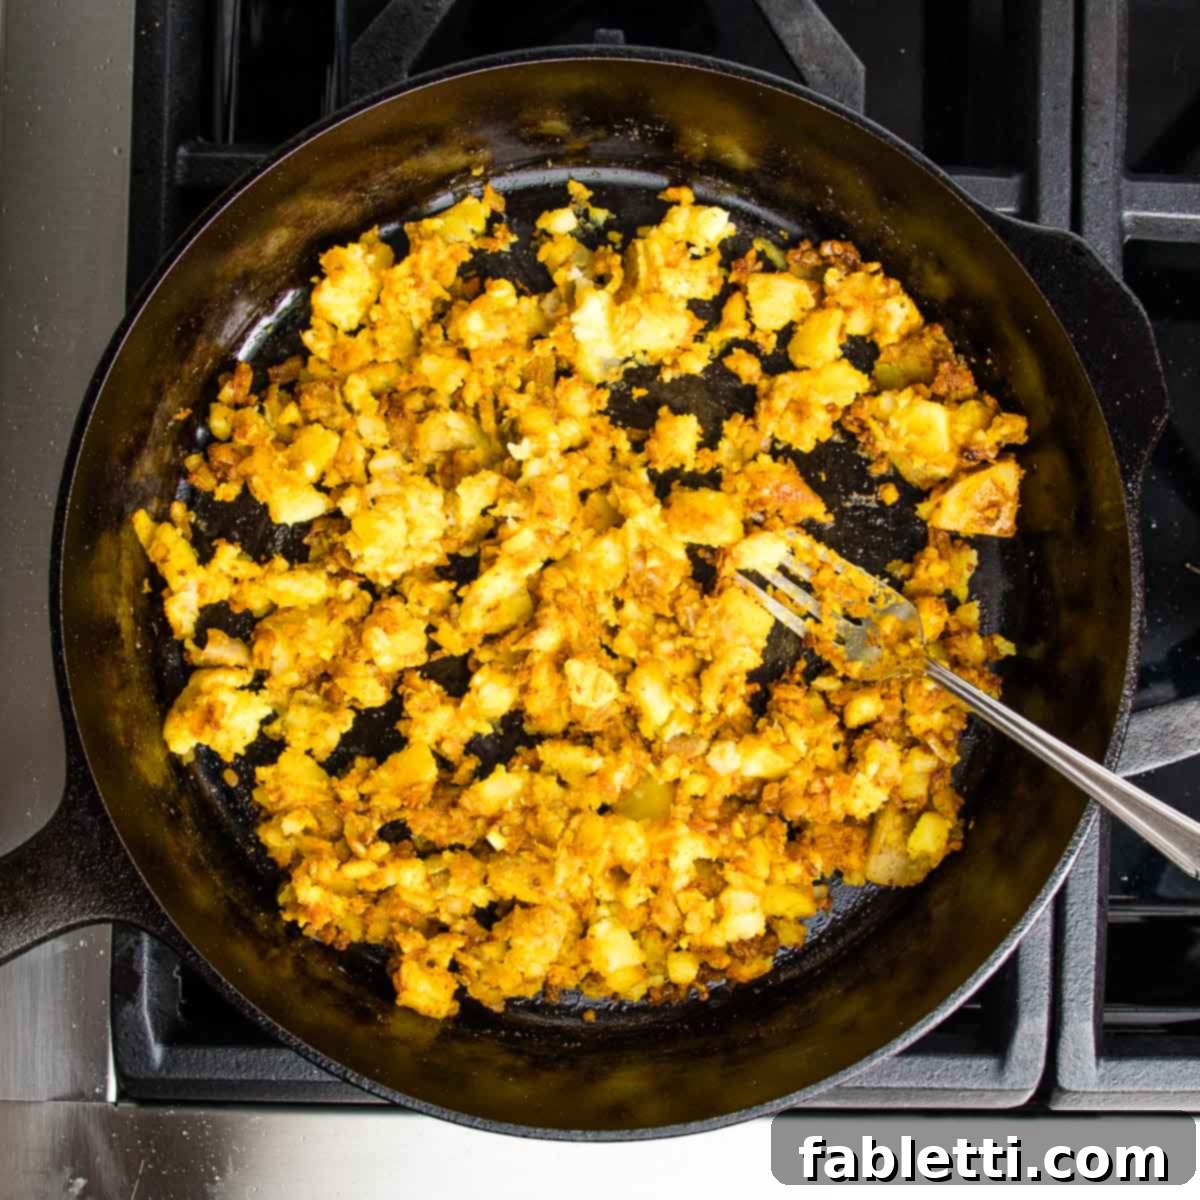
Once the potatoes are tender, drain them thoroughly and add them directly to the skillet with the sautéed onion and spice mixture. Using a fork, gently mash the potatoes, simultaneously incorporating them into the fragrant onion and spice blend. This ensures an even distribution of flavor throughout the filling. The goal is a slightly chunky yet cohesive mixture, not a completely smooth mash.
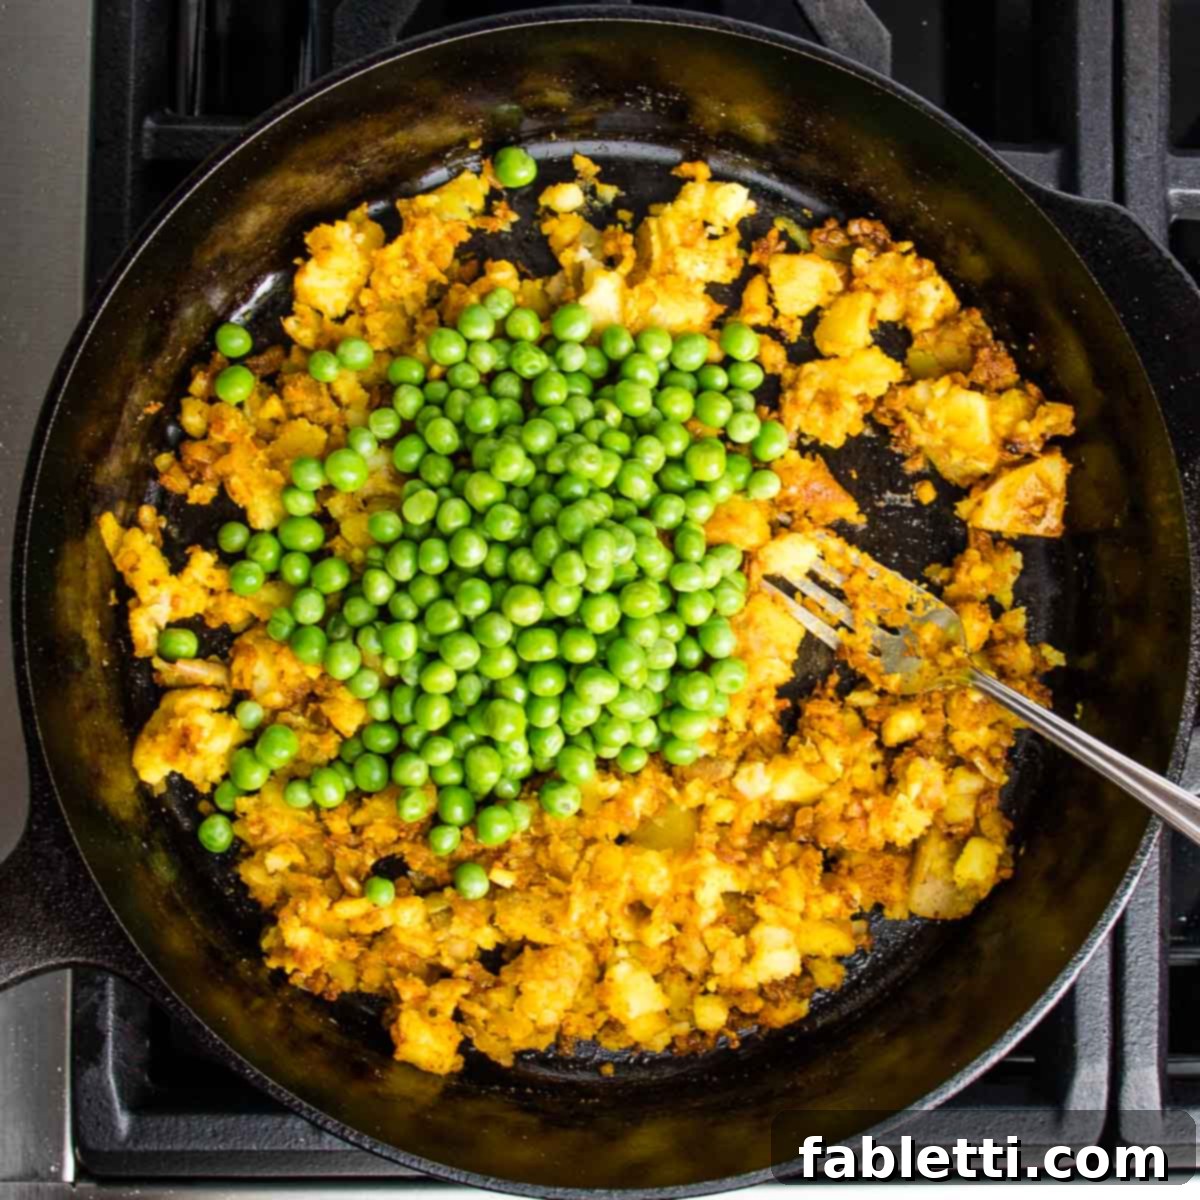
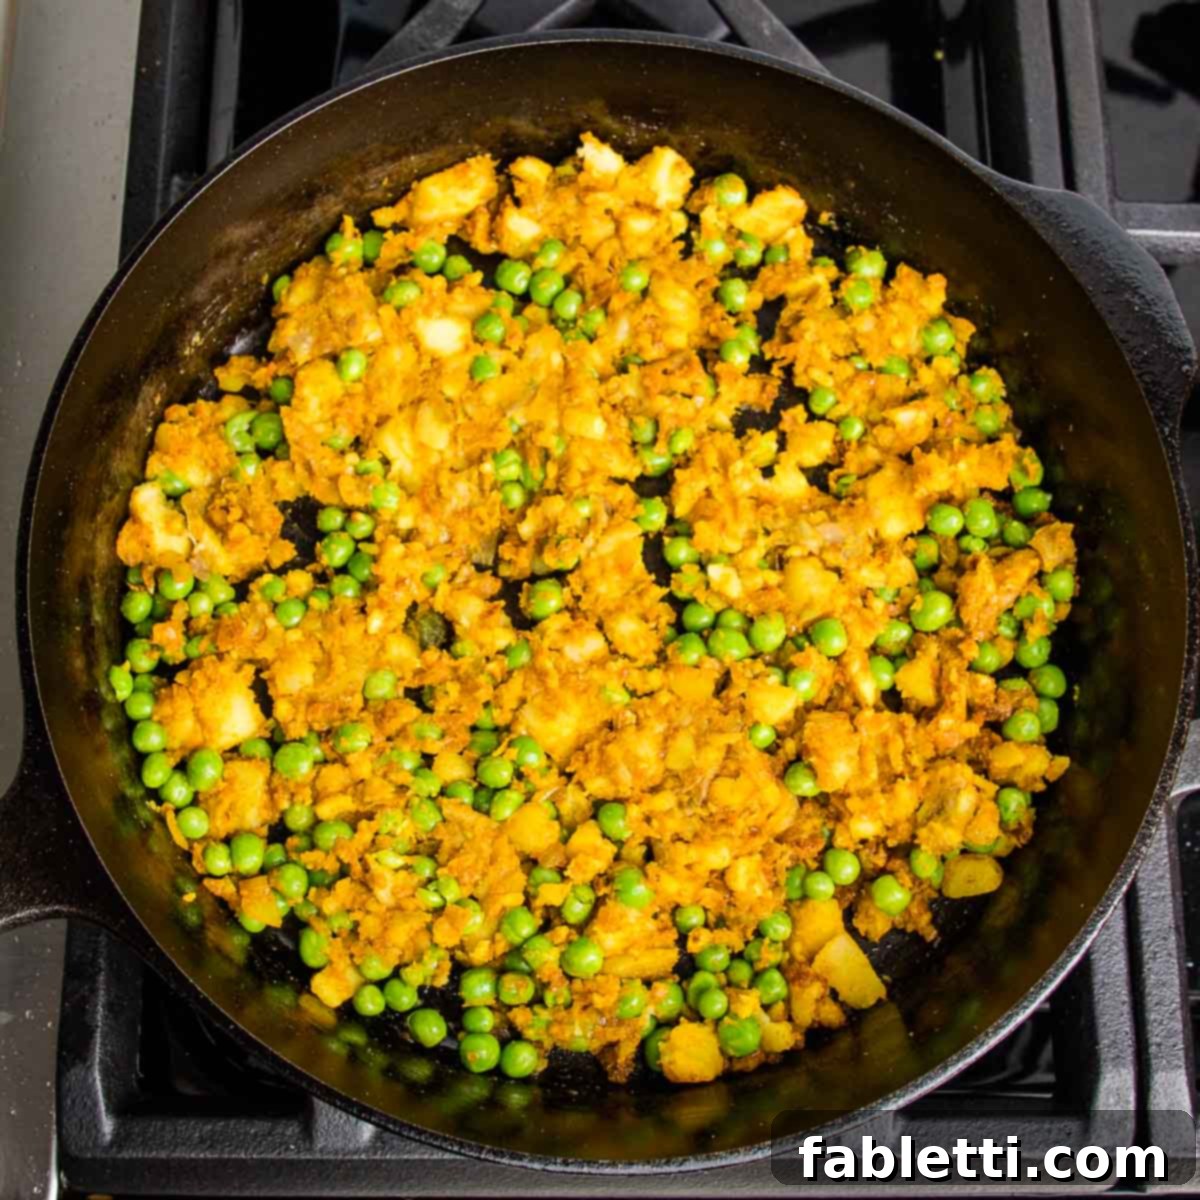
Finally, gently fold the frozen green peas into the potato mixture. The residual heat from the potatoes and skillet will be enough to thaw them perfectly without overcooking. Give the mixture a taste and adjust any seasonings as needed. If you desire a bit more heat, a pinch more chili powder can be added. If you like a brighter flavor, a squeeze of lime juice or a handful of fresh cilantro can be incorporated now. Your delicious, aromatic samosa filling is now ready for assembly!
Mastering the Art of Folding Rice Paper Samosas
Folding rice paper wrappers might seem a little daunting at first, but with a few tips and a bit of practice, you’ll be making perfectly sealed samosas in no time. The key is efficient preparation and working quickly once the wrappers are moistened.
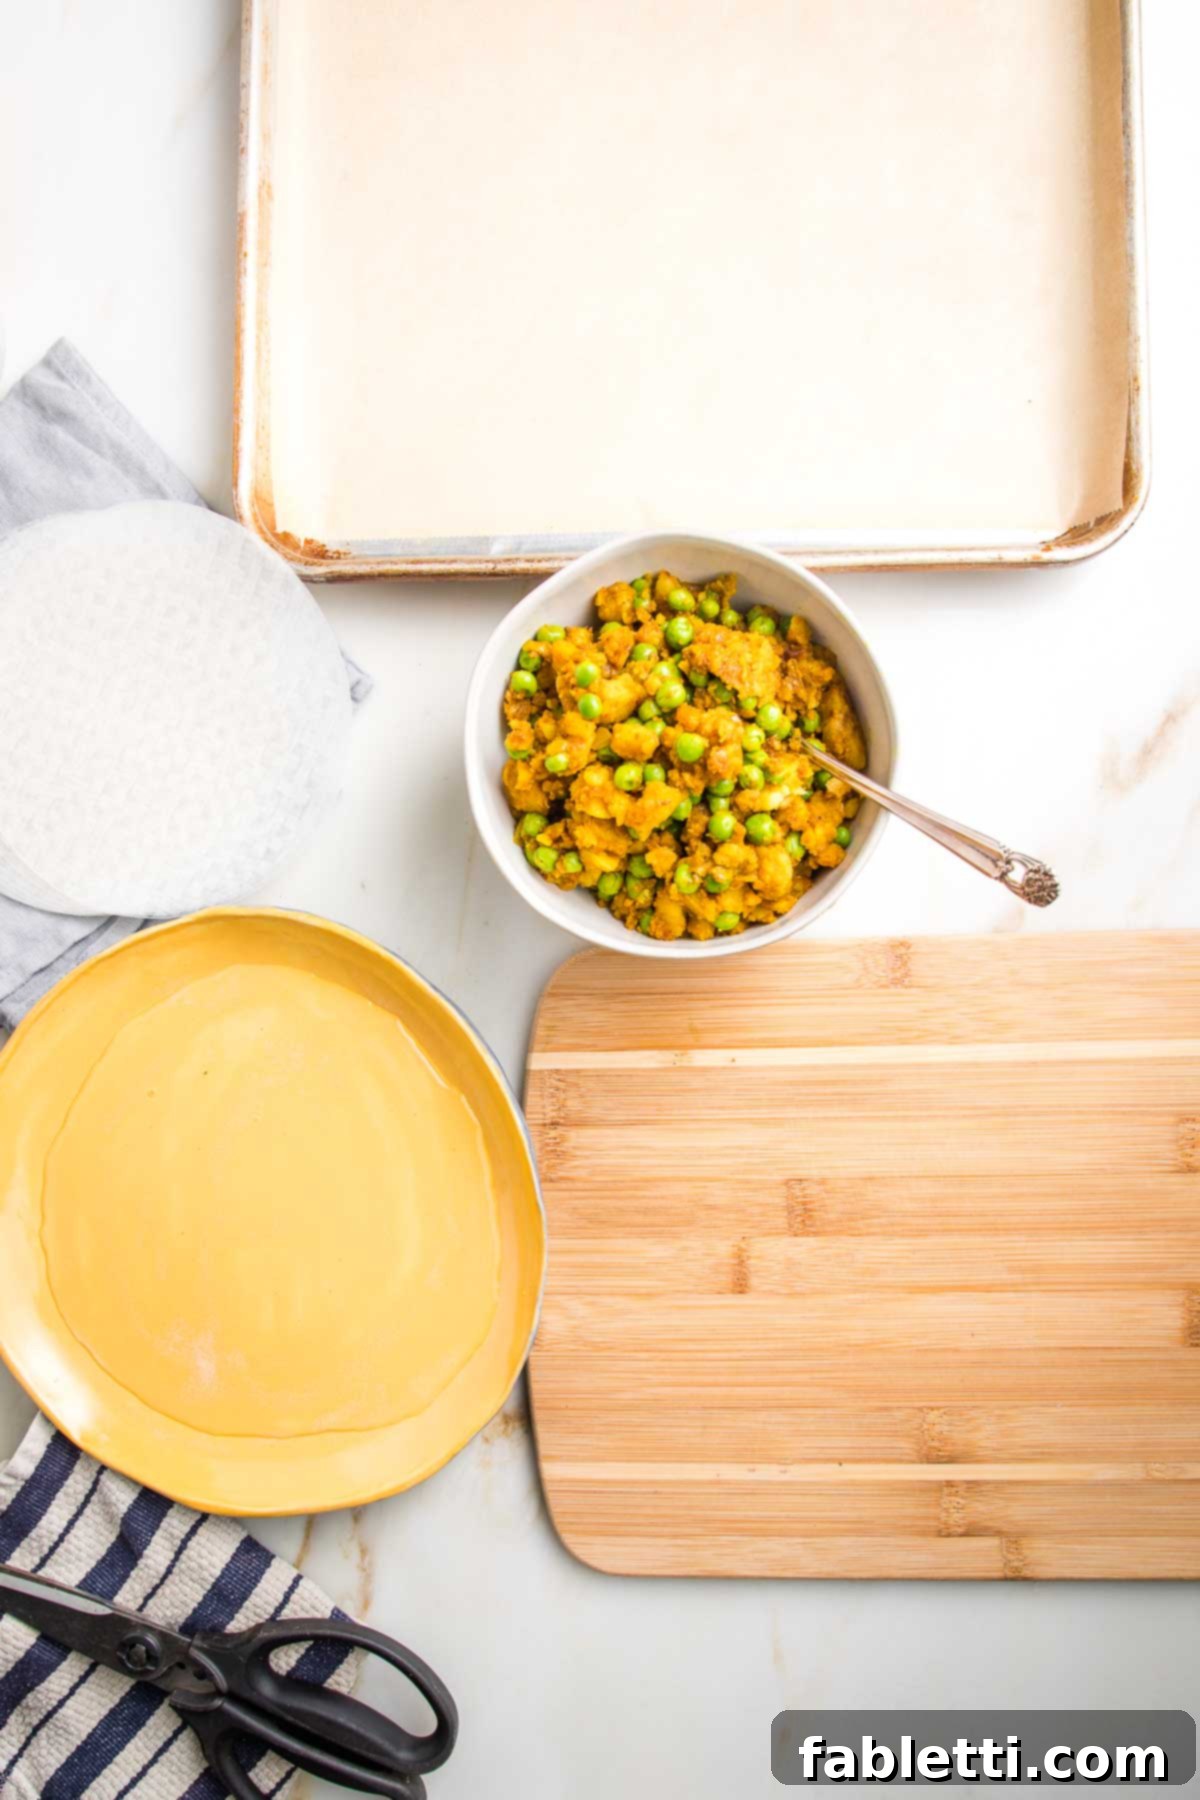
Before you begin the folding process, ensure all your supplies are meticulously organized and ready. Preheat your oven to 400°F (200°C). Line a large rimmed baking sheet with unbleached parchment paper to prevent sticking. Gather your prepared samosa filling, a stack of rice paper wrappers, a pie plate or shallow dish filled with about ¼ inch of warm water (large enough to fully submerge a wrapper), a clean dish towel (be mindful that turmeric can stain, so use a towel you don’t mind getting marked), a small wooden board or clean, flat surface to work on, and a pair of kitchen scissors. Having everything within arm’s reach will make the assembly much smoother.
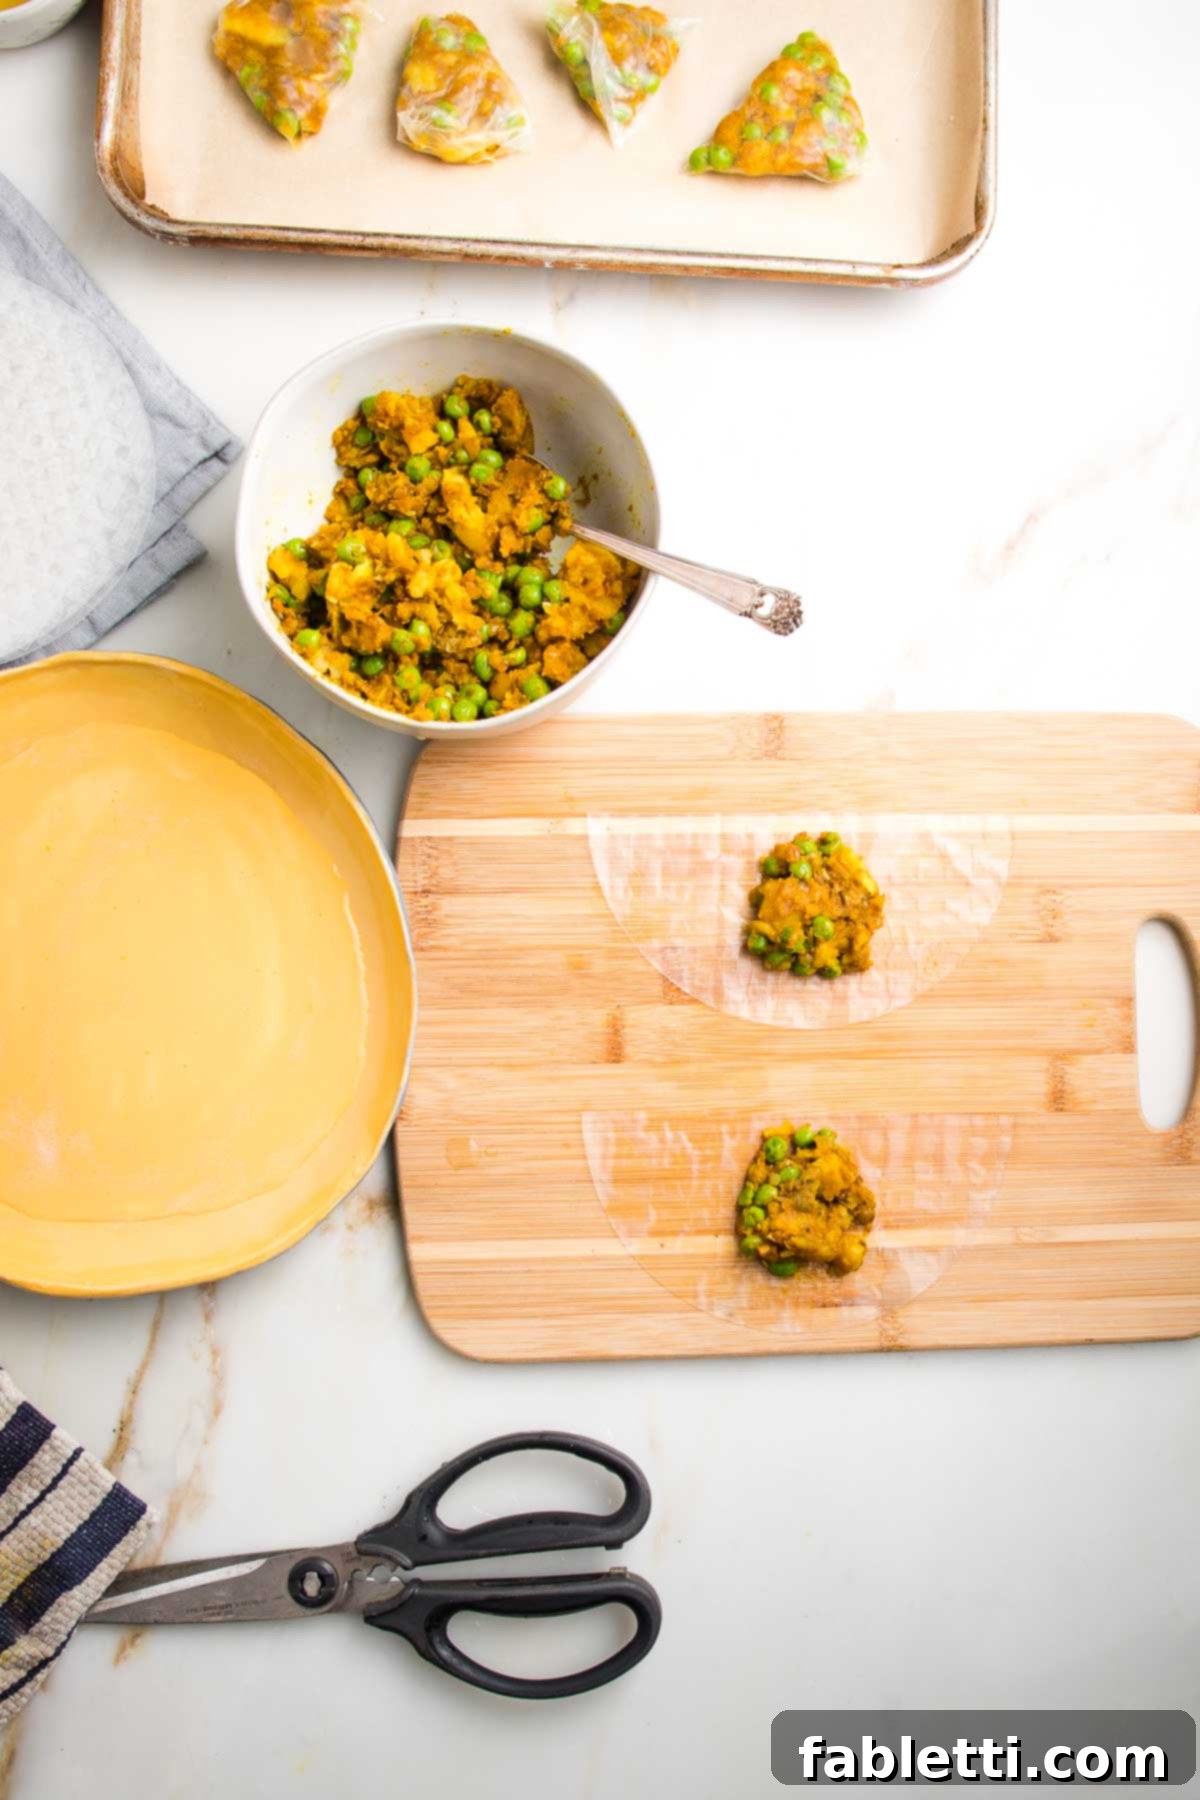
First, take one rice paper wrapper and dip it into the water-filled dish. Allow it to soak for about 5 seconds. Flip it over and submerge it for another 10-15 seconds. The goal is to make the wrapper pliable enough to cut and fold without tearing, but not so excessively sticky or “goopy” that it becomes difficult to handle. This delicate balance comes with a bit of practice, but generally, slightly firmer is better than too soft.
Once pliable, gently lift the wet wrapper and lightly tap it onto your dish towel to remove any excess dripping water. Immediately, use your kitchen scissors to cut the circular wrapper in half, creating two semi-circular “half-moon” shapes. Place both halves flat onto your wooden board or working surface.
Scoop a generous tablespoon of the prepared potato filling onto the center of each half-moon wrapper. You’ll need to work quickly with each half before the wrapper becomes too sticky. Ensure the filling is placed closer to the straight, cut edge of the half-moon, leaving enough space around the edges for folding.
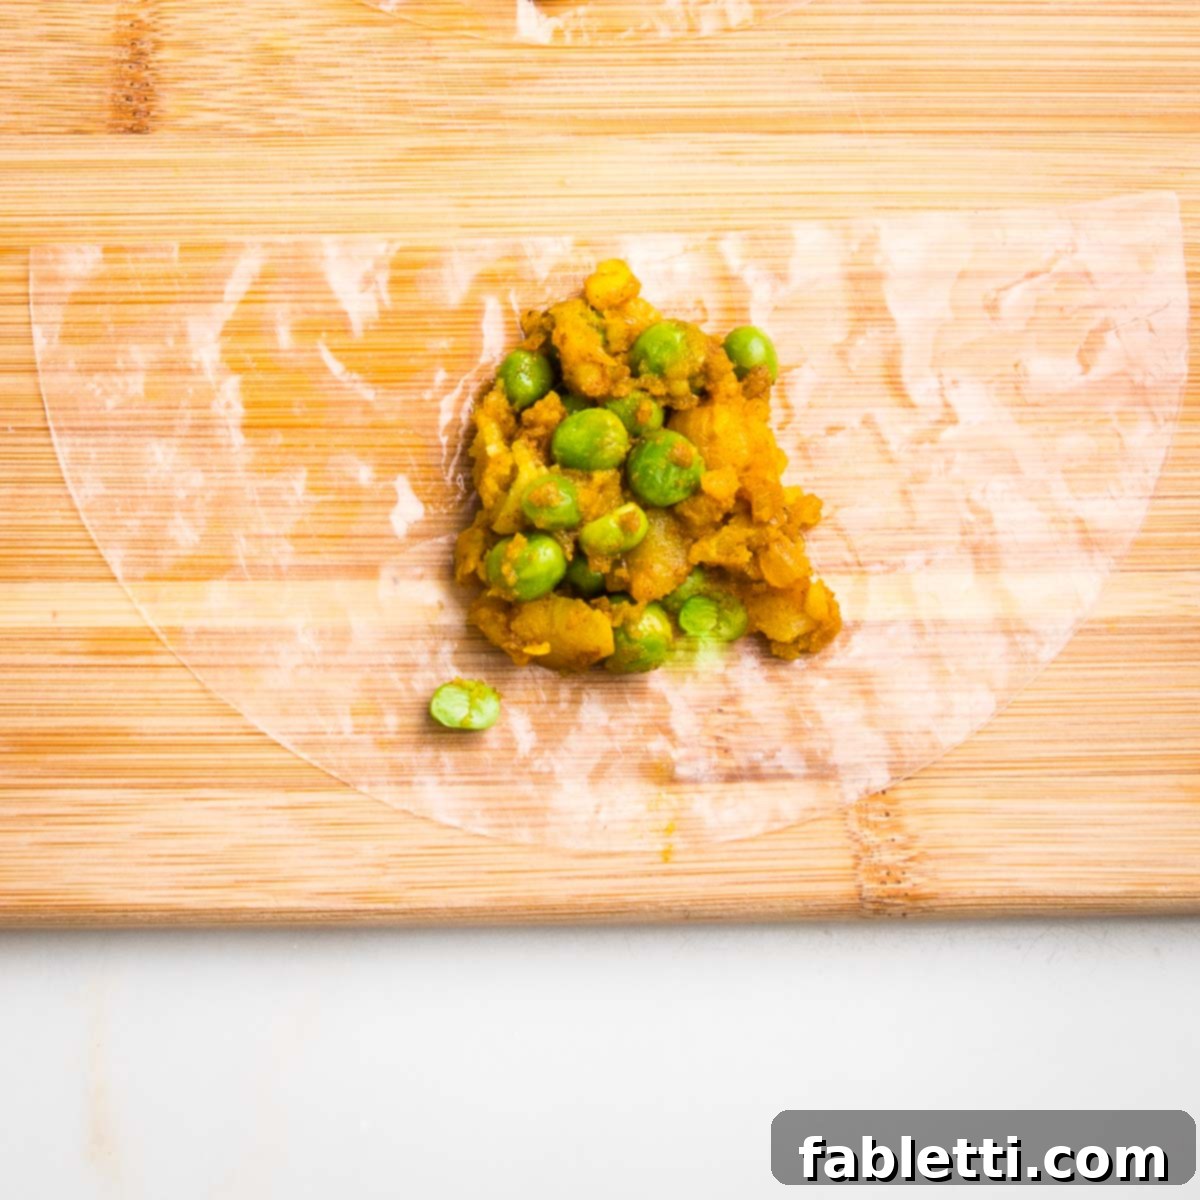
Orient the half-moon so that the flat (cut) side is positioned at the top and the rounded side is at the bottom. This will be your starting point for folding into a neat triangle.
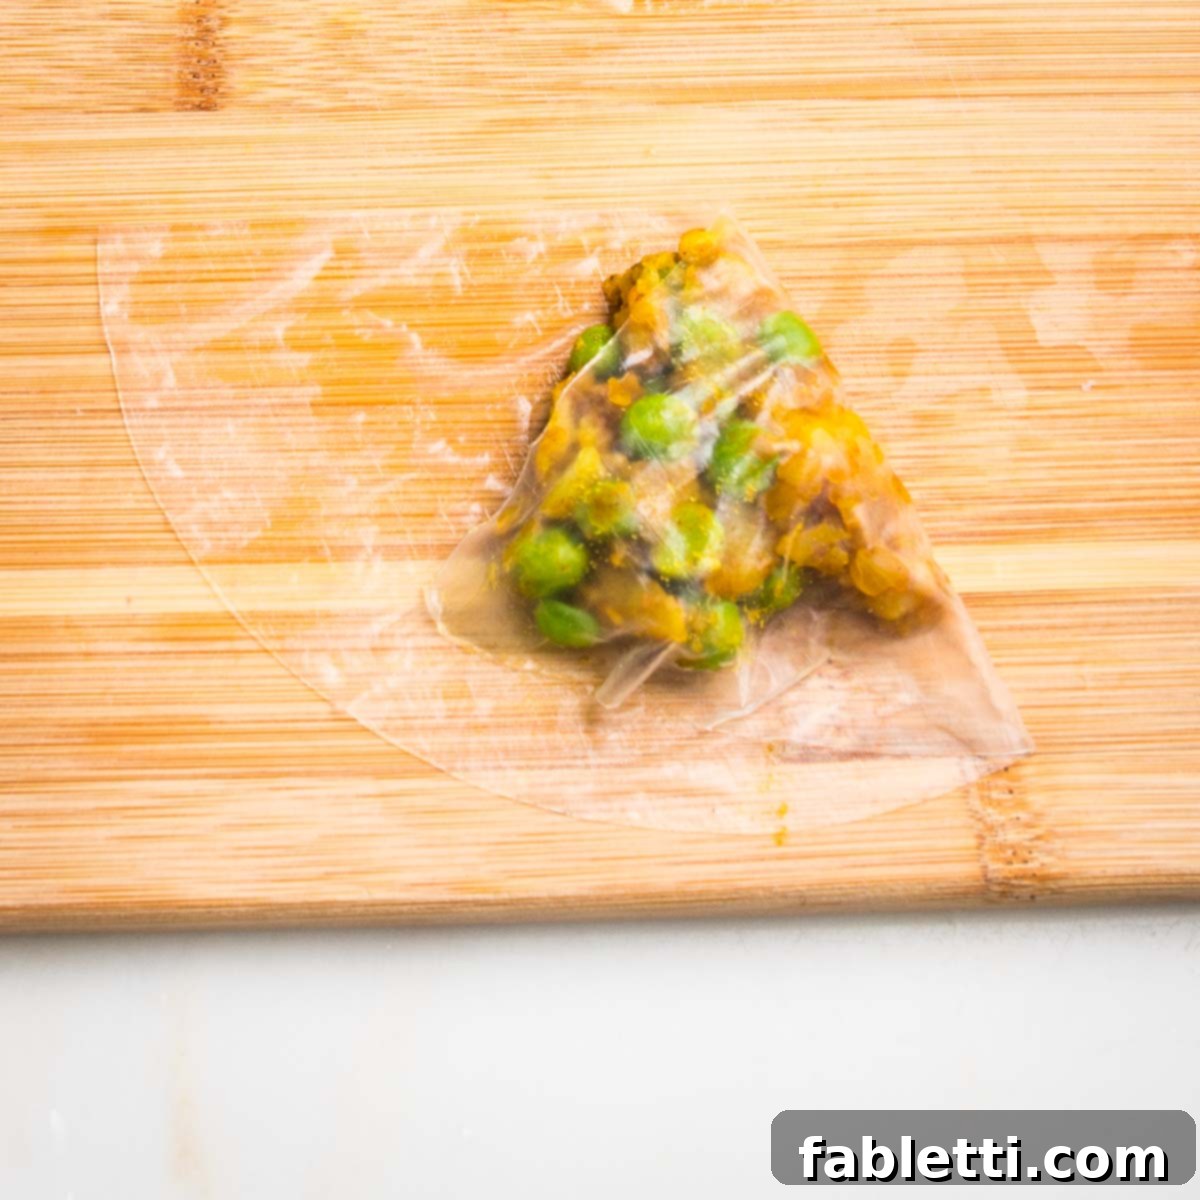
Take the top right corner of the wrapper and fold it downwards, bringing it towards the opposite side, aligning it with the bottom curve of the wrapper. Press gently to adhere the wrapper, forming the first edge of your triangle.
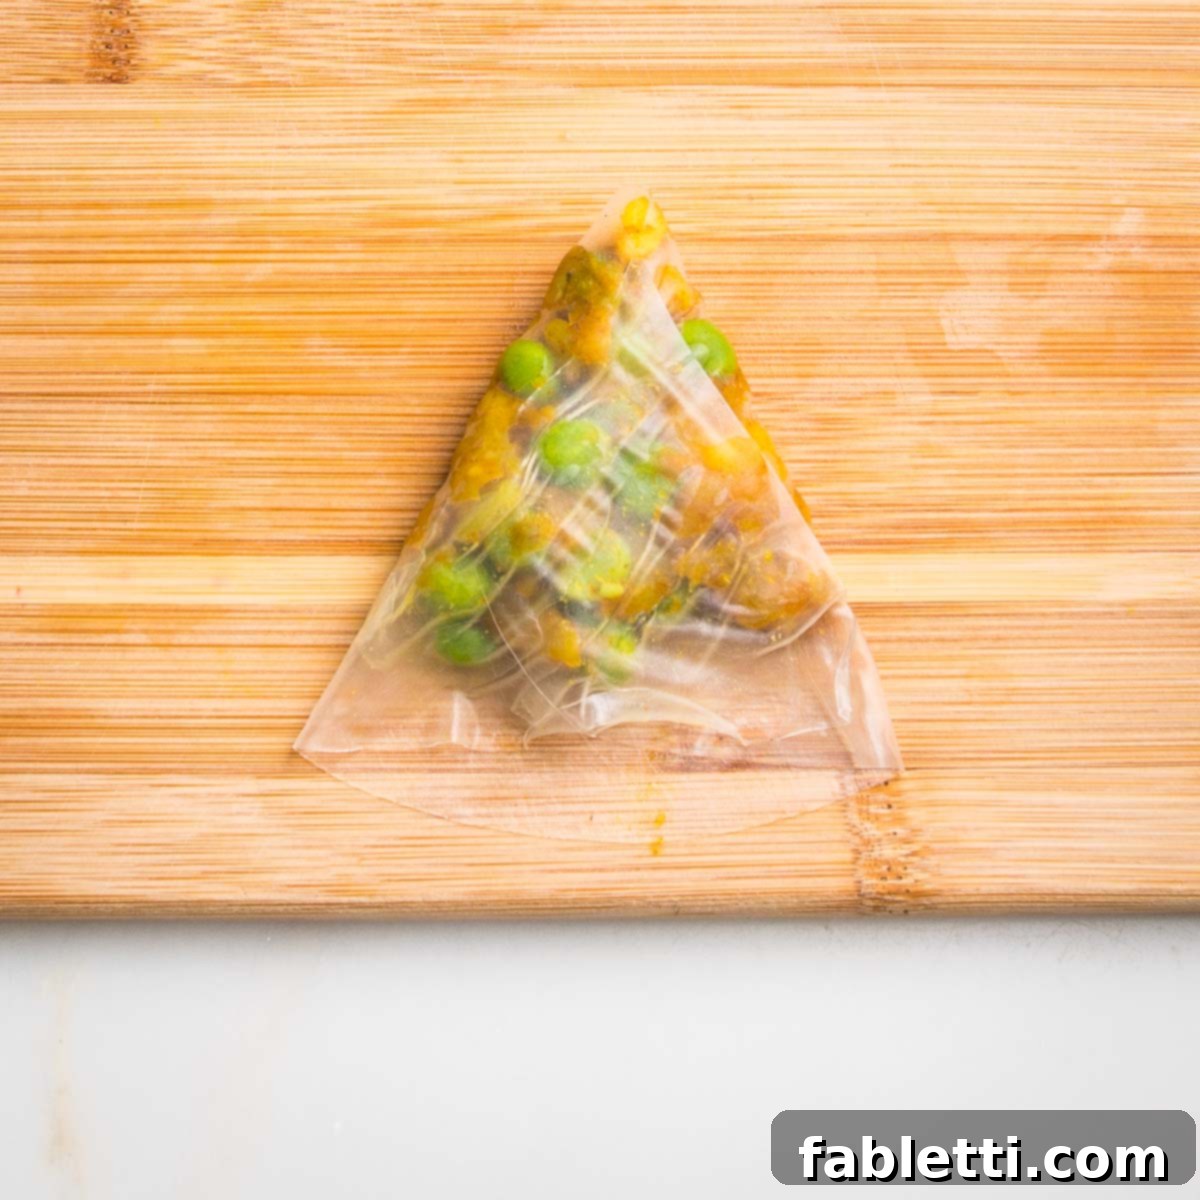
Next, take the top left corner and fold it down towards the right bottom, meeting the previously formed diagonal edge. This step completes the basic triangular shape of the samosa. Gently press along the edges to seal the filling inside.
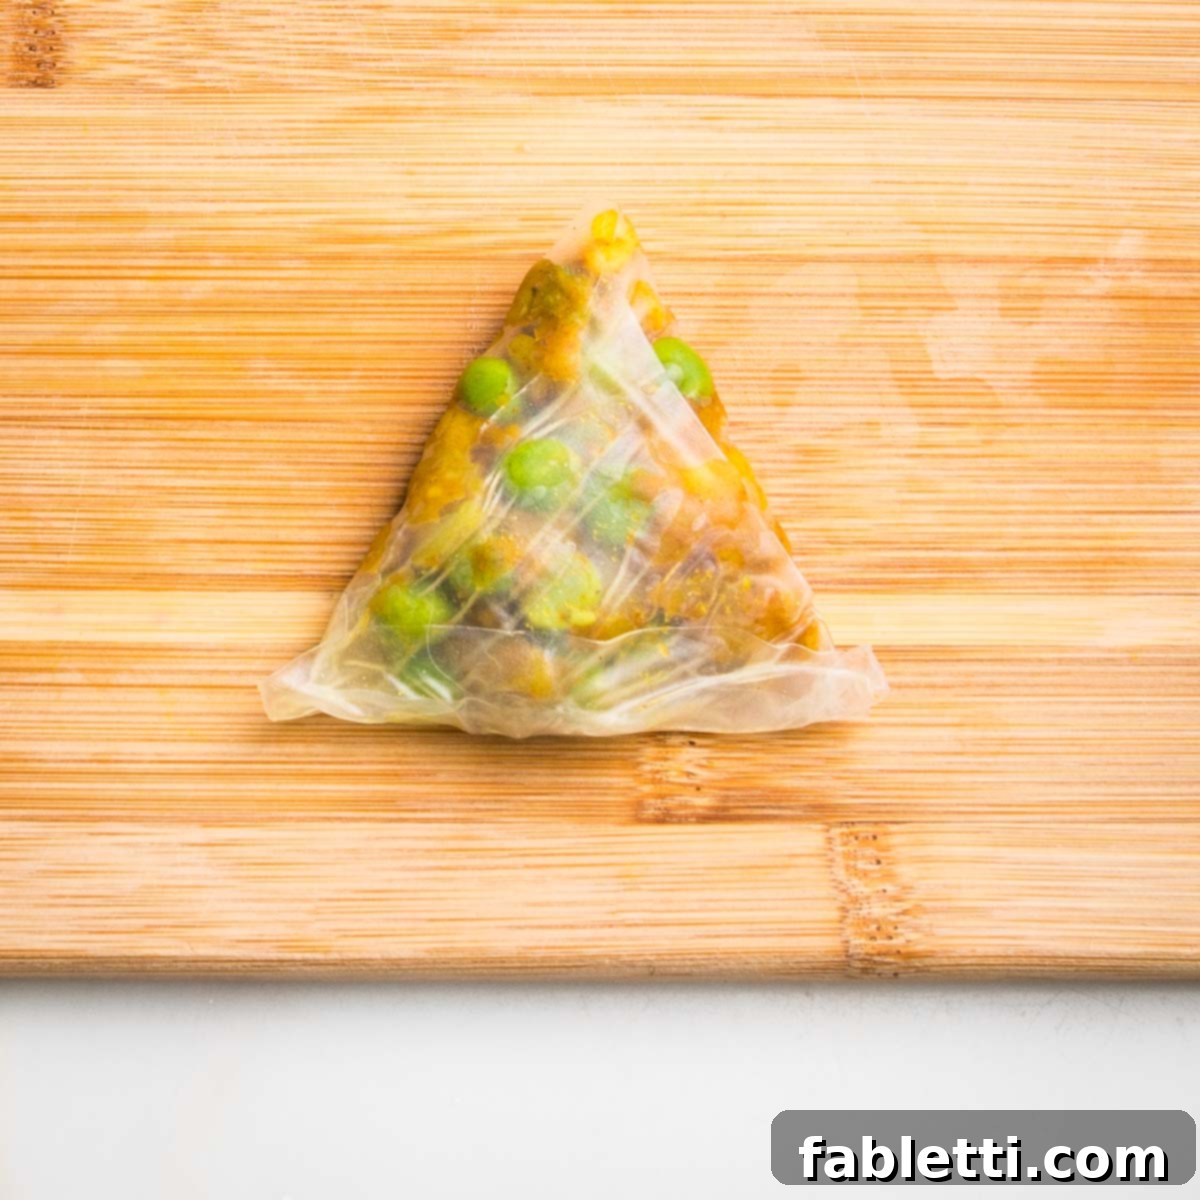
The final step in folding is to take the bottom rounded edge of the triangle and fold it upwards, overlapping it onto the main body of the samosa. This action seals the last open side, ensuring the filling is completely enclosed. While striving for a perfect triangle is ideal, the most important aspect is that all sides are securely sealed to prevent any filling from escaping during baking. Don’t worry if your first few aren’t perfect; the wrappers can be a little tricky initially, but you’ll quickly get the hang of it.
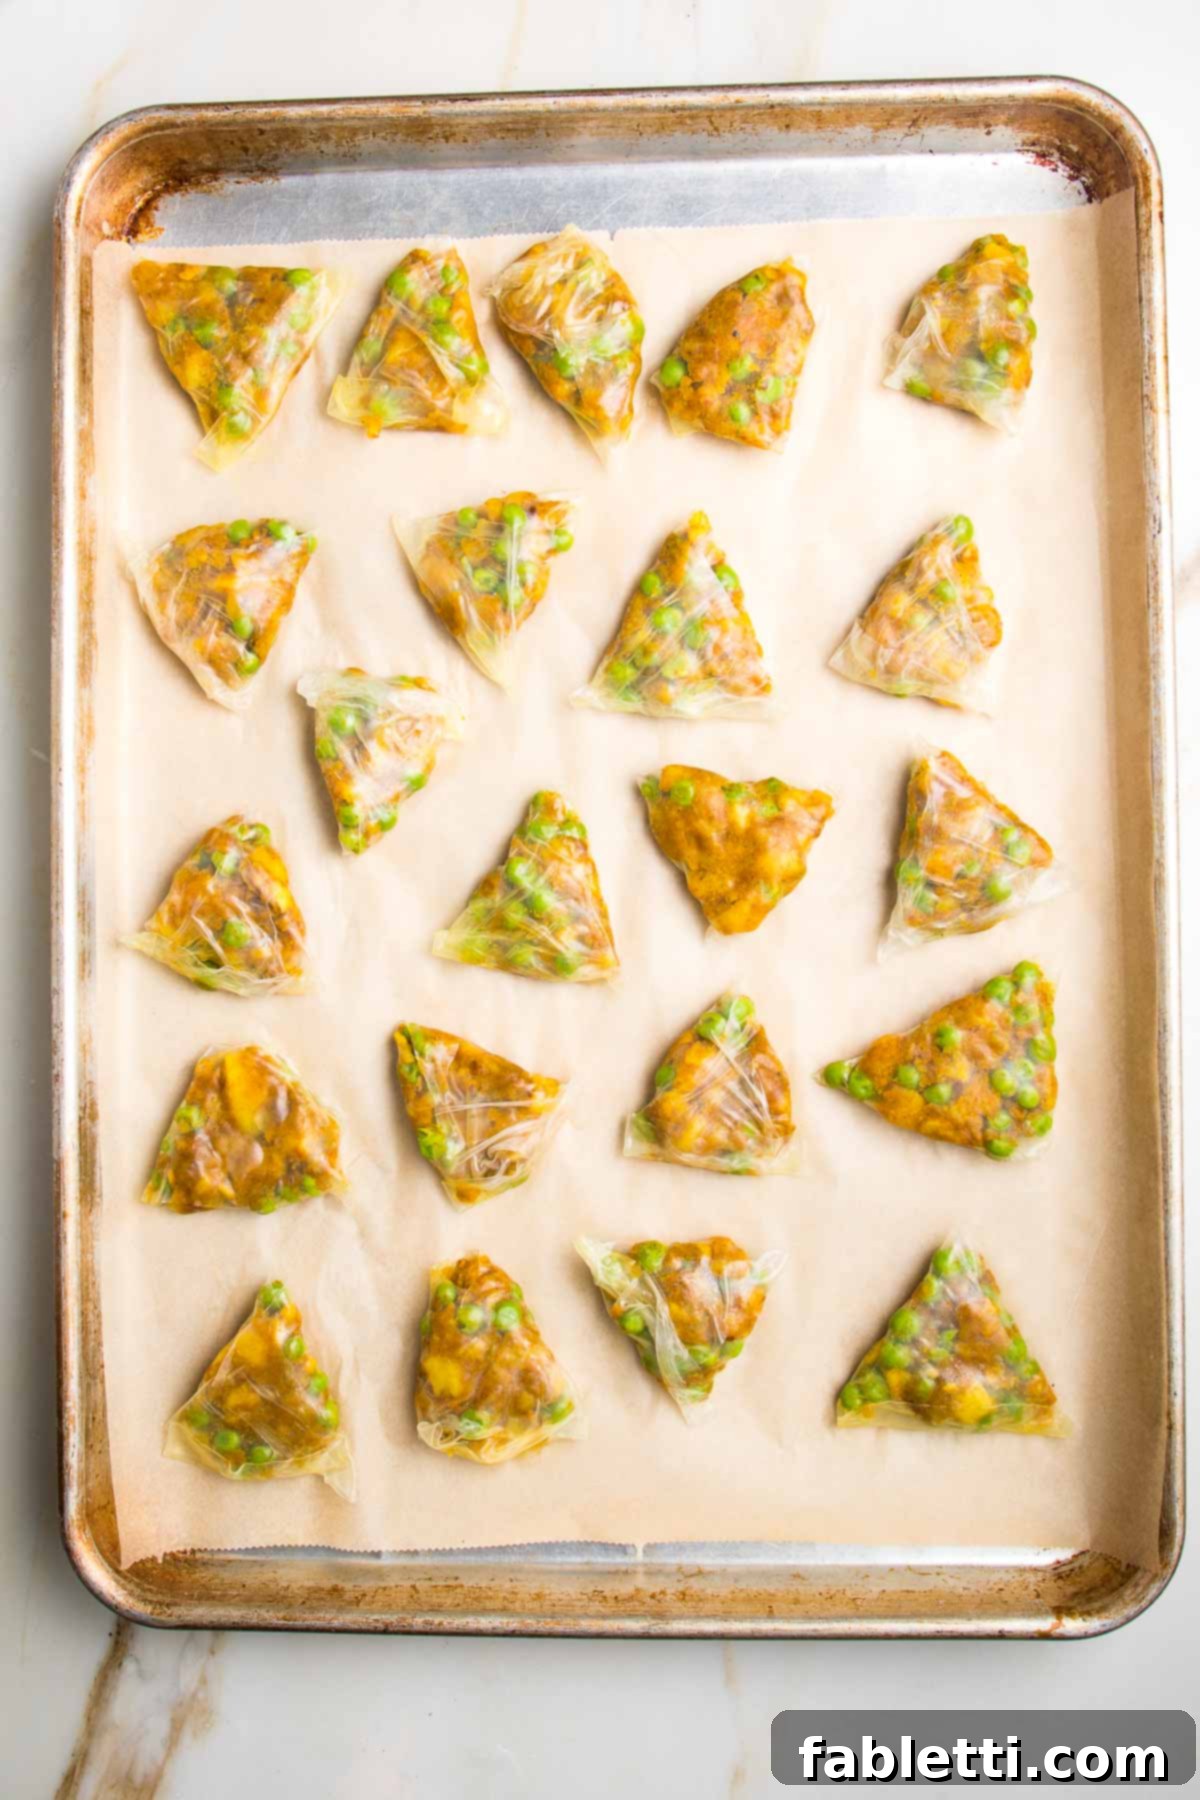
As soon as each samosa is folded and sealed, gently transfer it to your prepared baking tray. The samosas may shrink slightly during baking, but they will largely maintain their shape and size, so there’s no need to space them too far apart on the tray. Continue this process until all the filling has been used and your tray is full of beautifully formed vegan samosas.
Baking for Golden Perfection
With your tray of perfectly folded samosas ready, it’s time to bake them to a golden, crispy finish. Place the baking tray into your preheated 400°F (200°C) oven. Bake for an initial 20 minutes, allowing the rice paper wrappers to crisp up and the filling to heat through. After 20 minutes, carefully flip each samosa to ensure even browning and crispness on both sides. Continue baking for another 10 minutes, or until the samosas are beautifully golden brown and delightfully crisp. Serve them immediately while they are warm and at their peak texture, ready to be enjoyed with your vibrant green chutney.
The Zesty Green Chutney: A Must-Have Companion
No samosa experience is complete without a dipping sauce, and this vibrant green chutney is the perfect tangy, herbaceous complement to our savory baked samosas. The best part? You can whip it up while your samosas are baking, ensuring everything is fresh and ready at the same time.
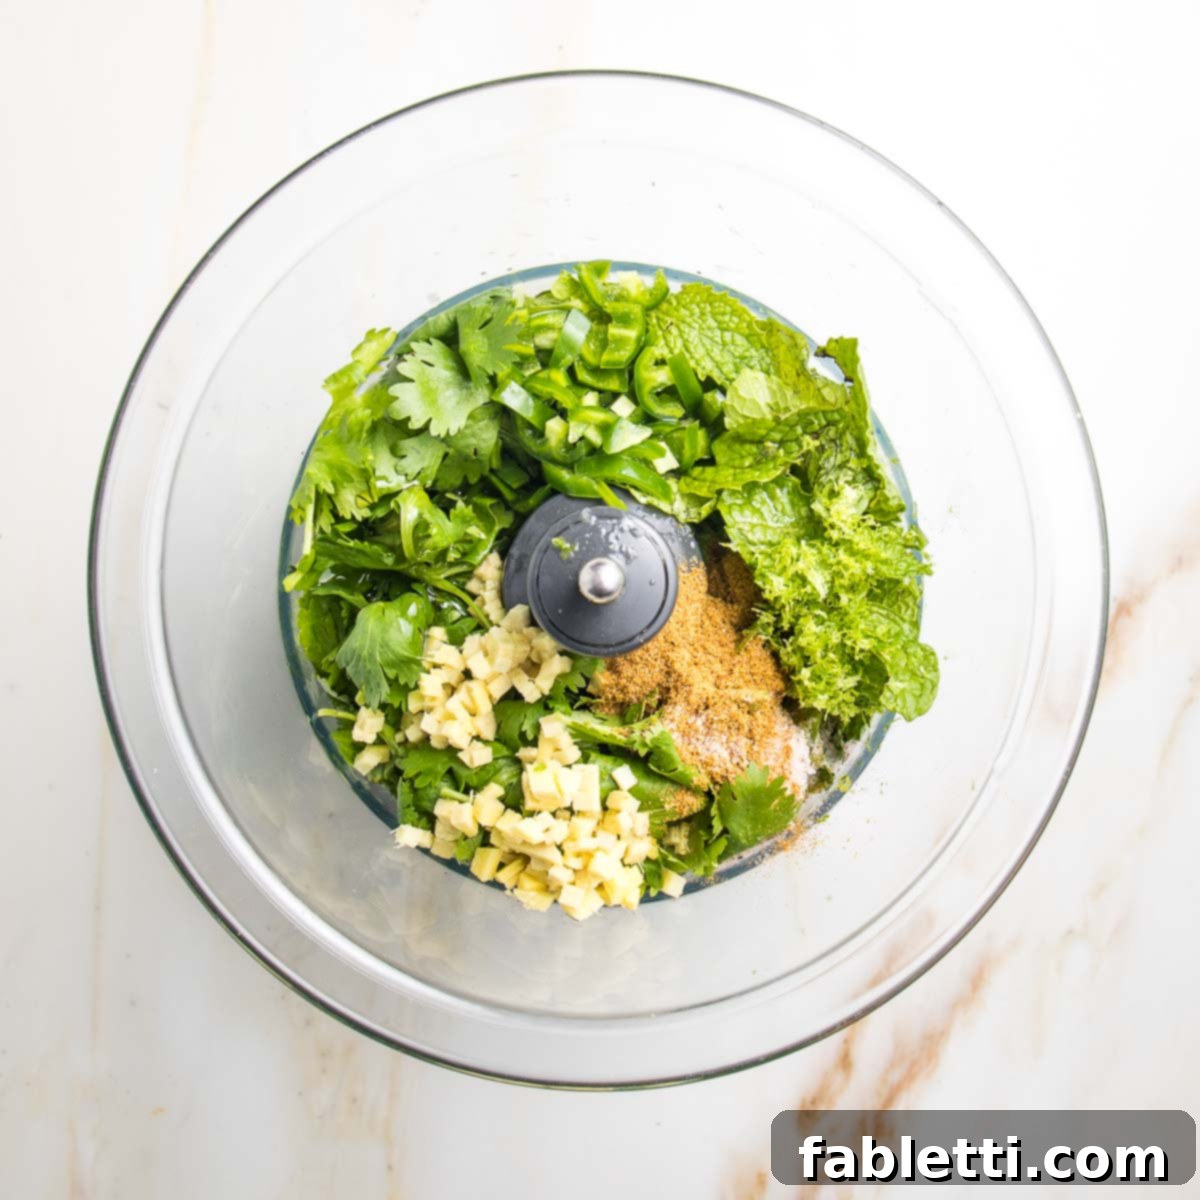
To make this irresistible green chutney, gather fresh cilantro (woody stems removed), fresh mint leaves, a deseeded jalapeño (for a mild kick, or keep seeds for more heat), minced fresh ginger, the zest and juice of one lime, ground cumin, a pinch of sea salt, and a touch of maple syrup (or honey for non-vegan). Place all these ingredients into the bowl of a food processor or a high-speed blender. Blend until the mixture is smooth and fully incorporated, scraping down the sides as needed.
Taste the chutney and adjust the seasonings to your preference. If you prefer a tangier chutney, squeeze in a little more lime juice. For a sweeter profile, add another teaspoon of maple syrup or honey. If you like a spicier kick, a sprinkle of crushed red pepper flakes can be stirred in. Finally, add 1-2 tablespoons of cold water, one tablespoon at a time, until the chutney reaches your desired dipping consistency – thick enough to coat a samosa but still easily scoopable. This fresh, bright chutney not only adds a burst of flavor but also cuts through the richness of the potato filling, creating a perfectly balanced bite. Store any leftover chutney in an airtight container in the refrigerator for up to three weeks.
Expert Tips for Samosa Success
Making baked rice paper samosas is a rewarding experience, and these pro tips will help ensure your success from start to finish:
- Prep Everything in Advance: This is arguably the most crucial tip. Once the rice paper wrapper is wet, it quickly becomes sticky and challenging to work with. Have your filling ready, baking sheet lined, water dish filled, and scissors at hand before you even touch a wrapper. This streamlined approach minimizes stress and maximizes efficiency.
- Keep a Towel Handy: A clean dish towel nearby is your best friend. Use it to dab excess water from the wrappers and to dry your fingers as needed. This helps prevent the wrappers from sticking to your hands and making the folding process messier.
- Embrace the Learning Curve: Don’t get discouraged if your first few samosas aren’t perfectly shaped. Rice paper wrappers have a unique texture, and it takes a little practice to get the hang of handling them. By the second or third attempt, you’ll feel much more confident. If a wrapper becomes too sticky or tears, simply scoop the filling back into your bowl, discard the wrapper, and start fresh – no big deal!
- Size Matters: For appetizer-sized samosas, cutting a standard circular wrapper in half works perfectly. However, if you’re aiming for larger, dinner-sized samosas, consider buying larger diameter rice paper wrappers. This allows for more filling and a heartier meal.
- Customize Your Filling: Always taste your potato filling before wrapping. This is your chance to adjust the spice levels, add more salt, or incorporate fresh herbs like cilantro if desired. The filling should be robust and flavorful on its own.
- Serve Fresh for Best Texture: Baked samosas are undeniably at their best when served warm, straight out of the oven. The rice paper wrappers will be wonderfully crisp. While you can prepare the filling and even pre-fold the samosas in advance, aim to pop them into the oven just before you plan to enjoy them.
- Beware of Turmeric Stains: Turmeric, while fantastic for flavor and color, is notorious for staining. Be cautious while handling the filling; your dish towel might get a yellow tint, so use one that you don’t mind sacrificing for the cause!
- Experiment with Filling Variations: While the potato and pea filling is classic, don’t hesitate to get creative. Add finely chopped carrots, bell peppers, spinach, or even crumbled paneer or tofu for different textures and flavors.
- Don’t Overstuff: A heaping tablespoon of filling per half-moon is usually sufficient. Overstuffing can make folding difficult and increases the likelihood of the wrapper tearing during baking.
Meal Prep and Storage Made Easy
These baked vegan samosas are not just delicious; they’re also fantastic for meal prepping, allowing you to enjoy their authentic flavors even on busy days. Here’s how to prepare and store them effectively:
- To Serve: For the ultimate crispy experience, samosas are best served fresh from the oven, still warm. Serve the appetizer-sized samosas with your homemade green chutney or a sweet mango dipping sauce. For a more substantial meal, make larger samosas and pair them with a light side like a simple cauliflower rice or a fresh salad.
- To Prep Ahead: The potato and pea filling can be made up to 3 days in advance. Store it in an airtight container in the refrigerator. The cilantro chutney is even more forgiving and can be prepared up to a week ahead, stored in a sealed jar in the fridge. If you want to prepare the samosas entirely before baking, you can fold them and arrange them on a baking tray. They can sit at room temperature for up to 4 hours before baking. Just pop them in the oven when you’re ready to serve.
- To Store Baked Samosas: If you have leftover baked samosas, store them in an airtight container in the refrigerator for up to 3-4 days. While they will become chewier than crisp after cooling, they can be easily revived.
- To Freeze Cooked Samosas: Ensure your baked samosas are completely cooled before freezing. Arrange them in a single layer on a baking sheet and freeze until solid. Once solid, transfer them to an airtight freezer-safe container or a heavy-duty freezer bag, placing parchment paper between layers to prevent sticking. They can be stored in the freezer for up to 3 months, making them a perfect make-ahead snack.
- To Reheat: To bring back their delicious crispness, reheat refrigerated samosas in a 375°F (190°C) oven for about 15 minutes, or until they are heated through and the wrappers have re-crisped. For frozen samosas, you can bake them directly from frozen at 375°F (190°C) for 20-25 minutes, flipping halfway, until hot and crispy. Avoid microwaving, as this will make them soggy.
More Healthy and Fun Appetizer Recipes
If you loved these baked vegan samosas, you’ll be thrilled to discover more delicious and healthy appetizer ideas that are perfect for entertaining or enjoying as a light snack. Explore these fantastic recipes to expand your repertoire:
- Vegan Sweet and Sour Meatballs
- Gluten-Free Stuffed Mushrooms
- Veggie Spring Rolls with Peanut Sauce
- No Yeast Flatbread Pizza Recipe
Your feedback is invaluable! If you enjoyed making and tasting this recipe, please consider leaving a five-star rating and a comment below. We love seeing your creations, so share your photos on Instagram by tagging me @dkhealthcoach and using the hashtag #debraklein!
Recipe

Baked Samosa Recipe
Light and crisp homemade healthy samosas baked in rice paper wrapper. A super tasty, vegan and gluten-free appetizer, served with green chutney.
Ingredients
- ½ lb. yukon gold potatoes*
- 1 onion small dice
- 2 or more cloves garlic, minced, pressed or zested.
- 1 teaspoon ground turmeric
- 1 teaspoon chili powder
- ¼ teaspoon cinnamon
- ½ teaspoon sea salt
- a few grinds black pepper
- 1 cup frozen peas
- optional: 2 Tablespoons fresh cilantro
- 12 rice paper wrappers*
Green Chutney
- 2 cups cilantro woody stems removed
- 1 cup mint leaves
- 1 lime zested and juiced
- 2 Tablespoons honey or maple syrup
- 1 Tablespoon diced fresh ginger
- 1 ½ teaspoons cumin
- 1 teaspoon salt
Instructions
- Cut potatoes into large dice. Place in a small saucepan, cover with water and cook until tender, but not mushy. About 20 minutes.
- Sauté onions in 1-2 Tablespoons water (orveggie broth or olive oil) for 3-5 minutes, until softening. Add the garlic, turmeric, chili powder, cinnamon, salt and pepper and stir constantly while garlic cooks and spices become fragrant. Add another Tablespoon water if the pan becomes too dry.
- Turn off heat and let the onion mixture sit until the potatoes are done. Then add the potatoes to the pan. Use a fork to roughly mash them, then stir the potatoes into the onion mixture until well incorporated. Add the peas and gently mix them in.
- Get yourself set up and ready before beginning to fold the samosas. Preheat the oven to 400°F (200°C). Line a rimmed baking tray with unbleached parchment paper. Fill a pie plate with ¼” water. Have a dish towel (preferably one that is already stained, as the turmeric could leach onto your towel) ready and a wooden board to fold the samosas. And you’ll need a pair of kitchen scissors.
- Dip one rice paper wrapper into the water. Wait 5 seconds. Flip it onto the other side and push down to submerge for about 10 seconds. You want it to be pliable, but not so sticky (like saran wrap) that it sticks to itself).
- Dab the wrapper onto your dish towel to prevent dripping, then cut in half so you have two half moons. Place each half separately onto the wooden board with the long edge on top and the curved edge on the bottom.
- Scoop 1 heaping Tablespoon of the potato mixture onto the middle of each half moon wrapper. Start folding by taking the right top edge and bringing it over to the left bottom. Then take the top left edge and bring it over toward the right bottom. You should have a triangle now. The very center will be the top point of the triangle. Fold the bottom edge up and over to seal the samosa.
- As soon as samosa is folded into a triangle, move it to the prepared baking tray. Continue until all the filling is used. You should be able to make 2 dozen appetizer sized samosas.
- Place the tray in the oven to bake for 20 minutes. Then flip and bake for another 10 minutes. Serve warm with cilantro dipping sauce.
Cilantro Chutney
- Place all ingredients in a food processor or high-speed blender. Blend until smooth.
- Taste for seasoning. Squeeze in another lime if you like your green chutney tangy. Add another Tablespoon honey or syrup if you prefer it sweeter. Sprinkle in some crushed red pepper if spicy is your jam.
- Add ¼ cup water, one Tablespoon at a time until desired consistency.
- Chutney will stay good in a sealed jar in the fridge for 3 weeks.
Notes
POTATOES: I like yukon gold for their yellow flesh that’s sweet and easy to mash. You can use any potato, even sweet potatoes that you have. I used 3 small potatoes. The exact measurement doesn’t matter. You can always adjust and add more spices if your potatoes are a bit larger.
RICE PAPER WRAPPERS: You’ll be cutting each circle in half to make 2 half moons, so each wrapper will make 2 samosas. You will get at least 24 samosas out of this recipe.
Nutrition
Note
The nutrition calculations were done using online tools. To obtain the most accurate representation of the nutritional information in any given recipe, you should calculate the nutritional information with the actual ingredients you used. You are ultimately responsible for ensuring that any nutritional information is accurate, complete and useful.
Did you make this recipe? Please leave a review below, then snap a picture and tag me @dkhealthcoach or use hashtag #dkhealtcoach on Instagram so I can see it!!
