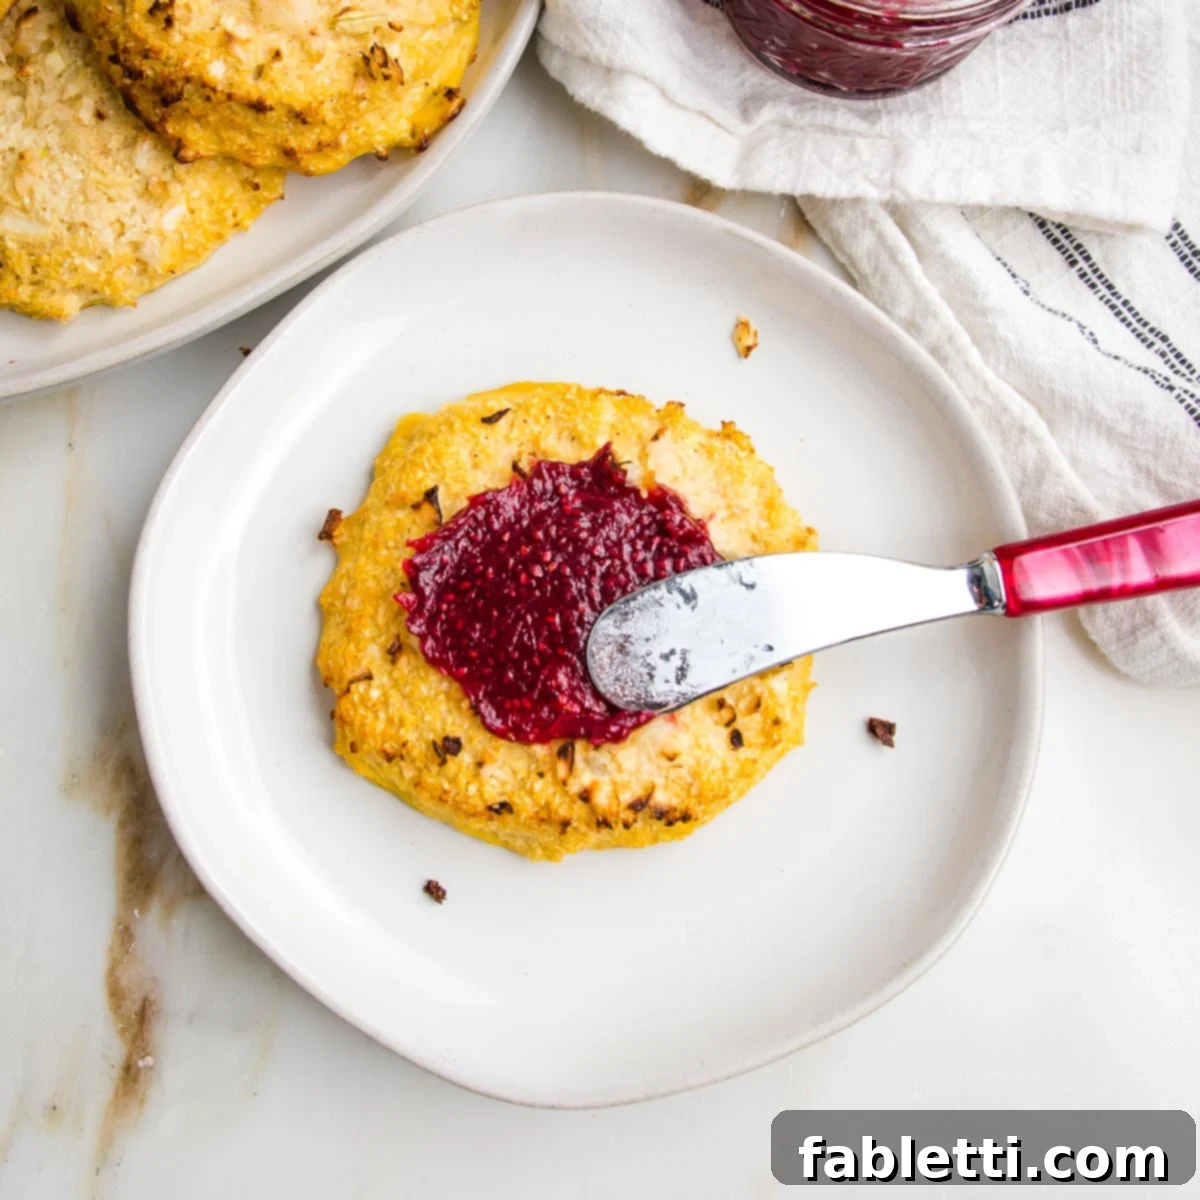
Delicious & Versatile Cauliflower Onion Rolls: Your Go-To Grain-Free, Low-Carb Alternative
Discover the ultimate solution for a healthy, adaptable bread alternative with these incredible Cauliflower Onion Rolls. Crafted with simple, grain-free ingredients, these rolls are not only effortlessly delicious but also a versatile make-ahead side dish or snack. Imagine sinking your teeth into a perfectly soft, savory bun that effortlessly fits into a Paleo, Whole30, or Kosher for Passover diet. Whether you need a sturdy foundation for your favorite sandwiches, a light base for veggie burgers, or a delightful canvas for almond butter or jam, these low-carb rolls are designed to impress and satisfy.

This comprehensive guide has been updated from its original publication in March of 2016 to bring you even more tips and details for perfect results.
Why You’ll Love These Cauliflower Onion Rolls
These Cauliflower Onion Rolls truly are a revelation – perfect for Passover celebrations and an absolute staple for any day of the year! If you’ve been searching high and low for a low-carb bun that doesn’t compromise on flavor or texture, your quest ends here. They offer a delightful chewiness and a gentle savory note that makes them incredibly versatile. Imagine them as the ideal accompaniment to your morning eggs, a sturdy base for a hearty lunchtime sandwich, or a light dinner roll.
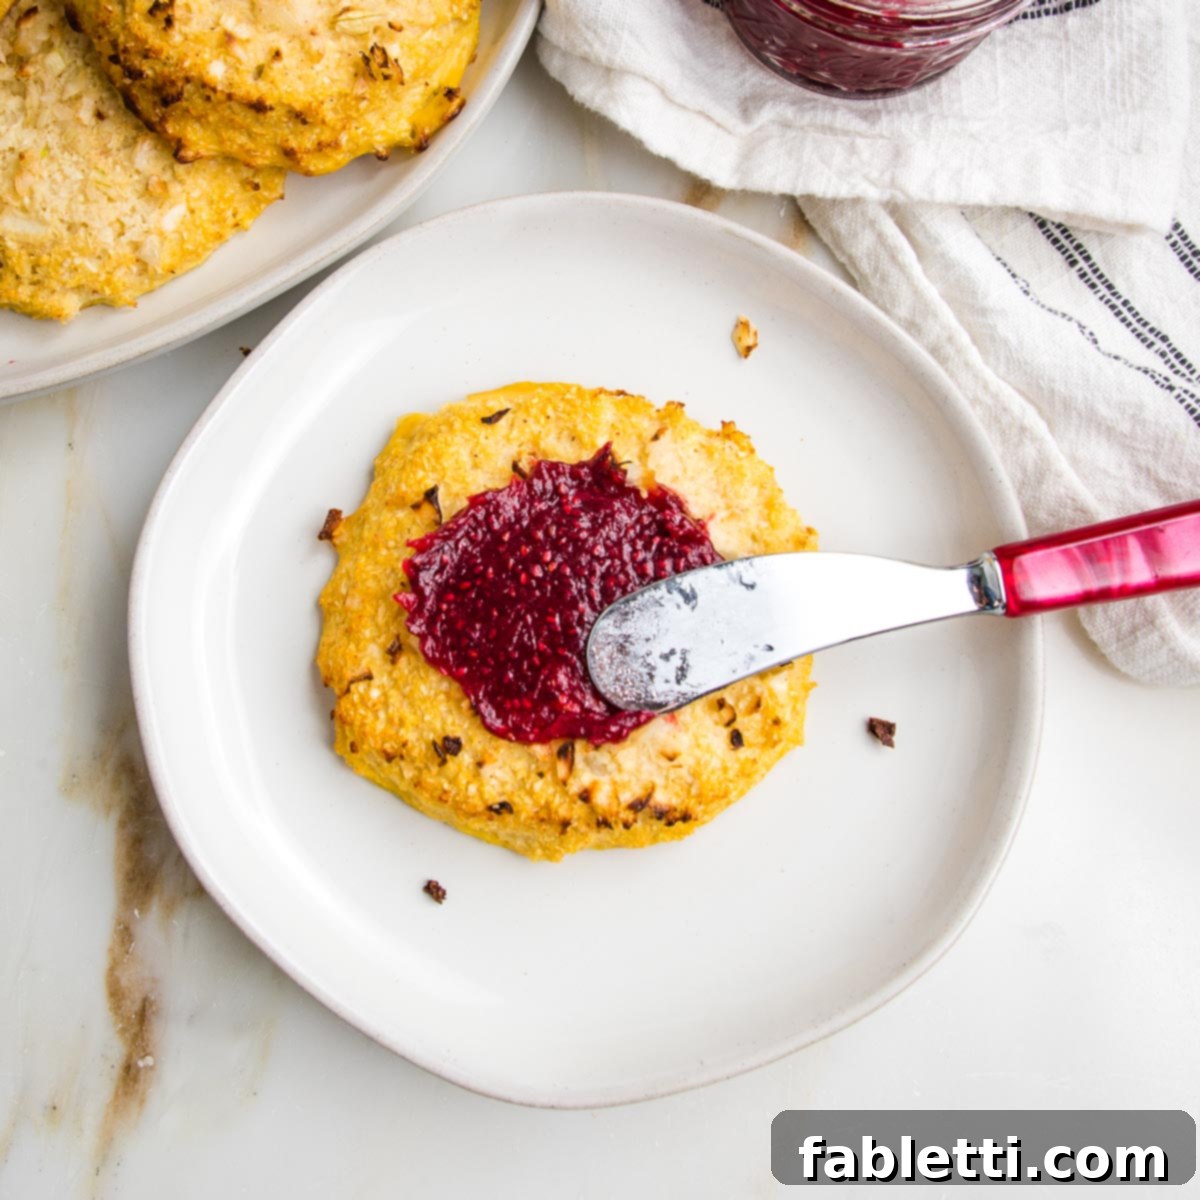
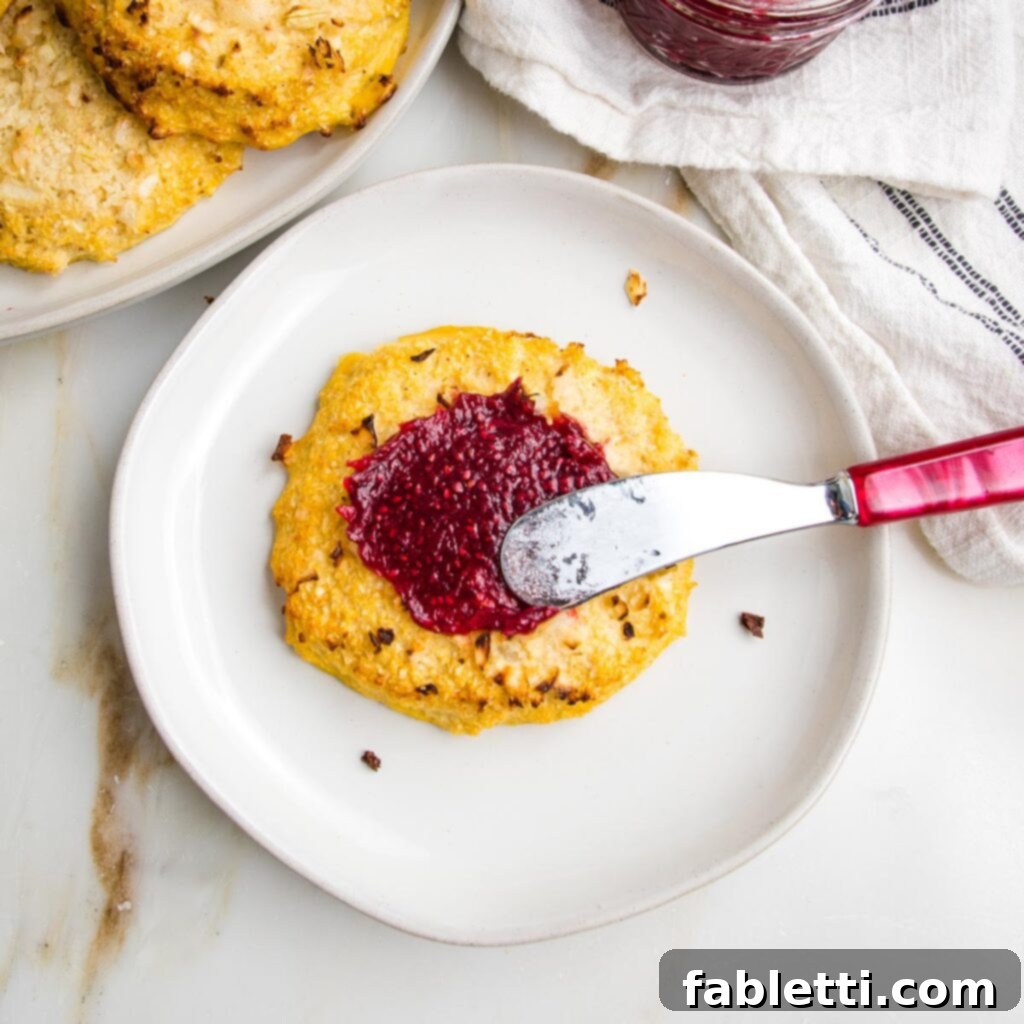
The magic happens when tiny, finely riced pieces of cauliflower are combined with almond flour, savory spices, and binding eggs. Sprinkled with aromatic onions and baked to golden perfection, the result is a remarkably satisfying, grain-free roll. Use them to elevate your vegan tuna sandwiches, serve alongside flavorful white bean burgers, or simply enjoy them on their own with a generous “shmear” of homemade cranberry chia jam. The possibilities are endless, and the deliciousness is undeniable.
While the sweet caramelization of baked onions on top is a personal favorite, don’t hesitate to experiment with other toppings. A sprinkle of “everything but the bagel” seasoning before baking takes these rolls to an entirely new level of savory bliss. It adds a fantastic crunch and an extra layer of flavor that’s truly “next-level” – though, rest assured, they are absolutely delicious just as they are!
Looking for more Healthy Passover Recipes? Discover new and exciting ways to enjoy Kosher for Passover dishes while maintaining a balanced diet with our collection of Vegetarian and Vegan Recipes for Passover.
The Remarkable Health Benefits of Cauliflower
Cauliflower, often hailed as a superfood, is far more than just a bland vegetable. Its mild flavor profile and incredible versatility in the kitchen make it a nutritional powerhouse that can seamlessly integrate into a variety of dishes. Incorporating cauliflower into your diet, especially as a replacement for higher-carb ingredients, offers a wealth of health advantages:
- Fiber for Optimal Gut Health: Cauliflower is an excellent source of dietary fiber, which is crucial for a healthy digestive system. Fiber helps to regulate bowel movements, preventing constipation and promoting overall gut regularity. Beyond that, it acts as a prebiotic, feeding the beneficial bacteria in your gut. A thriving gut microbiome is linked to improved immune function, better mood, and enhanced nutrient absorption.
- Rich in Essential Vitamins and Minerals: This humble vegetable is packed with vital nutrients. It’s particularly high in Vitamin C, a powerful antioxidant essential for immune system support and skin health. Cauliflower also provides a good amount of Vitamin K, important for blood clotting and bone health, as well as potassium for blood pressure regulation, folate for cell growth and function, and manganese, which plays a role in metabolism.
- Potent Antioxidant Properties: Like many cruciferous vegetables, cauliflower is brimming with antioxidants. These compounds actively combat free radicals in the body, which are unstable molecules that can cause cellular damage and contribute to chronic diseases. By reducing oxidative stress and inflammation, the antioxidants in cauliflower help to boost your immune system, protect your cells, and support long-term health.
- An Ideal Low-Carb Alternative: For those managing blood sugar levels, following ketogenic diets, or simply aiming to reduce carbohydrate intake, cauliflower is an invaluable ingredient. Its low-carb content makes it a fantastic substitute for grains and starchy vegetables. This allows you to enjoy familiar textures and meal structures without the carb overload, supporting weight management and metabolic health.
I genuinely adore cooking with cauliflower because it’s not only incredibly nutritious but also surprisingly adaptable. As long as you don’t overcook it (which can lead to a mushy texture and a sulfurous smell), its relatively neutral flavor allows it to readily absorb and enhance the seasonings and other ingredients you pair it with. This chameleon-like quality makes it perfect for transforming into diverse culinary creations. For example, my Oven Roasted Cauli-rice bursts with vibrant Mexican flavors, making it a super tasty and healthy side.
The versatility of cauliflower extends to its many forms and uses. A whole roasted cauliflower, beautifully seasoned and cooked until tender, serves as an impressive and delicious vegan centerpiece for any meal. For a low-carb twist on a beloved Jewish holiday tradition, my Cauliflower Kugel offers a healthier yet equally comforting option. And for a truly satisfying plant-based main, I love preparing roasted cauliflower steaks with a bright chimichurri sauce. For a quick and nutritious side, my favorite 15-minute dish is riced cauliflower with tender asparagus.
I frequently use cauliflower as a smart substitute for higher-carb alternatives like potatoes or legumes in many recipes, aiming to significantly boost nutrition and lower the carbohydrate count. Classic examples include a creamy and comforting Cauliflower Leek Soup, a lighter yet equally satisfying take on Vegan Mashed Potatoes and Roots, and a flavorful Cauliflower Hummus that makes for a fantastic low-carb dip. It truly makes you wonder: is there anything cauliflower can’t do in the kitchen?
Essential Ingredients and Smart Substitutions
Crafting these delicious cauliflower onion rolls requires just a handful of simple, wholesome ingredients. The key to their success lies in selecting quality components and understanding their roles in the recipe:

- CAULIFLOWER: The star of our recipe! For the absolute best texture in your finished rolls, it’s crucial to pulse a whole head of cauliflower in a food processor until it resembles tiny grains of quinoa. This specific, fine consistency is what creates a roll-like structure. Already riced cauliflower, whether fresh or frozen, typically has larger pieces that won’t break down adequately into the batter, resulting in a less cohesive and less satisfying roll.
- ONION: Finely chopped yellow onion is mixed directly into the batter and sprinkled on top, providing a wonderful aromatic depth and subtle sweetness when baked. If yellow onions aren’t available or you prefer a milder flavor, you can easily substitute with finely chopped scallions (green onions) or leeks.
- EGGS: Eggs serve as the primary binder in this recipe, holding everything together and contributing to the roll’s structure. Unfortunately, there isn’t a truly effective vegan substitute for eggs in this particular formulation. I’ve experimented with flax eggs, but they generally don’t provide the same binding power, and the rolls tend not to hold together well.
- ALMOND FLOUR: Using super fine, blanched almond flour is essential for achieving the right consistency and tender crumb in these rolls. It’s readily available in most major grocery stores, as well as bulk retailers like Costco, Trader Joe’s, and online platforms such as Thrive Market. While I haven’t personally tested it with coconut flour due to an allergy, you could potentially try it as a substitution, though the liquid ratios would likely need significant adjustment as coconut flour absorbs much more moisture.
- SPICES: A simple blend of paprika, sea salt, and white pepper provides a balanced, savory flavor profile that complements the cauliflower and onion beautifully. Feel free to adjust these to your taste or add a pinch of garlic powder or onion powder for extra depth.
Step-by-Step Guide: Crafting Your Cauliflower Onion Rolls
Making these cauliflower onion rolls is a straightforward process, but paying attention to a few key steps will ensure perfect results every time. Follow these instructions to create your batch of healthy, grain-free buns:
Step 1: Rice the Cauliflower to Perfection
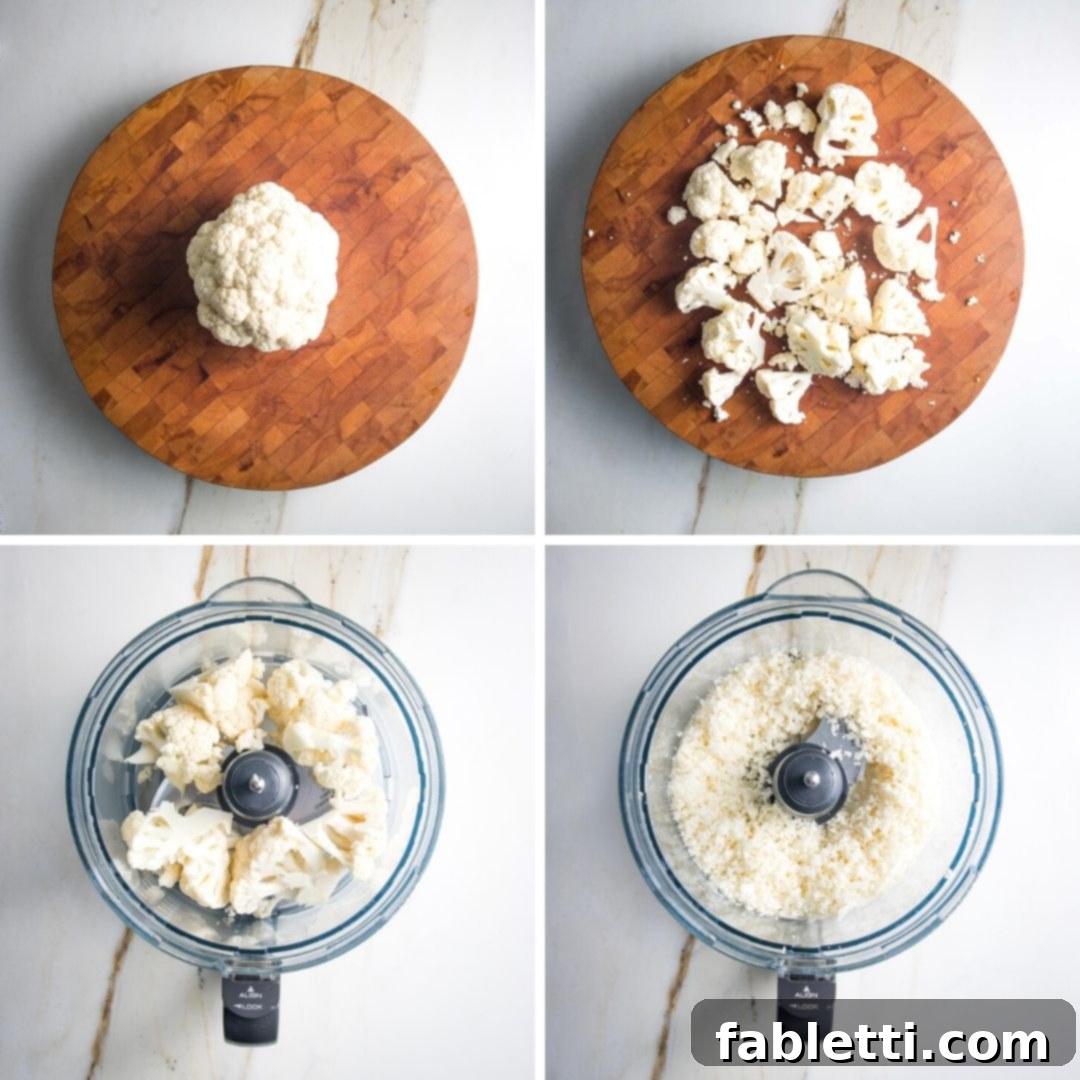
First, and perhaps the most crucial step, you’ll need to transform a head of cauliflower into tiny, uniform pieces, roughly the size of quinoa grains. This is easily achieved using a food processor. Begin by cutting the cauliflower into florets. Depending on the size of your cauliflower and your food processor, you may need to work in 3-4 batches to avoid overcrowding and ensure even ricing. Pulse in short bursts until the cauliflower reaches the desired consistency – fine, but not mushy.
Step 2: Mix and Season Your Batter
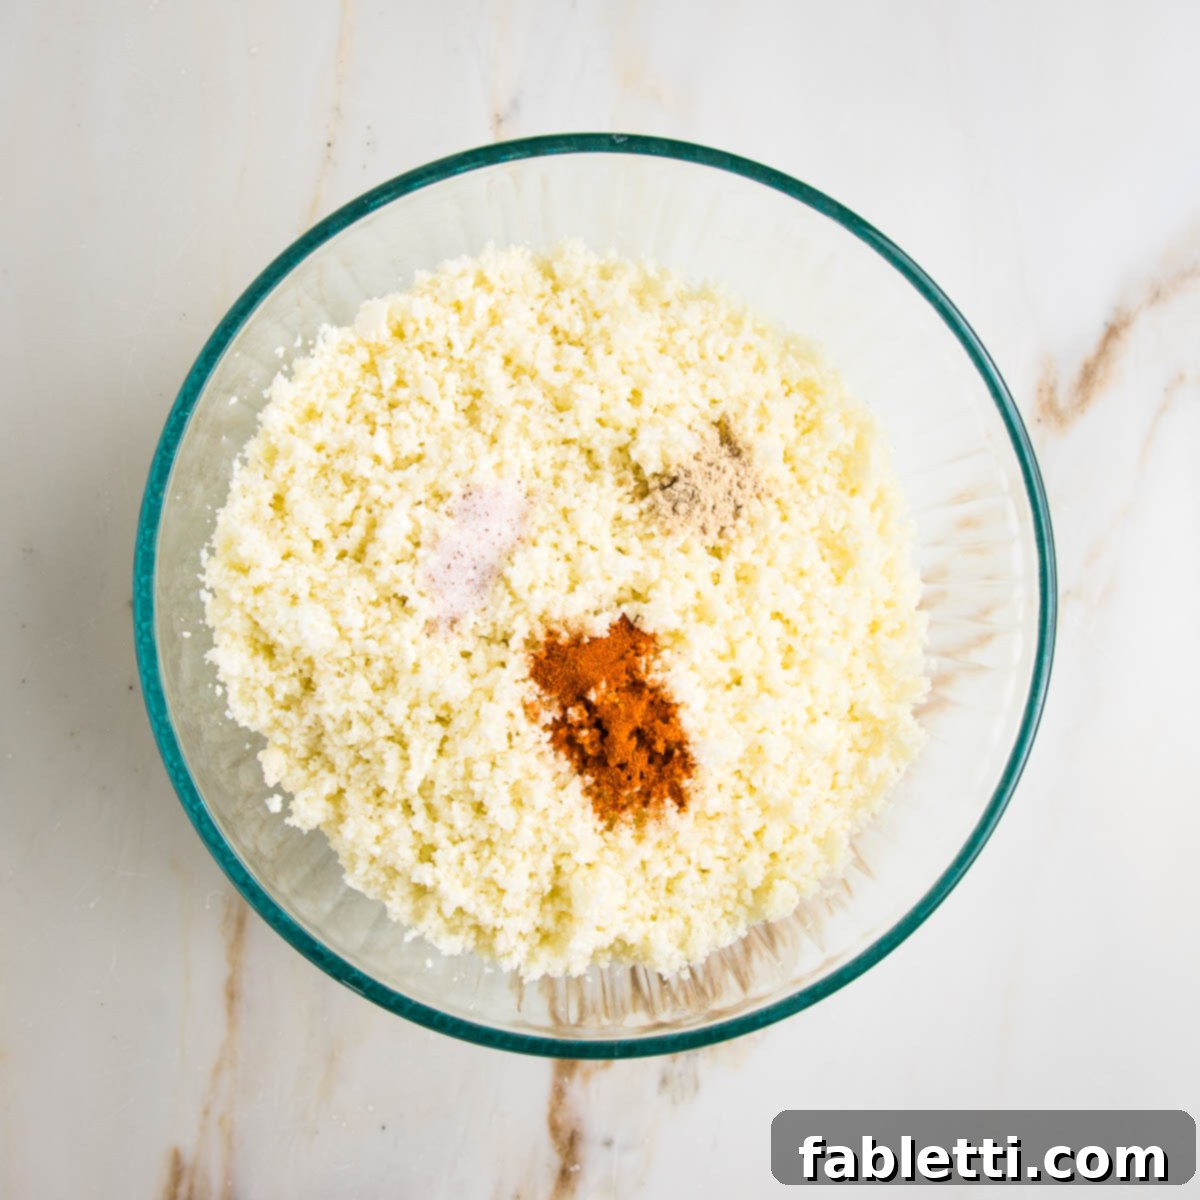
Once your cauliflower is perfectly riced, transfer it to a large mixing bowl. Add the sea salt, white pepper, and paprika. Then, incorporate most of your finely chopped onions, reserving a small portion for sprinkling on top of the rolls just before baking. Stir these ingredients thoroughly to ensure the seasonings are evenly distributed throughout the cauliflower.
Step 3: Incorporate Wet Ingredients and Almond Flour
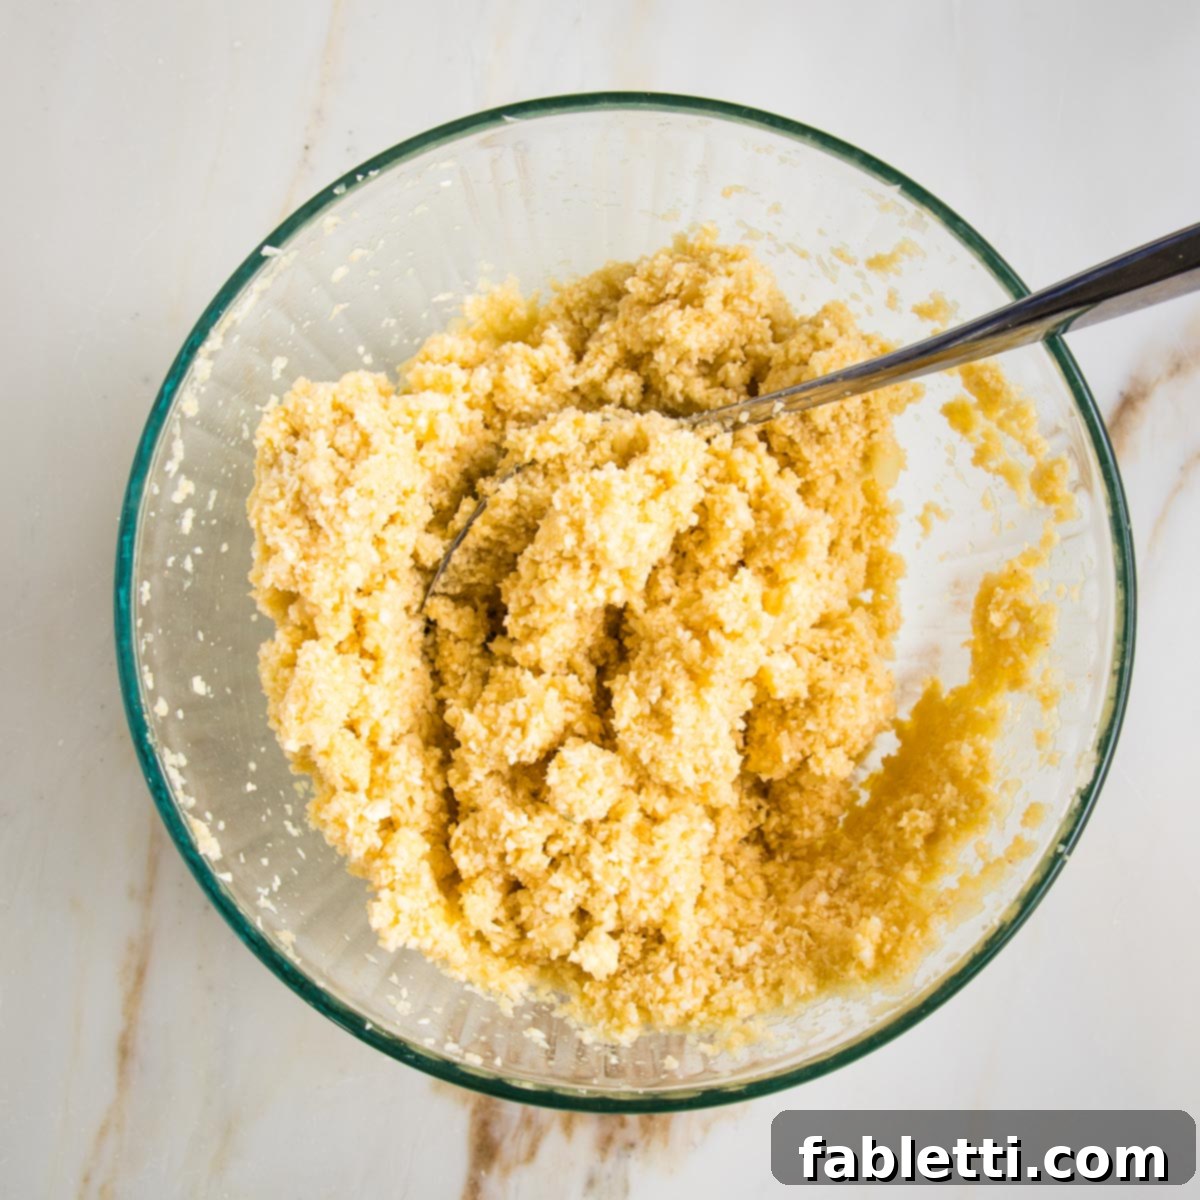
In a separate small bowl, lightly scramble your eggs until they are well combined and slightly frothy. Pour the beaten eggs into the cauliflower mixture. Mix everything together thoroughly. Next, add the almond flour; this will help to bind the mixture and absorb any excess moisture from the eggs and cauliflower. Continue mixing until a cohesive batter forms. If the batter appears too wet or “oozing” liquid, add an additional tablespoon of almond flour, one teaspoon at a time, until the mixture is firm enough to shape.
Step 4: Form and Prepare for Baking
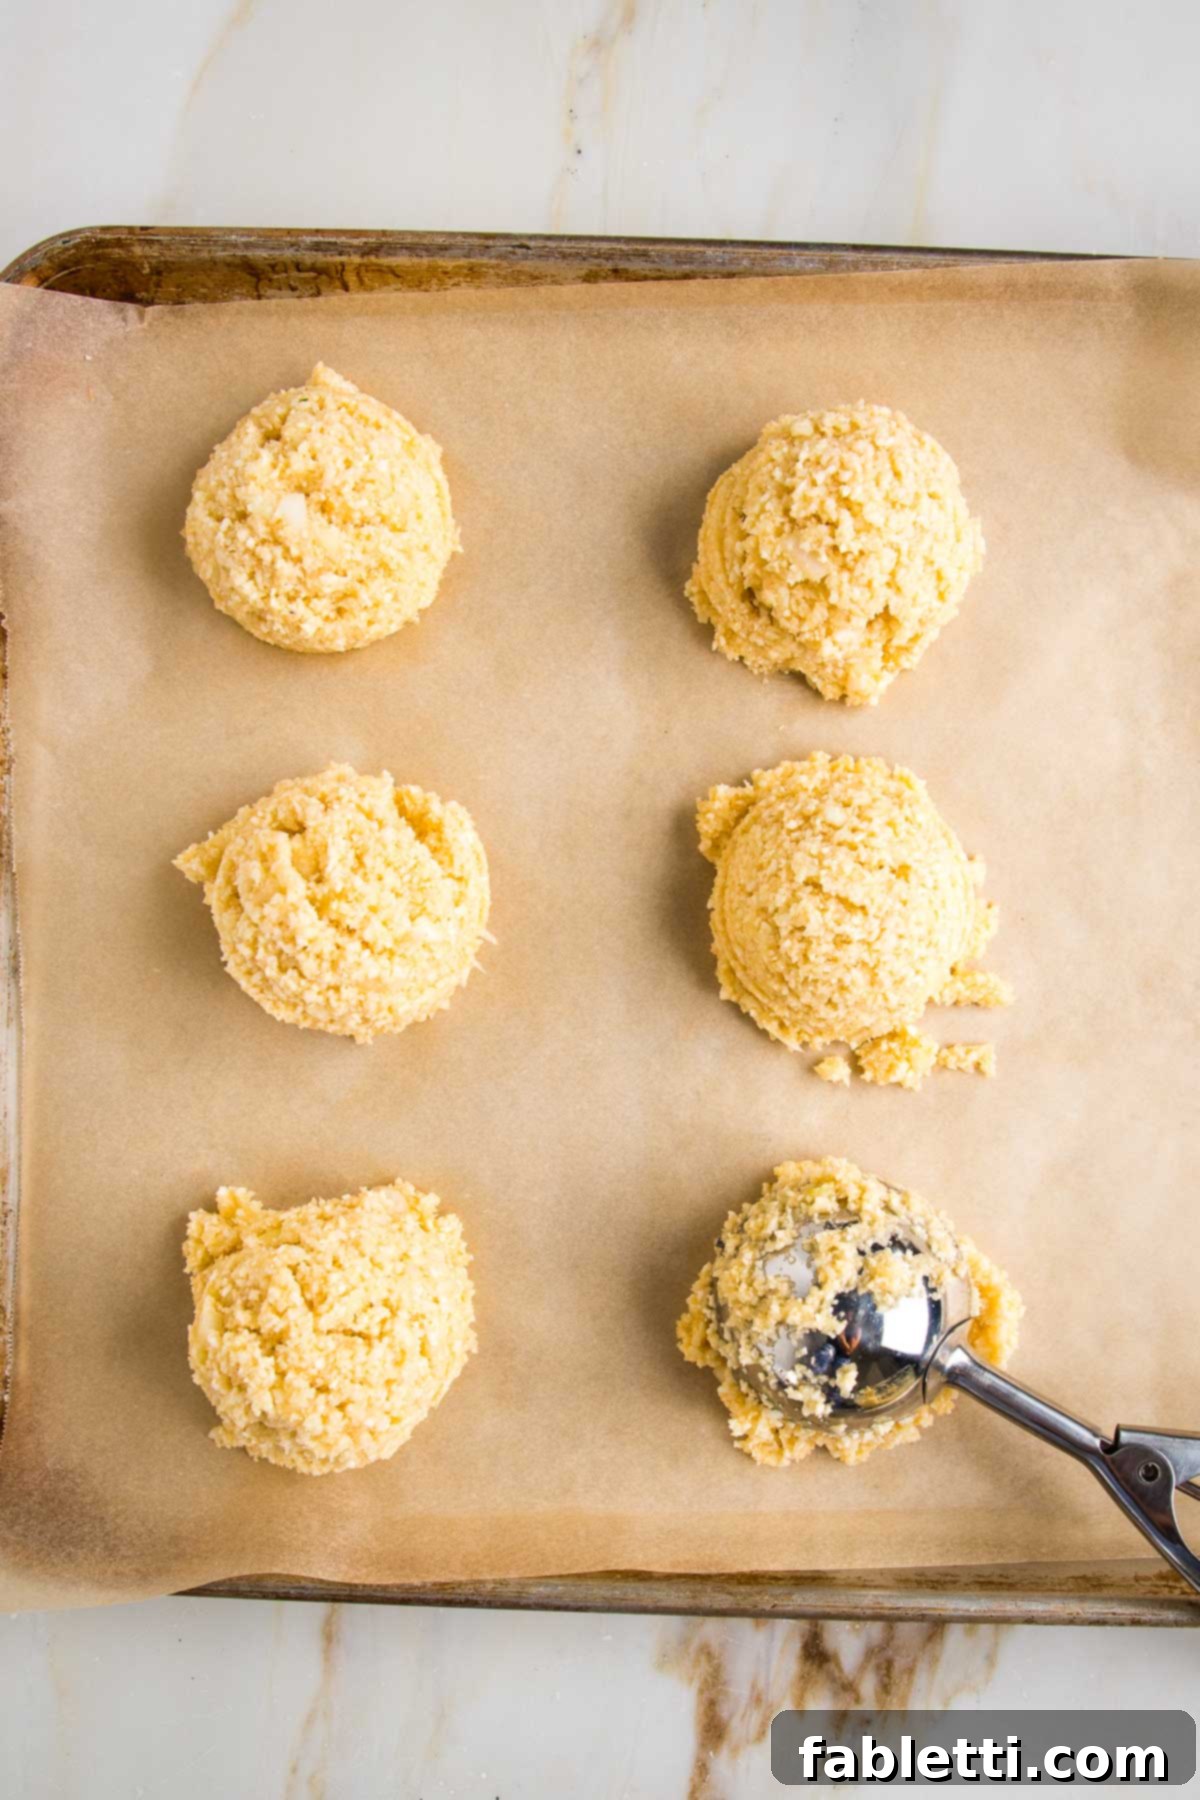
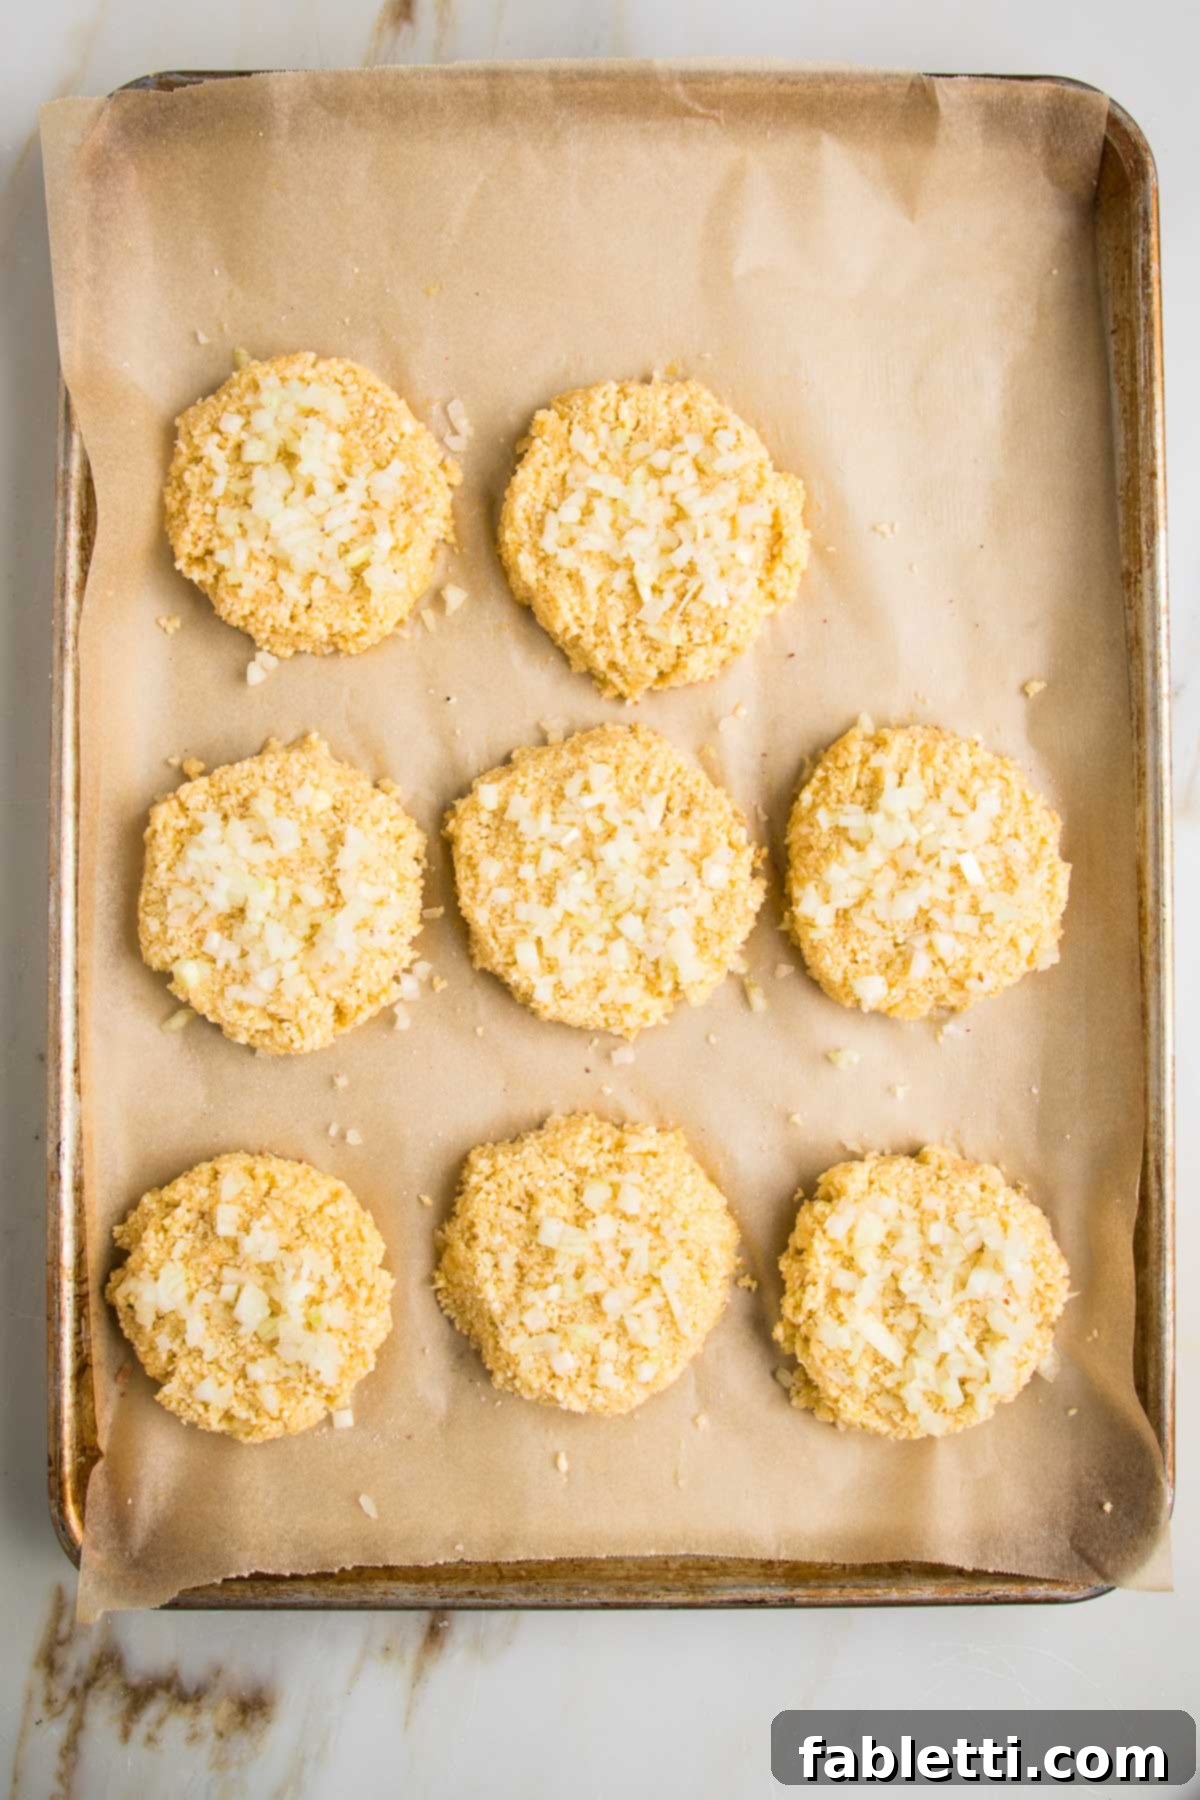
Line a sturdy baking sheet with parchment paper and preheat your oven to 400°F (200°C). Divide the cauliflower mixture into 8 equal portions. A large scoop or a spoon can help with this. Gently scoop each portion onto the prepared baking sheet, spacing them evenly. Use the back of a fork to slightly flatten each “roll” into a disc shape; this helps them cook more evenly and provides a better surface for toppings. Finally, sprinkle the reserved chopped onions over the tops of the rolls. For an extra touch of flavor and texture, a pinch of coarse sea salt can also be added at this stage.

Step 5: Bake Until Golden
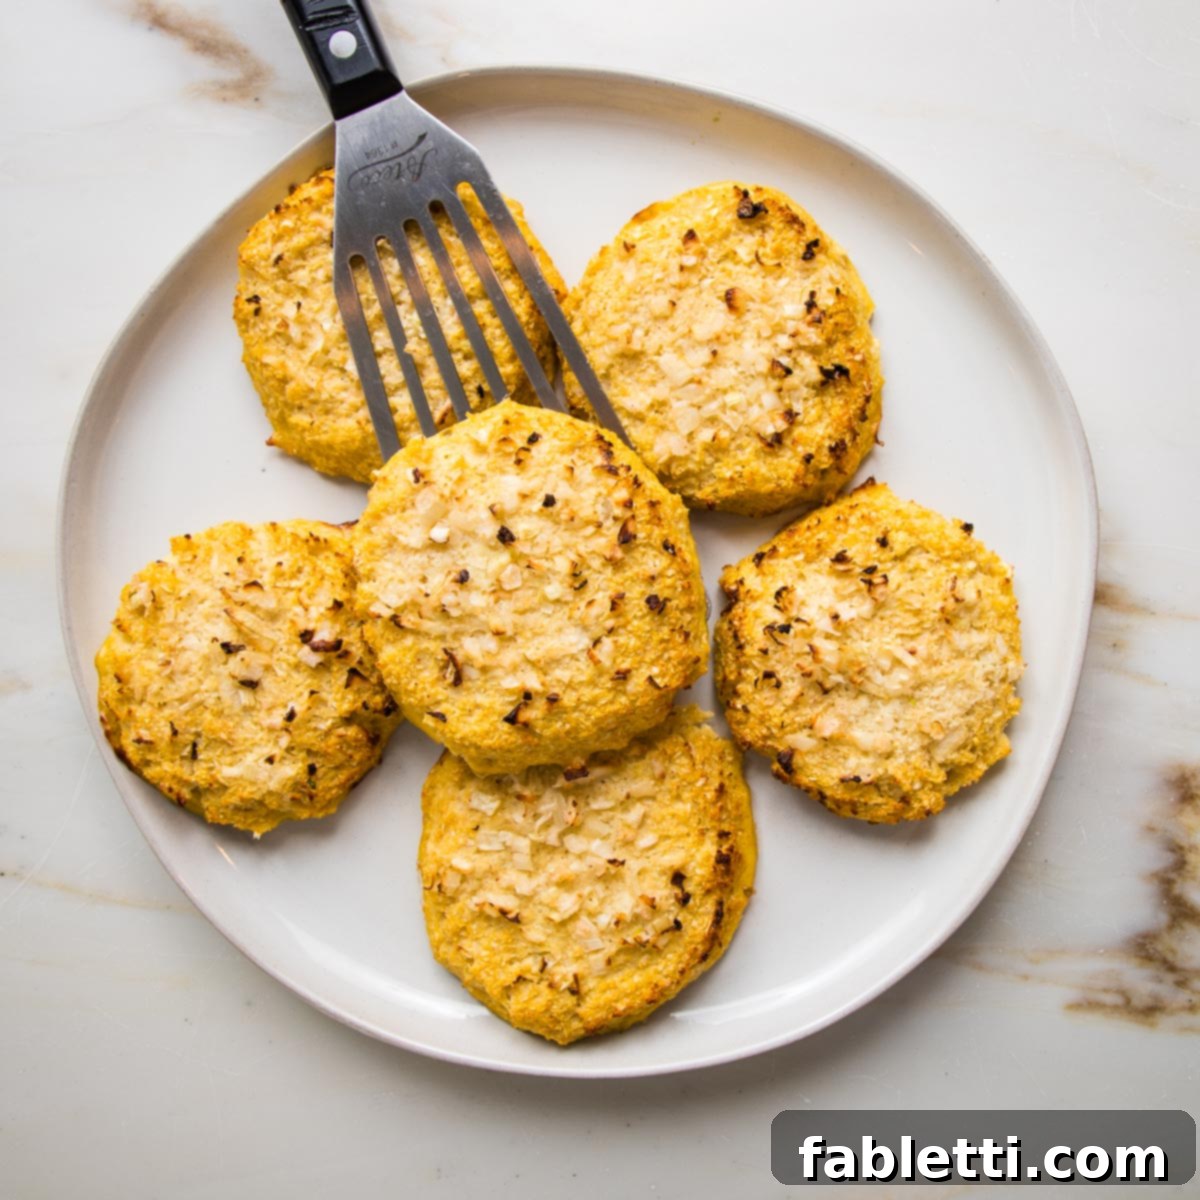
Place the baking sheet in your preheated 400°F (200°C) oven and bake for 30-35 minutes. The rolls should turn a beautiful golden brown on the outside, and feel firm to the touch. If you’ve made your rolls slightly thicker (which is great for creating a more substantial sandwich bun), they might require the full 35 minutes to cook through to the center. Once baked, remove them from the oven and let them cool slightly on the baking sheet before transferring to a wire rack. These rolls are delightful served warm, but they are equally delicious at room temperature.
Debra’s Expert Tips for Perfect Rolls
- Precision in Onion Prep: When preparing your onions, make sure to dice them as finely as possible. This ensures they integrate seamlessly into the batter, offering a consistent flavor in every bite, and prevents large chunks that might compromise the roll’s structure. Don’t forget to save some of those finely diced onions to sprinkle on top for an added layer of flavor and visual appeal before baking!
- The Art of Riced Cauliflower: This is a game-changer! Pre-riced cauliflower, whether fresh or frozen, typically has larger, more uneven pieces that simply won’t yield the same delicate, roll-like texture. Taking the extra few minutes to pulse your cauliflower in a food processor until it’s the size of quinoa grains is crucial. This finer consistency mimics the texture of traditional bread more closely, giving your low-carb rolls a superior, authentic feel.
- Flavorful Variations: While these rolls are phenomenal as a Passover-compliant and grain-free option, don’t limit yourself to just onions! For a different flavor profile, add all the finely diced onions directly into the batter. Then, before baking, generously sprinkle with “everything but the bagel” seasoning. The sesame seeds, poppy seeds, dried garlic, and onion flakes add an incredible savory crunch that elevates these rolls to a gourmet level.
- Creative Serving Ideas: Beyond being a fantastic bun for sandwiches or burgers, these rolls shine as a delightful snack. Try toasting one lightly in your toaster or under the broiler for a minute or two. Then, spread it generously with your favorite jam, almond butter, or even a savory vegan cream cheese for a truly perfect tea-time snack or quick breakfast. They also pair wonderfully with a hearty bowl of soup or stew.
Meal Prep and Smart Storage Solutions
One of the best features of these cauliflower onion rolls is how well they lend themselves to meal prepping. Enjoy them fresh, or prepare a larger batch to savor throughout the week or month!
- SERVE: These versatile rolls can be enjoyed in countless ways. Use them as a bun for your favorite veggie burgers, slice them in half for a lighter sandwich thin, or simply enjoy them as a flavorful roll alongside a meal. They are also excellent cut in half and spread with savory pesto, sweet jam, or creamy hummus. Consider them as mini-pizza bases or serve them with a dollop of avocado for a quick, healthy bite.
- PREP AHEAD: To save time on busy days, you can “rice” the cauliflower up to 5 days in advance. Store the riced cauliflower in an airtight container in the refrigerator until you’re ready to mix the batter and bake. This makes the baking process much quicker and more efficient.
- STORE: Once baked and completely cooled, Cauliflower Onion Rolls can be stored in the fridge. Place them in an airtight container to maintain their freshness for up to 5 days. You can easily gently reheat them in a toaster oven or microwave for a fresh-from-the-oven feel.
- FREEZE: These rolls freeze beautifully, making them ideal for long-term meal planning. Ensure the rolls are completely cool before storing them to prevent freezer burn. Arrange them in a single layer on a baking sheet to flash freeze for about an hour, then transfer them to freezer-safe zip-top bags or glass storage containers. They will keep well in the freezer for up to 3 months. When ready to enjoy, simply thaw in the refrigerator overnight or reheat directly from frozen in a preheated oven.
More Inspiring Healthy Passover Recipes
- Vegetarian Chopped Liver Recipe with Mushrooms
- Double Chocolate Zucchini Muffins
- Cauliflower Kugel Recipe
- Vegan Shepherd’s Pie with Sweet Potato Mash
The Cauliflower Onion Rolls Recipe

Cauliflower Onion Rolls
Debra Klein
Cauliflower Onion Rolls are a delicious and satisfying grain-free recipe. These amazing low-carb buns can be used for sandwiches, veggie burgers, or toasted with almond butter or jelly for a tasty snack. Made with simple ingredients, they are compliant with many dietary styles, including Paleo, Whole30, and Kosher for Passover.
Rate this Recipe
Pin Recipe
10 minutes
30 minutes
40 minutes
Breakfast & Brunch
Grain-Free
8 rolls
43 kcal
Equipment
- Glass Mixing Bowls with Lids
- Parchment Baking Paper
- Food Processor
Ingredients
- 1 medium cauliflower riced (about 3 ½ cups)
- 1 small yellow onion super small dice
- ½ teaspoon sea salt
- ¼ teaspoon white pepper
- ½ teaspoon sweet paprika
- 2 large eggs
- ¼ cup + 1 Tablespoon Almond meal fine ground*
Instructions
- Preheat oven to 400°F (200°C) and line a heavy baking tray with unbleached parchment paper.
- Cut the end off the cauliflower, cut through the core, and then break into smaller pieces. Place ⅓ of the cauliflower pieces into the bowl of a food processor fitted with the “S” blade and pulse until cauliflower is uniformly in small pieces resembling quinoa. Continue in batches until all cauliflower is “riced.”
- Transfer riced cauliflower to a large bowl and mix in salt, pepper, paprika, and 1 Tablespoon of the finely diced onions.
- Beat the eggs until frothy and add to the mixture. Mix well. Then add in ¼ cup of the almond meal to soak up the moisture from the eggs. Add another Tablespoon of almond flour if the batter is oozing liquid and feels too wet.
- Form the mixture into 8 evenly sized balls. Push each “roll” down gently with the back of a fork to flatten slightly. Sprinkle with remaining onions and additional coarse sea salt if desired.
- Bake for 30 minutes. If rolls are a bit thicker (which is often preferred for sandwiches), they may need 35 minutes to cook all the way through. Serve warm or at room temperature.
Video
Notes
It’s important to “rice” the cauliflower into super small pieces using a food processor. The finer consistency will produce a more desirable roll-type texture. Already riced cauliflower—either fresh or frozen—doesn’t work as well in this recipe as it typically comes in larger, less uniform sizes.
Store any extra rolls in an airtight container in the fridge. To serve, bring to room temperature or gently reheat in a 300°F (150°C) oven for about 10 minutes. Alternatively, slice them and toast or broil them for 3 minutes before making sandwiches or adding your favorite spreads.
Nutrition
Calories: 43kcal
Carbohydrates: 4g
Protein: 3g
Fat: 2g
Polyunsaturated Fat: 1g
Cholesterol: 47mg
Sodium: 161mg
Fiber: 2g
Sugar: 2g
Note
The nutrition calculations were done using online tools. To obtain the most accurate representation of the nutritional information in any given recipe, you should calculate the nutritional information with the actual ingredients you used. You are ultimately responsible for ensuring that any nutritional information is accurate, complete and useful.
Did you make this recipe?
Please leave a review below, then snap a picture and tag me @dkhealthcoach or use hashtag #dkhealtcoach on Instagram so I can see it!!
