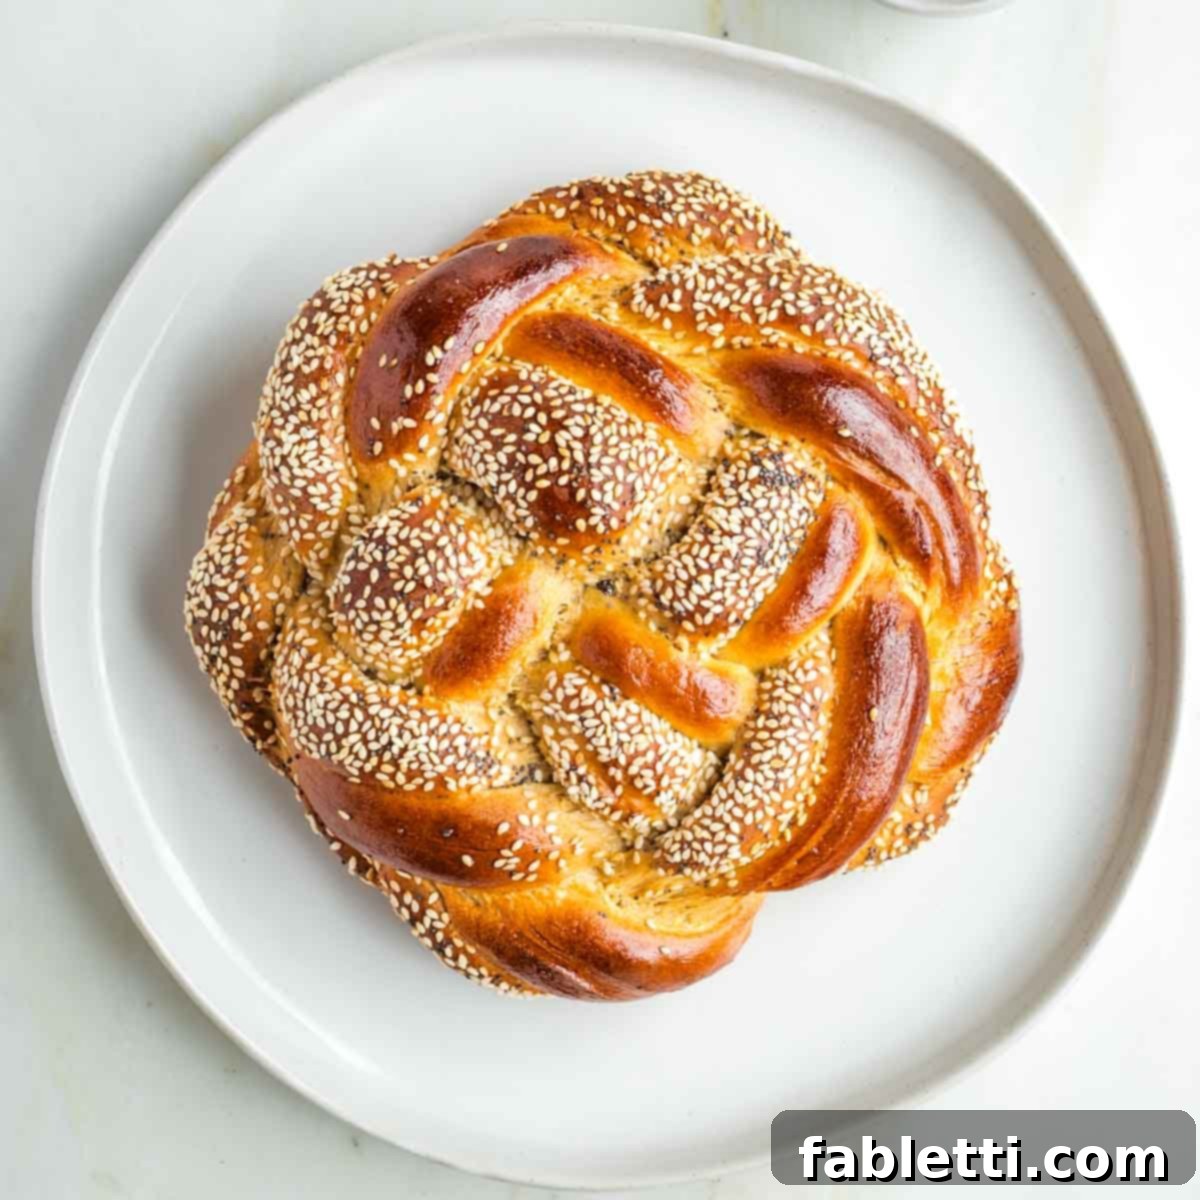
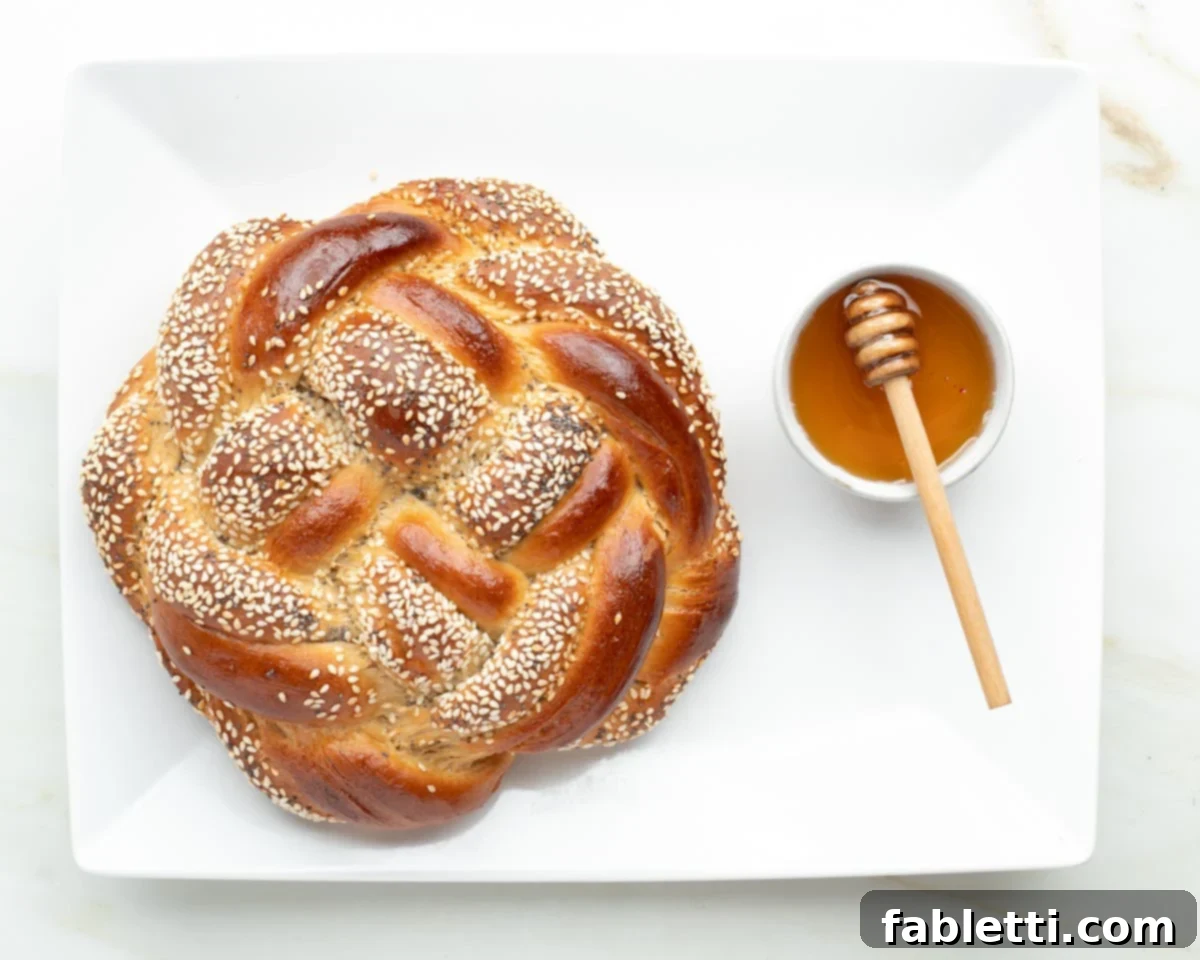
Sweet Round Challah Bread is more than just a simple loaf; it’s a cherished symbol and an essential part of Jewish Holiday Traditions. This delightful challah dough recipe, naturally sweetened with golden honey instead of refined sugar, is expertly divided and braided into beautiful, meaningful round loaves. These artisanal breads are not only perfect for Rosh Hashanah and all the Jewish High Holidays, symbolizing heartfelt wishes for a sweet and prosperous new year, but any leftover sweet challah also transforms effortlessly into the most exquisite French toast you’ll ever taste!
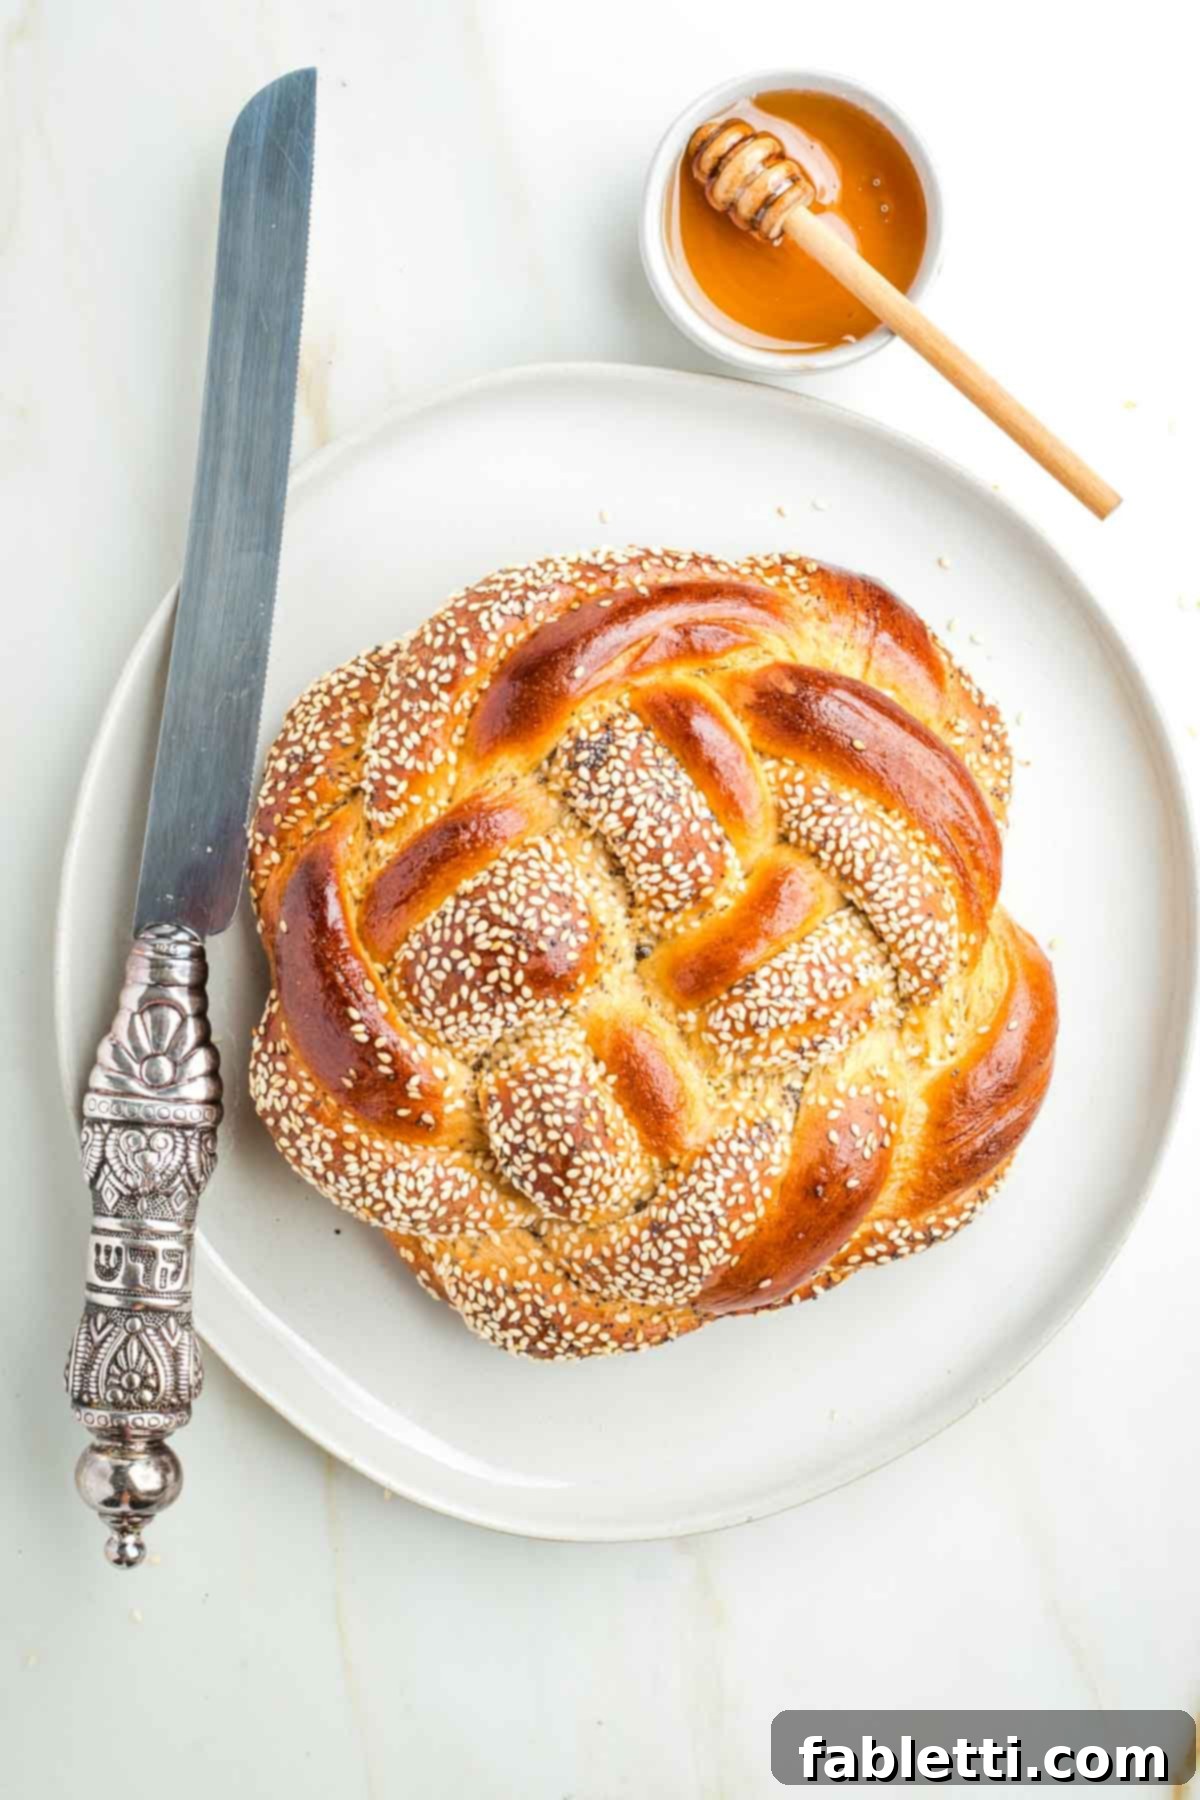
Bake the Perfect Sweet Round Challah Bread for Jewish Holidays
Embarking on the journey of making homemade Challah Bread from scratch might seem a little daunting at first glance, but I assure you it’s an incredibly rewarding and special tradition that’s far easier than you might imagine. With over 25 years of hands-on experience baking challah every single week for Shabbat and lovingly crafting countless round loaves for all the Jewish holidays, I’ve gathered invaluable insights and perfected techniques for getting that challah dough just right.
For the joyous celebrations of Rosh Hashanah and Sukkot, I consciously incorporate an extra touch of honey into my regular dough. This isn’t merely about enhancing the flavor; it’s a beautiful culinary tradition, symbolically representing our heartfelt wishes for a sweet, fulfilling, and prosperous new year. Often, the weekend before a major holiday, I cherish the tradition of inviting friends over for an enjoyable marathon baking session. Together, we knead, braid, and bake an abundance of these gorgeous, round challah loaves. Sharing this experience truly sweetens the baking process and strengthens our bonds, making the preparation almost as meaningful as the meal itself.
Once you’ve savored some of this tender challah, perhaps dipped in honey, why not consider elevating the experience with something savory to spread on your slice? My personal favorite pairings for this sweet challah include a delightful vegetarian mock chopped liver, offering a rich and earthy contrast, and a fragrant garlic and leek confit. These unique pairings offer a wonderful balance that truly highlights the challah’s delicate sweet notes, making each bite an exploration of flavor.
Kickstart the Jewish New Year with Healthy & Delicious Rosh Hashanah Recipes
Are you looking to begin the Jewish New Year with a festive spread of healthy and utterly delicious dishes? Be assured that no Jewish holiday menu is ever truly complete without an abundance of yummy food that nourishes both body and soul. I encourage you to explore my carefully curated roundup of Healthy Rosh Hashanah Recipes to discover and introduce exciting new flavors and traditions to your festive table this year. From vibrant salads to comforting mains, you’ll find inspiration to make your holiday meals unforgettable.
Essential Ingredients for Your Perfect Homemade Challah
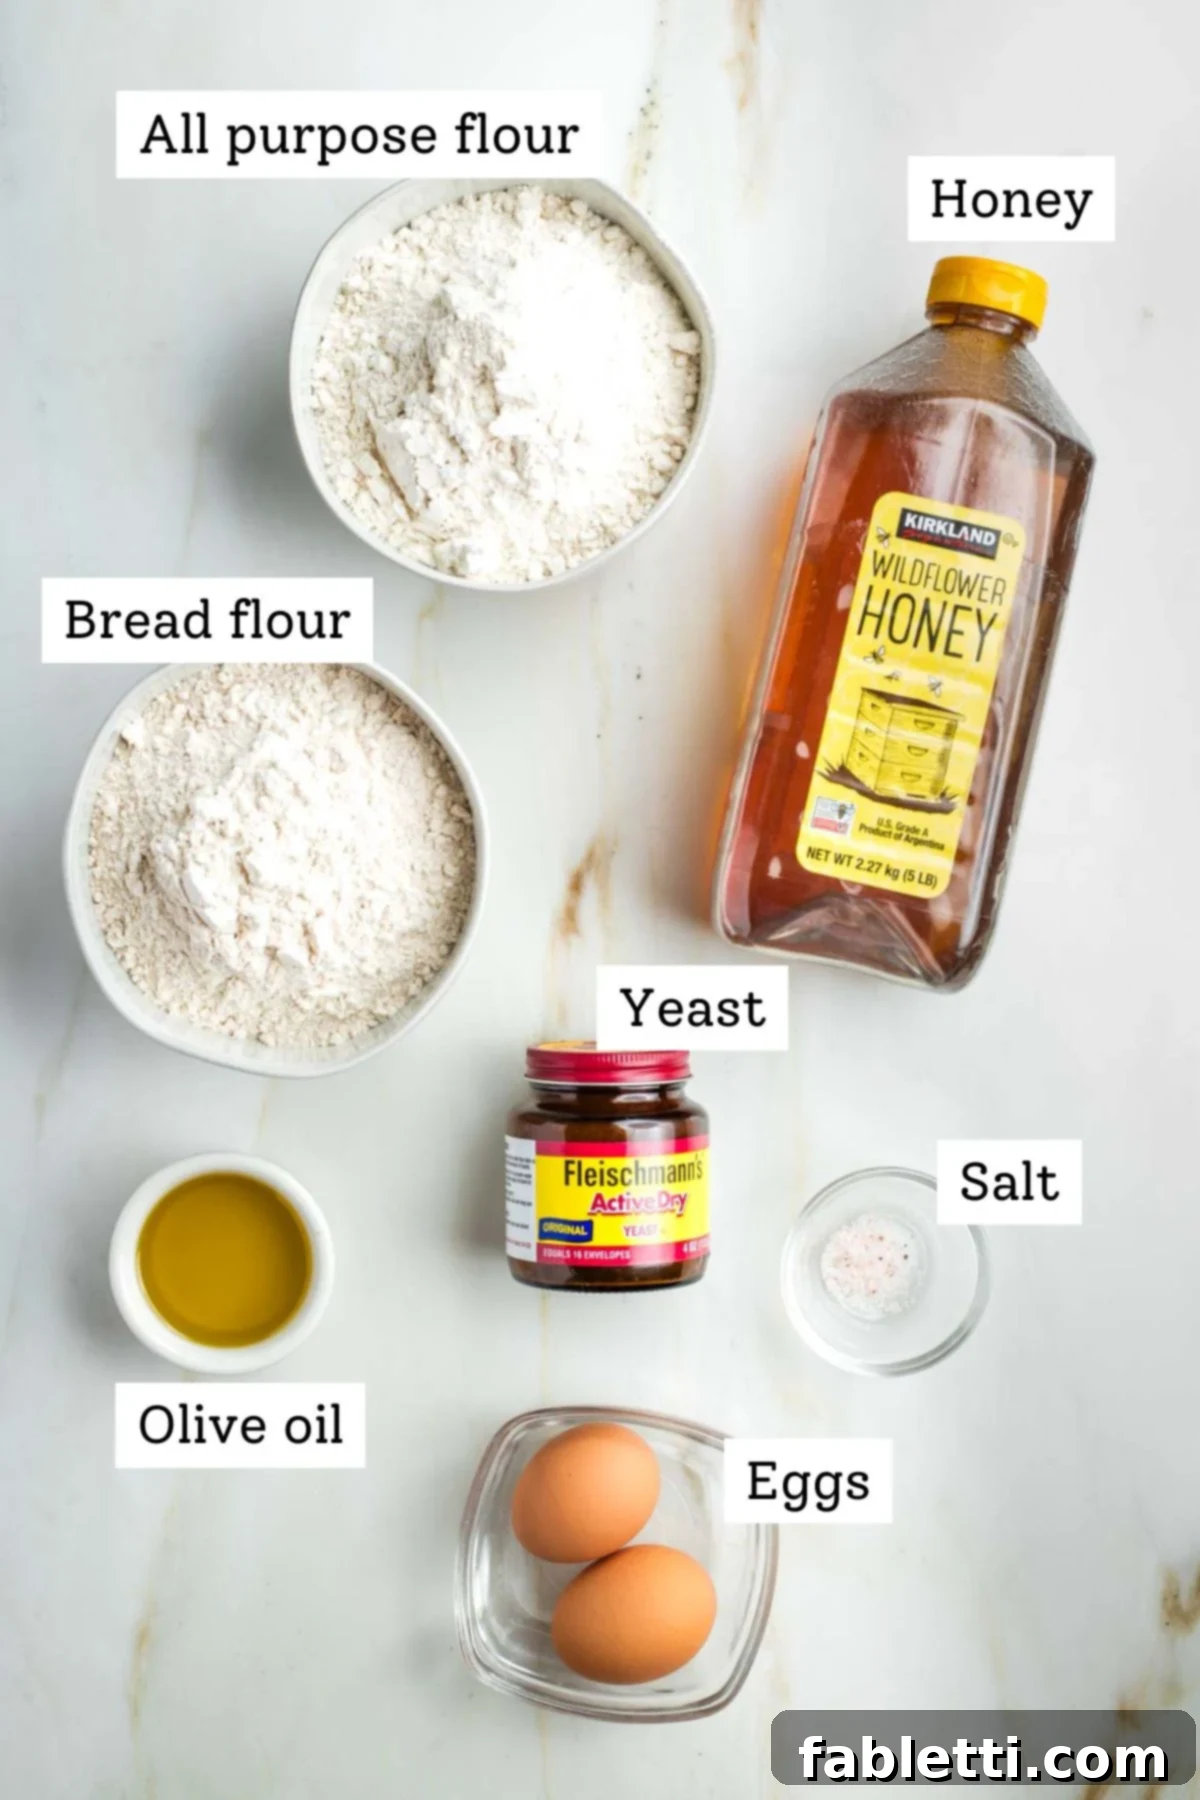
- Flour: The choice of flour profoundly impacts your challah’s final texture and flavor. I passionately advocate for using freshly milled whole grain flour whenever possible, as it brings superior flavor, aroma, and nutritional value compared to highly processed alternatives. Through my extensive years of weekly baking, I’ve discovered that a balanced combination of whole grain bread flour and whole grain all-purpose flour yields the absolute ideal challah – a perfect blend of robust structure and tender, delicate crumb. Bread flour, with its higher protein content, provides the necessary gluten development for that characteristic chewy, elastic texture, while all-purpose flour contributes to a softer, more yielding interior. That being said, please don’t let the quest for specific flour types deter you; I’ve successfully baked delicious challah with various flours, even while traveling with limited options, and they all work. The most important thing is to simply use what you have readily available!
- Yeast: Yeast is the incredible living magic that makes your challah rise to fluffy perfection. While both active dry yeast and rapid-rise (or instant) yeast can be used, active dry yeast is generally my preferred choice for challah. It requires a brief, initial period of “proofing,” which not only visually confirms its viability but also kickstarts its activity, resulting in a more robust and flavorful rise. If you opt for rapid-rise yeast, you might not need to proof it separately, but always check the specific package instructions. Regardless of type, always ensure your yeast is fresh and within its expiration date; expired yeast simply won’t perform, leading to a flat, dense loaf.
- Honey: Honey is the undisputed star sweetener in this challah recipe, offering a complex, nuanced flavor and a beautiful golden-brown hue that granulated sugar simply cannot replicate. Beyond its delightful taste, honey plays a crucial role in activating and nourishing the yeast, helping it bloom vigorously and ensuring a strong, consistent rise for this rich egg dough. Its natural hygroscopic properties also contribute significantly to the challah’s tender crumb and help extend its freshness, keeping it moist and delicious for longer.
- Eggs & Olive Oil: These rich additions are fundamental to the challah’s iconic golden color, tender texture, and incredible flavor profile. Eggs add essential structure, a luxurious richness, and help to emulsify with the olive oil, creating a truly smooth and pliable dough. Olive oil, chosen for its healthy fats and subtle flavor, keeps the challah wonderfully moist and further enhances its delicate sweetness, contributing to a truly indulgent experience.
- Salt: A seemingly small but undeniably mighty ingredient, salt is absolutely essential for balancing the sweetness from the honey, enhancing the overall depth of flavor in the challah, and regulating the yeast activity, ensuring it doesn’t rise too quickly. Never skip the salt; it brings all the flavors together in perfect harmony.
I totally “get” that the process of baking challah from scratch can appear intimidating, especially with detailed instructions and numerous process photos. However, please do not let the length of this post or the sheer number of visual aids scare you away! Every single photo and step is included with one singular goal in mind: to make this baking experience as straightforward, easy, and ultimately successful as possible for you. Think of all these images as me virtually cheering you on, guiding you through each critical stage, and helping you visualize exactly what your dough should look like at every point. You absolutely *can* do this! And trust me, the end result—a warm, fragrant, and personal loaf of homemade challah—is an incredibly rewarding triumph worth every moment of effort.
Mastering the Yeast Proof: The Foundation of Fluffy Challah
Proofing the yeast is arguably the most critical—yet surprisingly simple—step in achieving a light, airy, and beautifully risen challah. It’s your initial test to ensure the yeast is alive, active, and ready to work its magic in your dough. While a precise kitchen thermometer can certainly help you achieve the perfect water temperature consistently, it’s not strictly essential once you develop a feel for it. The ideal temperature range for yeast activation is precisely between 105-110 degrees Fahrenheit (approximately 40-43 degrees Celsius); remember, water that is too cold will prevent the yeast from activating, while water that is too hot risks killing the delicate yeast organisms entirely.
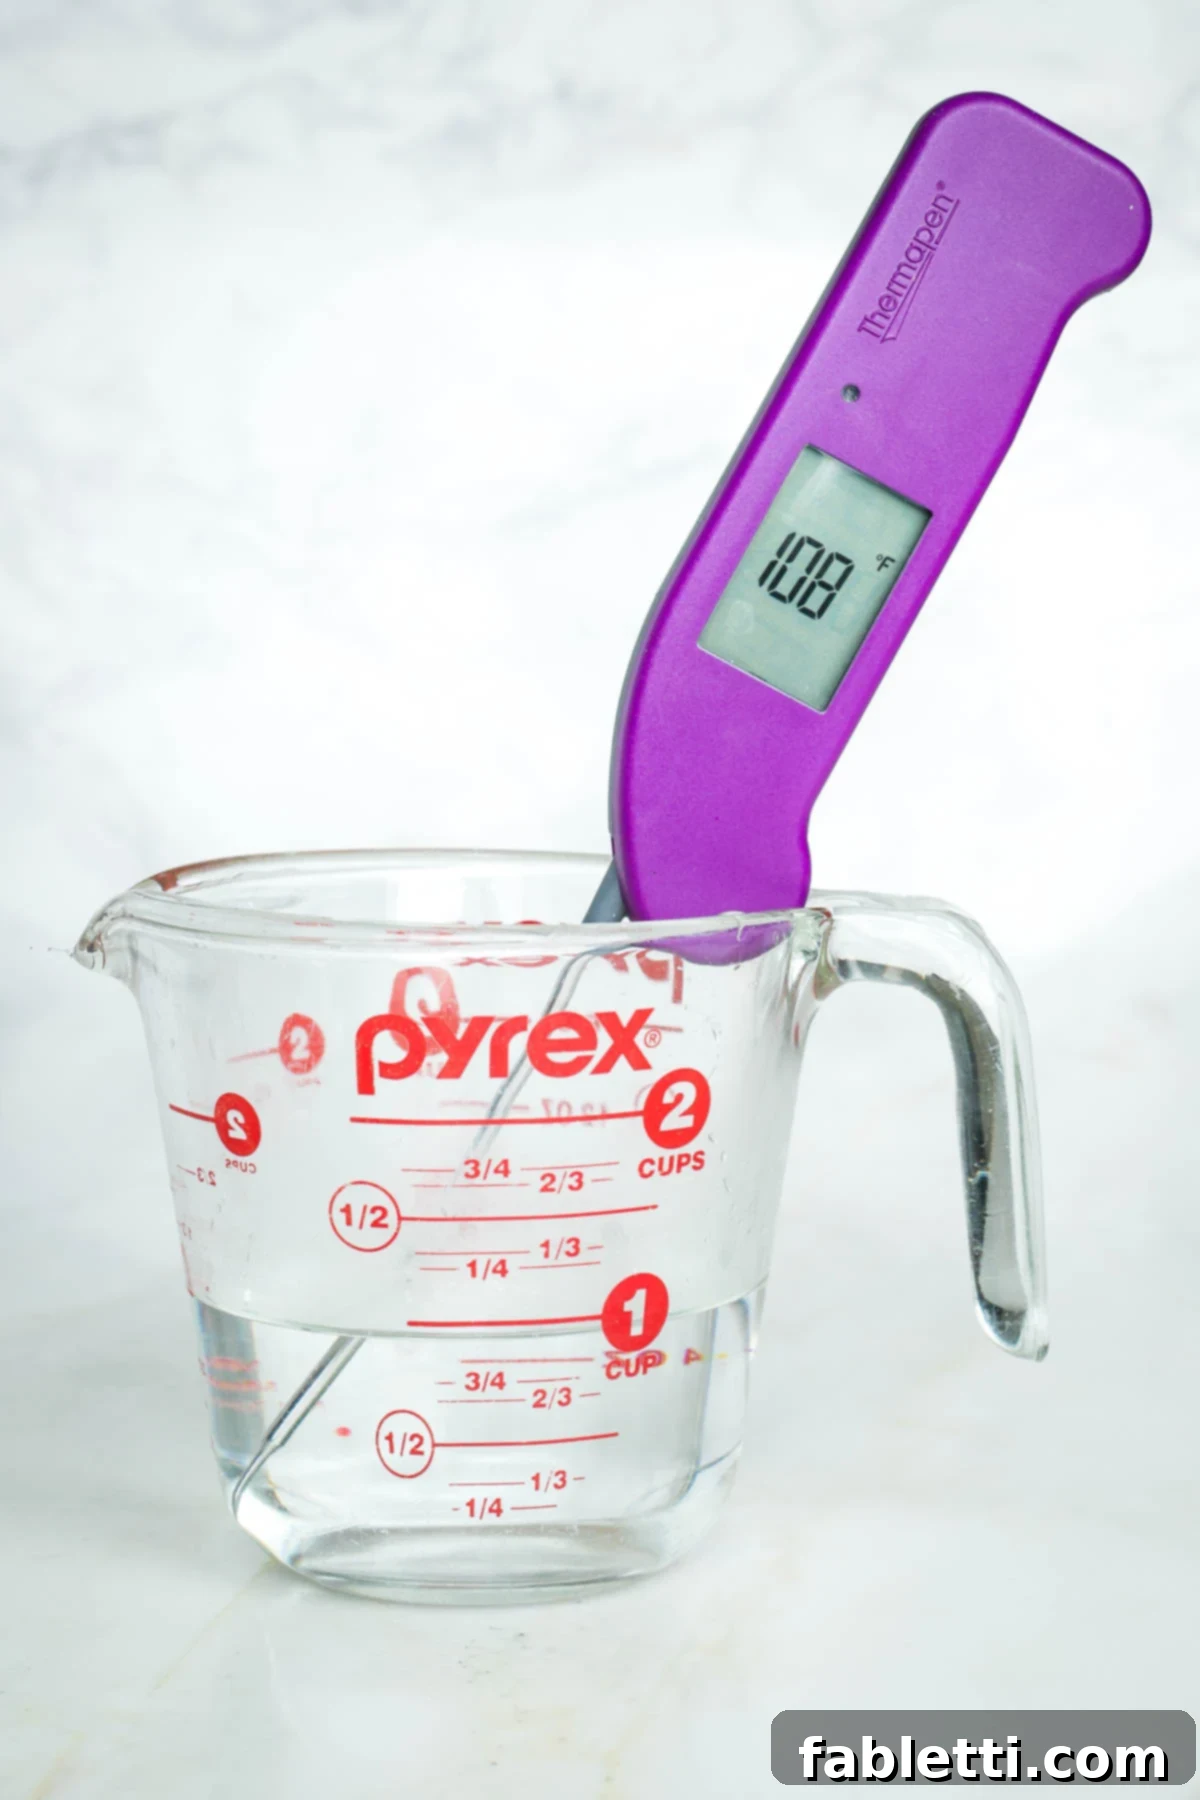
If you possess a thermometer, I recommend using it diligently during your first few challah bakes until you become intuitively accustomed to what the right temperature feels like. Aim consistently for anything between 105-110 degrees F. If you don’t have a thermometer, simply turn on your hot water tap and let it run until it feels quite warm to the touch—definitely hot, but not uncomfortably scalding. Your hand should be able to comfortably withstand the warmth without any pain or immediate discomfort.
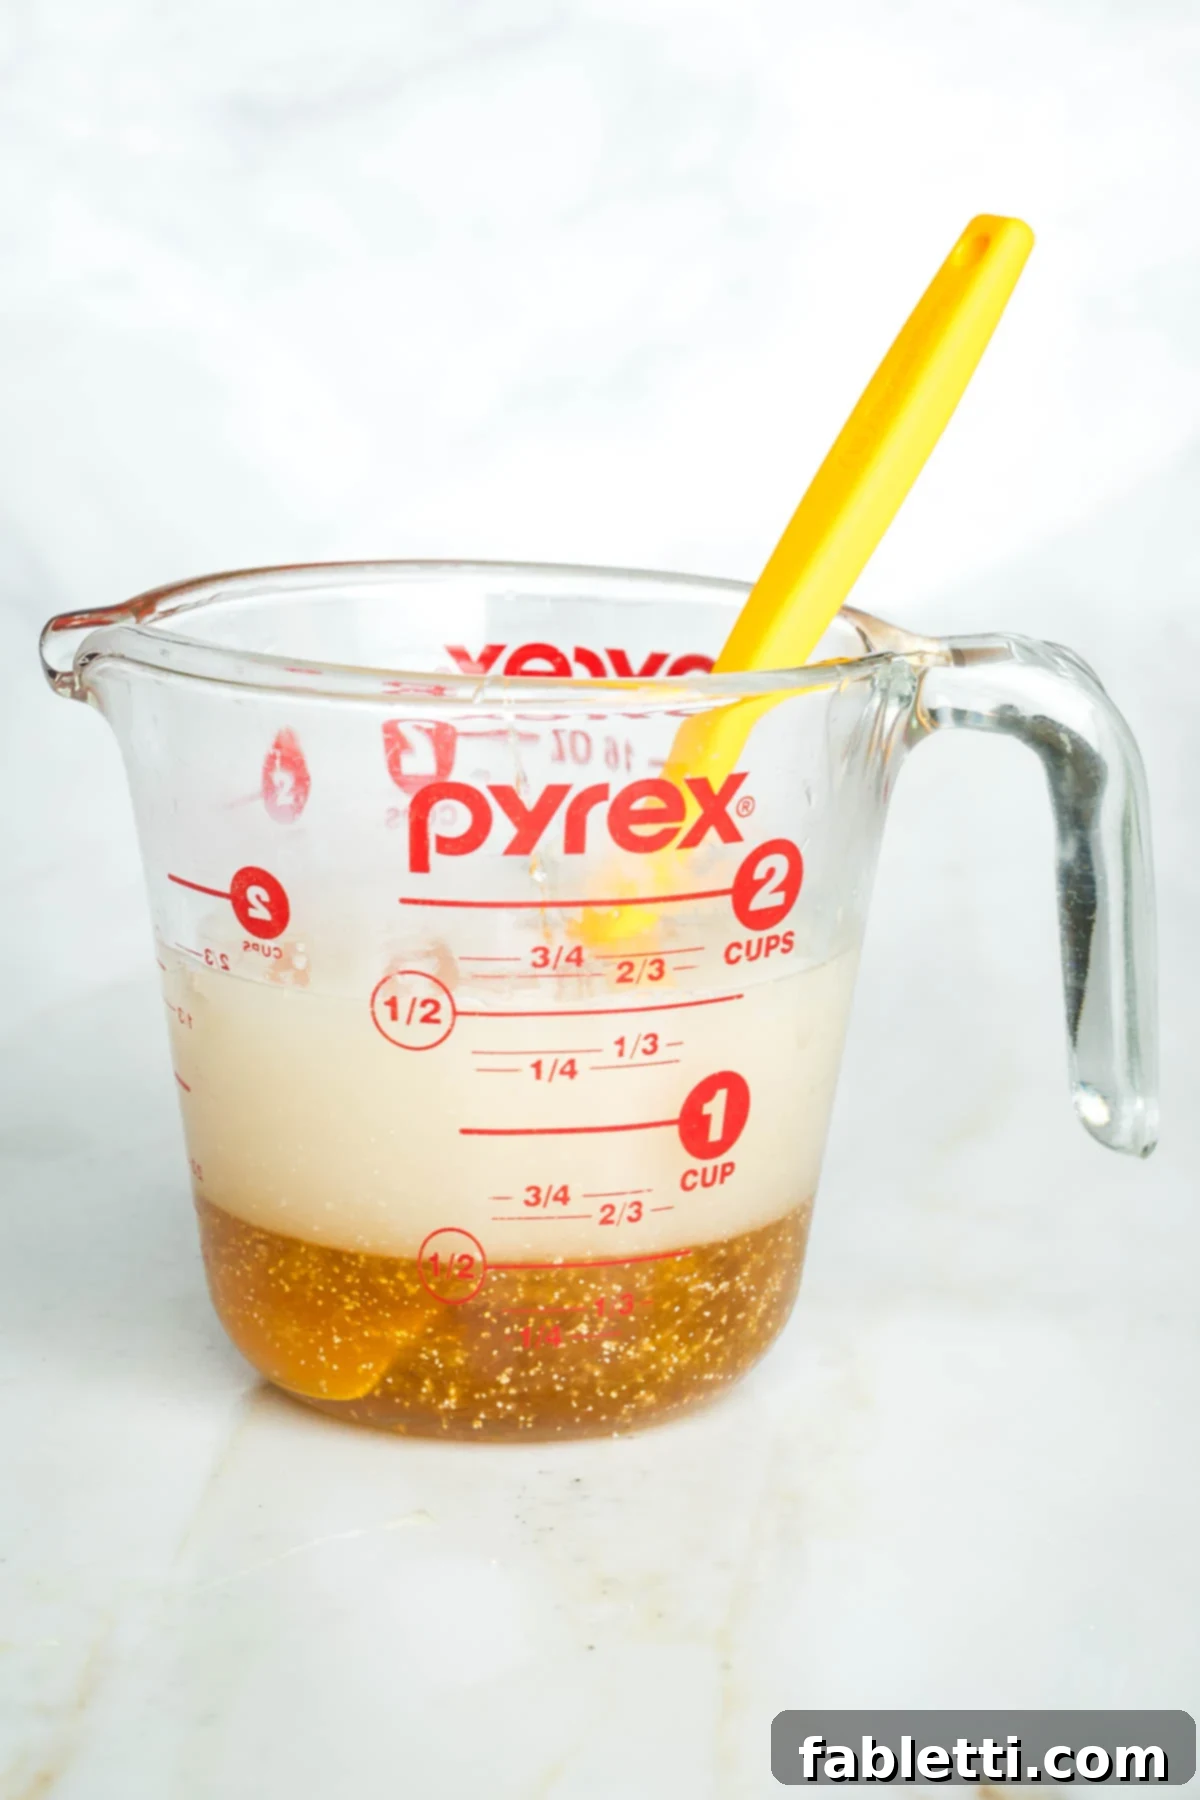
Using a 2-cup glass measuring cup is incredibly helpful for this specific step. Its transparent walls allow you to clearly see the honey settling at the bottom, and its marked measurements ensure accurate liquid volumes. First, measure your hot water. Then, pour in the honey; its natural viscosity will allow you to precisely measure it up to the ½ cup mark on the measuring cup. Finally, add the salt and the active dry yeast, stirring everything thoroughly with a spoon until all ingredients are well combined.
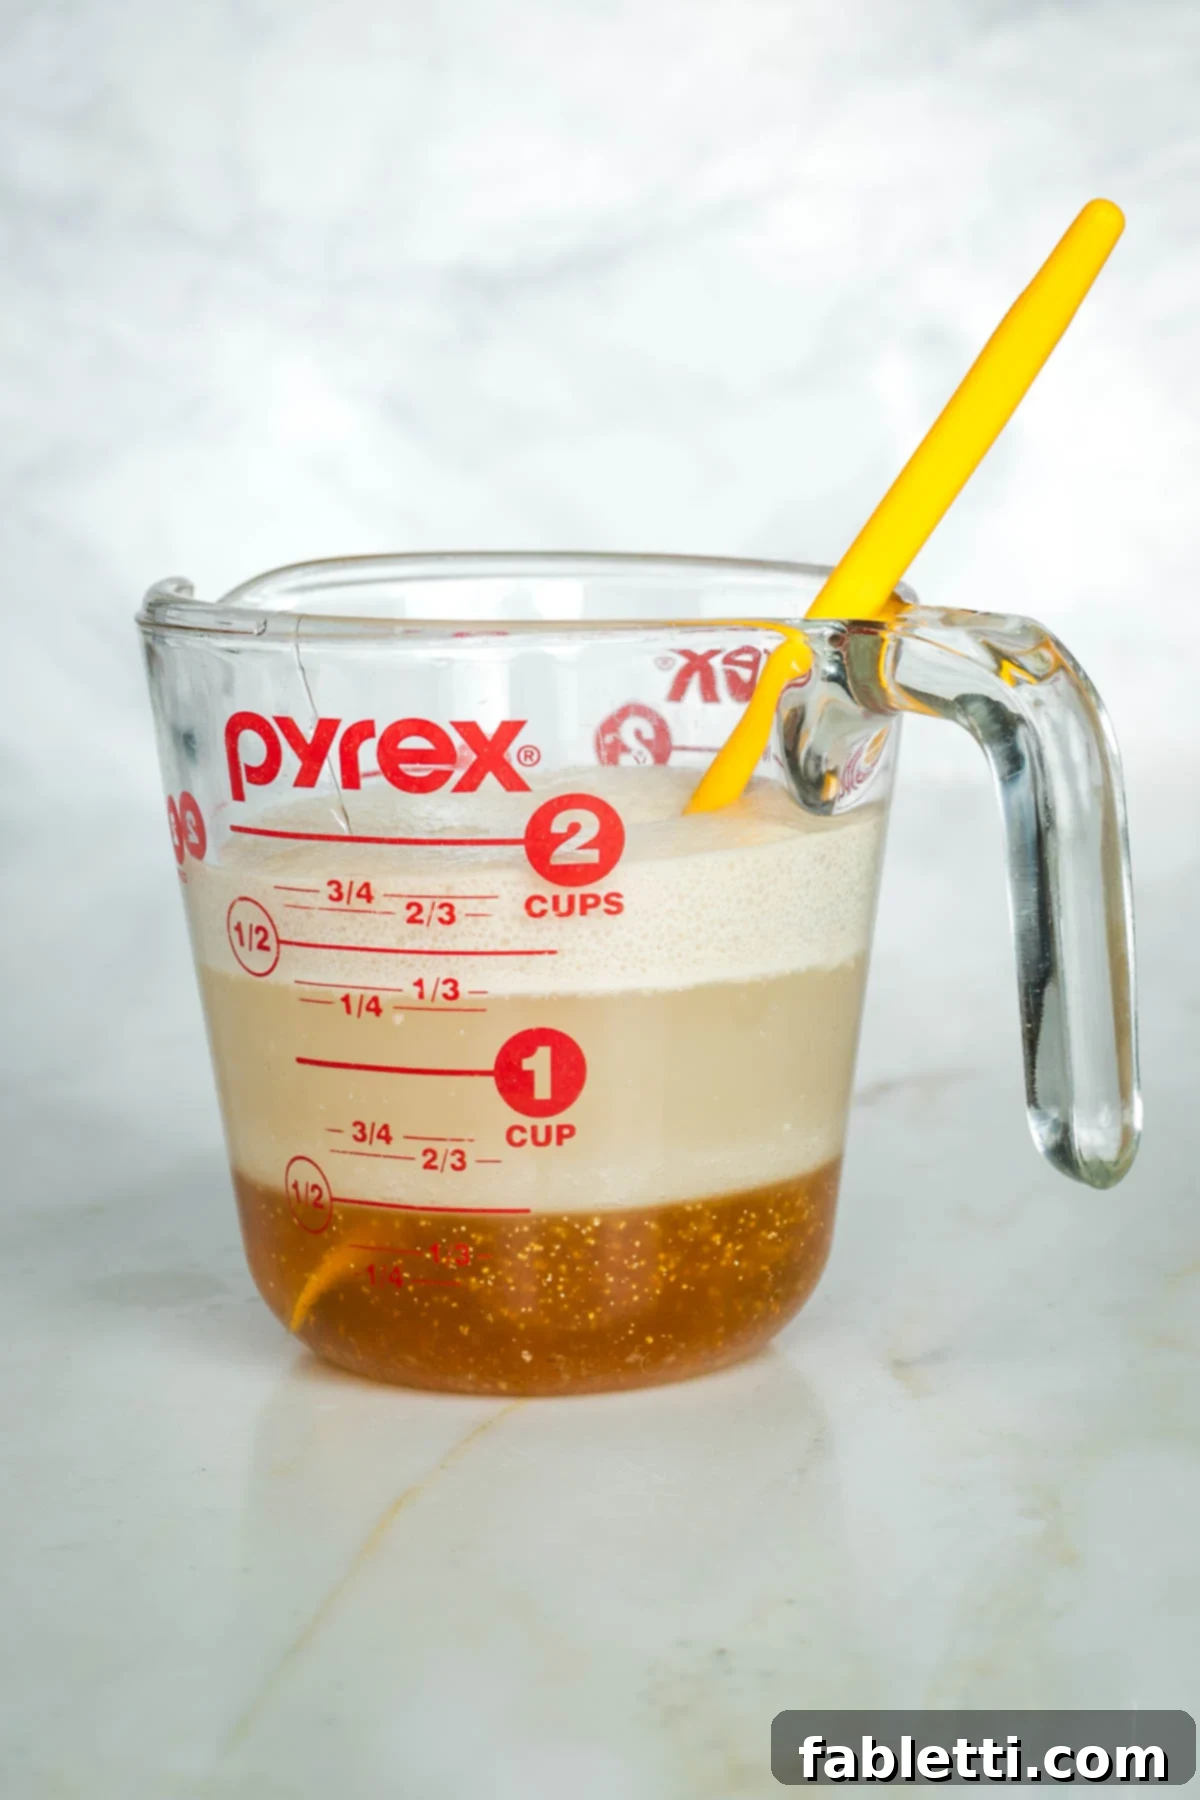
Allow the mixture to sit undisturbed for a minimum of 5 minutes. During this crucial time, the dormant yeast cells will begin to awaken and become actively fermenting. You’ll first observe small, delicate bubbles forming on the surface, which will then gradually expand and develop into a cohesive, frothy, and distinctly beige mound that floats on top. This frothy cap is your clear and unmistakable sign that your yeast is alive, viable, and enthusiastically ready to leaven your beautiful challah dough.
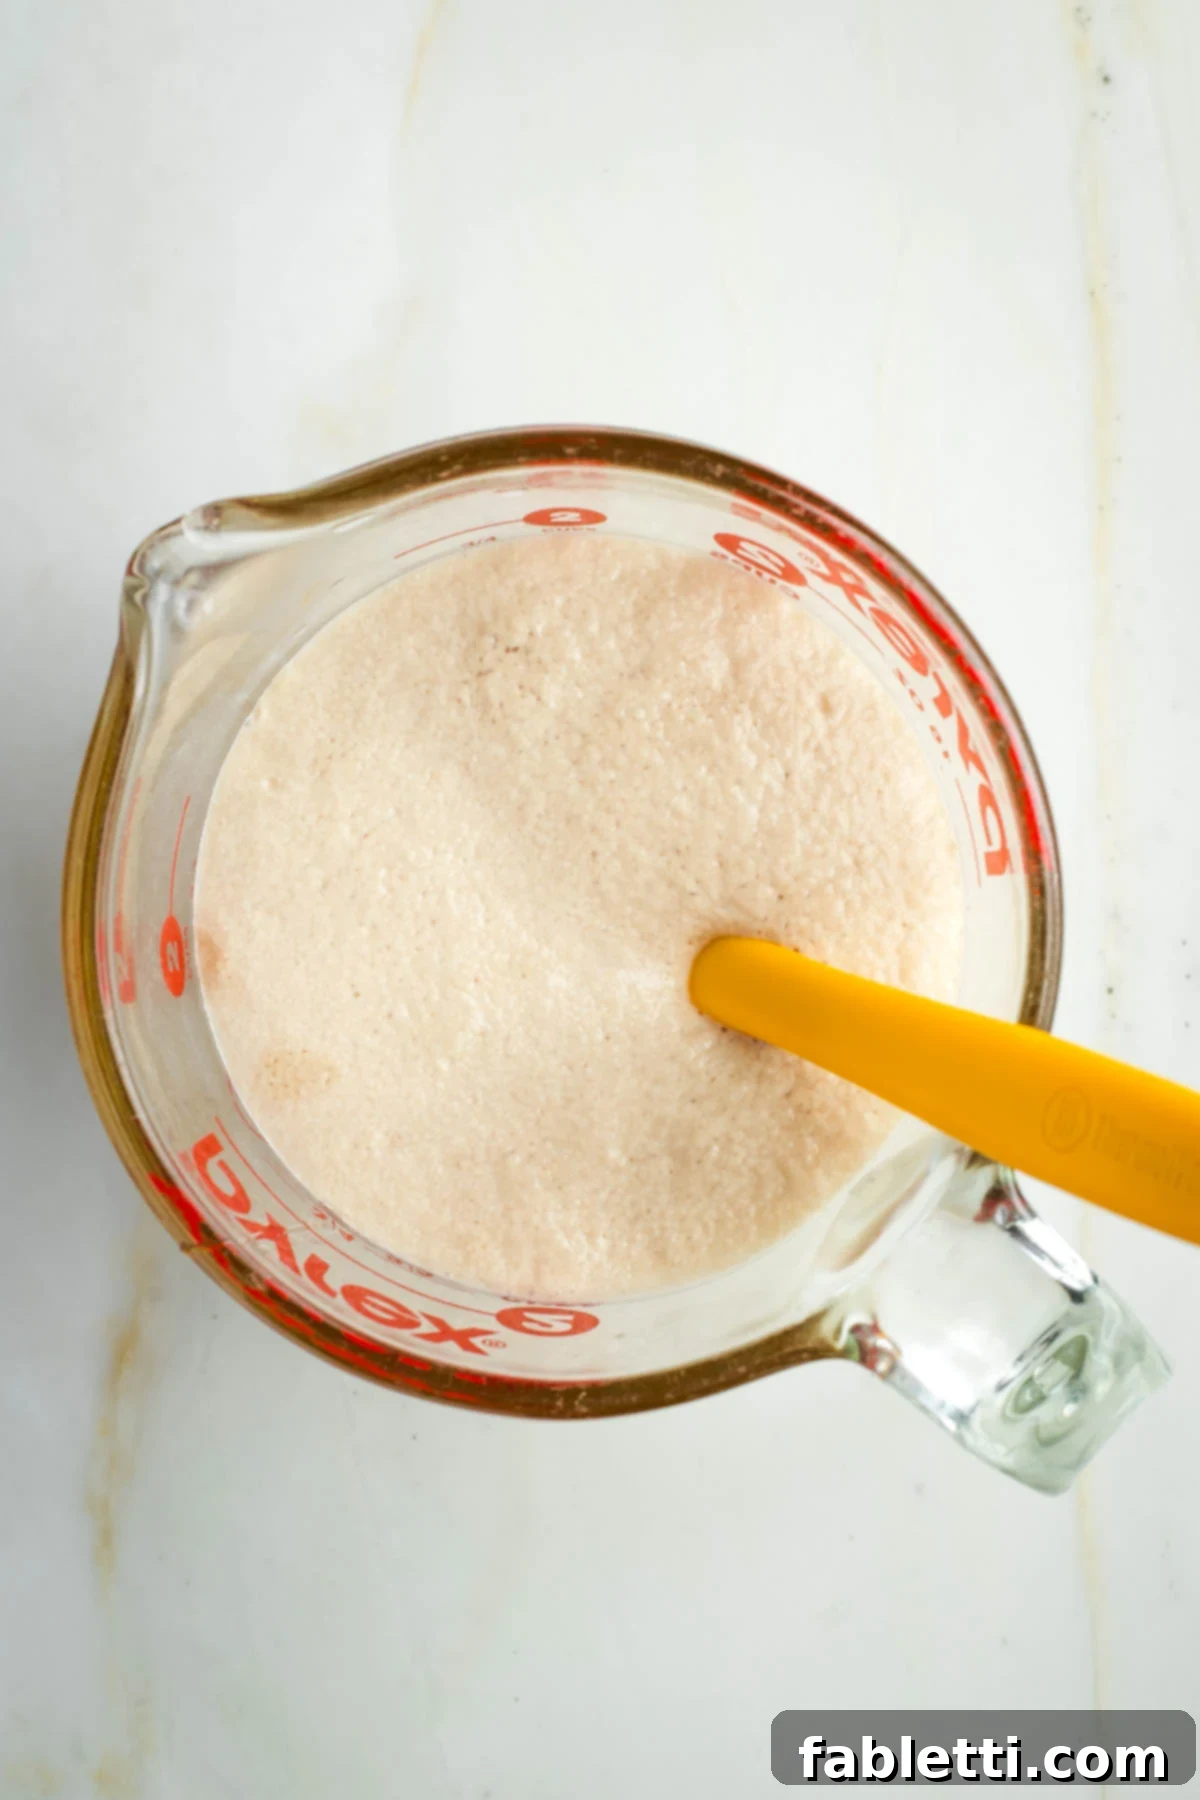
If, after the full 5 minutes, your yeast mixture shows absolutely no bubbling, frothing, or visible growth, then something is unfortunately amiss. This usually indicates one of two primary issues: either your water temperature was incorrect (either too hot, which kills the yeast, or not hot enough, which fails to activate it), or your yeast is simply no longer fresh. Always double-check the expiration date on your yeast packet! If your mixture doesn’t visually resemble the vibrant, frothy consistency proudly displayed in the photo, it is unequivocally best to discard it and promptly start over with fresh yeast and correctly tempered water. A failed yeast proof means your challah will tragically not rise, making this foundational step absolutely non-negotiable for a truly successful and fluffy bake.
Crafting the Perfect Challah Dough: From Mixing to the First Rise
Once your yeast is beautifully proofed and bubbling with life, it’s time to bring all the remaining ingredients together to form your luscious challah dough. This crucial process can be efficiently achieved with the aid of a food processor, a reliable stand mixer, or, for those who prefer a more tactile and hands-on approach, entirely by hand. Each method, when performed correctly, yields excellent results, so feel free to choose the equipment that works best and most comfortably for you!
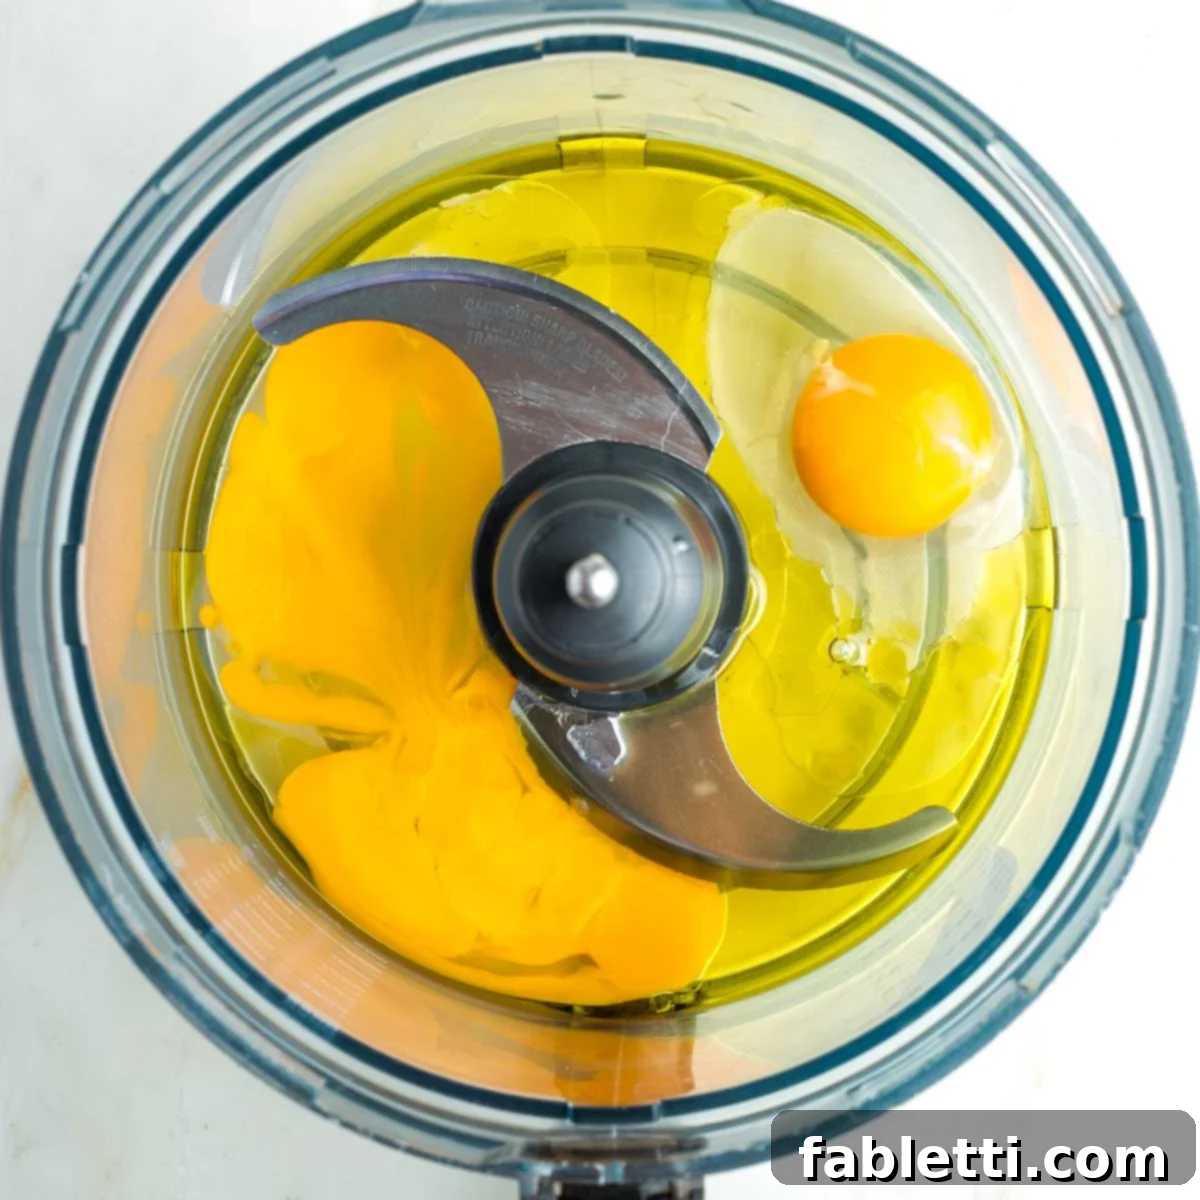
Begin by accurately measuring the olive oil and cracking the eggs directly into the bowl of your food processor (ensuring it’s fitted with the “S” blade for optimal mixing efficiency), or into the bowl of your stand mixer with the paddle attachment securely in place. If you are opting for the traditional hand-mixing method, simply use a large, sturdy mixing bowl and a robust whisk.
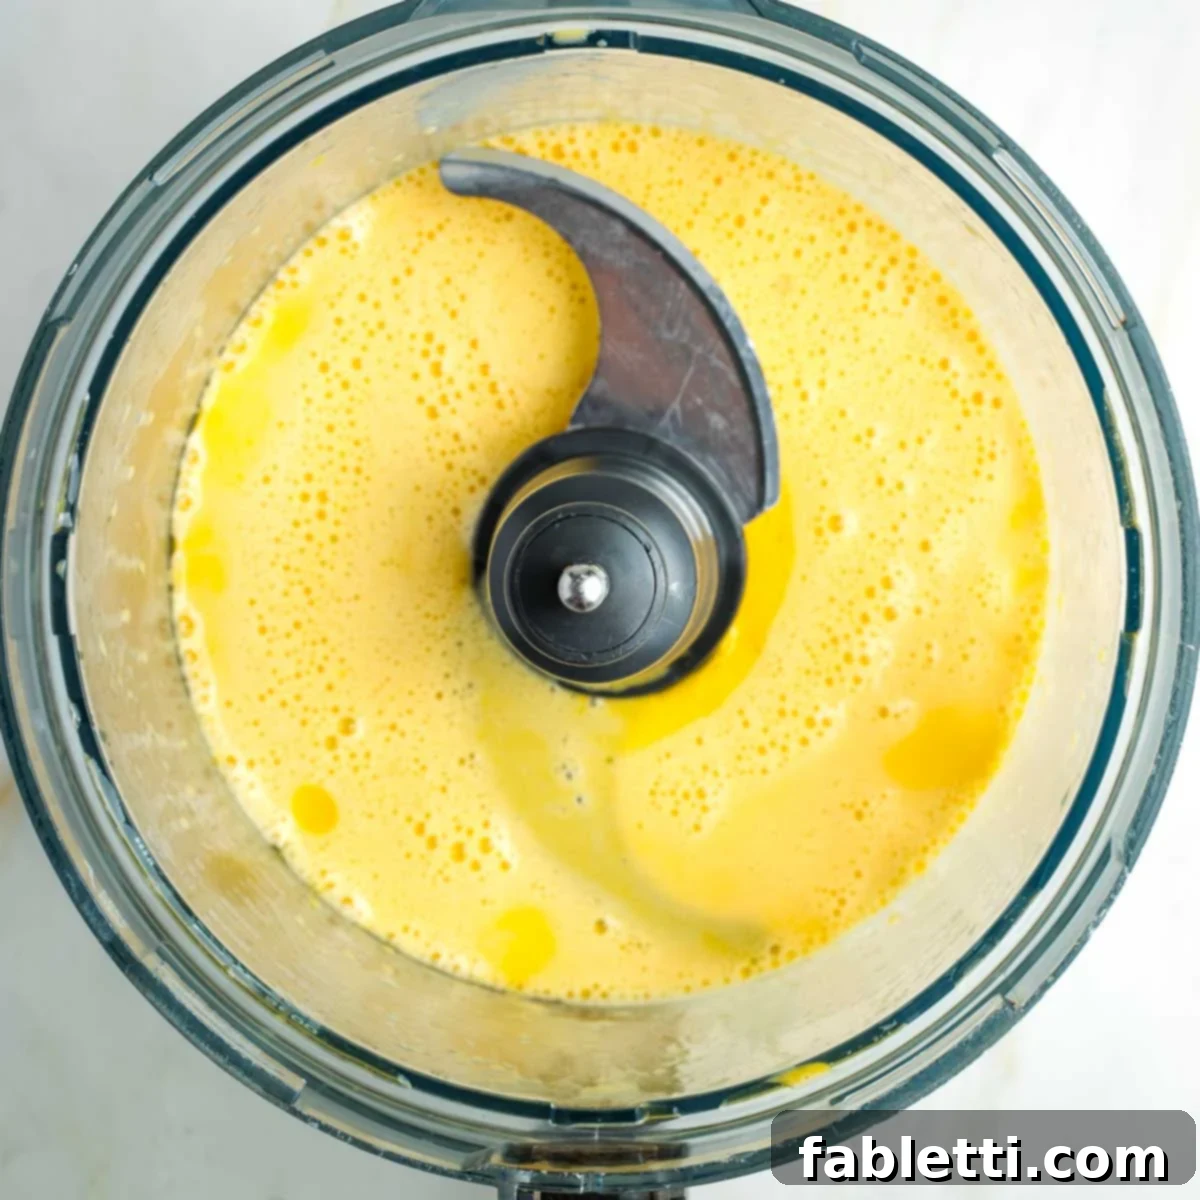
Process or whisk these ingredients together vigorously until the eggs and oil are thoroughly emulsified and have visibly transformed into a light, airy, and frothy mixture. This crucial initial step effectively incorporates air into your mixture, which contributes significantly to the challah’s overall lightness and helps to establish a wonderfully uniform texture throughout the finished bread.
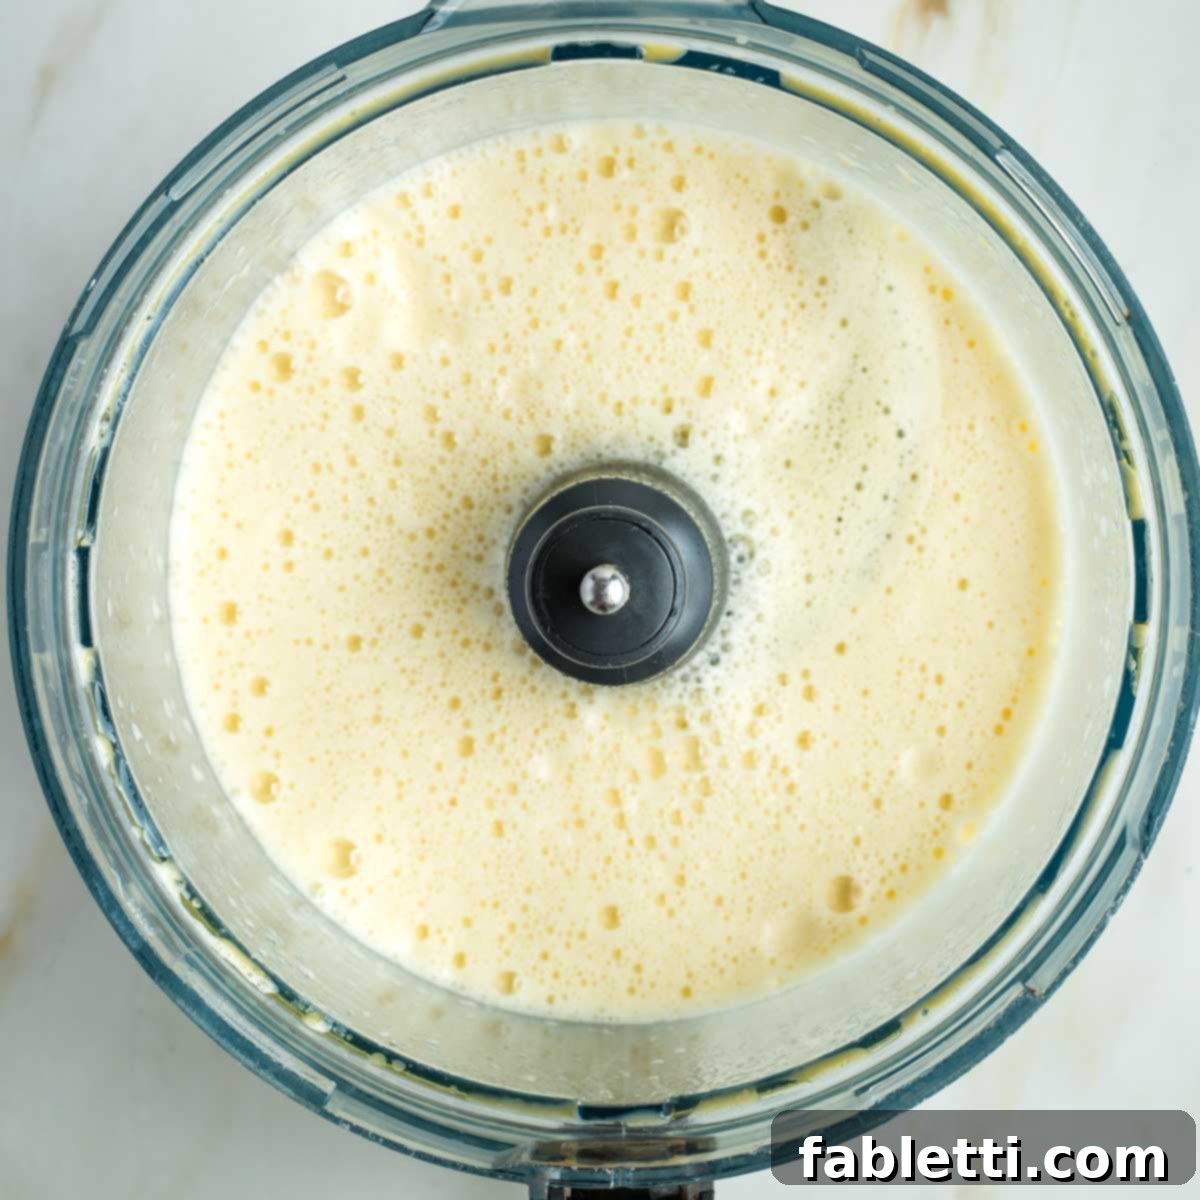
Once your yeast mixture has successfully proofed and is wonderfully bubbly and active, carefully pour it into the previously emulsified egg and oil mixture. Process or mix again briefly, just enough to thoroughly combine all the wet ingredients. The entire liquid mixture should now appear very bubbly and highly active, which is a truly promising sign for your dough’s forthcoming rise and ultimate texture.
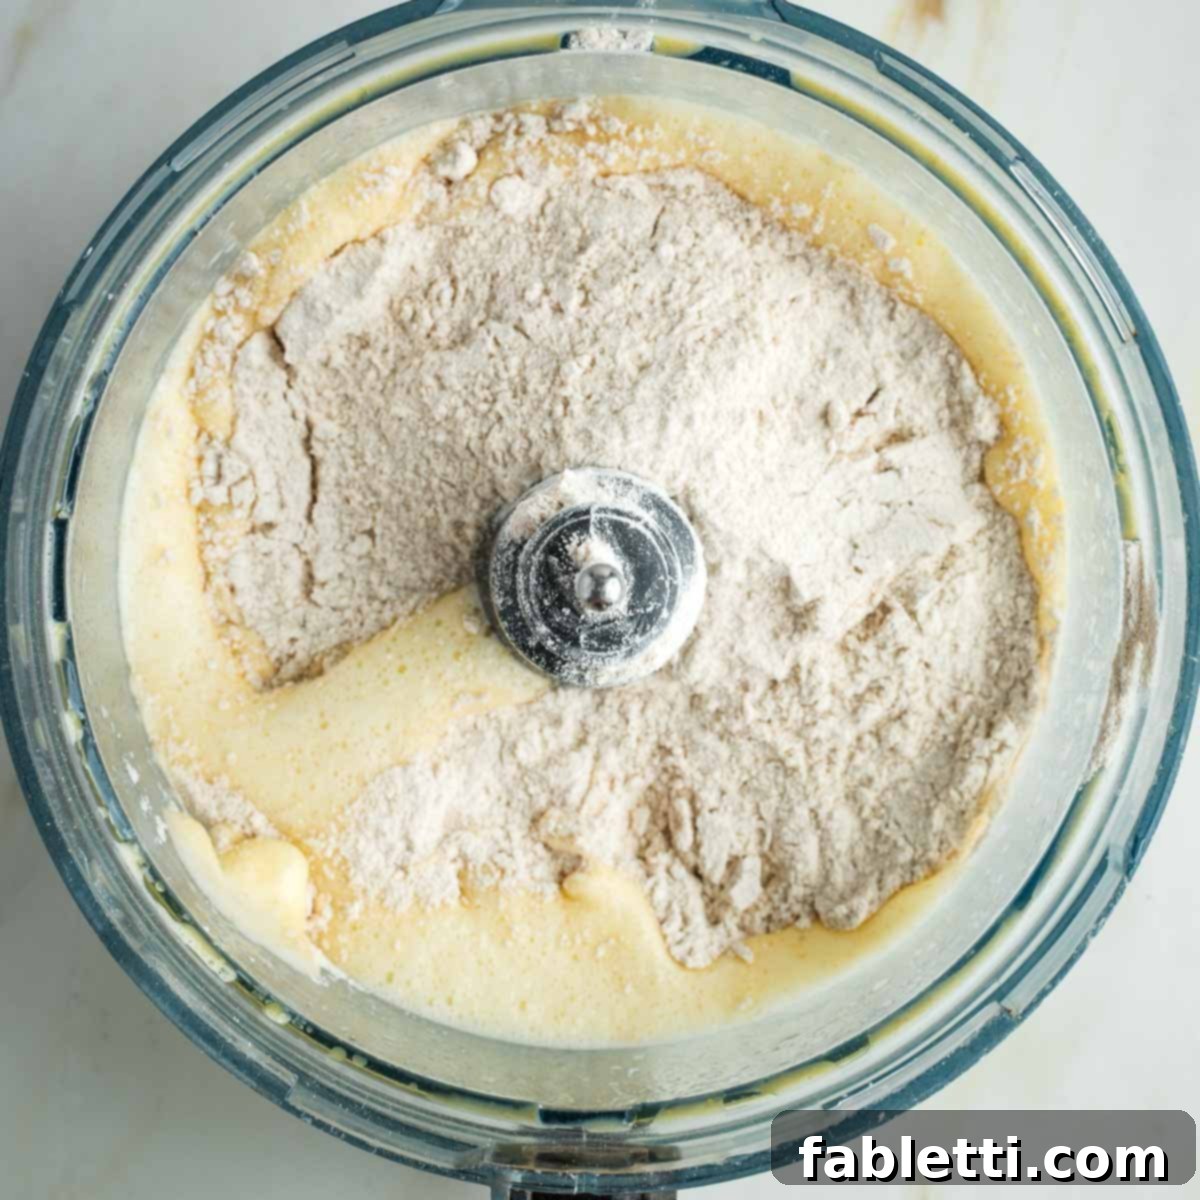
Now, it’s time to carefully introduce the dry ingredients. Sprinkle in approximately half of the total flour mixture. For this initial addition, I typically use a balanced combination of about 1.5 cups of whole grain all-purpose flour and 1 cup of whole grain bread flour. This strategic, staged approach helps to ensure even incorporation of the flour and prevents the dough from becoming too dry or stiff too quickly, allowing for optimal hydration.
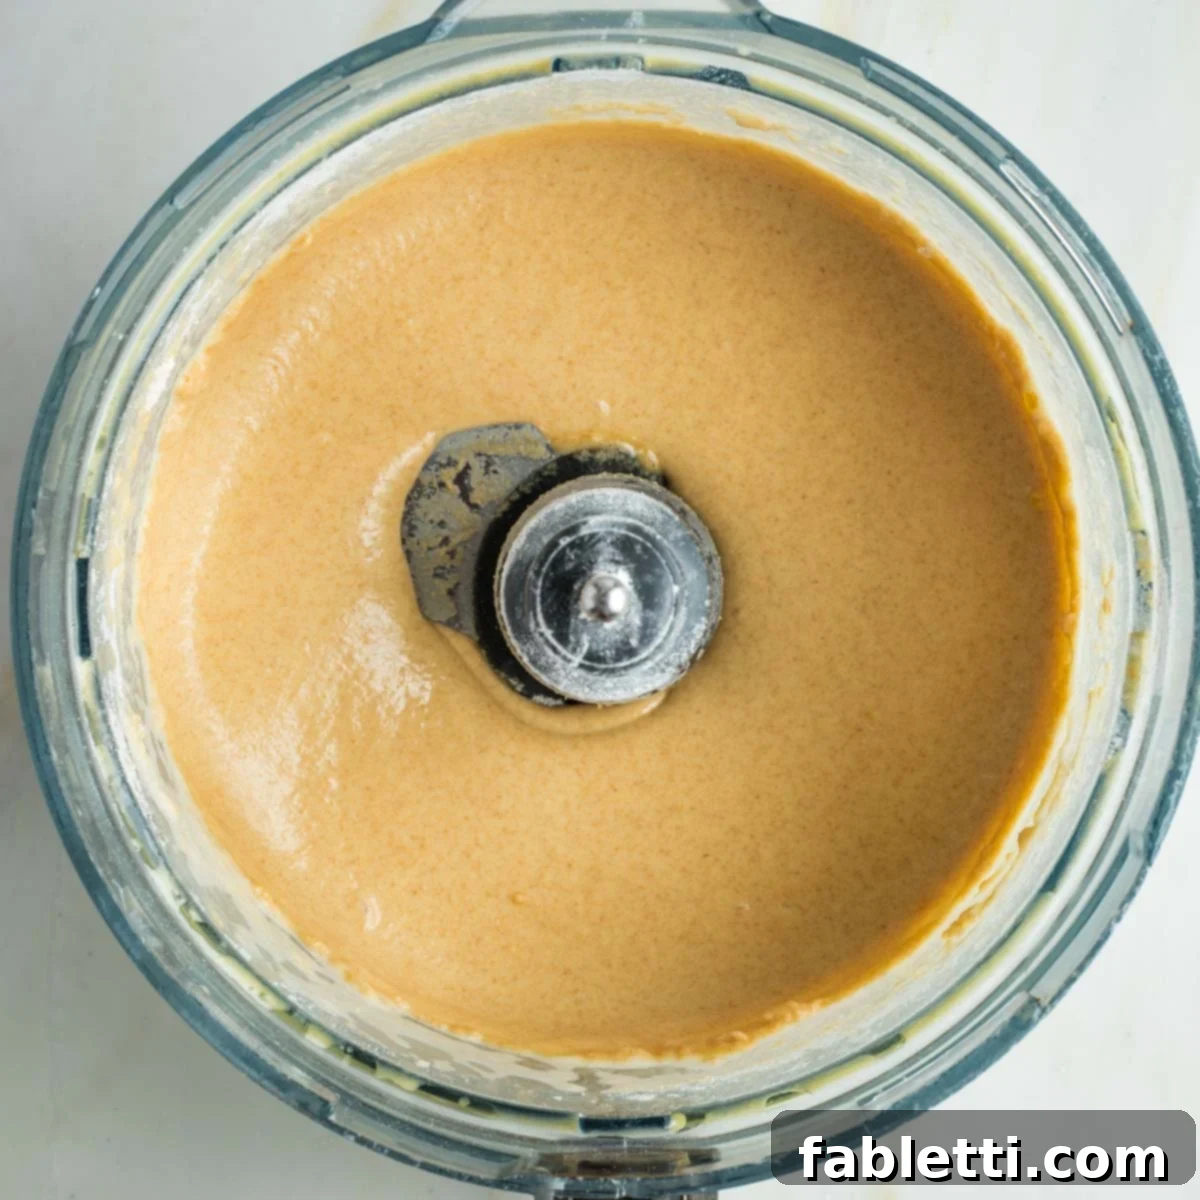
Process this first portion of flour into the liquid ingredients until it’s just mixed and forms a creamy, uniformly tan batter. At this stage, avoid the temptation to overmix; our goal is simply initial incorporation and hydration of the flour, preparing it for the remaining dry ingredients.
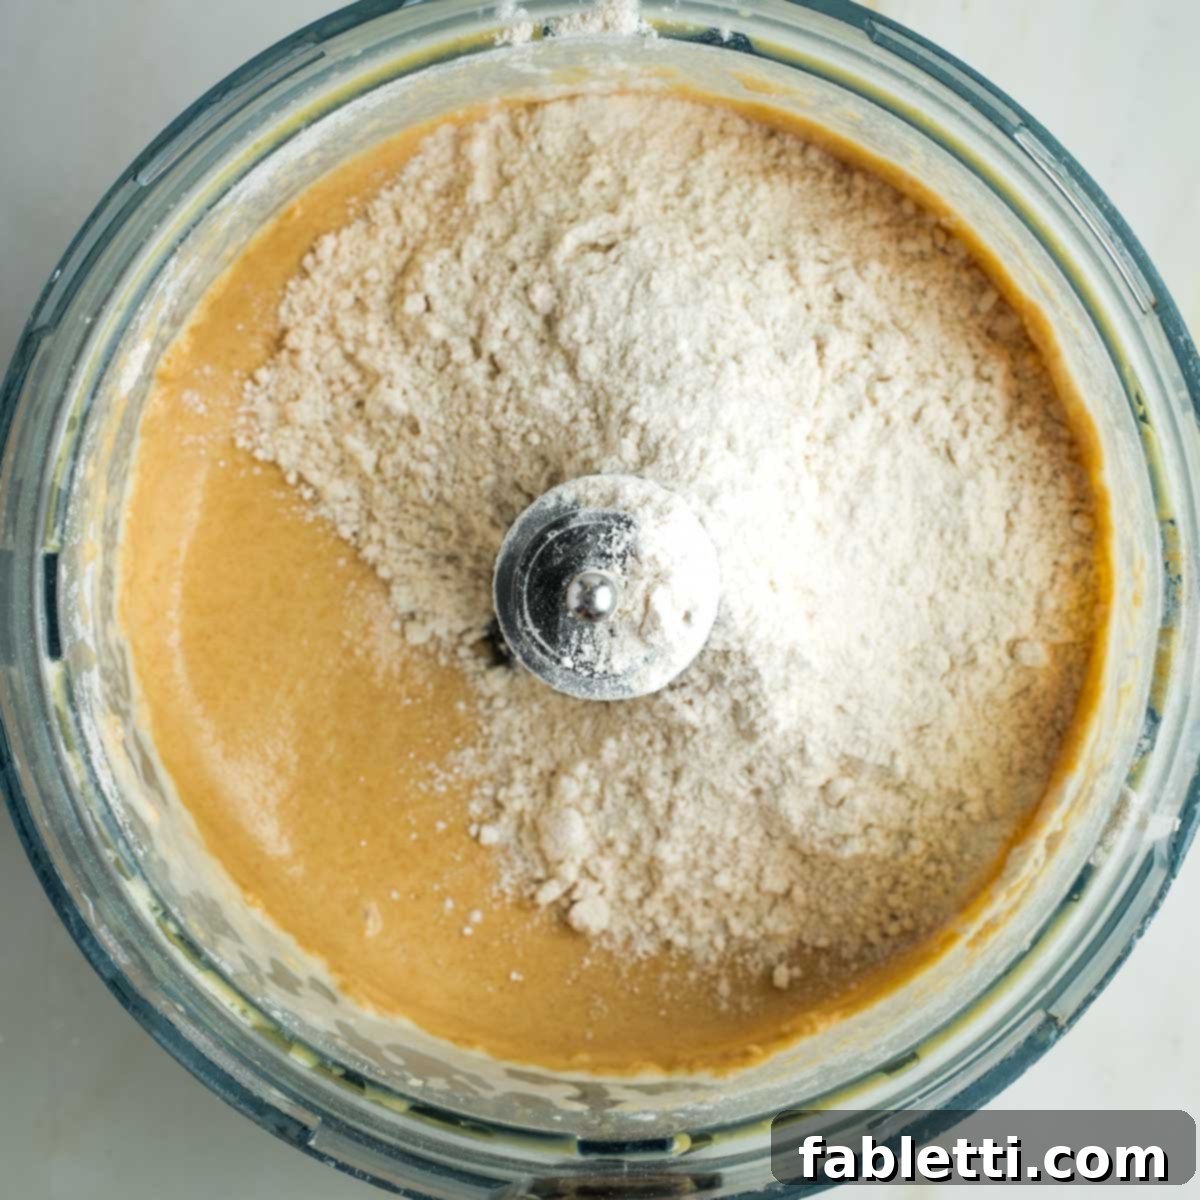
Now, carefully add the remaining 2.5 cups of flour into the bowl. This completes the flour addition, and the dough is now perfectly poised for the crucial kneading process, where gluten development truly begins.
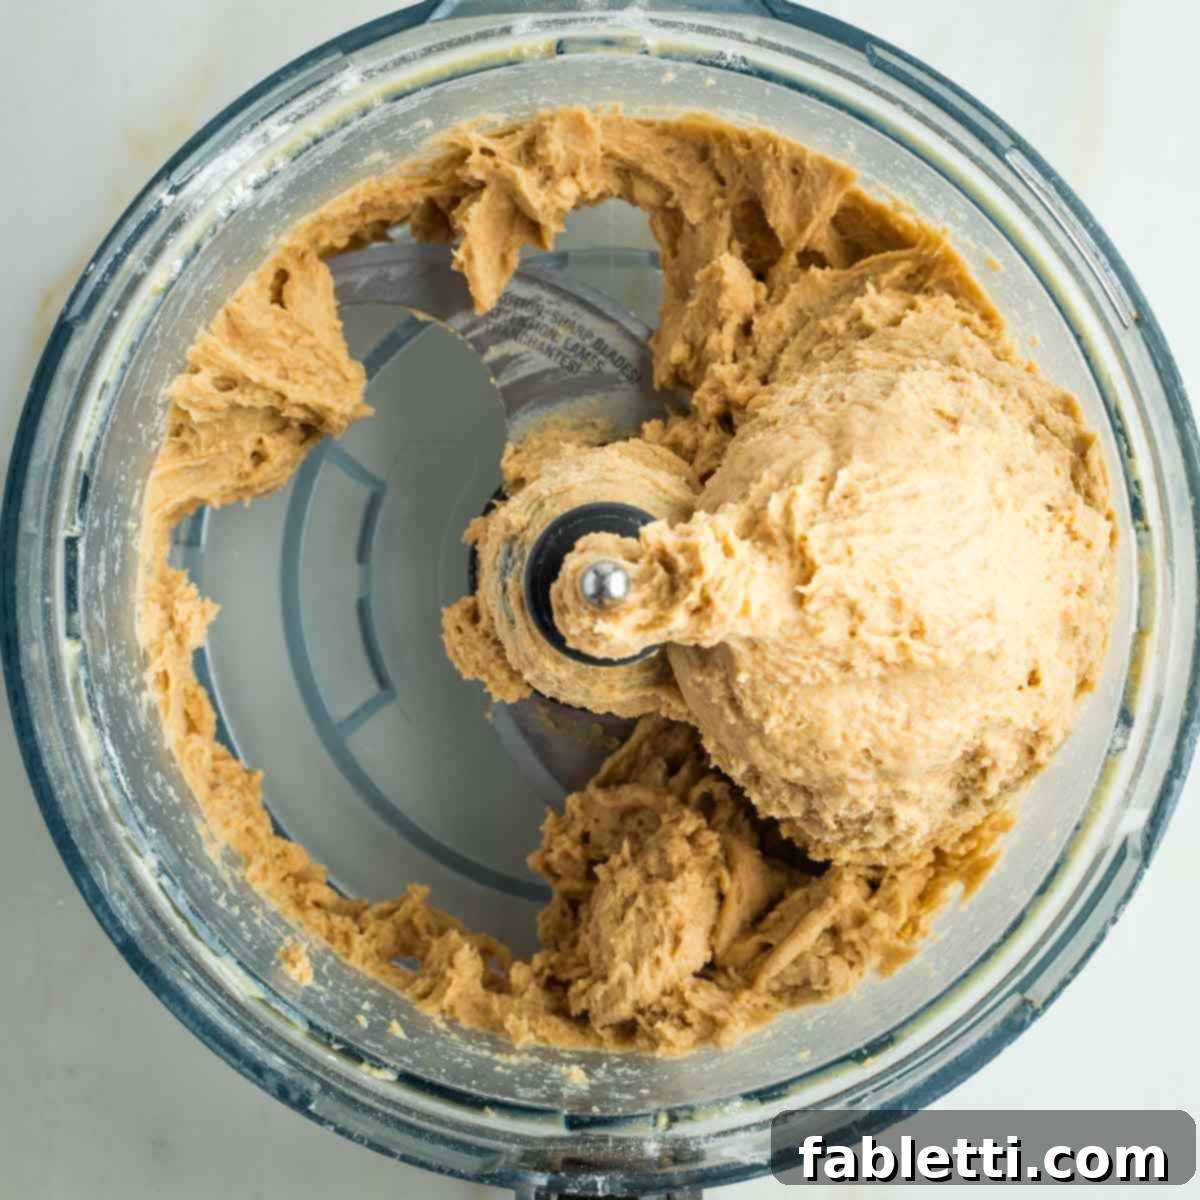
Allow your food processor or stand mixer to efficiently perform the work of kneading for you. Pay close attention to the dough’s behavior: if it’s still sticking significantly and persistently to the sides of the bowl or stubbornly clinging to the blade (or paddle attachment), it’s a clear indication that it needs just a tiny bit more flour. However, strongly resist the urge to add too much flour at once, as this is the most common mistake that can result in a dense, dry, and less flavorful challah.
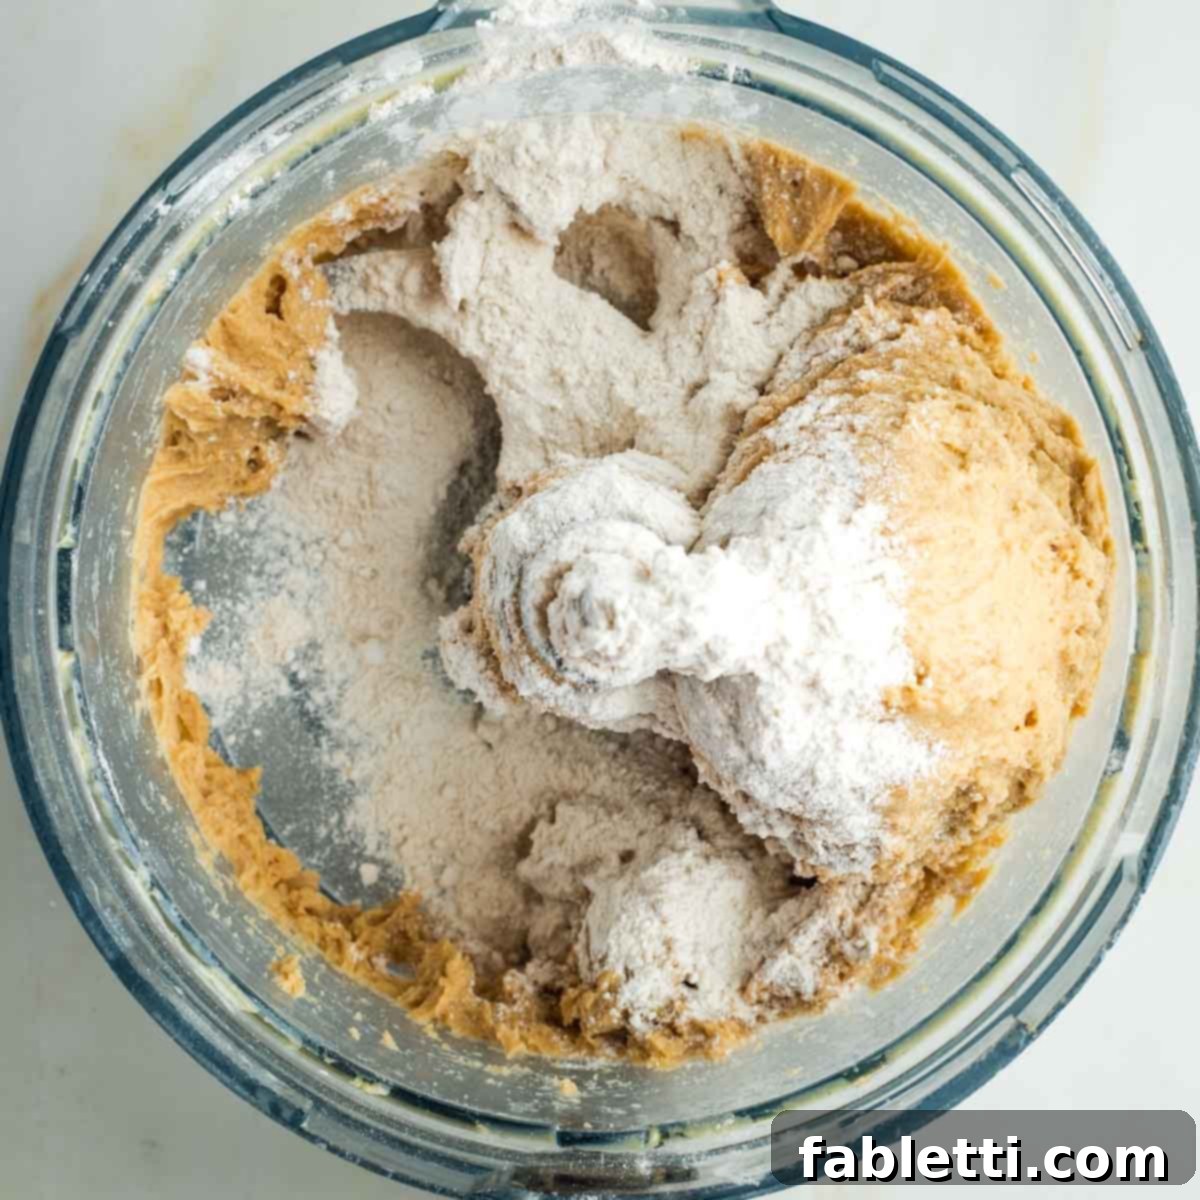
Proceed with caution and patience. Sprinkle just one tablespoon of flour onto the dough at a time. This measured, incremental approach helps you achieve the perfect, ideal consistency without the risk of over-flouring and compromising the dough’s texture. Mix again after each addition to assess the change.
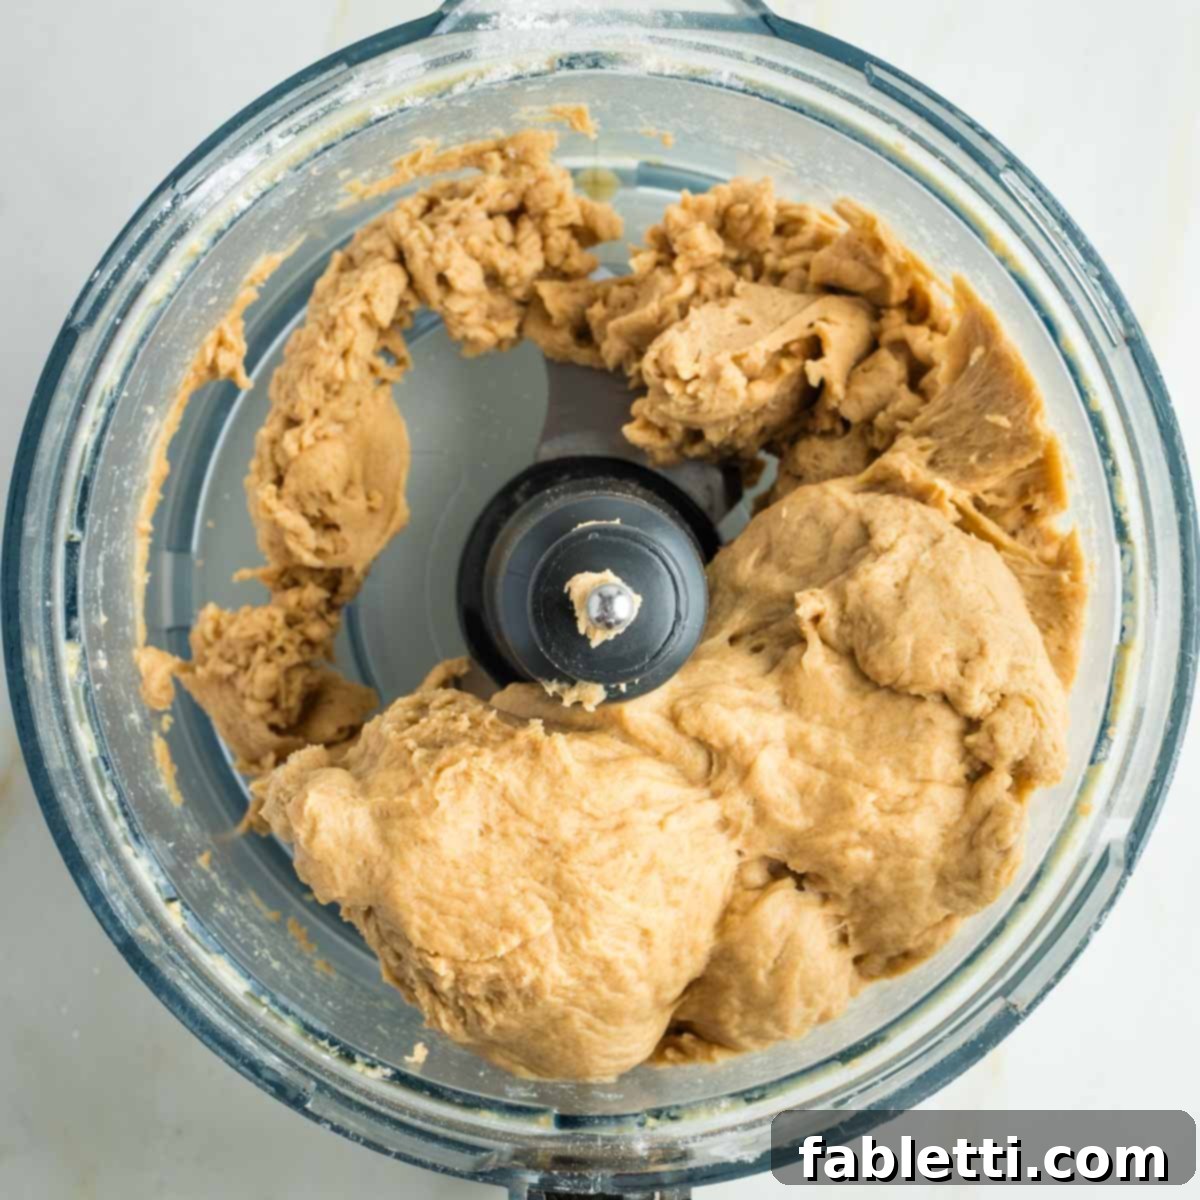
Mix again for another minute or two. At this stage, your dough should be holding together beautifully, forming a cohesive mass, and no longer sticking excessively to the sides of the bowl. It should still feel slightly tacky to the touch, which is perfectly normal and indeed desirable for challah, indicating proper hydration and elasticity. If it’s still too sticky, you may carefully add *one more* tablespoon of flour and mix again. However, I must strongly caution you against adding much more flour beyond this point. An over-floured dough will invariably result in a dry, dense, and unappetizing challah, completely lacking its characteristic fluffy, tender texture.
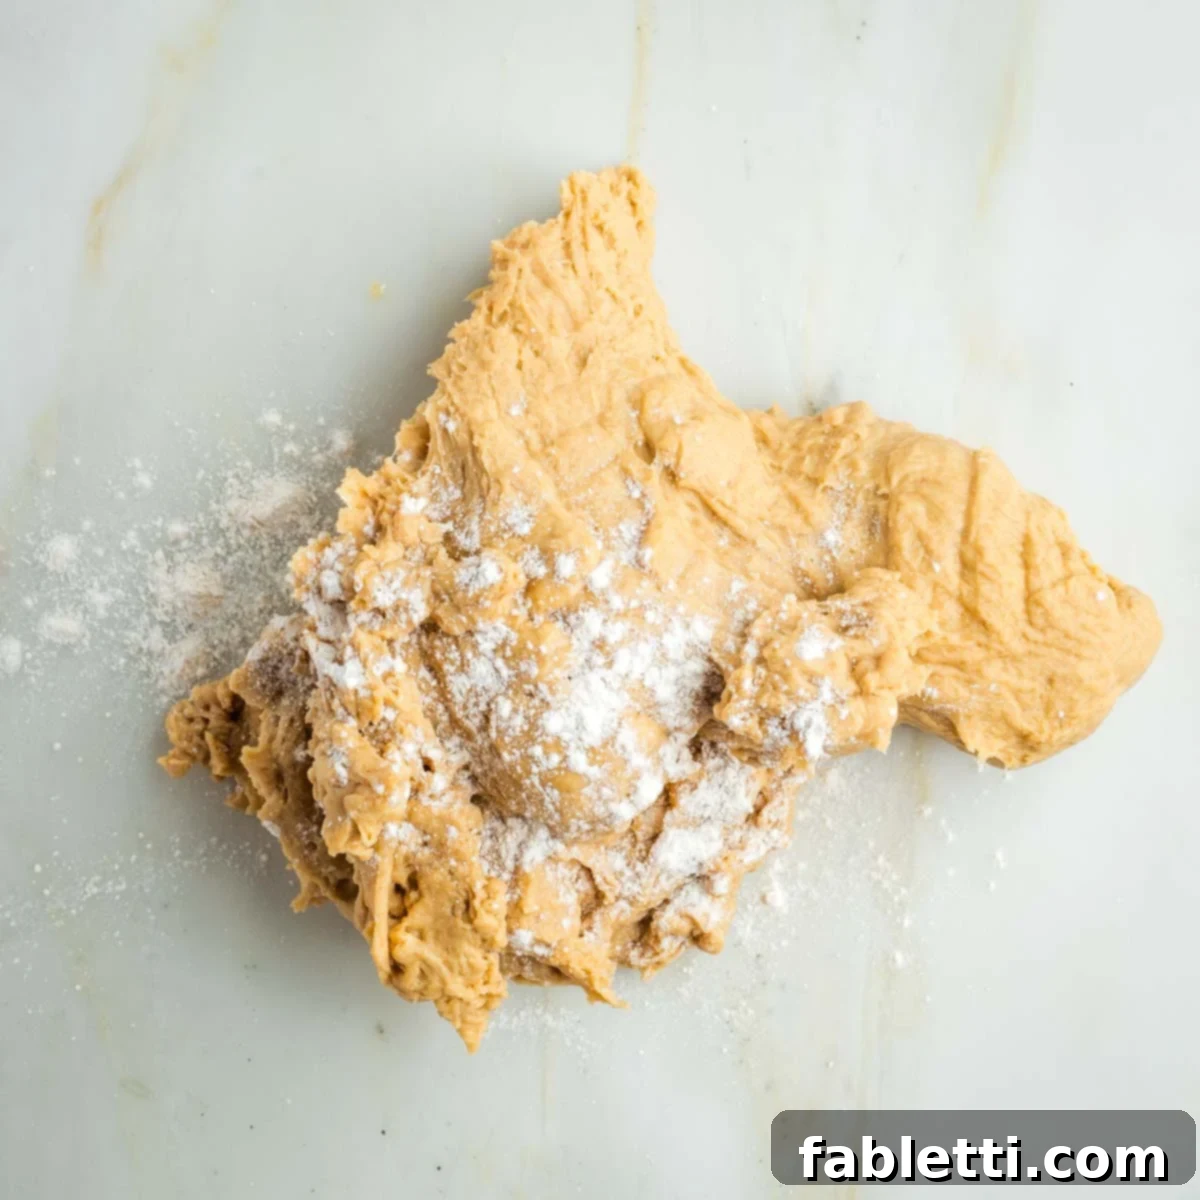
Gently turn the dough out onto a *lightly* floured surface. The emphasis here is on “lightly”; too much flour at this stage will toughen the dough. If it still feels a bit too sticky to comfortably handle or work with, sprinkle a mere teaspoon of extra flour on top. Remember this golden rule: less is almost always more when it comes to adding additional flour to bread dough.
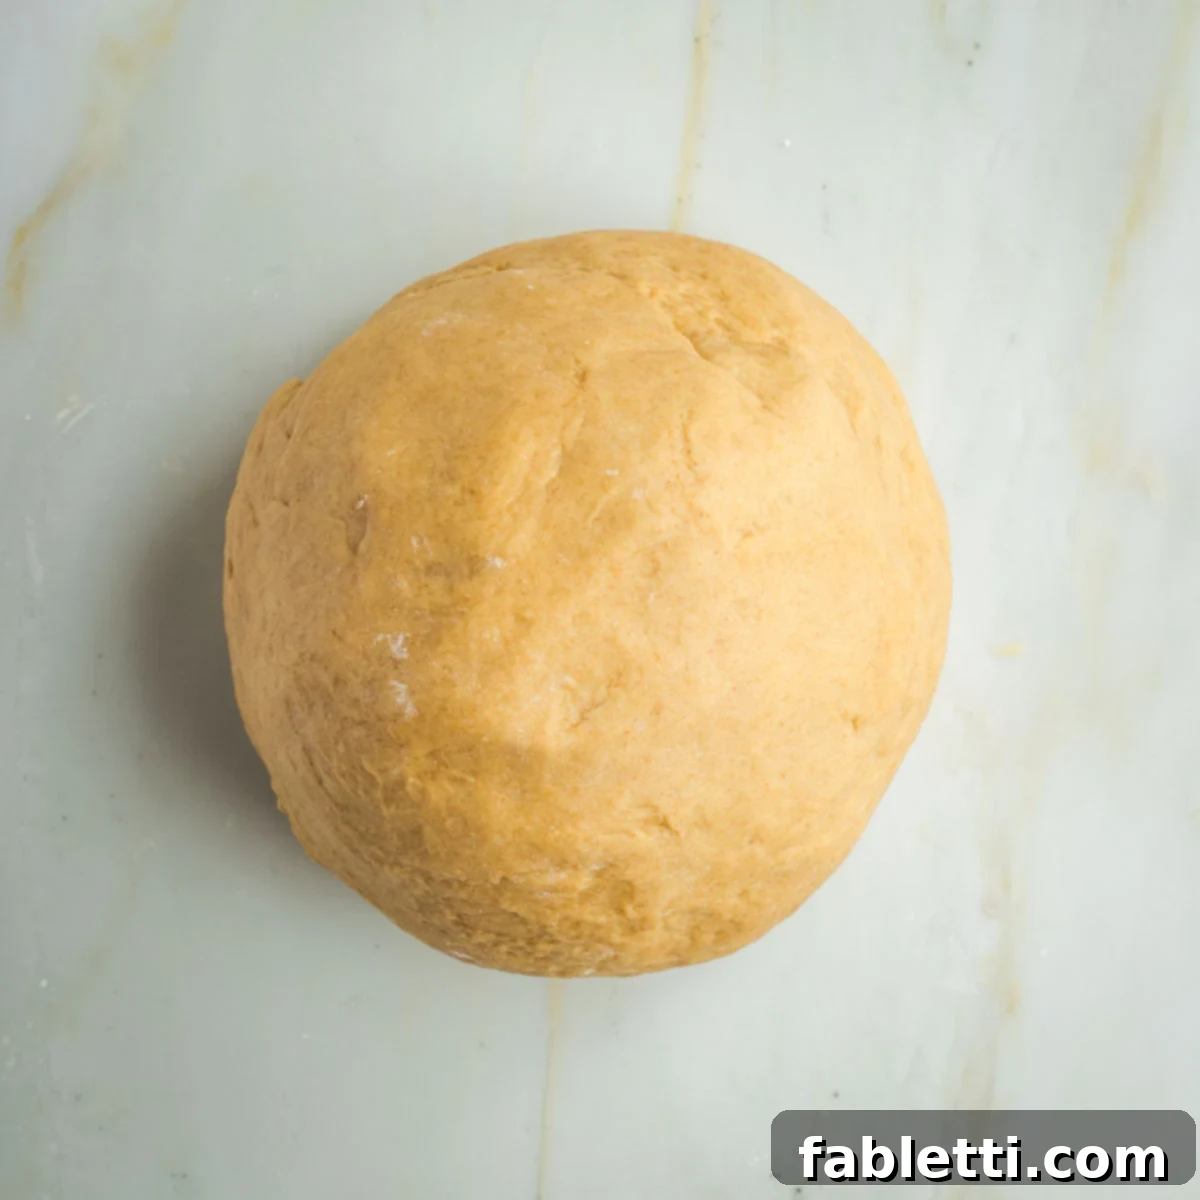
Knead the dough by hand for about a minute. This brief, final hand-kneading helps to further develop the gluten structure, ensuring a smooth, elastic, and beautifully formed ball is achieved. You’ll feel the dough become wonderfully supple and pliable under your hands, a true pleasure to work with.
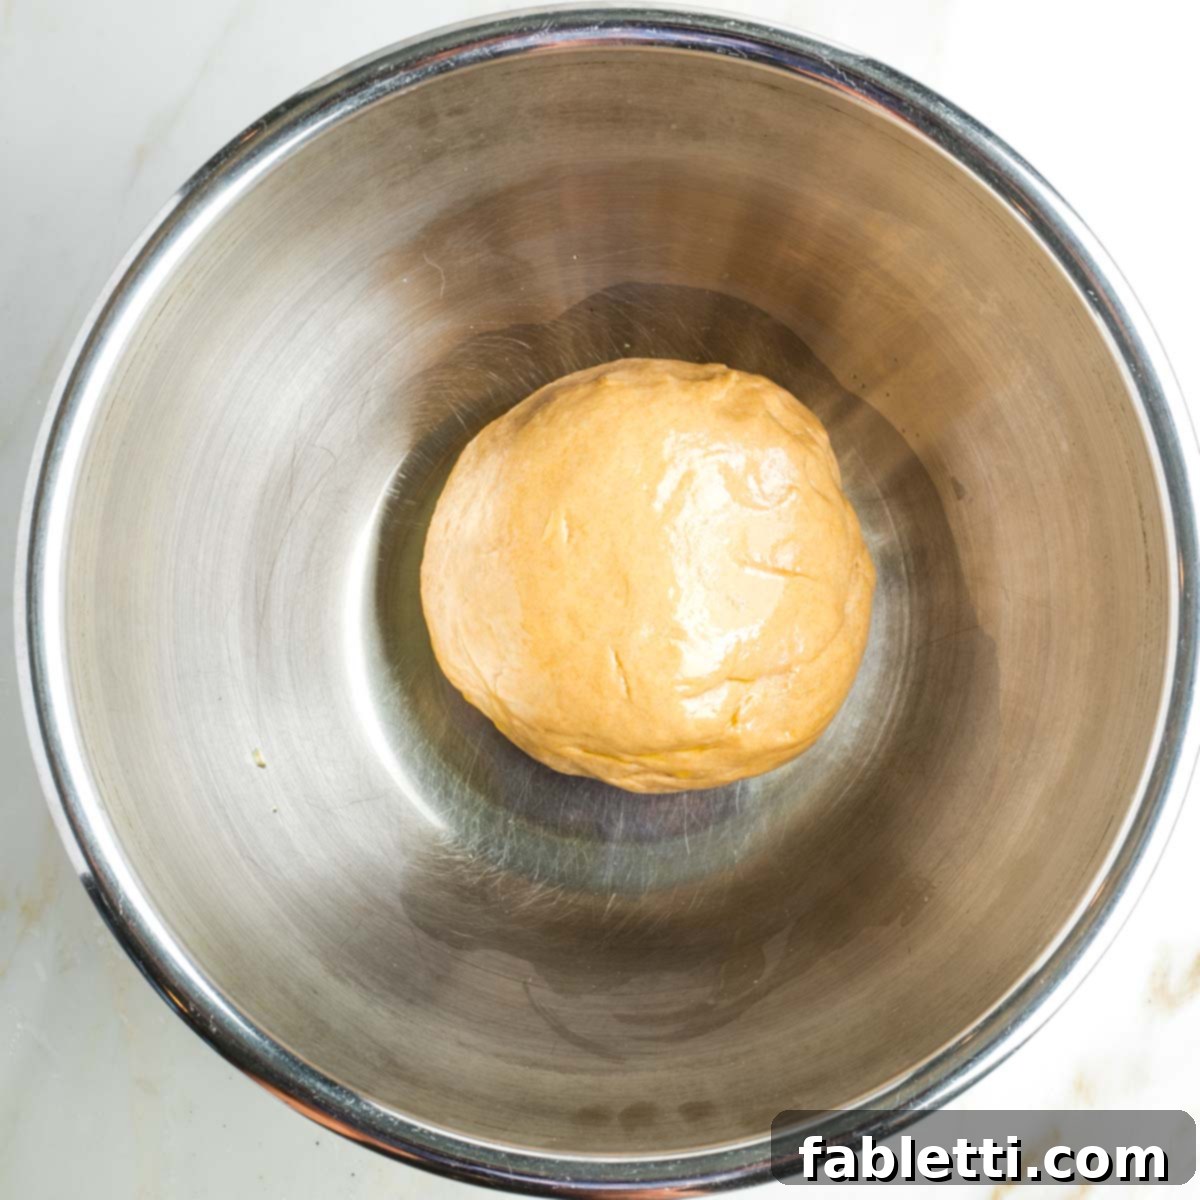
Swirl a tablespoon of olive oil around the inside of a large, clean mixing bowl, ensuring the bottom and sides are lightly coated. Carefully place the smooth ball of dough into this bowl and turn it gently on all sides to ensure it is completely coated with the oil. This vital step prevents a dry crust from forming on the dough’s surface and helps the dough rise evenly and smoothly.
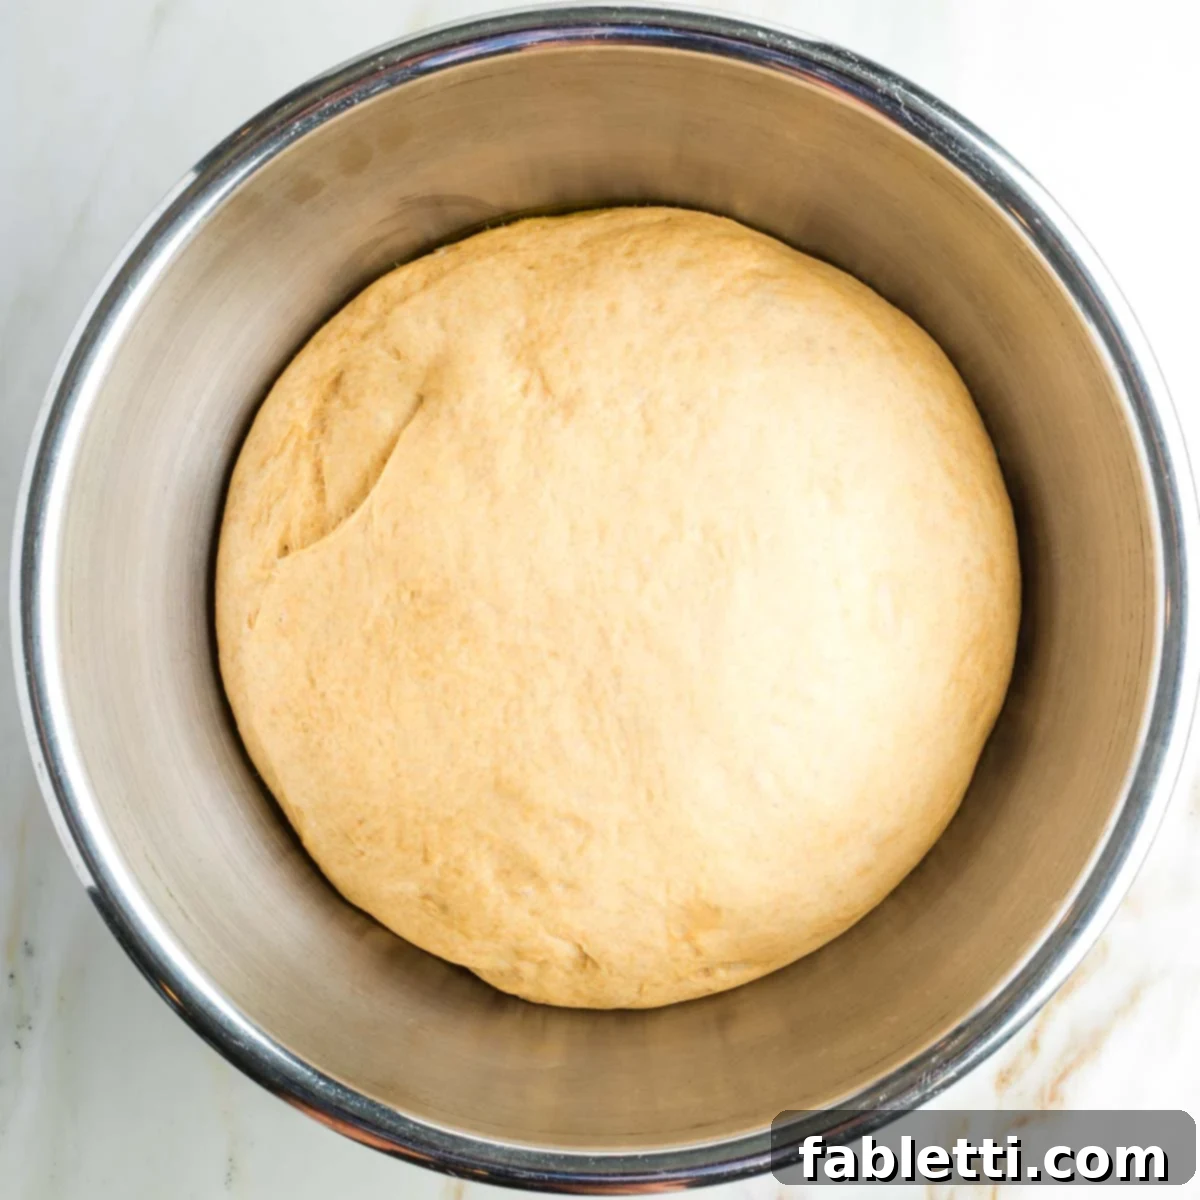
Cover the bowl securely with a clean kitchen towel or plastic wrap. Place it in a warm, draft-free spot for at least 2 hours to undergo its crucial first rise, also known as bulk fermentation. A sunny kitchen window, a slightly warmed oven (turned off, or on a specialized proof setting around 100°F/38°C), or simply a warm kitchen counter will work wonders. The dough should more than double in size, appearing incredibly light, airy, and wonderfully puffy. This slow, steady rise allows for optimal flavor development, giving your challah its signature depth and complexity.
Dividing the Dough and Mastering the Elegant Challah Braid
Once your challah dough has gloriously completed its first rise, becoming beautifully expanded and airy, it’s time for the truly artistic part of the process: carefully dividing the dough and expertly braiding it into its iconic round shapes. This satisfying step is where your challah truly begins to take its festive, show-stopping form, transforming from a simple mass into a work of culinary art.
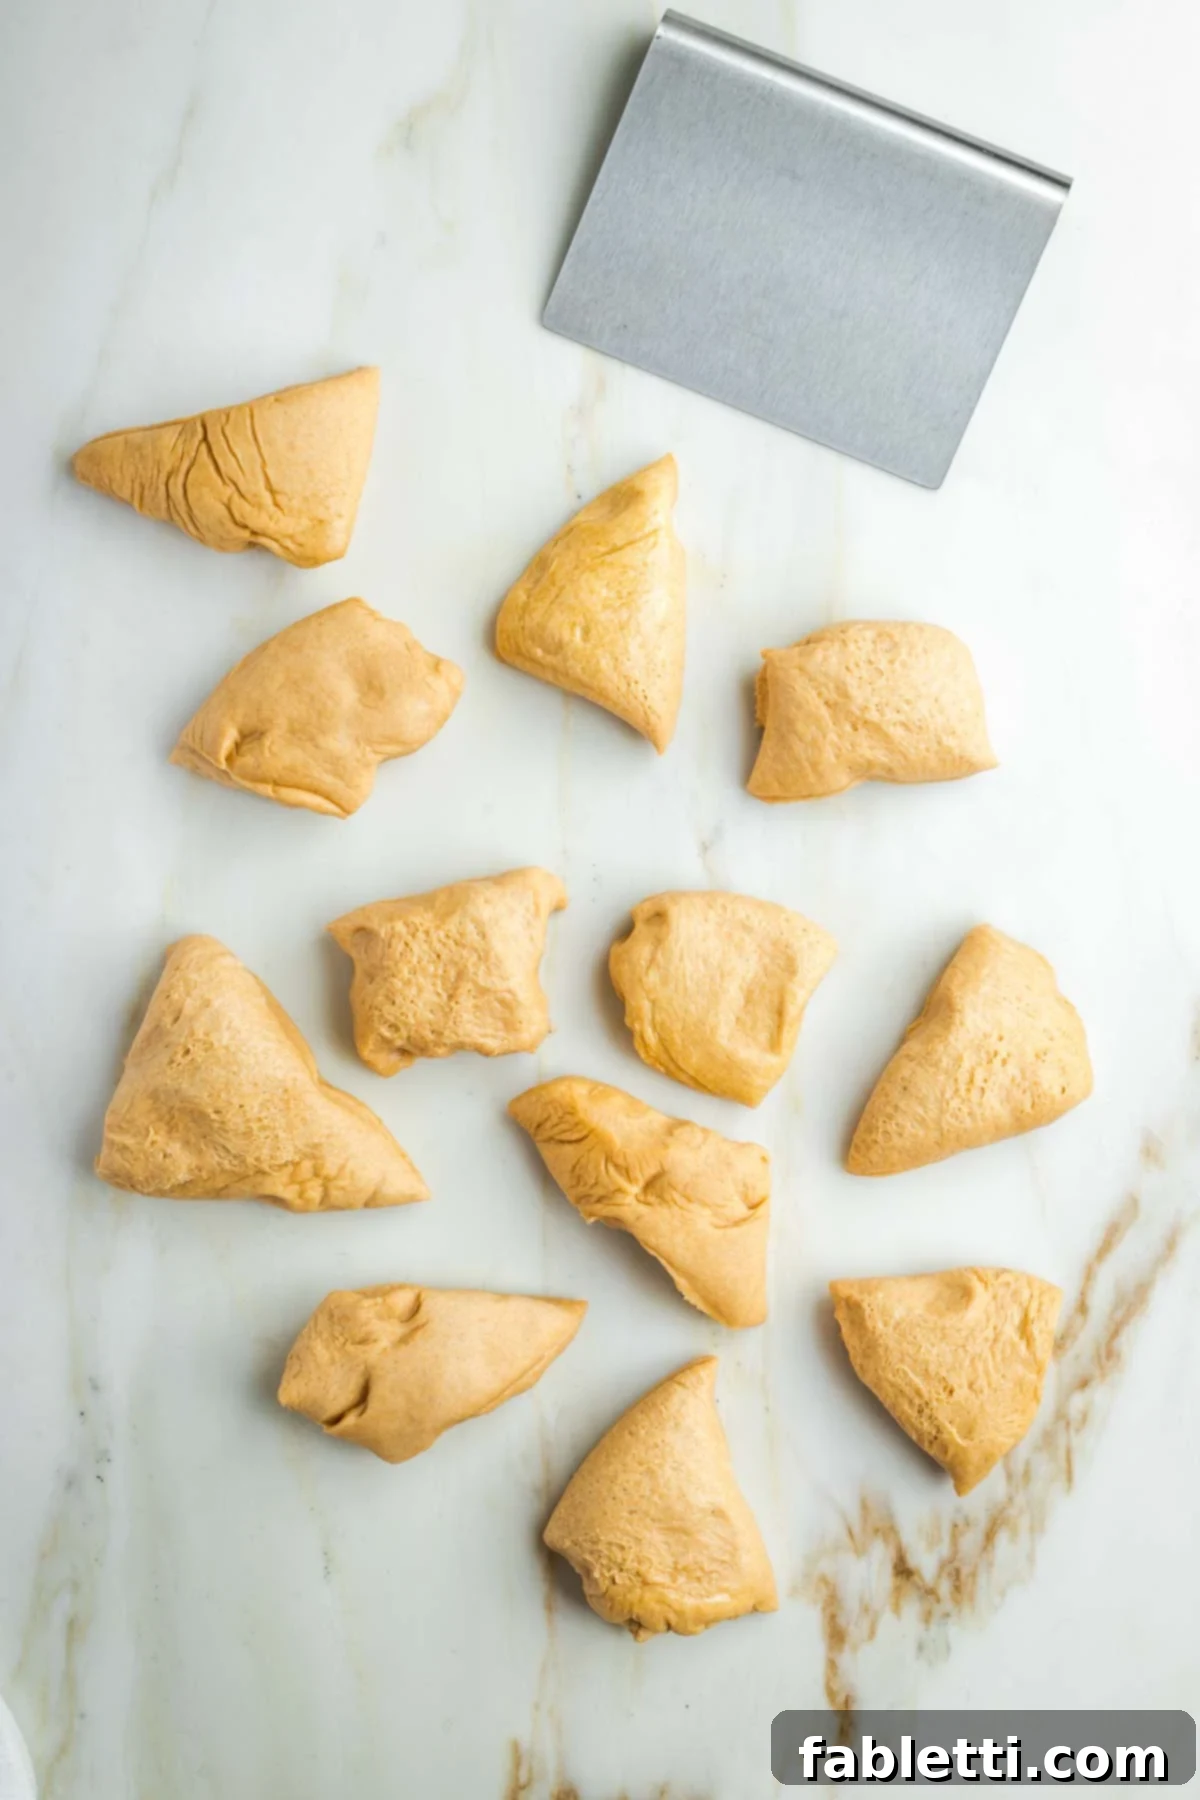
This generous batch of challah dough will yield three perfectly sized loaves, each a beautiful and impressive centerpiece for your holiday table. Begin by gently deflating the risen dough – simply press out the air – and turning it out onto a clean, lightly floured surface. Now, with precision, divide the dough into 12 equal pieces. For optimal consistency, each piece should ideally weigh approximately 3 ounces (about 85 grams). Using the edge of a dough scraper makes this task remarkably easy and ensures consistent portions. Alternatively, you can simply use your hands, visually dividing the dough in half, then halving those pieces, and continuing until you achieve 12 uniform portions.
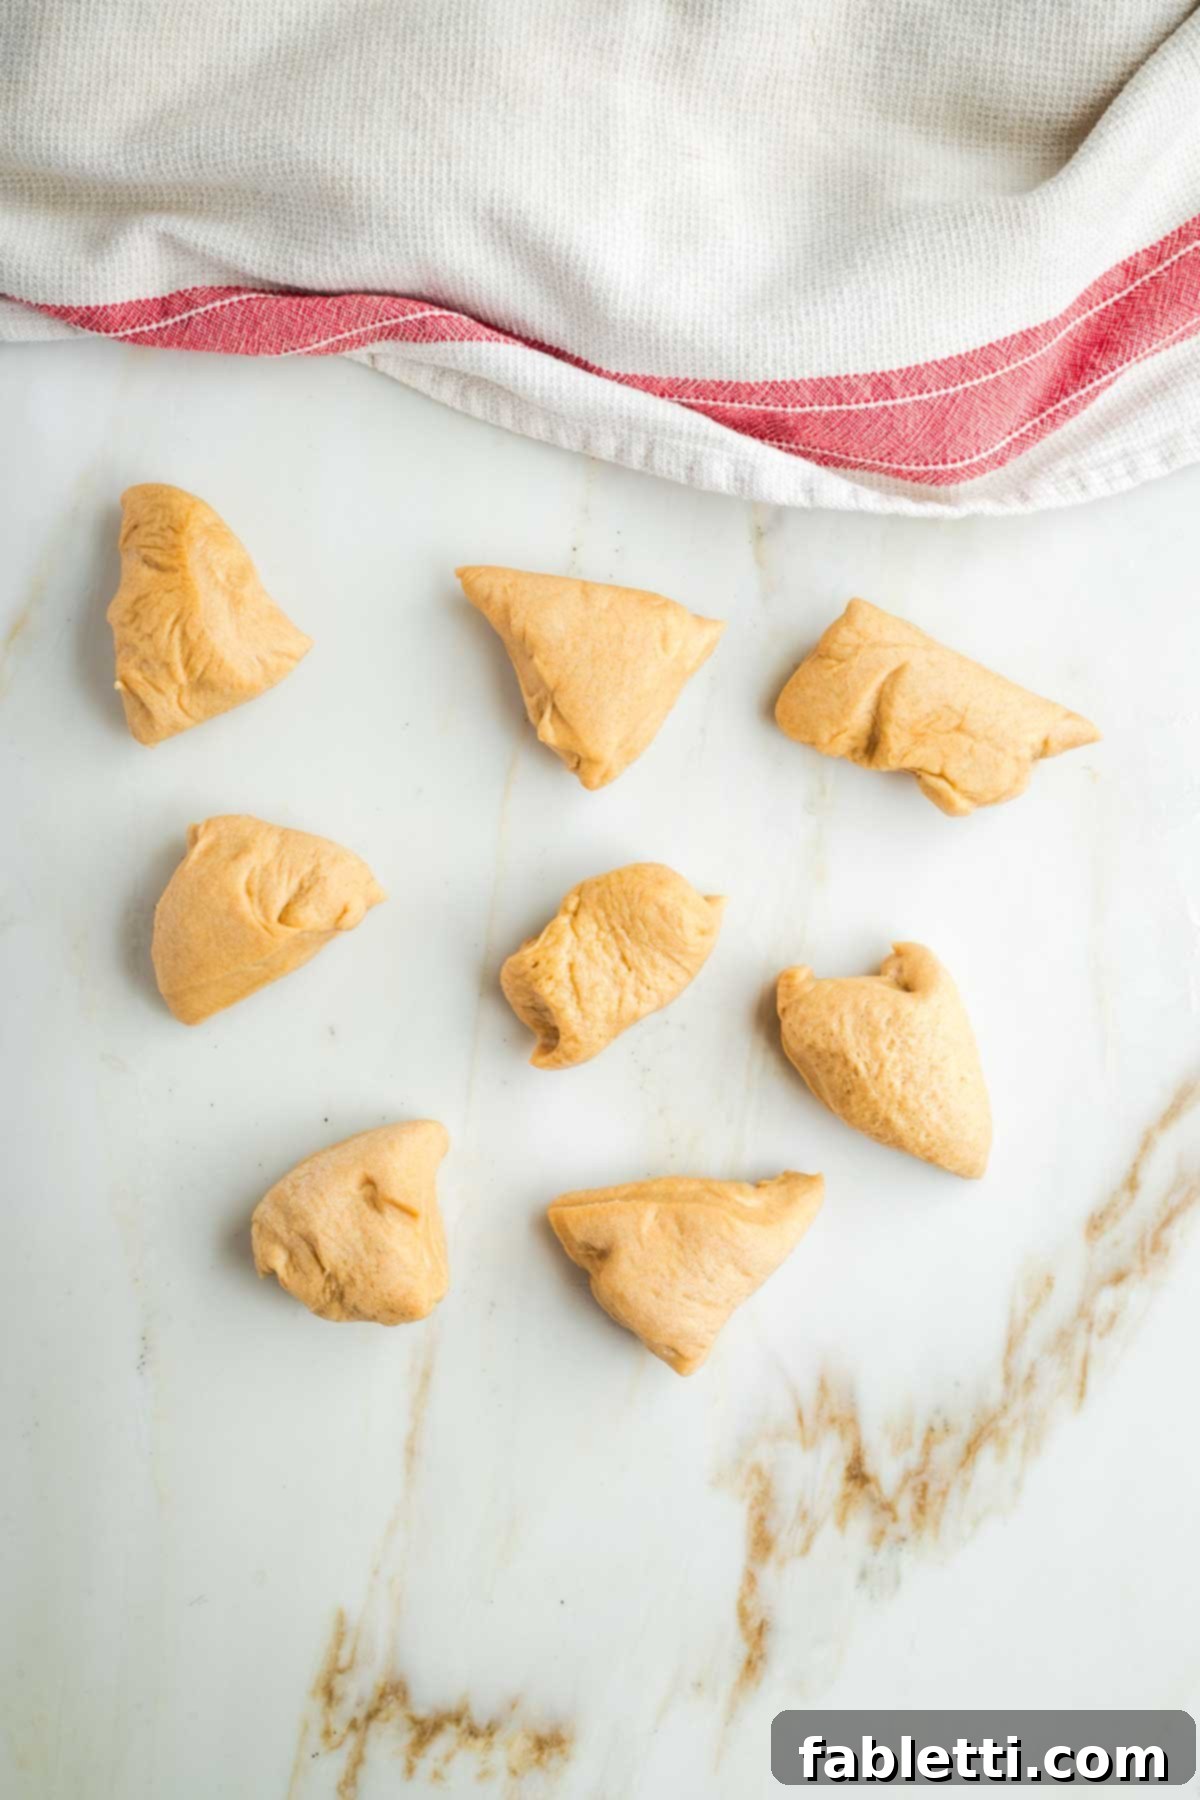
As you meticulously work with individual pieces of dough, it’s absolutely crucial to keep any unused portions generously covered with a clean kitchen towel. This vital step prevents the dough from drying out, which can quickly make it difficult to roll, stretch, and braid smoothly. Each challah loaf, whether a 4-strand or 8-strand braid, will require 4 of these 12 main pieces. If you decide to tackle the more intricate and visually striking 8-strand braid, you’ll simply take each of those 4 pieces and cut them in half again, creating 8 smaller, equal strands specifically for that one loaf.
Crafting the Elegant 8-Strand Round Challah with Seeds
The 8-strand braid is renowned for creating a visually stunning and intricately woven challah, especially when you strategically incorporate savory seeds. While it might appear a bit more intricate initially, it is incredibly satisfying to master and yields an impressive result. For this particular method, you will be working with 8 thinner, individual strands of dough for each loaf.
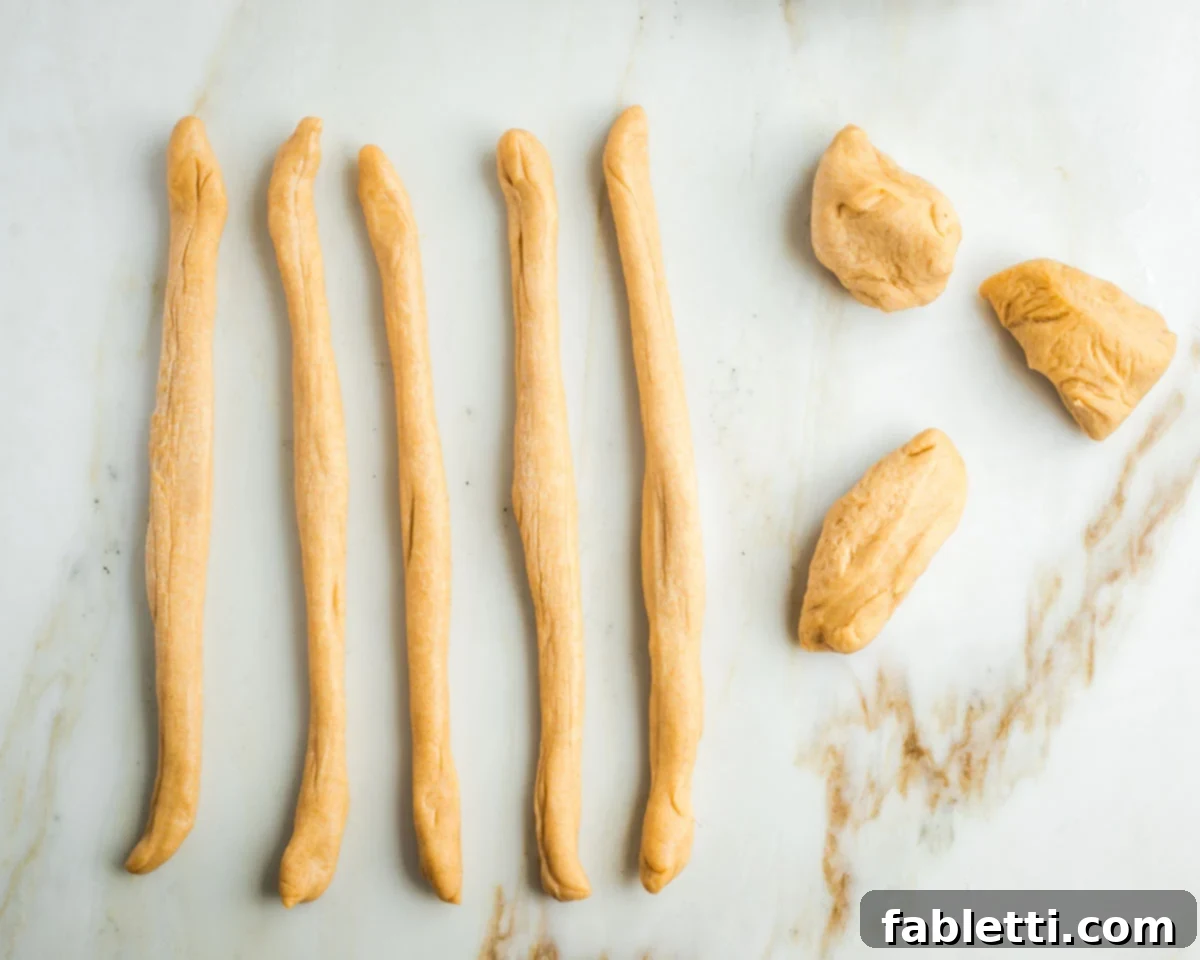
Take each of your 8 individual dough pieces and gently, yet firmly, roll them between your hands or on a lightly floured surface into long, even rope-like strands. Aim for a consistent thickness along the entire length of each rope. This uniformity is crucial to ensure an even bake and to create a beautifully symmetrical braid.
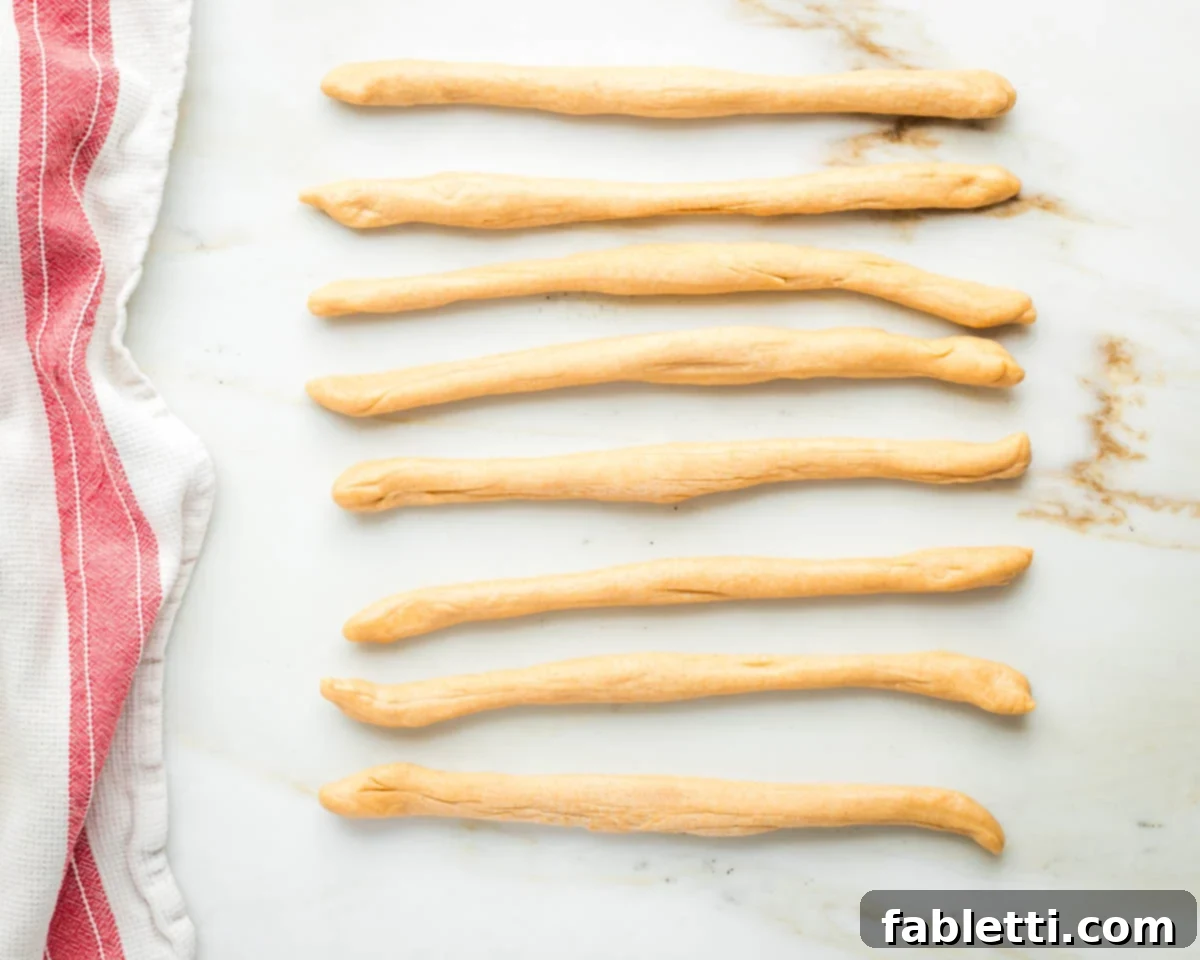
Regardless of any slight variations in thickness (some flours or dough consistencies might naturally yield slightly thinner or thicker strands), your primary focus should be on making all your dough pieces as equal in length as possible. This uniformity in length is a key factor for achieving a well-structured, tightly woven, and aesthetically pleasing braid.
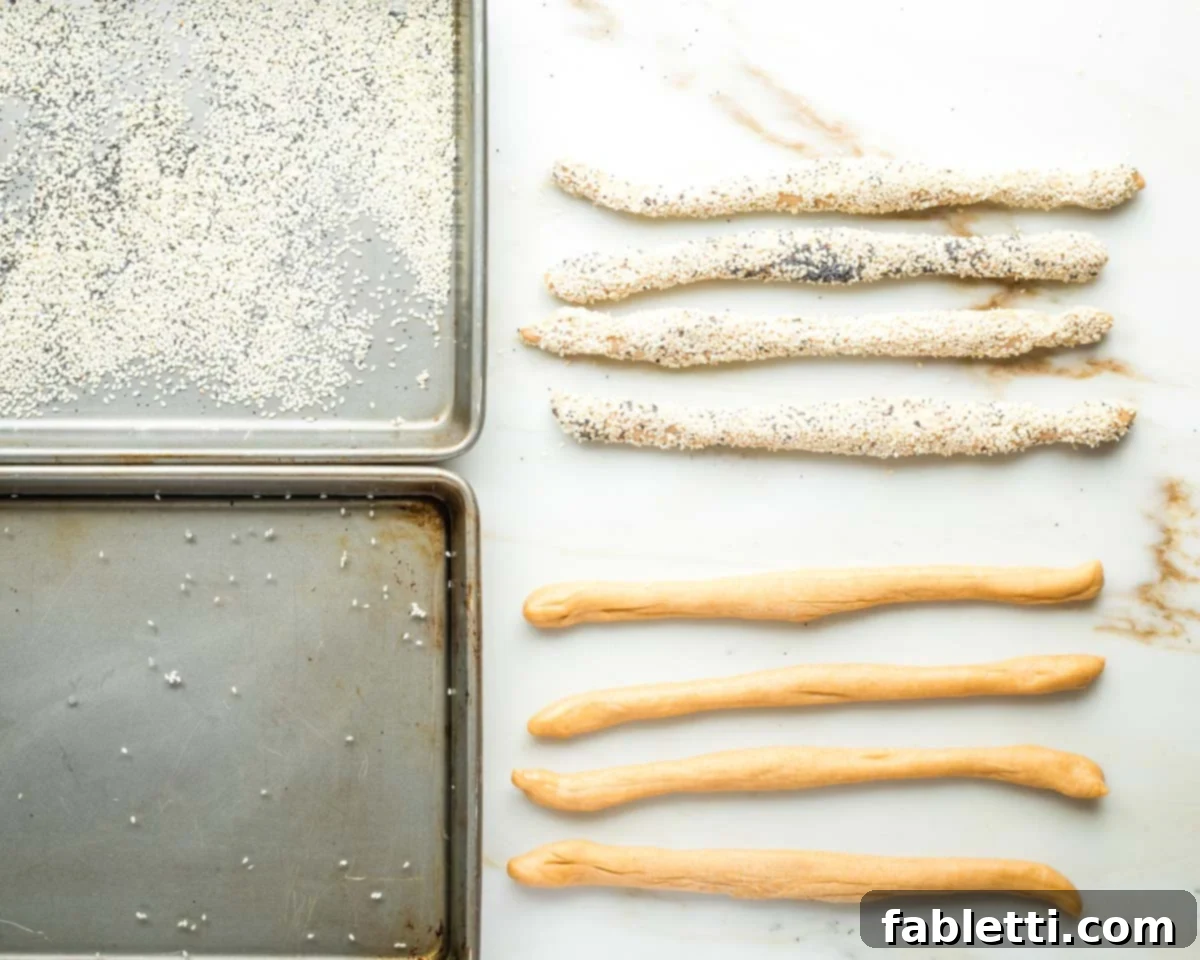
To prepare your beautifully seeded strands, set up two shallow, rimmed trays or plates side-by-side: one containing a small amount of plain water, and the other generously filled with your chosen mixture of sesame and poppy seeds (or just one type, if preferred). This clean and organized setup allows for an efficient and mess-free application.
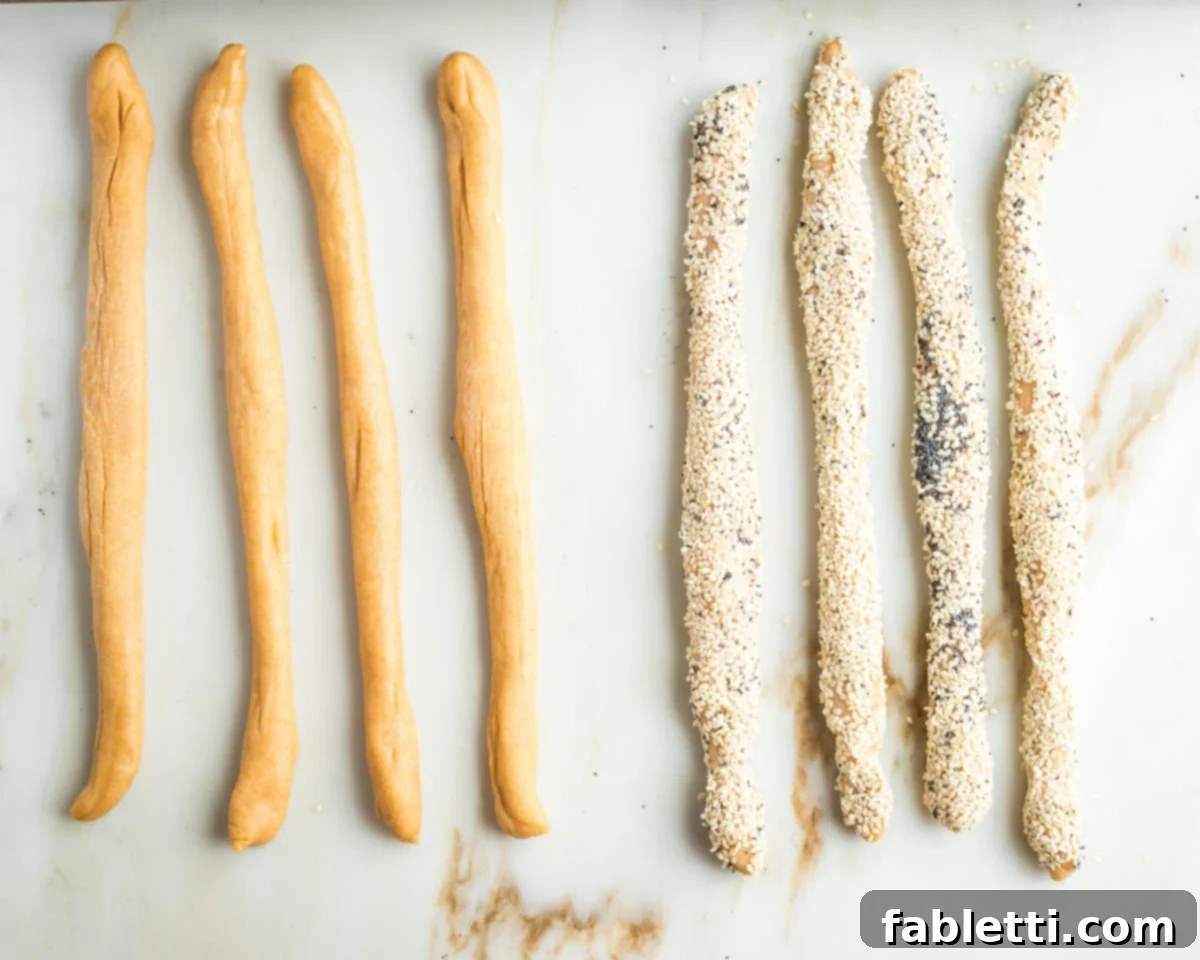
Gently moisten one of your dough strands by briefly dipping it in the water, ensuring it’s evenly coated without being soggy. Then, immediately roll it through the seed mixture, ensuring a generous and even coating of seeds. Repeat this precise process with exactly half of your total strands (so, 4 out of the 8 strands designated for one loaf), intentionally leaving the other half plain. This thoughtful alternation creates a striking and beautiful visual contrast in your final braided challah.
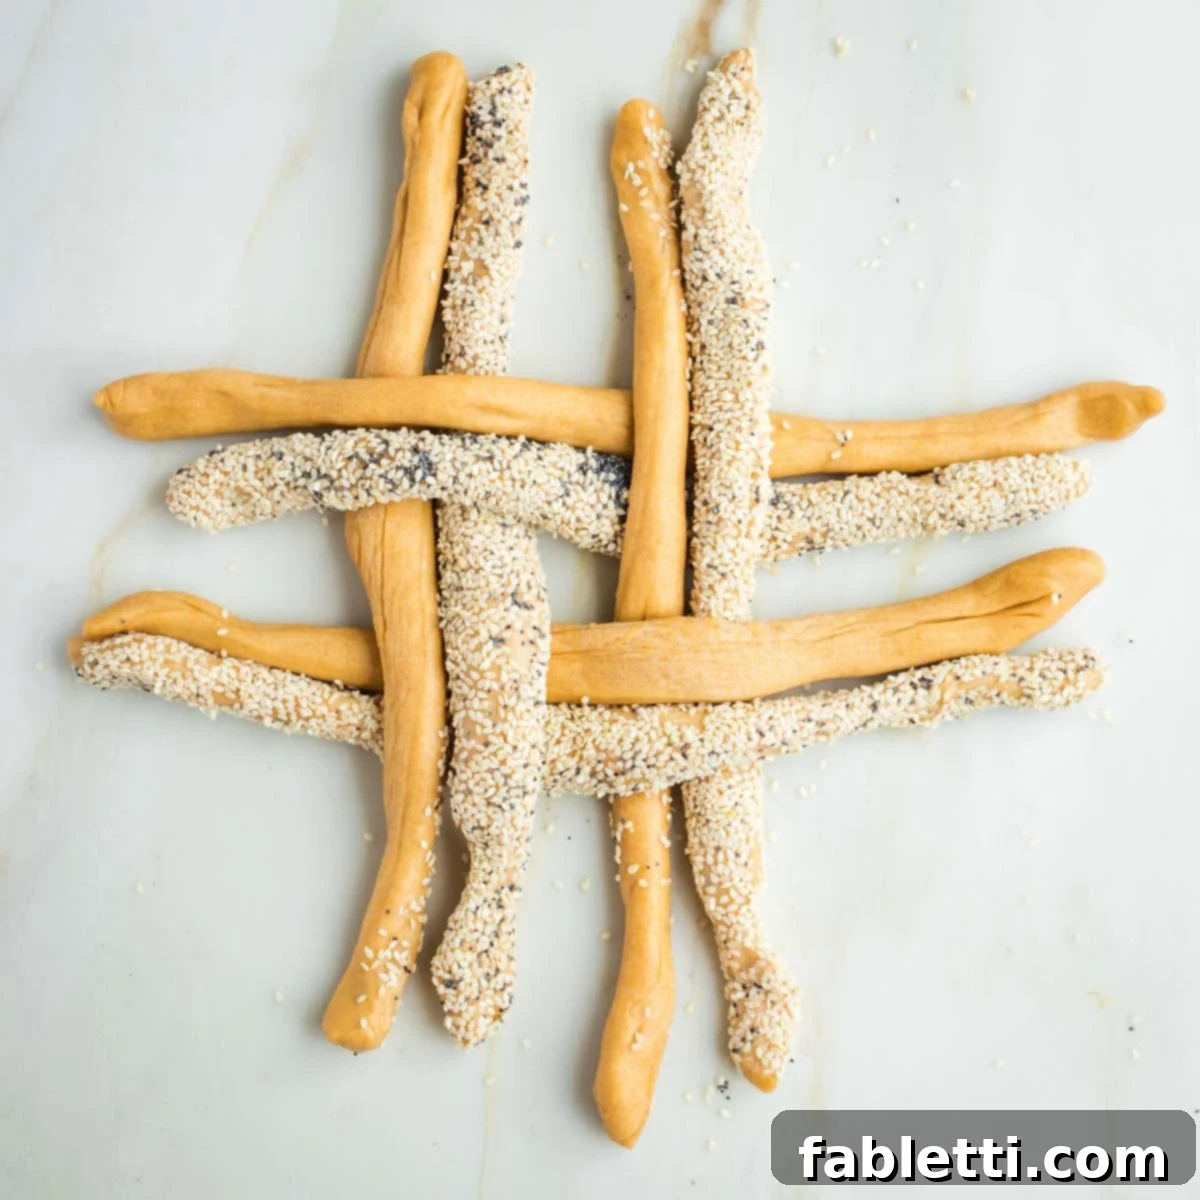
To meticulously begin the 8-strand braid, lay out your strands in a specific alternating pattern, forming an over/under grid that might remind you of a tic-tac-toe board. Position one plain strand directly next to a seeded strand, then another plain, and another seeded, creating two distinct horizontal rows. Next, carefully weave the remaining four strands vertically through these horizontal ones, ensuring they consistently alternate over and under the horizontal strands, precisely as clearly depicted in the accompanying photo. This carefully constructed pattern forms the central, foundational star-like base of your round braid.
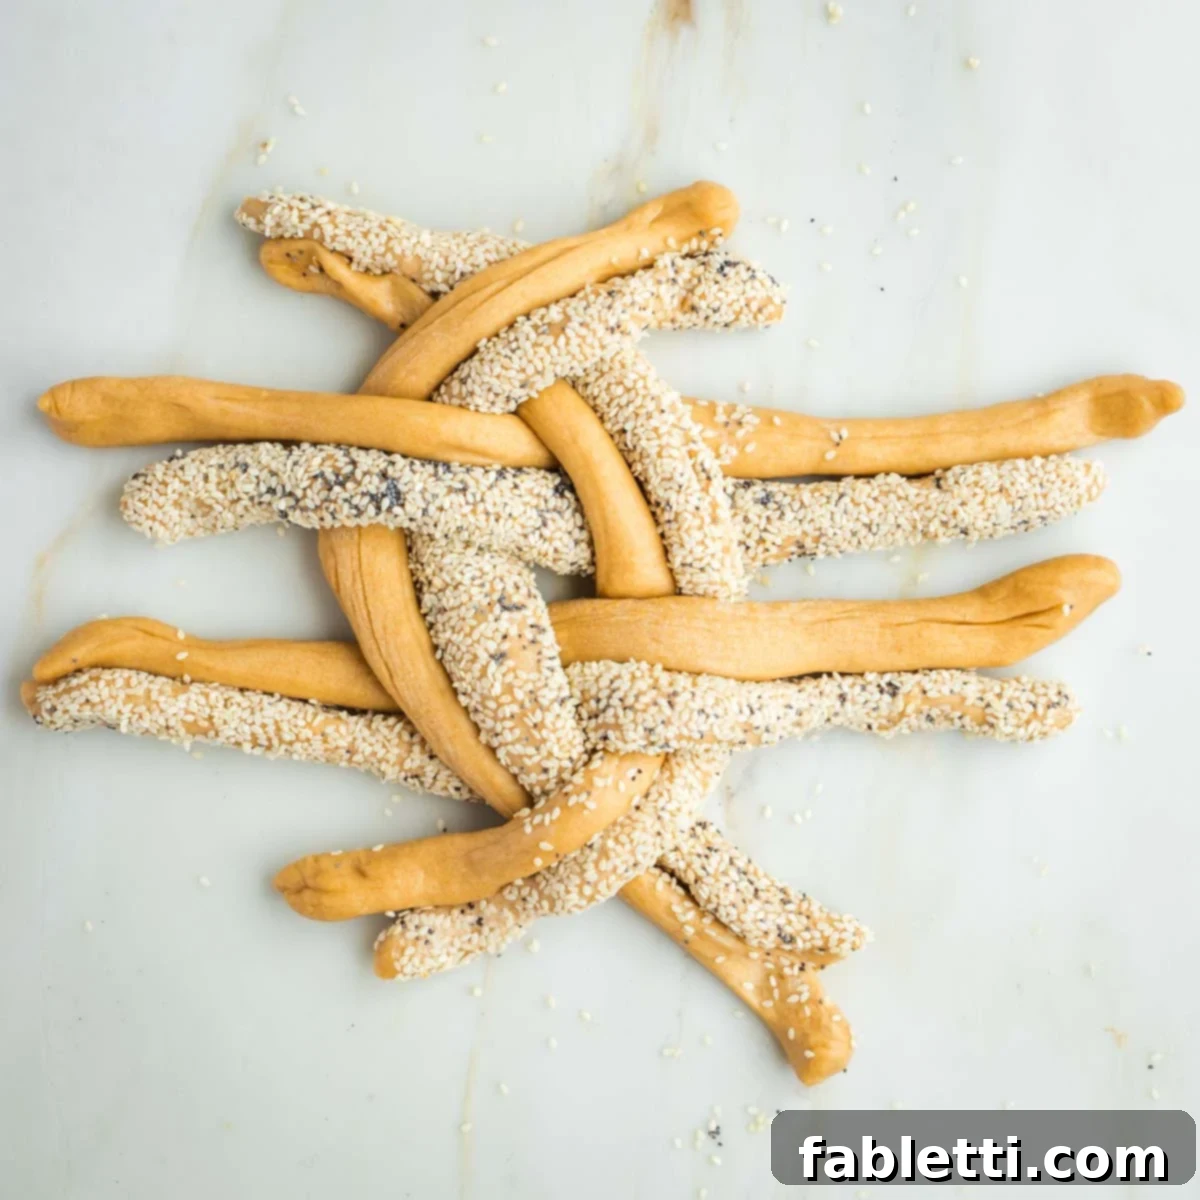
Now, consider each visual pairing of seeded and plain ropes as a single, cohesive unit. Gently cross the top and bottom pairs of strands over the *under* strands of the central grid. This initial, thoughtful movement begins to pull the entire weave into a natural circular pattern. The overarching goal is to meticulously keep the plain and seeded strands together as a distinct visual pairing, allowing them to alternate gracefully over and under the other pairs as you systematically work outwards from the center.
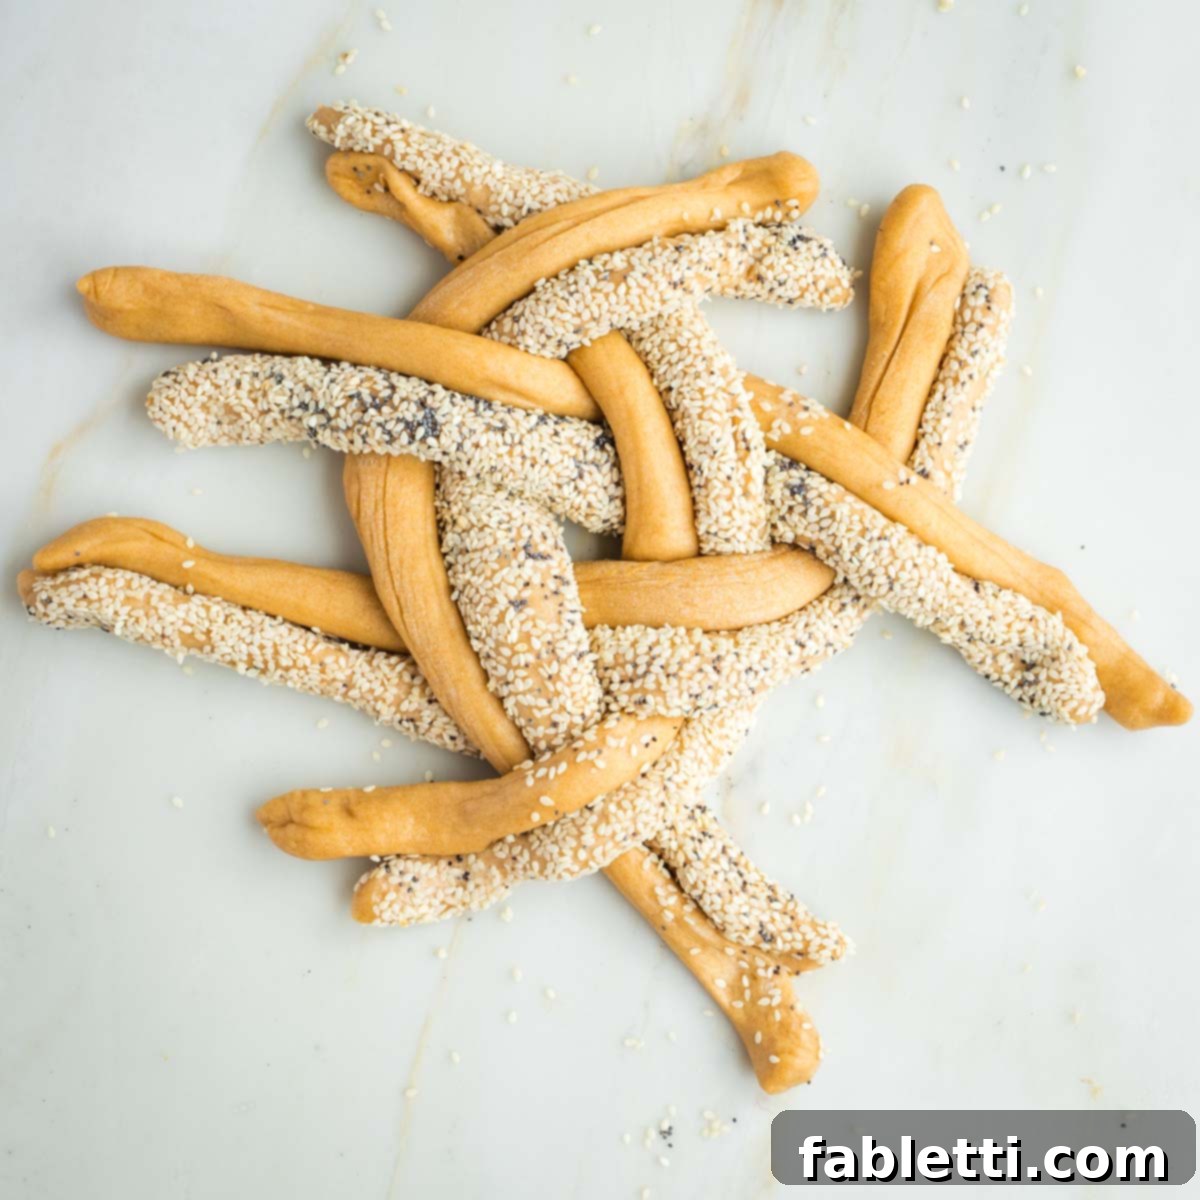
Continue this intricate braiding pattern, carefully working your way around the sides of the nascent challah. At every juncture, always ensure that the strands consistently alternate correctly – over and under – to meticulously maintain the beautiful, complex woven texture. Take your time to gently maneuver the pliable dough, striving to keep the tension consistent but never overly tight, which could result in a dense loaf.
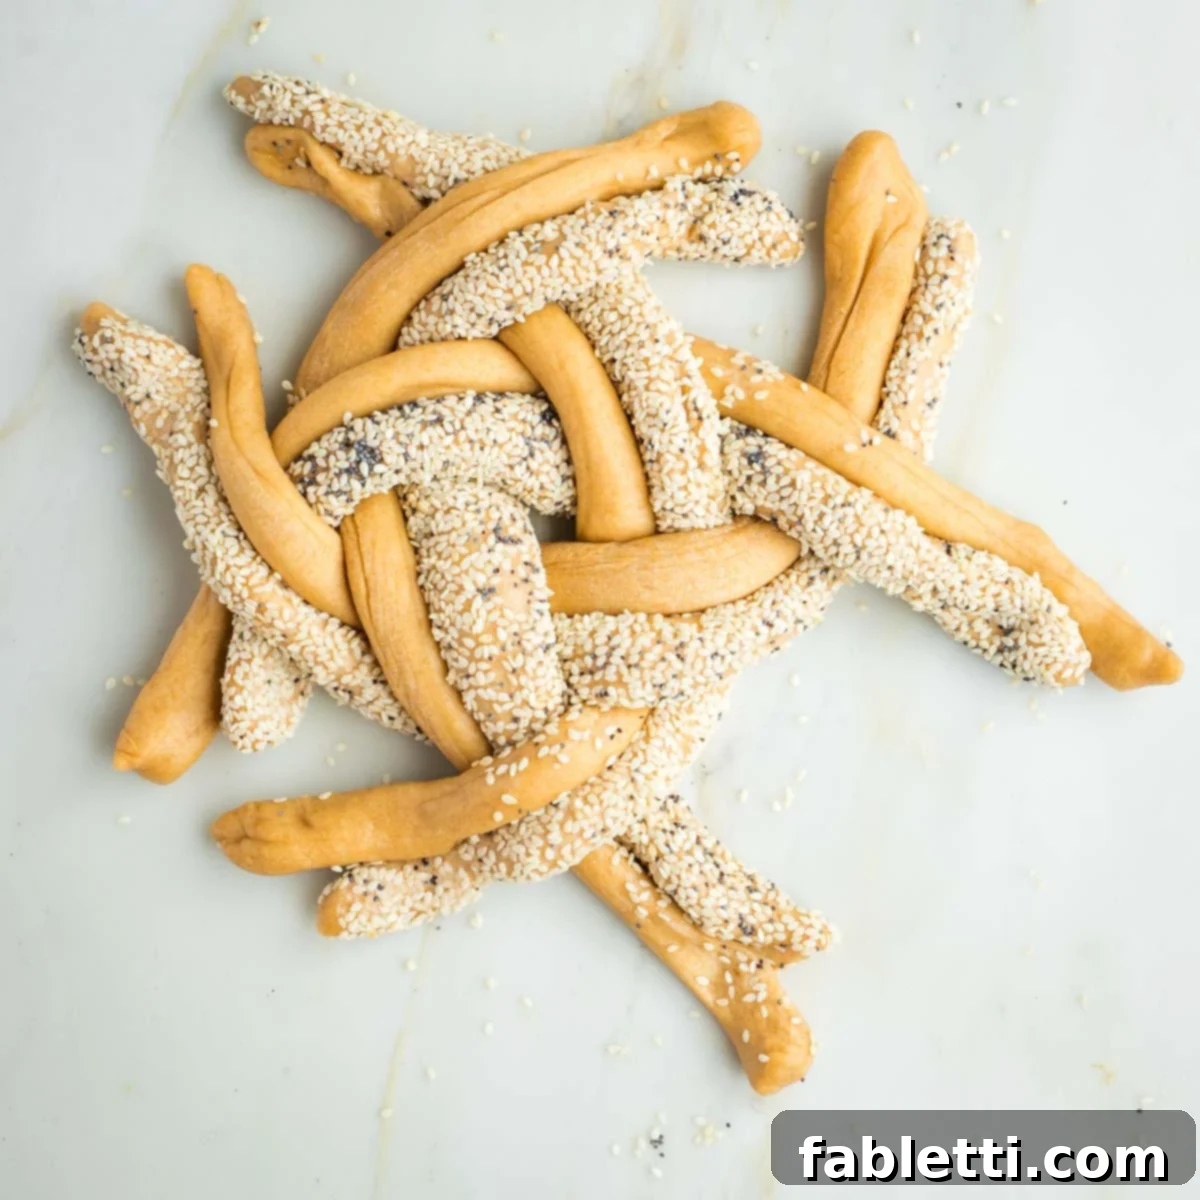
As you expertly progress with the braid, the elegant round shape will naturally begin to form and solidify. Continue to meticulously keep the seeded and plain strands consistently paired together, allowing them to create a distinct and visually appealing pattern within the overall braid. The true beauty and artistry of this particular challah lie in the striking contrasting textures and colors thoughtfully provided by the seeds.
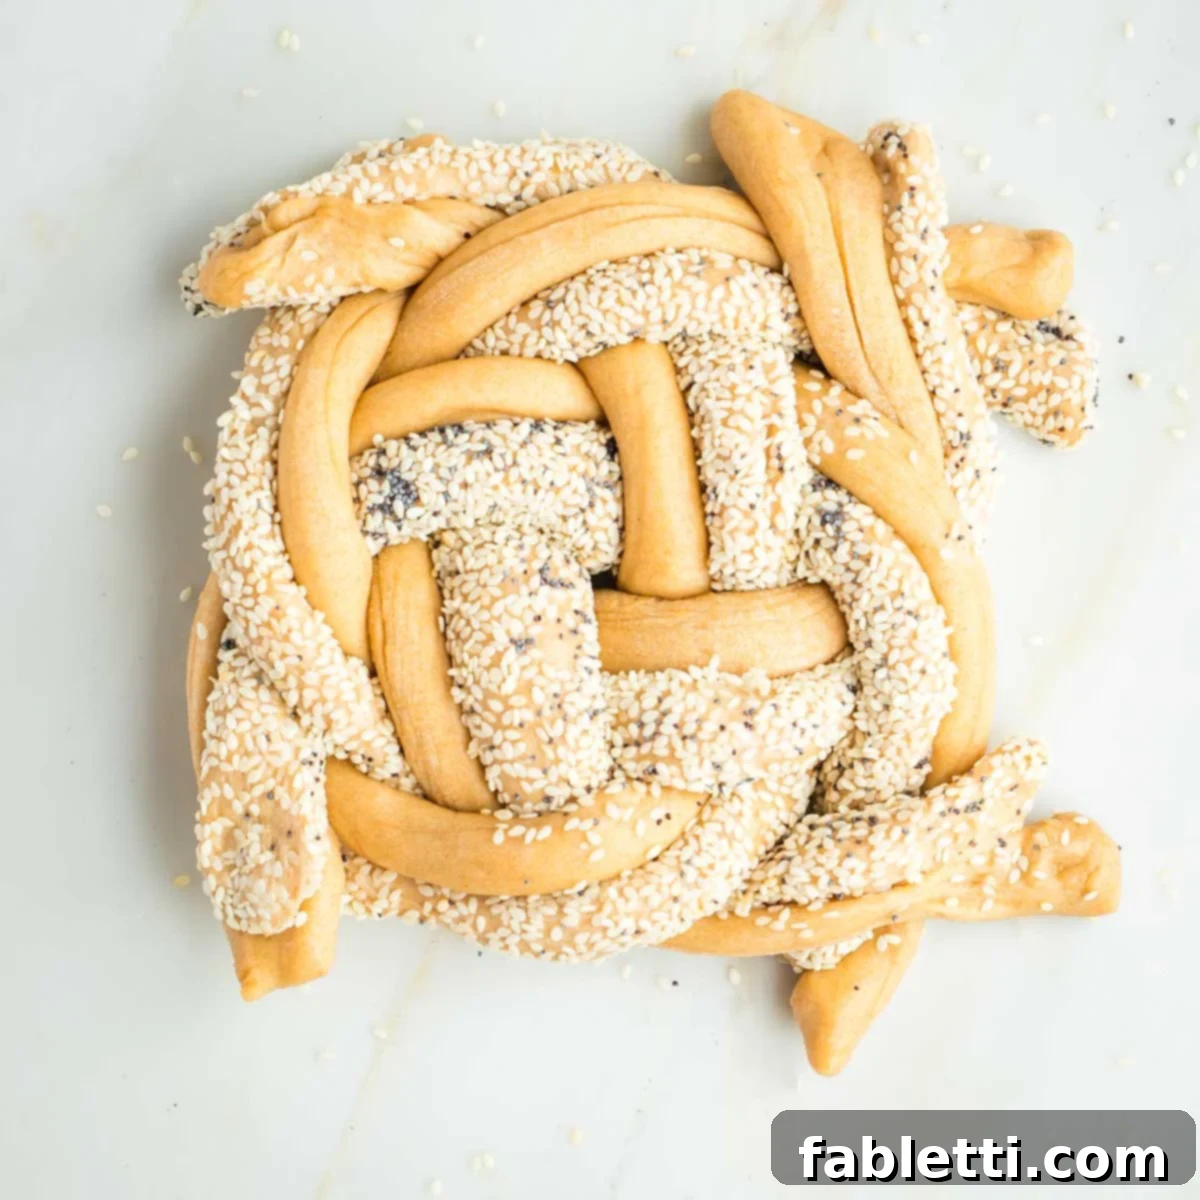
You will eventually reach a point where the remaining strands become too short to comfortably continue the intricate crossing pattern. At this precise stage, gently but firmly pinch all the ends together at the point where you can no longer smoothly braid. This action securely fastens the braid and prevents it from unraveling during the subsequent proofing and baking stages.
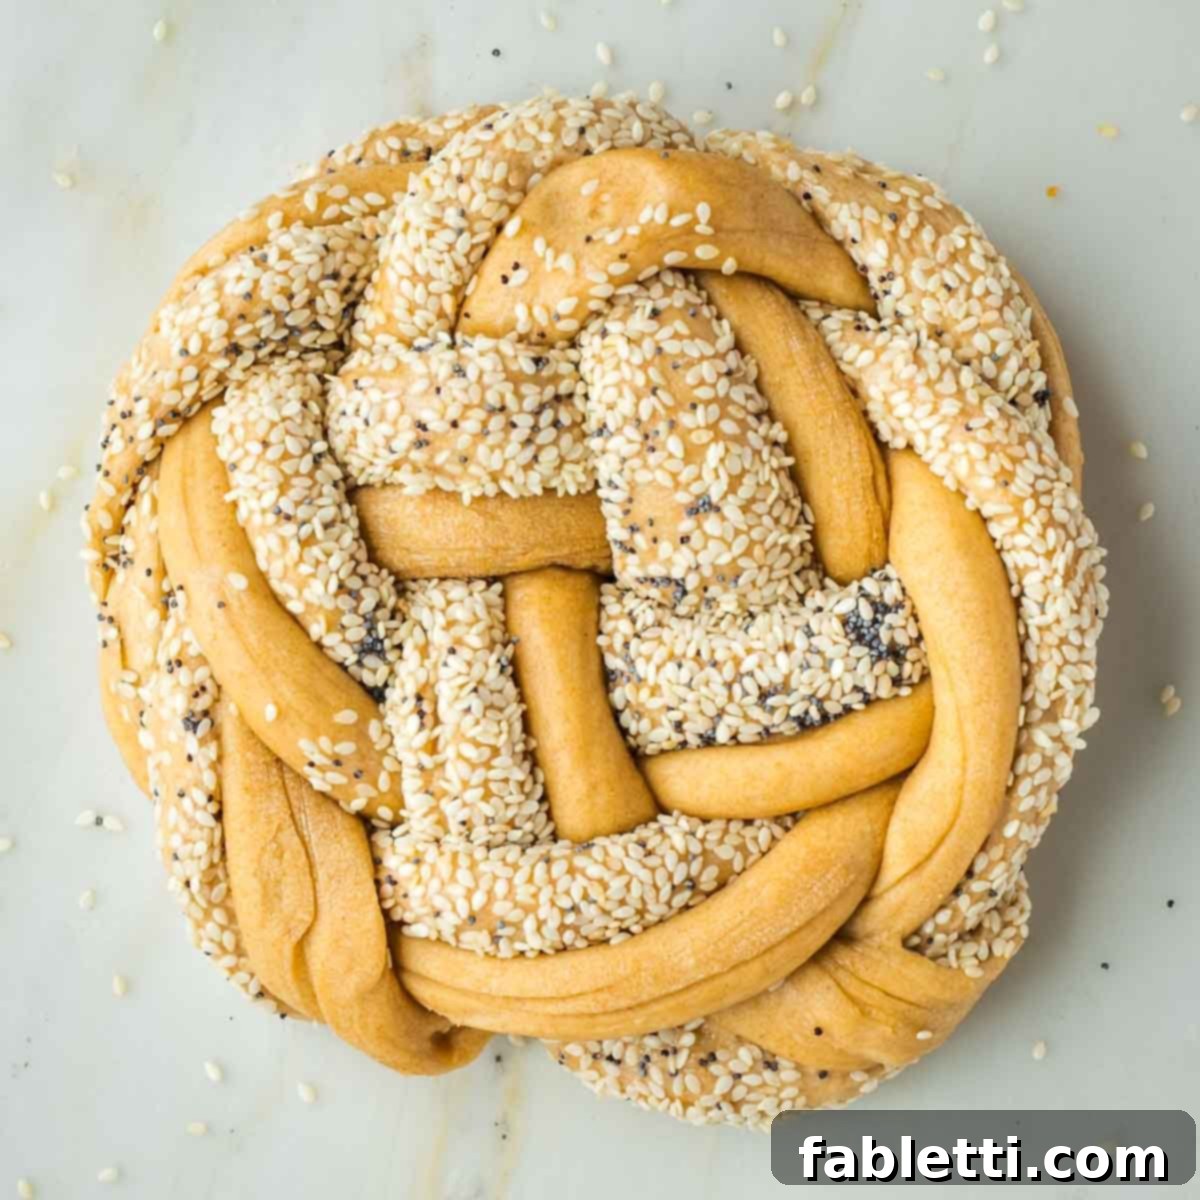
Finally, and with great care, gently tuck all those pinched ends neatly underneath the challah loaf. This creates a beautifully seamless, continuous, and professionally finished round product, ready for its crucial second rise. The goal is to completely hide all loose ends, giving your challah a pristine and elegant appearance that will impress everyone at your table.
Simpler Elegance: The 4-Strand Round Challah Braid
For a slightly less intricate but equally beautiful and impressive round challah, the 4-strand braid is an excellent choice. This method is a fantastic option for those who are newer to the art of challah braiding or when you simply prefer a quicker shaping process without compromising in any way on visual appeal or the delicious outcome. It still delivers a stunning presentation with fewer steps.
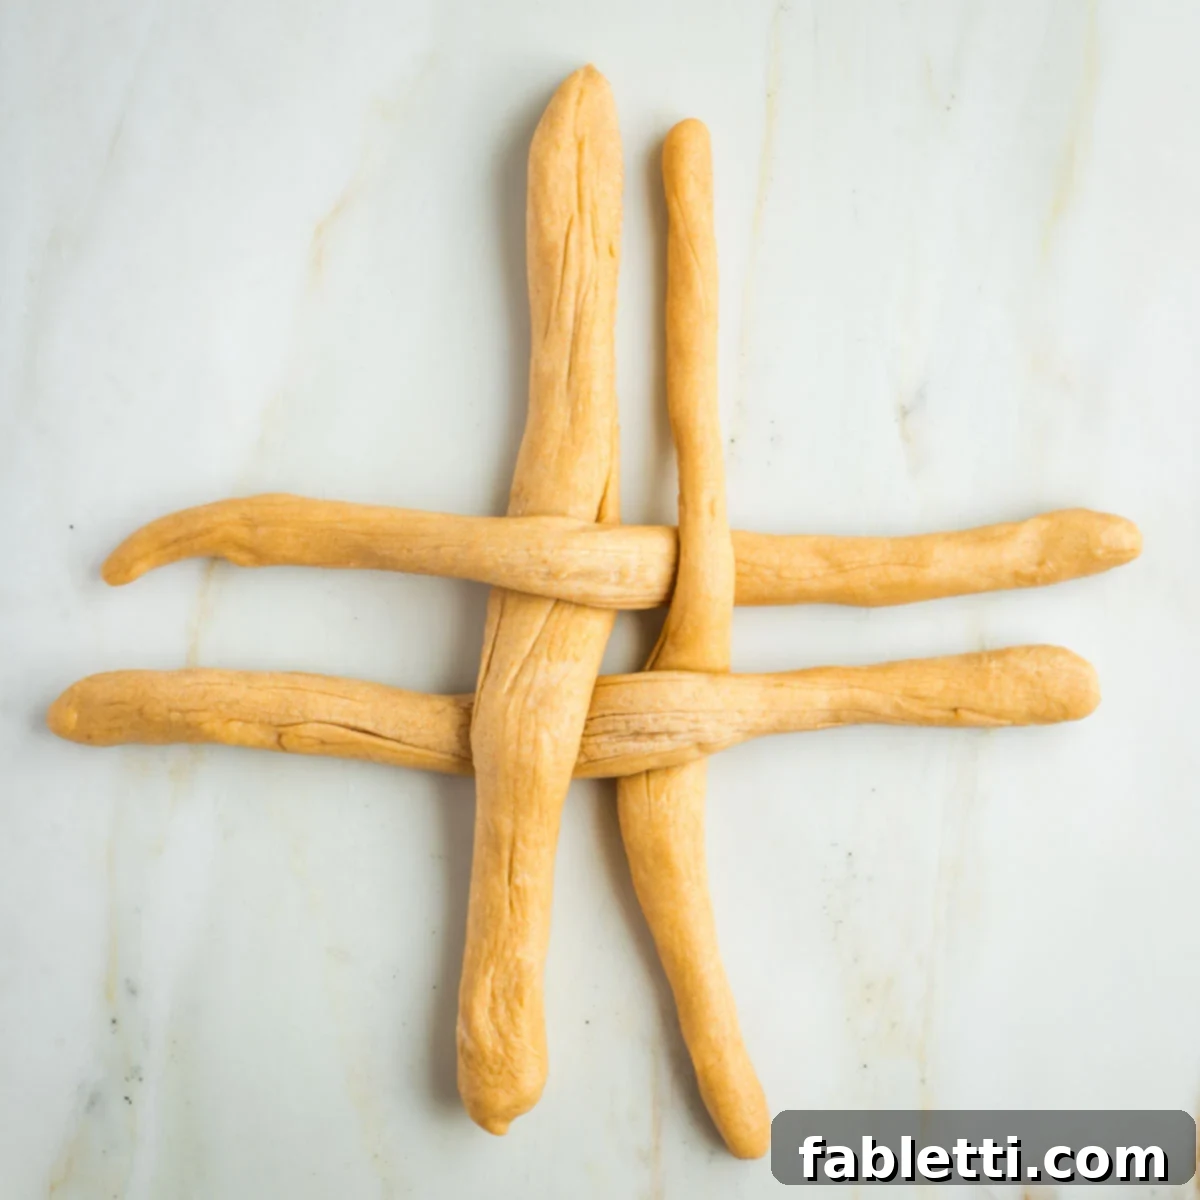
Begin by rolling your four individual dough pieces into long, even ropes of equal length. Don’t be concerned if the smaller initial dough portions yield slightly thinner strands; the paramount key here is consistency in length across all four ropes. Lay them out on your clean workspace in a precise criss-cross pattern: position two strands horizontally and two vertically, carefully ensuring they alternate over and under at the exact center point, precisely as clearly illustrated in the accompanying photo. This carefully constructed pattern forms the crucial starting point for your round braid.
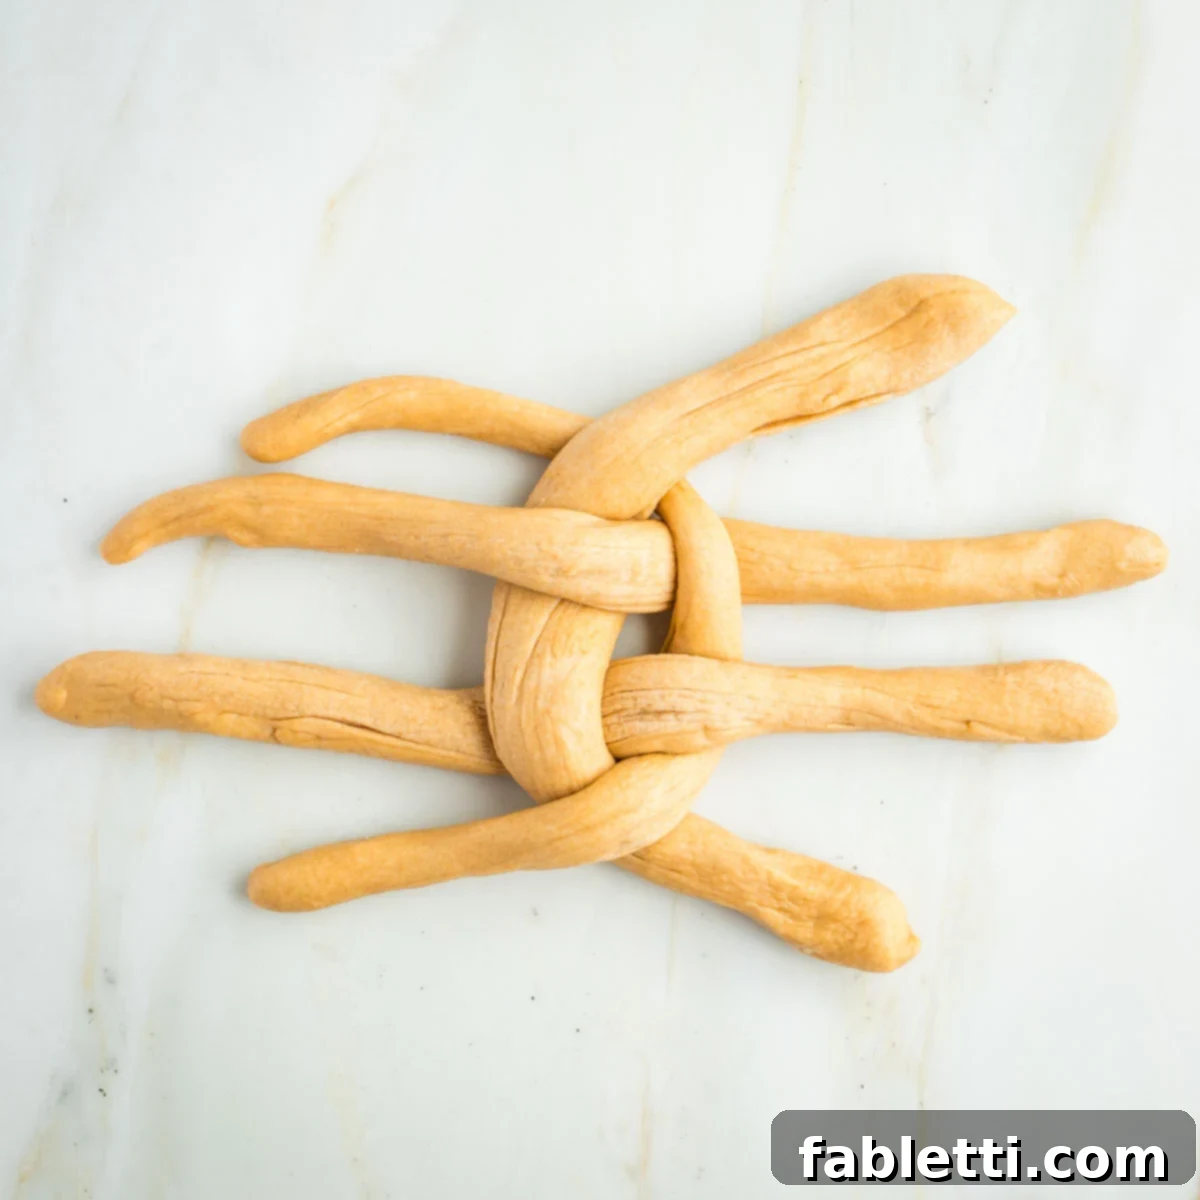
Next, focus your attention on the top two strands. Carefully cross them over so they continue the established alternating over and under pattern with the strands they intersect. Repeat this exact movement with the bottom two strands. This deliberate expansion of the central weave begins to effectively define and shape the graceful round structure of your challah loaf.
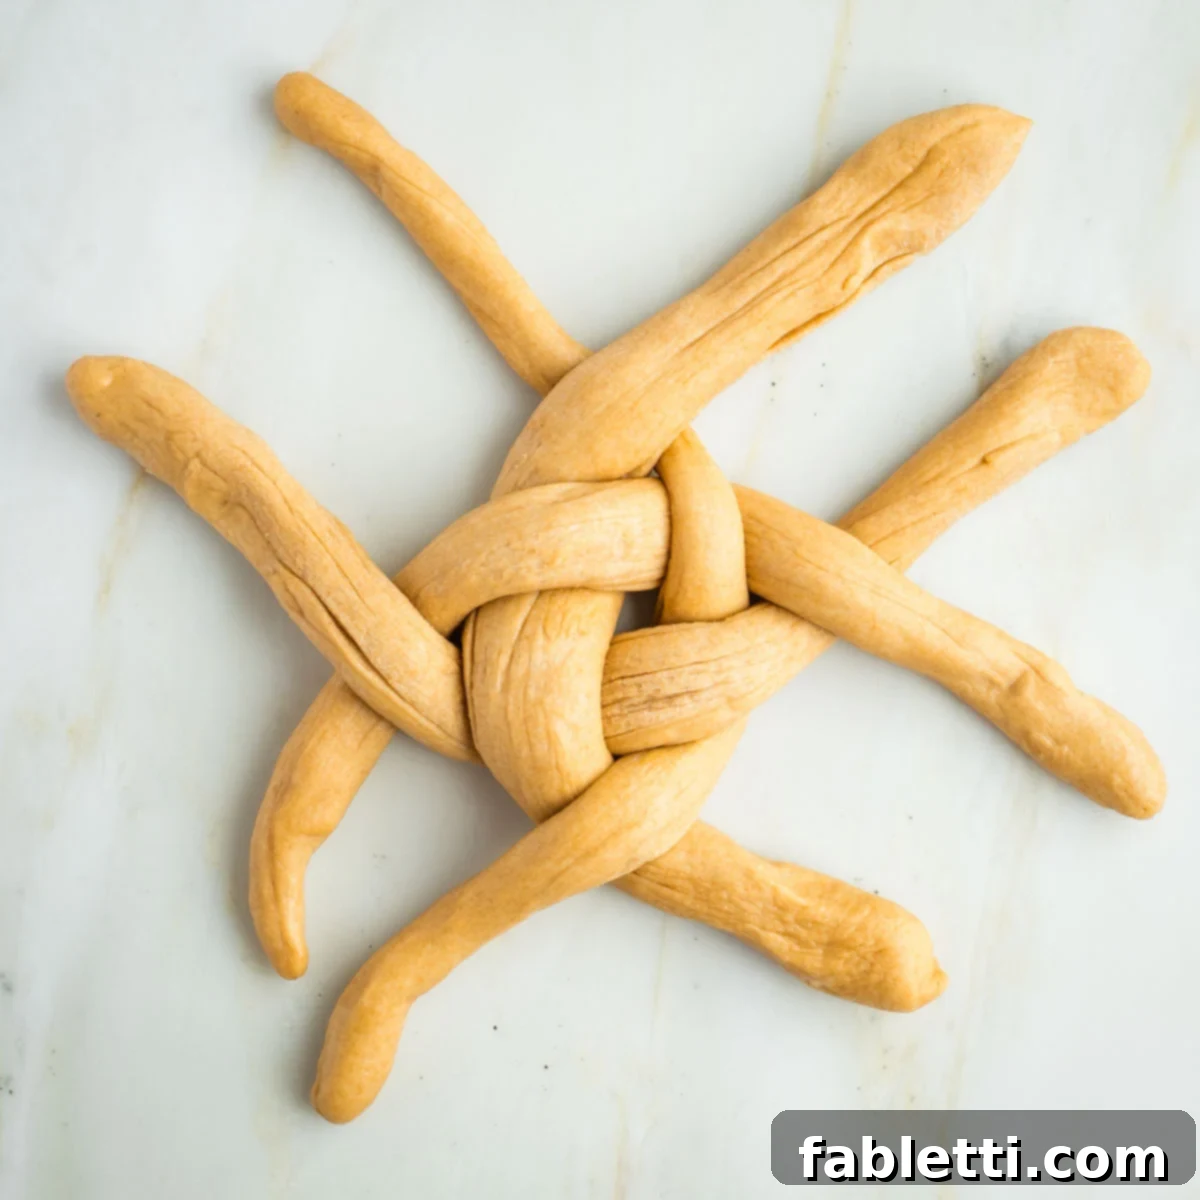
Now, meticulously repeat this process on the right side of your nascent challah, and then again on the left side. It is crucial to always ensure that the over/under alternating pattern is continued consistently throughout these movements. As you carefully weave outwards, you will distinctly notice the challah gradually taking on a more defined, compact, and beautiful round shape, testament to your careful braiding.
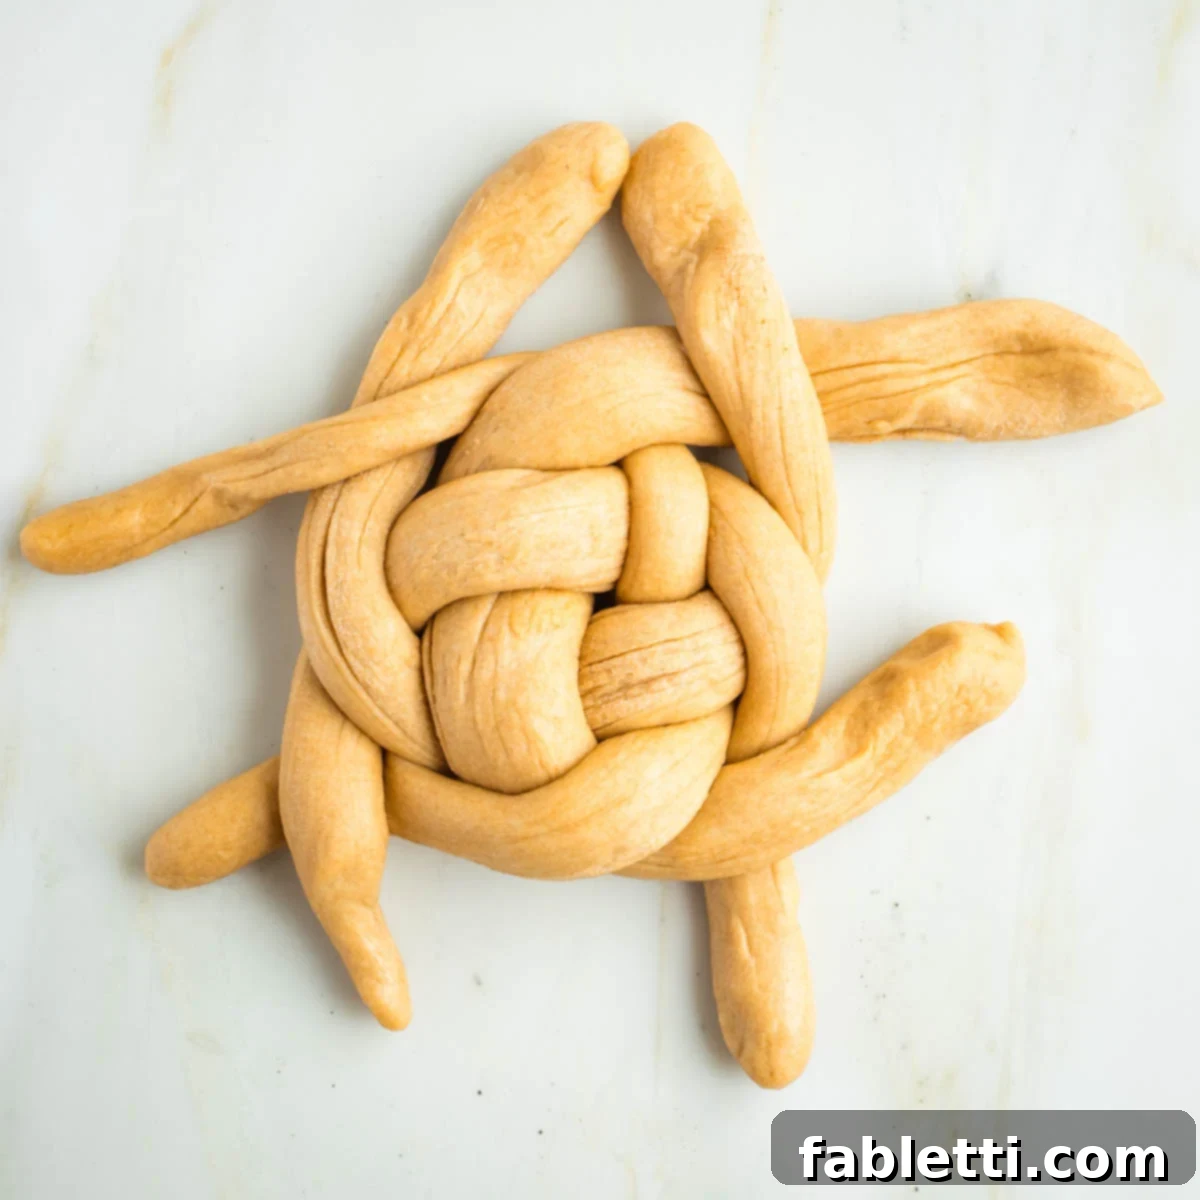
From this point onward, continue to work in a smooth, continuous circular pattern around the loaf. Identify an “open” strand (one that is not currently integrated into the weave) and gently cross it either over or under its neighboring strand, meticulously following the established pattern. Think of this stage as spiraling outwards gracefully from the challah’s center, gradually building its full, round form.
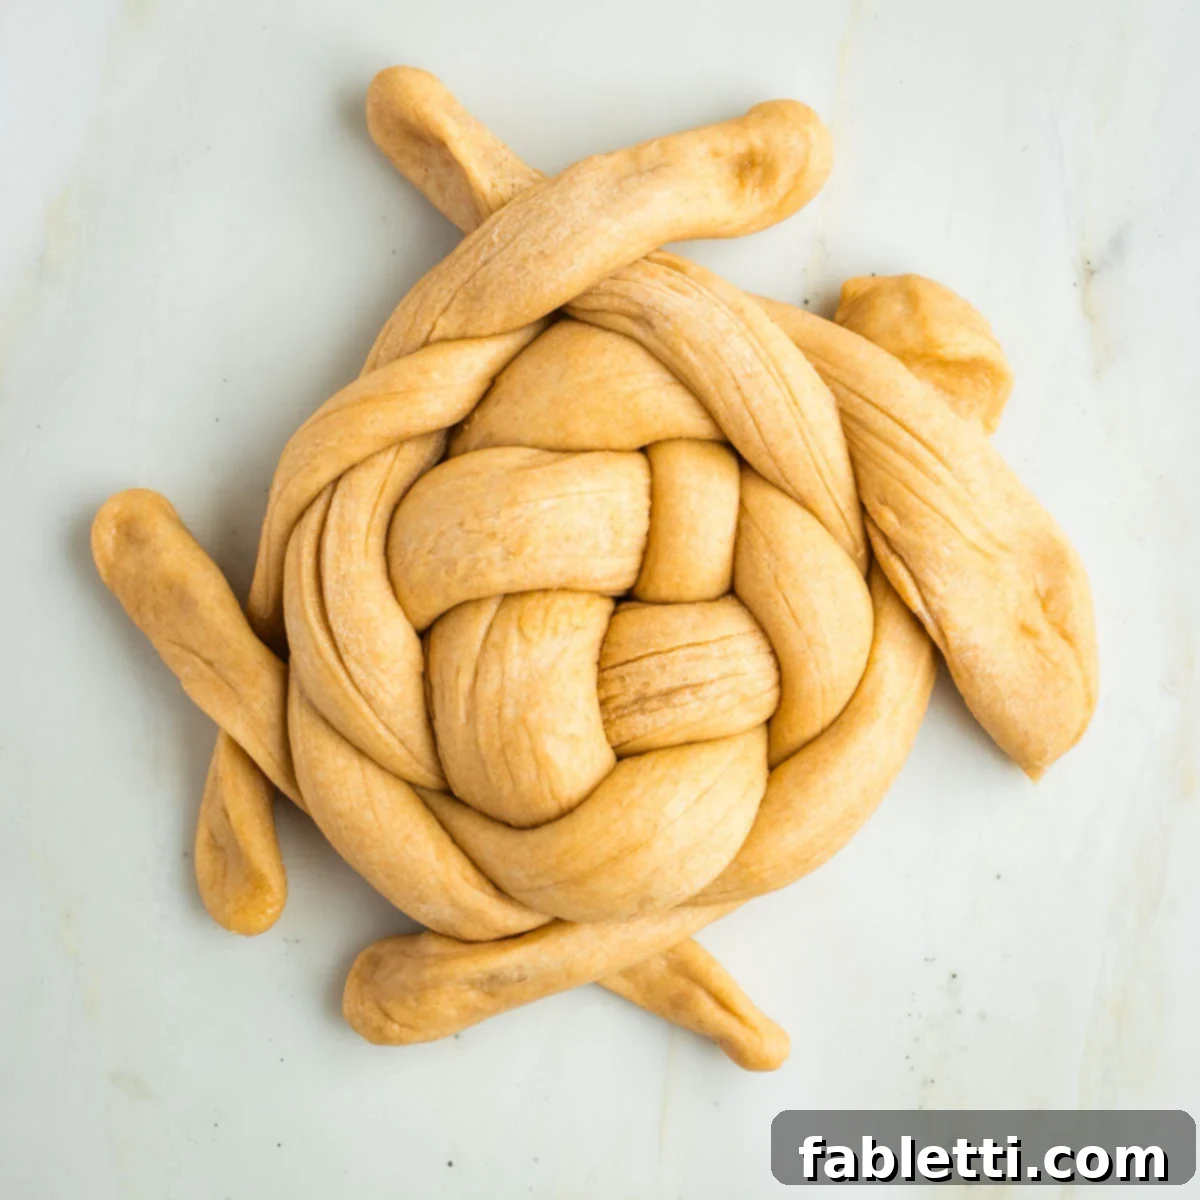
Keep this satisfying circular weaving going, carefully adjusting the tension of the dough strands as needed, until the ends of the open strands become simply too short to comfortably reach their counterparts and continue the full braid. By this point, you will have created a beautiful, tight, and uniform weave, showcasing your braiding skill.
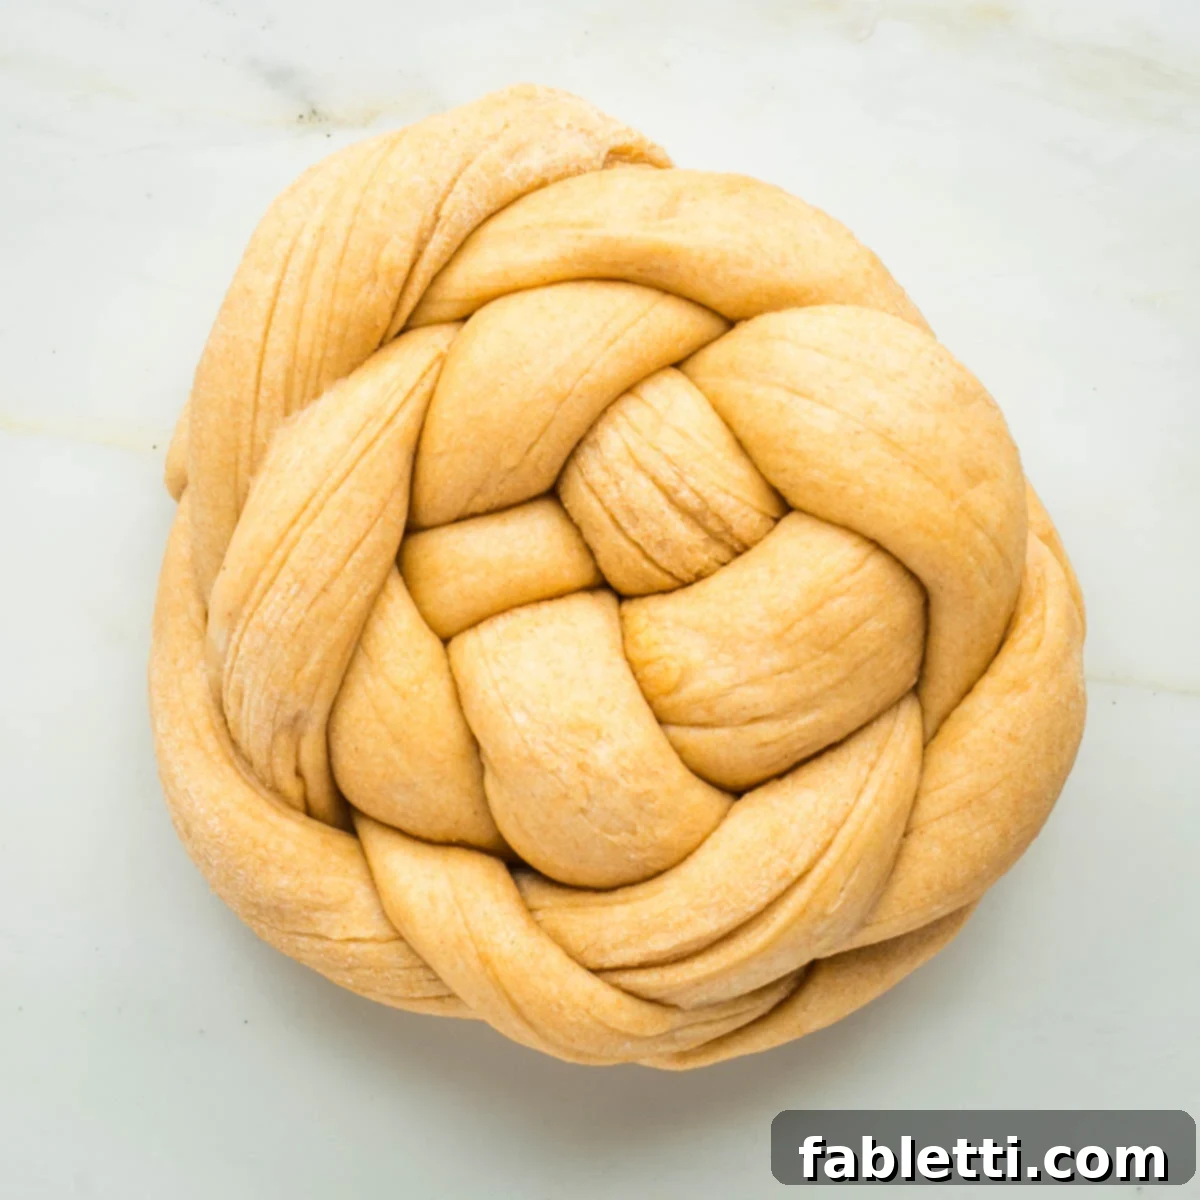
Once you’ve braided as much as possible, gently pinch together any remaining loose ends of dough. Then, with great precision and care, meticulously tuck all these ends completely underneath the loaf. This creates a beautifully smooth, continuous, and polished appearance, ensuring no loose edges detract from your wonderfully crafted round challah. Your perfectly shaped loaf is now ready for its crucial second rise!
The Final Proof & Baking Your Golden Sweet Round Challah
After the satisfying work of shaping and braiding, your challah loaves require one more crucial step before they enter the oven: the second rise, also elegantly known as the final proof. This vital period allows the yeast to produce a final burst of gas, further expanding the dough and setting the stage for that wonderfully light, airy, and tender texture you desire. Following this, a simple yet effective egg wash and precise baking will yield a gloriously golden, delectably flavorful challah that’s ready to grace your table.
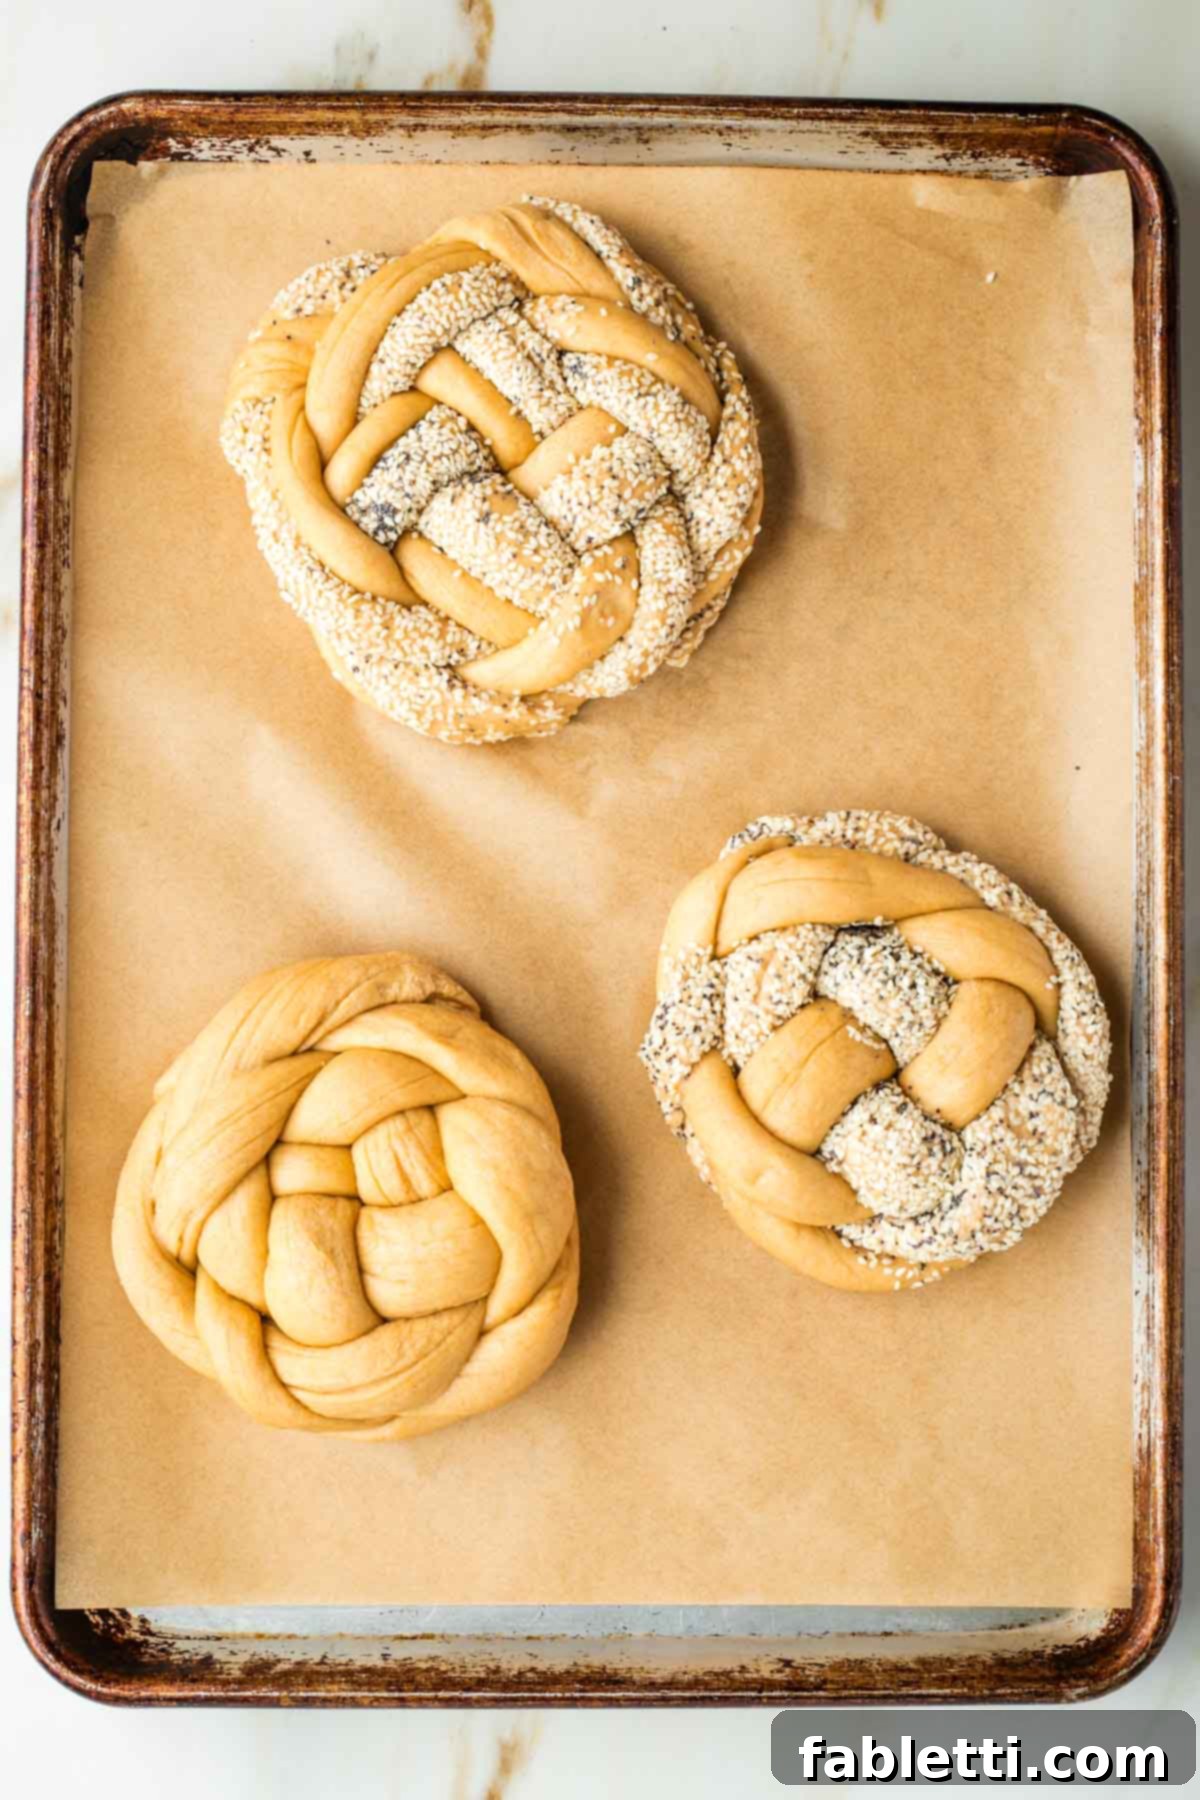
Carefully transfer your freshly braided challah loaves to a large, rimmed baking sheet. It is absolutely essential to ensure the baking sheet is diligently lined with either unbleached parchment paper or a high-quality silicone baking mat (such as a Silpat) to prevent any sticking and to aid in effortlessly easy cleanup after baking. Remember to space the loaves adequately, as they will notably expand during both the second rise and their time in the hot oven, requiring room to grow without touching.
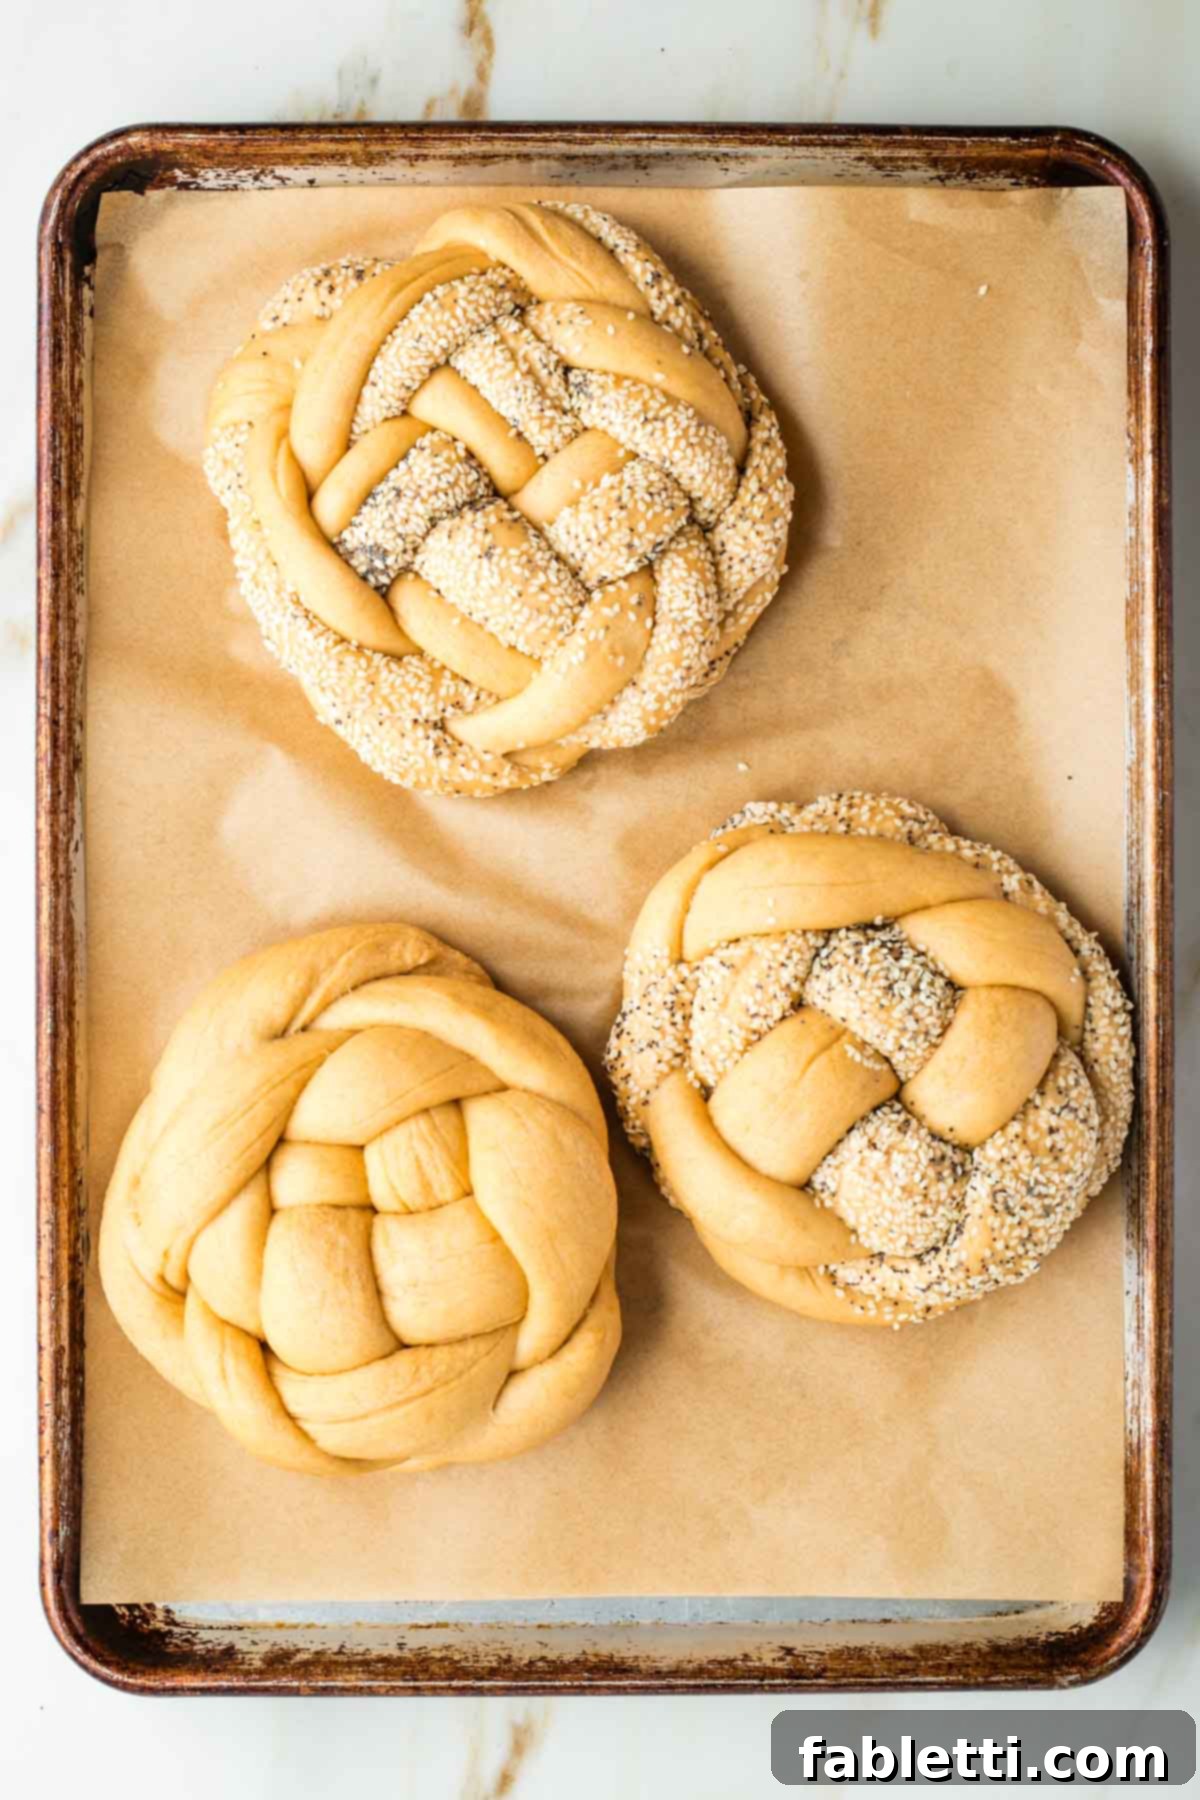
Once arranged with care, cover the baking sheet loosely with a clean kitchen towel. Allow the challah to undergo its critical second rise in a warm, draft-free spot for approximately one full hour. During this crucial period, the loaves will visibly swell, becoming noticeably plumper and airier, though it’s important to note they might not quite double in size as dramatically as they did during the initial bulk fermentation. This final expansion, however, is absolutely crucial for achieving that wonderfully light, tender, and delicate crumb structure in your finished challah.
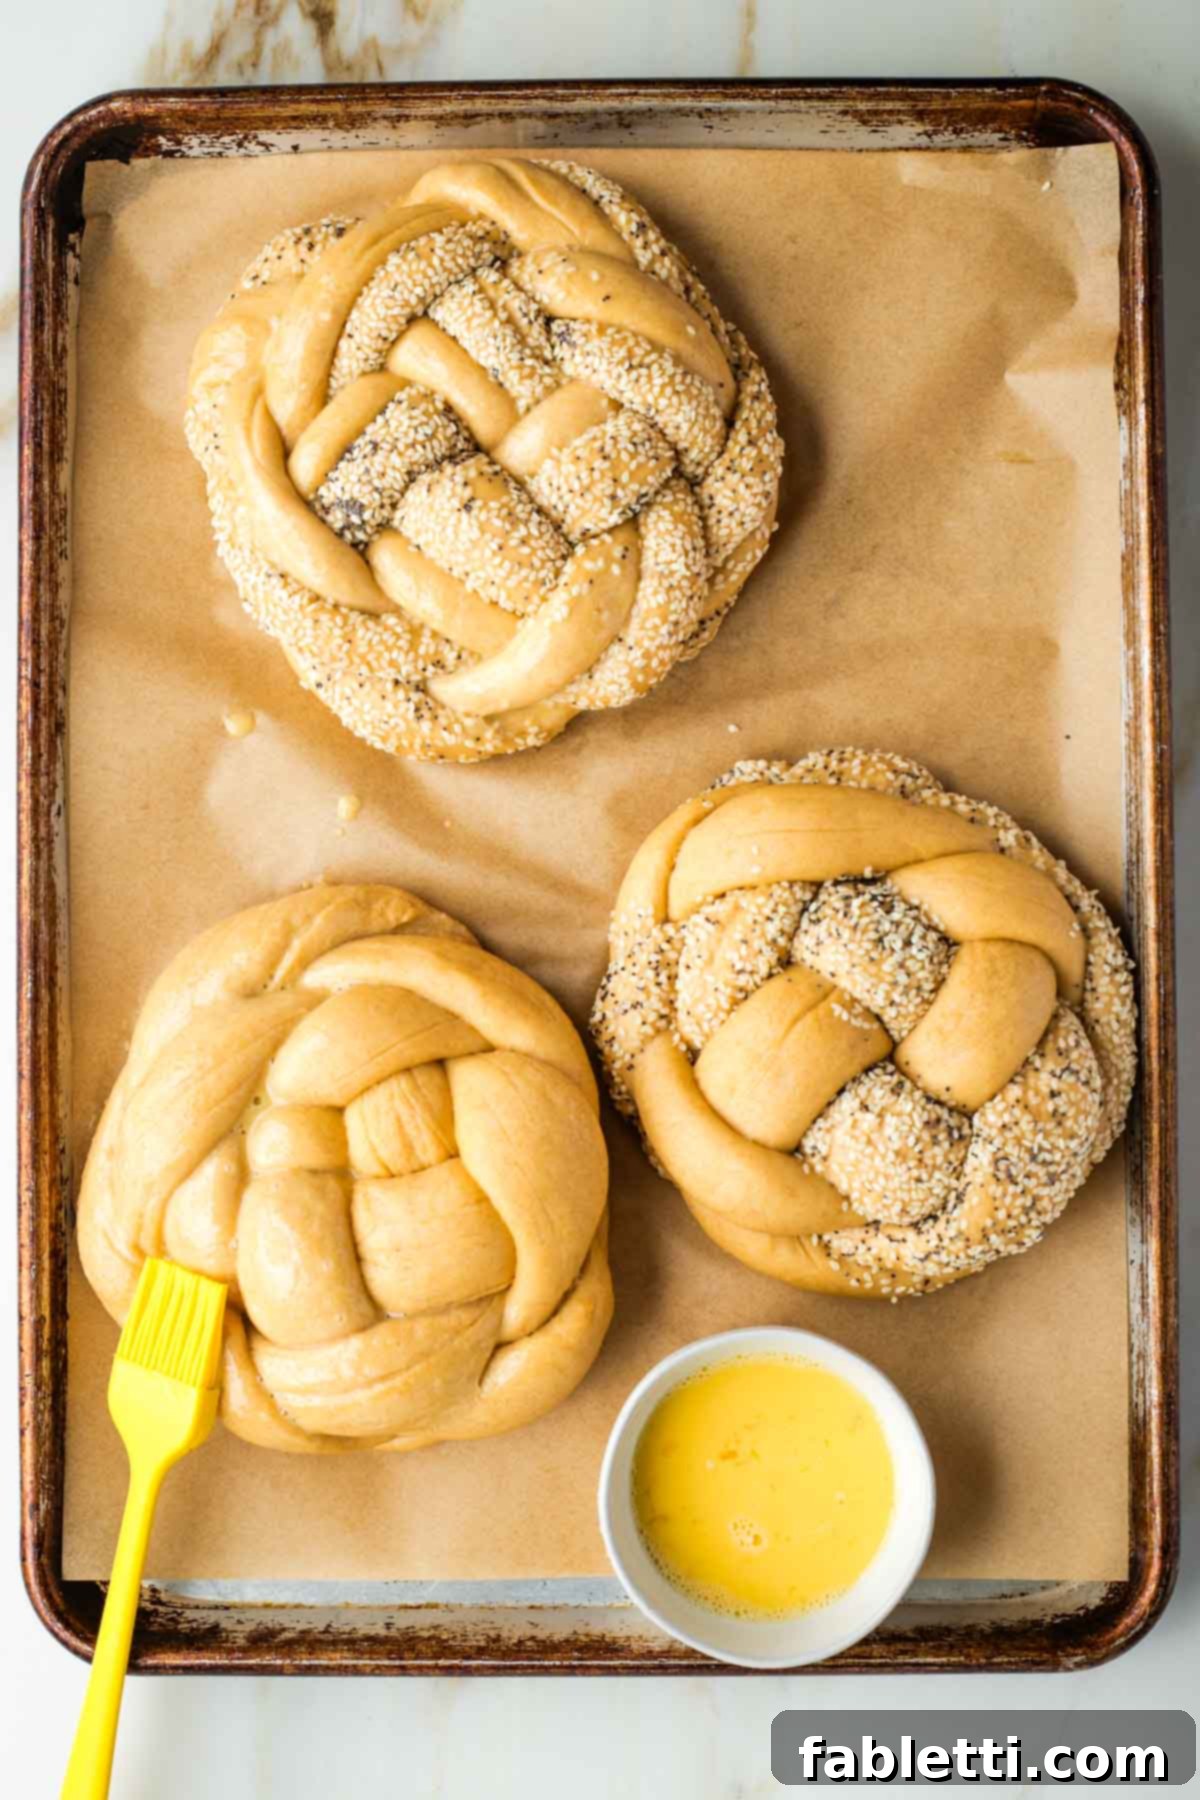
Preheat your oven to a precise 350 degrees Fahrenheit (175 degrees Celsius). While the oven efficiently heats up, take a moment to prepare your egg wash: whisk one large egg thoroughly until it’s frothy and completely smooth. Using a soft pastry brush, gently and thoroughly brush this glistening egg wash over all exposed dough surfaces of your challah. If some strands were already dipped in seeds, you can carefully avoid brushing those specific areas if you wish to preserve a clear visual distinction, or simply brush over them to help secure the seeds even further. The egg wash is absolutely vital for creating that signature glossy, rich golden-brown crust and also helps any additional decorative seeds adhere beautifully to the surface.
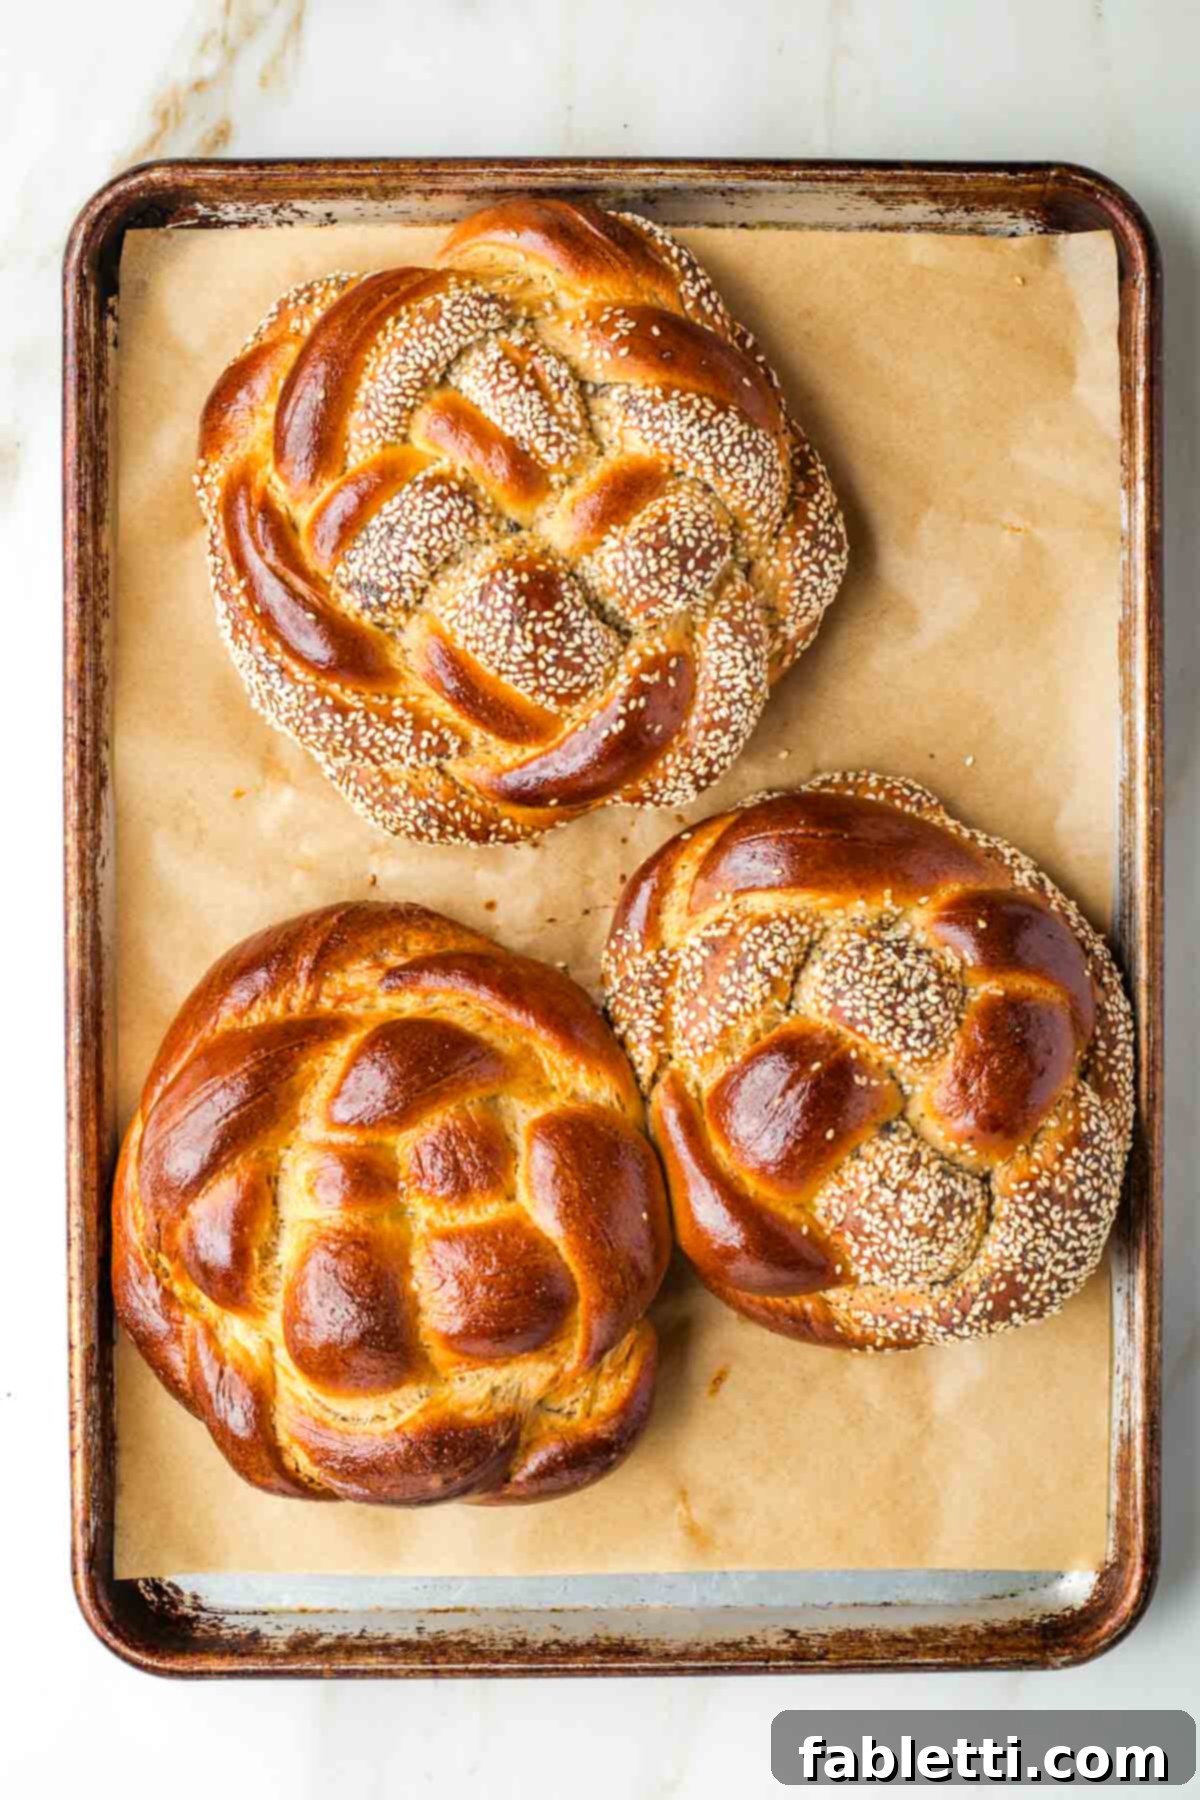
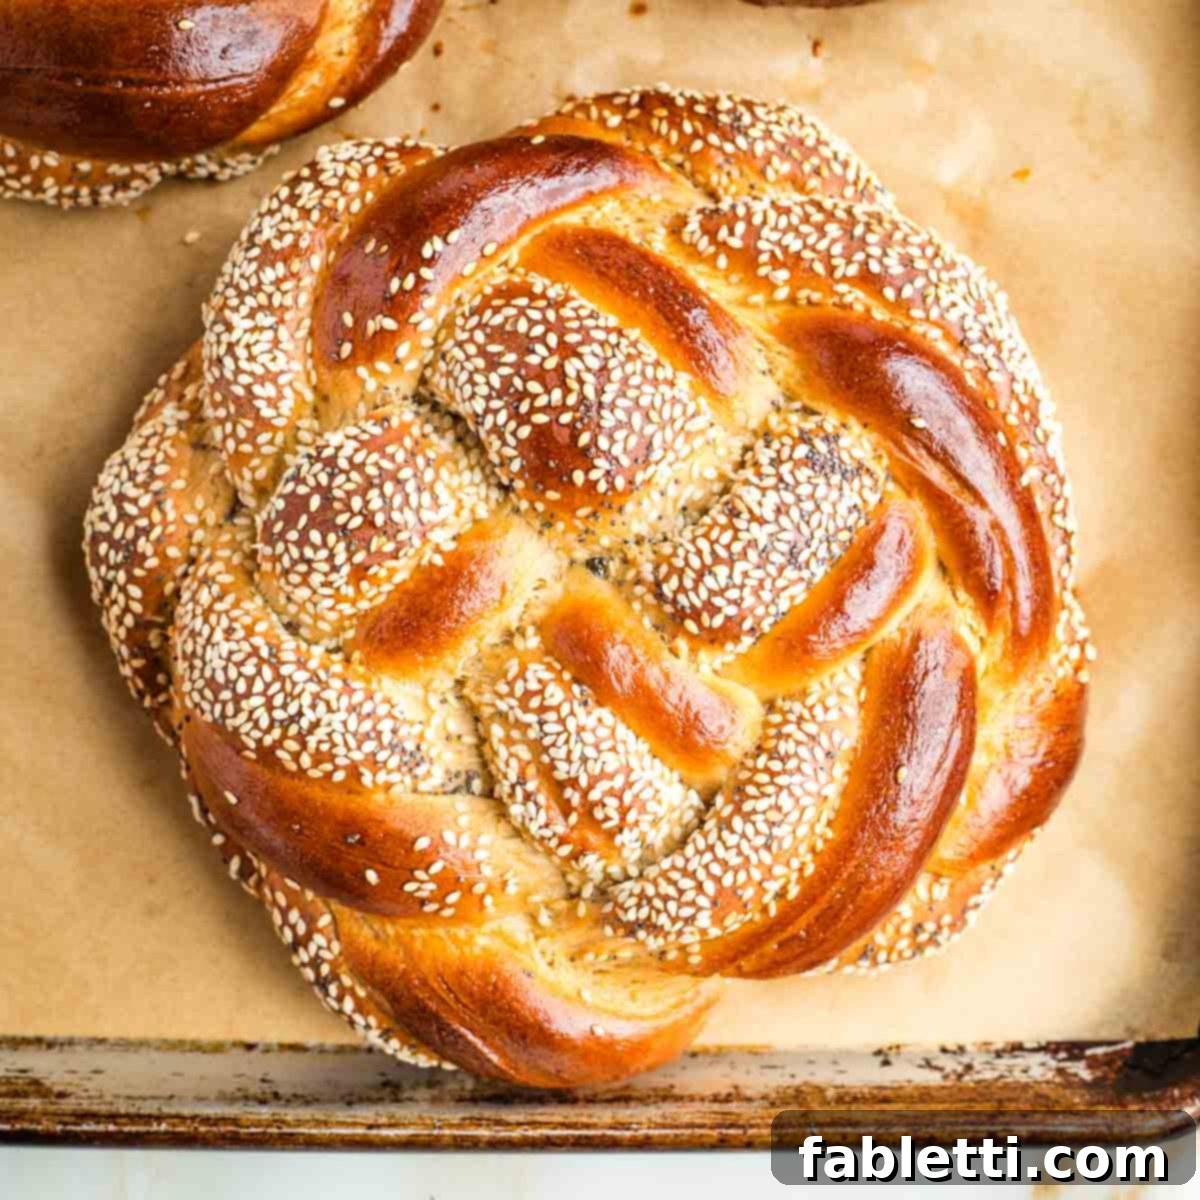
Once your oven is perfectly preheated and the loaves are glistening with their egg wash, carefully place the baking sheet into the hot oven. Bake for approximately 30 minutes, or until the challah boasts a rich, deep golden-brown color on its top surface and sounds satisfyingly hollow when gently tapped on the bottom. It’s always a good idea to keep a watchful eye on them towards the end of the baking time, as oven temperatures can sometimes vary slightly.
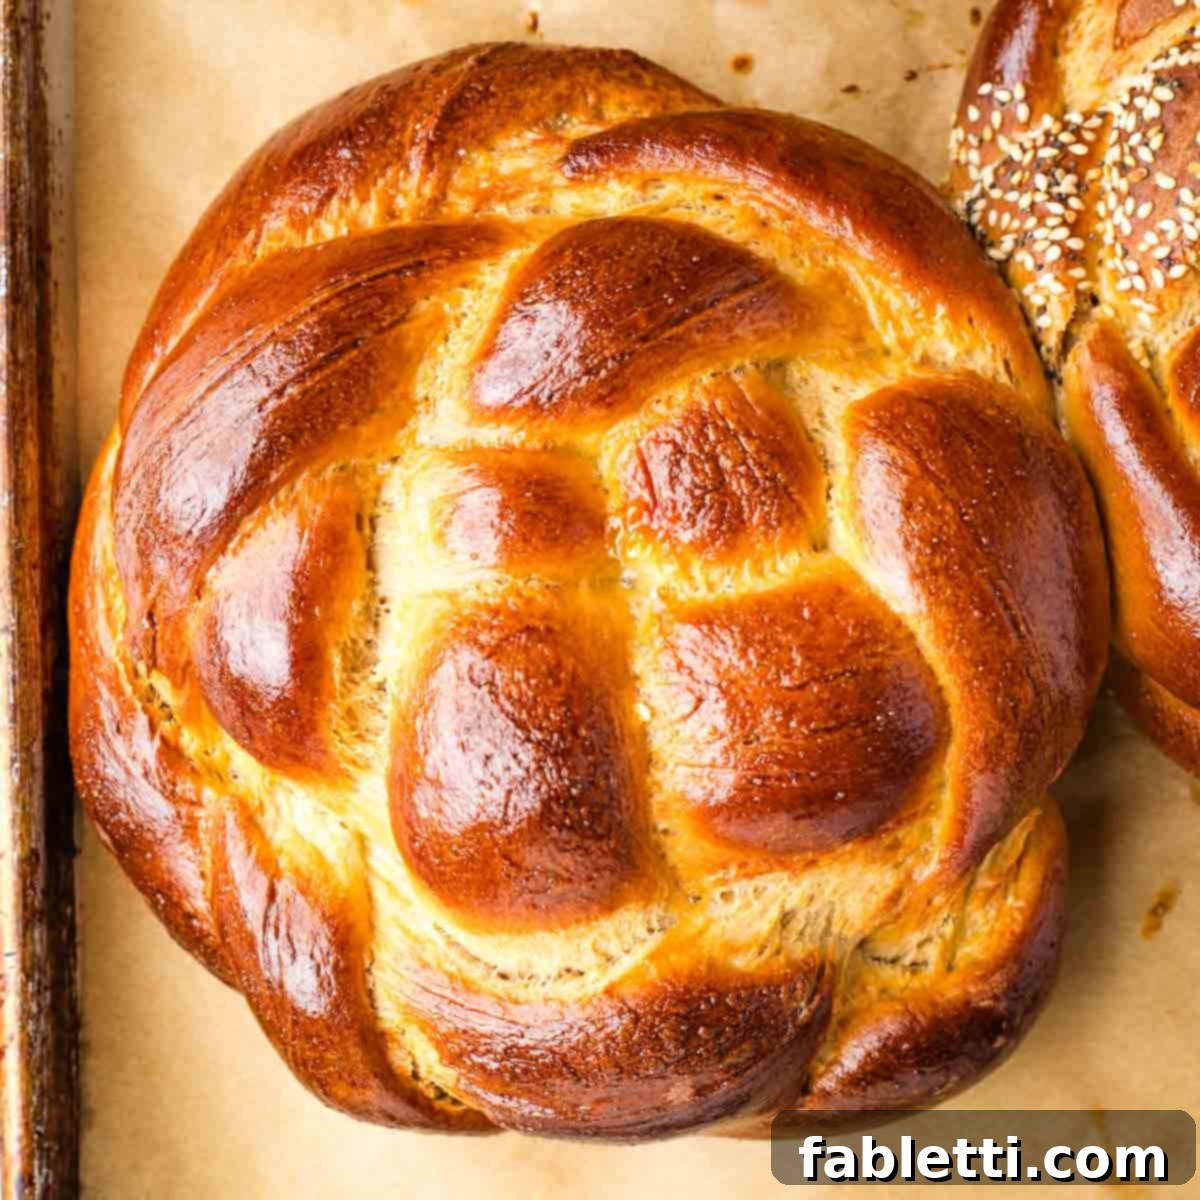
Upon removing the fragrant challah from the oven, immediately transfer the hot loaves to a wire rack to cool completely. This crucial cooling step prevents the bottom from becoming soggy due to trapped steam and allows the internal structure of the bread to properly set, resulting in that perfect, tender crumb. While challah will undeniably remain delicious in an airtight container for up to a week, it truly tastes absolutely freshest and most delightful for the first 3-4 days after baking. After that, it’s prime for transforming into delectable French toast, homemade croutons, or savory breadcrumbs—ensuring nothing goes to delicious waste!
For longer-term storage, challah freezes exceptionally well, making it perfect for preparing ahead of time for holidays. Once completely cooled to room temperature, wrap each loaf tightly in plastic wrap, and then encase it securely in aluminum foil. This effective double layer of protection helps prevent dreaded freezer burn and preserves its fresh flavor. Freeze immediately after cooling for the best results. To enjoy a frozen loaf, simply defrost it at room temperature for approximately 6-8 hours. If you desire a warm, “fresh out of the oven” experience, gently reheat the defrosted challah in a 300-degree Fahrenheit (150-degree Celsius) oven for about 10 minutes before serving.
Debra’s Expert Tips for Challah Baking Success
- Flawless Yeast Proofing: Refer back to the dedicated step-by-step photos above for a crystal-clear visual guide on what successfully proofed yeast should look like. This initial proofing step is absolutely non-negotiable for a successful challah. If your yeast doesn’t become frothy, bubbly, and visibly active, it is inactive. Do not proceed with the recipe; instead, responsibly discard the mixture and start again with fresh yeast and correctly tempered water. This crucial step is the undeniable cornerstone of a well-risen, light, and airy challah.
- Patience is a Virtue (and a Necessity!): The true art of baking challah genuinely rewards patience. Under no circumstances should you rush the rising times. The first rise, after the dough is initially mixed, should ideally be a full 2-3 hours, but it can even be longer if your daily schedule demands it or if your kitchen isn’t particularly warm. The second rise, after your beautiful loaves are carefully braided, requires a precise one hour. Allowing the dough ample time to slowly develop its complex flavor and wonderfully light texture is paramount for an exceptional challah.
- Optimal Rising Environment: Yeast thrives and performs best in a consistent, warm, and draft-free environment. Seek out a cozy, undisturbed spot for your dough to conduct its rises. A sunny kitchen window is often a classic and effective choice. If your oven is equipped with a convenient “proof” setting (which typically maintains a temperature of around 100°F or 38°C), this provides a perfectly consistent and ideal environment. Absolutely avoid placing your dough in a cold, drafty area, as this can significantly slow down or completely halt the crucial rising process.
- Embrace the “Messy” Braid: Here’s a comforting secret for you: your braiding technique doesn’t need to be absolutely flawless or geometrically perfect! While a meticulously neat braid is undoubtedly lovely, even a slightly uneven or what you might perceive as a “sloppy” braid will still produce an incredibly delicious, flavorful, and beautiful challah bread. In fact, those charming little imperfections often delightfully highlight the homemade, made-with-love quality, which, let’s be honest, is truly the very best addition to any holiday or family menu. Please don’t let the pursuit of perfection become the enemy of progress (or, more importantly, deliciousness!).
- Practice Makes Perfect (or at least, Consistently Delicious!): I’ve personally baked well over 2,500 loaves of challah throughout my extensive baking journey – a testament to countless years of dedicated practice and continuous refinement of my craft. And you, too, will undoubtedly perfect your craft over time. The most important thing is to start exactly where you are today. Give yourself an abundance of grace, wholeheartedly enjoy the enriching process, and simply get in there and do it! I’ve had the immense pleasure of guiding countless nieces, friends, and even friends of my kids through their very first challah bakes, often over cheerful video calls, and I can assure you, it always works out. The profound joy of creating something so meaningful and deeply delicious is, without a doubt, the greatest reward.
Did you know that actively commenting on and rating recipes is one of the most effective and direct ways to support your favorite food bloggers and help countless others discover truly great recipes? If you made this Sweet Round Challah Bread recipe, please consider taking a moment to leave a genuine five-star rating and a thoughtful comment below to share your wonderful experience. Additionally, we would absolutely love to see your beautiful challah creations! Please share your photos on Instagram by tagging me @dkhealthcoach and using the hashtag #debraklein so I can admire your wonderful culinary artistry! Your invaluable support truly means the world!
📖 Sweet Round Challah Bread Recipe
Sweet Round Challah Bread Recipe
Author: Debra Klein
This Sweet Round Challah Bread is a cornerstone of cherished Jewish Holiday menus. Sweetened purely with golden honey, this rich challah dough is expertly divided and braided into beautiful round loaves, symbolizing a sweet and prosperous new year. It’s perfectly suited for Rosh Hashanah and all the Jewish High Holidays. Plus, any delightful leftovers make for an absolutely fantastic French toast – a true bonus!
Equipment
- Food Processor
- Pyrex Glass Measuring Cup Set
- Large Rimmed Baking Sheet
- Kitchen Scale
- Thermometer
Ingredients
- 1 cup hot water (105-110 degrees F)
- ½ cup honey
- 2 ¼ teaspoon active dry yeast
- ¼ teaspoon salt
- ¼ cup olive oil
- 2 large eggs
- 2 ½ cups whole grain bread flour
- 2 ½ cups whole grain all purpose flour
- 1 tablespoon olive oil (for greasing bowl)
Optional Wash and Sprinkle
- 1 large egg (for egg wash)
- 2 tablespoon sesame seeds
- 1 tablespoon poppy seeds
Instructions
Proof Yeast
- Use a 2-cup glass measuring cup to measure 1 cup of hot water. If you have a thermometer, aim for around 110 degrees F. Otherwise, ensure it’s hot to the touch but not scalding.
- Pour the honey directly into the measuring cup, using the side measurements to reach ½ cup. Sprinkle in the salt and active dry yeast. Mix well with a spoon.
- Let the mixture sit for at least 5 minutes. It should become visibly bubbly and rise slightly, forming a frothy cap. If not, your yeast may be inactive, and you’ll need to start over with fresh yeast.
Make the Dough
- In the bowl of a food processor (fitted with the “S” blade) or a stand mixer (with the paddle attachment), combine the ¼ cup olive oil and 2 large eggs. Mix until frothy and emulsified.
- Once the yeast mixture is proofed, pour it into the egg/oil mixture and process briefly to combine. The mixture should appear very bubbly.
- Add half of the bread flour and half of the all-purpose flour to the wet ingredients all at once. Process until uniformly mixed into a thick batter. (For accuracy, 2.5 cups of mixed flour weighs approximately 10 ¾ oz if using a kitchen scale).
- Sprinkle on the remaining combination of flour. Process or knead with your mixer for about 3 minutes.
- Observe the dough: if it’s holding together and pulling away from the sides of the processor bowl, it’s likely perfect. However, if it’s still too sticky or clinging to the blade, sprinkle in 1 tablespoon of additional flour. Process again. Continue to add 1 tablespoon of flour at a time, mixing well after each addition, until the dough is tacky but no longer excessively sticky to the touch. Remember to err on the side of less flour, not more.
- Turn the dough out onto a lightly floured countertop. If still slightly sticky, dust with an extra teaspoon of flour. Knead by hand for about a minute until it forms a smooth, elastic ball.
- Lightly grease a large bowl with the final 1 tablespoon of olive oil. Transfer the dough ball to the bowl and turn it to coat all sides with oil. Cover the bowl with a clean kitchen towel and place it in a warm, draft-free spot (like a sunny window or an oven on a proof setting at 100°F/38°C) to rise for at least 2 hours, or until more than doubled in size and airy.
Braid and Prep the Loaves
- Line a large rimmed baking sheet with unbleached parchment paper.
- This recipe makes three medium-sized challah loaves. Gently deflate the risen dough and divide it into 12 equal pieces, each weighing approximately 3 oz (85g).
- Take 4 dough balls to work with for your first loaf, and keep the remaining dough covered with a kitchen towel to prevent it from drying out.
- For a 4-strand braid: Roll each of the 4 dough balls into long, even ropes. Arrange them in a criss-cross pattern (two horizontal, two vertical) at the center of your workspace, alternating over and under. Follow the visual guide in the photos above to weave outwards in a circular motion, maintaining the over-under pattern. Pinch and tuck ends underneath.
- For an 8-strand braid (optional, more intricate): Divide each of the 4 dough balls in half again, creating 8 smaller strands. Roll them into even ropes. Moisten half the strands with water and roll in sesame/poppy seeds for contrast. Create an over-under grid with alternating plain and seeded strands. Weave outwards in a circular pattern, keeping plain and seeded pairs together, then pinch and tuck ends underneath.
- Transfer your braided loaf to the prepared baking sheet. Repeat the braiding process with the remaining dough until you have 3 challah loaves on your baking sheet. Cover them with the kitchen towel and set a timer for 1 hour for the second rise.
Baste and Bake
- Preheat your oven to 350 degrees Fahrenheit (175 degrees Celsius).
- Whisk together the remaining large egg for the egg wash. Gently brush the frothy egg wash over the top and sides of your risen challah loaves, avoiding any already-seeded areas if you’re preserving a specific design, or brushing over them to secure seeds. If you didn’t add seeds before braiding, now is the time to sprinkle them on top, if desired.
- Bake for 30 minutes, or until the challah loaves are beautifully golden brown and sound hollow when tapped on the bottom.
- Carefully transfer the baked challah to a wire rack to cool completely. This prevents condensation and keeps the crust crisp. Store in an airtight container for up to a week. For optimal freshness, enjoy within 3-4 days. These challahs are also freezer-friendly: once completely cooled, wrap tightly in plastic wrap, then aluminum foil, and freeze. Defrost at room temperature for 6-8 hours. If desired, gently reheat in a 300-degree F (150-degree C) oven for 10 minutes before serving.
Notes
- Flour: I highly recommend using whole grain stone-milled flour from sources like Mighty Mill (or local artisanal mills). They often sell organic flour online, in their shops, and select grocery stores. Sourcing quality whole grain flour significantly enhances flavor and nutrition.
- I prefer a combination of whole wheat bread flour and whole wheat all-purpose flour for the best consistency – it provides a perfect balance of structure and tenderness. Using all bread flour can sometimes result in denser loaves.
- The specified 5 cups of flour should generally be the right amount if measured carefully (or weighed). However, be prepared to add 1-3 tablespoons more if your dough remains excessively sticky. I typically use the full 5 cups and then dust my countertop with about 1 tablespoon of flour for hand kneading, just to prevent sticking.
- Nutrition Information: The provided nutrition calculations are based on one recipe yielding 3 challahs, with each challah then divided into 8 portions. These values are estimates derived from online tools. For the most precise nutritional information, it is always best to calculate based on the specific ingredients and brands you use. You are ultimately responsible for verifying the accuracy and completeness of any nutritional data.
Nutrition Facts (Estimated per Serving)
- Calories: 147 kcal
- Carbohydrates: 24g
- Protein: 4g
- Fat: 5g
- Saturated Fat: 1g
- Polyunsaturated Fat: 1g
- Monounsaturated Fat: 3g
- Trans Fat: 0.003g
- Cholesterol: 23mg
- Sodium: 34mg
- Potassium: 112mg
- Fiber: 3g
- Sugar: 6g
- Vitamin A: 36 IU
- Vitamin C: 0.04mg
- Calcium: 24mg
- Iron: 1mg
Did you bake this delightful Sweet Round Challah Bread?
Please consider leaving a review below! Your valuable feedback helps other aspiring bakers and genuinely supports my work in sharing these cherished recipes.
Capture a beautiful picture of your magnificent challah and share it proudly on Instagram. Remember to tag me @dkhealthcoach and use the distinctive hashtag #debraklein so I can admire your wonderful culinary artistry and celebrate your success!
